Remote Access for Schneider PLCs - eWON wiki
Remote Access for Schneider PLCs - eWON wiki
Remote Access for Schneider PLCs - eWON wiki

You also want an ePaper? Increase the reach of your titles
YUMPU automatically turns print PDFs into web optimized ePapers that Google loves.
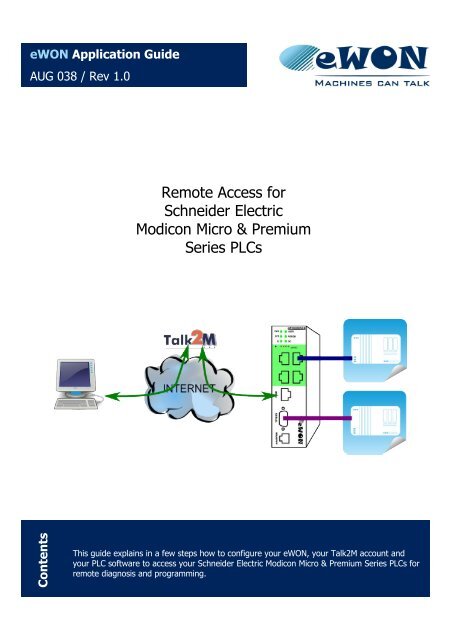
<strong>eWON</strong> Application Guide<br />
AUG 038 / Rev 1.0<br />
Contents<br />
<strong>Remote</strong> <strong>Access</strong> <strong>for</strong><br />
<strong>Schneider</strong> Electric<br />
Modicon Micro & Premium<br />
Series <strong>PLCs</strong><br />
This guide explains in a few steps how to configure your <strong>eWON</strong>, your Talk2M account and<br />
your PLC software to access your <strong>Schneider</strong> Electric Modicon Micro & Premium Series <strong>PLCs</strong> <strong>for</strong><br />
remote diagnosis and programming.
Table of Contents<br />
1.Hard- and software requirements.......................................................................................................................<br />
3<br />
1.1 Hardware requirements................................................................................................................................<br />
3<br />
1.2 Software requirements..................................................................................................................................<br />
3<br />
1.2.1 <strong>eWON</strong> related software....................................................................................................................<br />
3<br />
1.2.2 <strong>Schneider</strong> Electric related software.................................................................................................<br />
3<br />
1.3 <strong>eWON</strong> Firmware Version..............................................................................................................................<br />
3<br />
2.Objective...............................................................................................................................................................<br />
4<br />
3.Typical configuration setup................................................................................................................................<br />
5<br />
4.Prerequisite: Determining suitable IP addresses..............................................................................................<br />
6<br />
4.1 Internet connection using the WAN Interface................................................................................................<br />
6<br />
4.2 Internet connection by modem (GSM, PSTN, ADSL) ................................................................................... 7<br />
4.3 For proper routing, remember... .................................................................................................................... 8<br />
5.Reaching your <strong>eWON</strong> through the Internet.......................................................................................................<br />
9<br />
5.1 Step 1: Setting IP address of <strong>eWON</strong> LAN.....................................................................................................<br />
9<br />
5.2 Step 2: Configure <strong>eWON</strong> <strong>for</strong> Internet connection........................................................................................<br />
12<br />
5.3 Step 3: Creating the <strong>eWON</strong> in your Talk2M account..................................................................................<br />
15<br />
5.4 Step 4: Getting the Talk2M activation key <strong>for</strong> the <strong>eWON</strong> ........................................................................... 18<br />
5.5 Step 5: Configuring your <strong>eWON</strong> to connect to Talk2M .............................................................................. 20<br />
5.6 Step 6: Connecting the <strong>eWON</strong> remotely.....................................................................................................<br />
23<br />
5.7 Step 7: Terminating the remote connection................................................................................................<br />
25<br />
6.Linking <strong>eWON</strong> and PLC.....................................................................................................................................<br />
26<br />
6.1 Local link capabilities..................................................................................................................................<br />
26<br />
6.2 Serial link (Unitelway) configuration............................................................................................................<br />
26<br />
6.3 Ethernet link configuration..........................................................................................................................<br />
29<br />
7.PLC software mapping configuration<br />
............................................................................................................. 32<br />
7.1 Understanding XIP......................................................................................................................................<br />
32<br />
7.2 XIP Driver Configuration <strong>for</strong> serial connection............................................................................................<br />
32<br />
7.3 XIP Driver Configuration <strong>for</strong> Ethernet connection.......................................................................................<br />
34<br />
8.Establishing remote connection.......................................................................................................................<br />
36<br />
9.Troubleshooting.................................................................................................................................................<br />
38<br />
9.1 Cannot reach the PLC on its Unitelway port? ............................................................................................. 38<br />
9.2 Cannot reach PLC by Ethernet ? ................................................................................................................ 38<br />
10.Appendix 1 – Specifics <strong>for</strong> Modem connections...........................................................................................<br />
40<br />
10.1 General.....................................................................................................................................................<br />
40<br />
10.2 Configuring the <strong>eWON</strong> <strong>for</strong> Internet connection (Step 2) ............................................................................ 40<br />
10.3 Creating the <strong>eWON</strong> in your Talk2M account (Step 3) ............................................................................... 42<br />
10.4 Connecting the <strong>eWON</strong> remotely (Step 6) .................................................................................................. 42<br />
10.5 Terminating the remote connection (Step 7) ............................................................................................. 43<br />
11.Appendix 2 – <strong>eWON</strong> as Gateway in PLC........................................................................................................<br />
44<br />
12.Appendix 3 – Security aspects.......................................................................................................................<br />
46<br />
13.Appendix 4 – Unitelway cable.........................................................................................................................<br />
47<br />
Revision history.....................................................................................................................................<br />
49<br />
<strong>Remote</strong> <strong>Access</strong> <strong>for</strong> <strong>Schneider</strong> Electric Modicon Micro & Premium Series <strong>PLCs</strong> (How to) Page 2/47
Hard- and software requirements<br />
1. Hard- and software requirements<br />
1.1 Hardware requirements<br />
In order to follow this guide you'll need:<br />
Chapter 1.<br />
� 1 <strong>eWON</strong> with VPN capabilities (<strong>for</strong> example <strong>eWON</strong> 2101CD with integrated<br />
modem or a 2005CD with second Ethernet interface)<br />
� 1 <strong>Schneider</strong> Electric PLC Modicon Micro or Premium Series or equivalent<br />
featuring Unitelway and/or Ethernet interface<br />
� PC suitable to configure the <strong>eWON</strong> and the PLC<br />
1.2 Software requirements<br />
1.2.1 <strong>eWON</strong> related software<br />
� Web browser – Internet Exploreri or Firefoxii<br />
to configure the embedded <strong>eWON</strong> parameters.<br />
� eBuddy – <strong>eWON</strong> detection and firmware maintenance utility<br />
http://support.ewon.biz/softwares.htm<br />
� eCatcher – VPN tunneling utility<br />
http://support.ewon.biz/softwares.htm<br />
Note: this utility will be used to create the Talk2M account and to connect to your<br />
<strong>eWON</strong> remotely.<br />
1.2.2 <strong>Schneider</strong> Electric related software<br />
� PL7 PRO® iii software including the XIP Driver and/or XWAY Drivers Manager.<br />
The version of the PL7 PRO® software must allow the use of the TCP/IP interface<br />
(version 4.1 or higher).<br />
1.3 <strong>eWON</strong> Firmware Version<br />
Successfully following these guidelines requires an <strong>eWON</strong> firmware version 6.1s2 or<br />
higher. The eBuddy application allows you to upgrade your <strong>eWON</strong> firmware if<br />
required.<br />
<strong>Remote</strong> <strong>Access</strong> <strong>for</strong> <strong>Schneider</strong> Electric Modicon Micro & Premium Series <strong>PLCs</strong> (How to) Page 3/47
Objective<br />
2. Objective<br />
Chapter 2.<br />
The objective of this document is to guide you through the steps required to enable<br />
remote access of your <strong>Schneider</strong> Electric <strong>PLCs</strong>.<br />
The remote access setup is composed of 4 different parts:<br />
� Communicating with your <strong>eWON</strong> through the Internet<br />
� Connecting your <strong>eWON</strong> with your <strong>Schneider</strong> Electric PLC<br />
� Configuring your <strong>Schneider</strong> Electric software to correctly communicate through the<br />
<strong>eWON</strong>.<br />
� <strong>Access</strong>ing your PLC through the Internet<br />
To configure the <strong>eWON</strong>, all you need is a Web Browser and to open the internal<br />
Web page of the <strong>eWON</strong>. (http://10.0.0.53 is the default IP factory setting)<br />
If you are connecting to an <strong>eWON</strong> <strong>for</strong> the first time, you should read the "Quick<br />
Start Guide <strong>for</strong> <strong>eWON</strong>" shipped with your <strong>eWON</strong>. This document explains step<br />
by step how to change the IP address of the <strong>eWON</strong> LAN port in order to be able<br />
to connect to it.<br />
<strong>Remote</strong> <strong>Access</strong> <strong>for</strong> <strong>Schneider</strong> Electric Modicon Micro & Premium Series <strong>PLCs</strong> (How to) Page 4/47
Typical configuration setup<br />
3. Typical configuration setup<br />
Chapter 3.<br />
Configuring remote access is simple. However, you will need to pay attention to the<br />
different IP ranges involved. The diagram below summarizes the different network<br />
ranges involved (numbers are examples).<br />
When it is hooked on the Company LAN (or to the Site LAN) the configuration PC<br />
needs to be configured in DHCP-enabled mode <strong>for</strong> you to be able to go through the<br />
steps involving the general Ethernet/Internet infrastructure.<br />
When it is hooked to the LAN-port of the <strong>eWON</strong> and the configuration PC needs to be<br />
configured with a fixed IP address - in the <strong>eWON</strong> LAN range - <strong>for</strong> you to be able to go<br />
through the steps involving the <strong>eWON</strong> (and the Ethernet connected <strong>PLCs</strong>).<br />
Note 1: Because iterations between IP ranges are necessary during the configuration<br />
process, you could consider using 2 different configuration PCs. It is no problem if you<br />
use only one single PC, the present guide mentions each change in IP configuration<br />
that will be required.<br />
Note 2: As the picture above shows, under normal circumstances the PC you will use<br />
to remotely access your <strong>eWON</strong> and <strong>PLCs</strong> will be on a different network than the site<br />
network. However, during configuration and testing, connecting PC to the site LAN is<br />
fine. As long as the site LAN address range is different than the <strong>eWON</strong> LAN address<br />
range you will not have routing issues.<br />
<strong>Remote</strong> <strong>Access</strong> <strong>for</strong> <strong>Schneider</strong> Electric Modicon Micro & Premium Series <strong>PLCs</strong> (How to) Page 5/47
Prerequisite: Determining suitable IP addresses<br />
Chapter 4.<br />
4. Prerequisite: Determining suitable IP addresses<br />
To avoid routing problems later, it is better to start to configure the <strong>eWON</strong> and the<br />
PLC with LAN IP addresses that will be suitable.<br />
The type of physical carrier (GPRS or WAN/LAN) your <strong>eWON</strong> will use to connect to<br />
the Internet will have impact on your IP address selection.<br />
Be<strong>for</strong>e starting actual configuration, please read the general principles below.<br />
4.1 Internet connection using the WAN Interface<br />
If you plan to connect to the Internet using the WAN interface, the <strong>eWON</strong> will work<br />
with a LAN IP address at the PLC side and a WAN IP address at the network side.<br />
Example of IP ranges involved in a WAN/LAN configuration:<br />
Important Note: The company network address ranges (Company LAN and Site LAN<br />
in the example above) are specified and managed by the respective network<br />
administrators. These ranges simply cannot be changed. So be<strong>for</strong>e configuring your<br />
<strong>eWON</strong> LAN IP address and your PLC IP addresses, please ask <strong>for</strong>:<br />
1. The specified company LAN network range to be used by the PC that will<br />
initiate the remote connection (Company LAN).<br />
In our example this range is 10.0.0.#<br />
2. The specified company LAN network (Site LAN) range (and gateway) which<br />
the <strong>eWON</strong> WAN port will use to get Internet connection.<br />
In our example this range is 10.10.0.#<br />
Knowing the ranges in use at the Company and Site side, you will be able to select a<br />
range outside these networks <strong>for</strong> the <strong>eWON</strong> LAN-port and the PLC.<br />
In the above example, we could select addresses in the 192.168.0.# IP range <strong>for</strong> the<br />
<strong>eWON</strong> LAN and PLC since it does not overlap neither with the Company LAN range<br />
nor with the Site LAN range.<br />
<strong>Remote</strong> <strong>Access</strong> <strong>for</strong> <strong>Schneider</strong> Electric Modicon Micro & Premium Series <strong>PLCs</strong> (How to) Page 6/47
4. Prerequisite: Determining suitable IP addresses<br />
4.2 Internet connection by modem (GSM, PSTN, ADSL)<br />
If you plan to connect to the Internet through a modem, you only need to select an IP<br />
address <strong>for</strong> the <strong>eWON</strong> LAN side. The IP address of the <strong>eWON</strong> LAN interface must be<br />
compatible with the IP address of the PLC, but be outside the network address space<br />
to which your PC is connected (Company LAN). If there is as an overlap between the<br />
IP range of your PC and the IP-range of the <strong>eWON</strong> and the PLC LAN, the setup will<br />
not route correctly.<br />
Example of IP ranges involved in a GPRS/Edge modem configuration:For proper<br />
routing, remember...<br />
1. The <strong>eWON</strong> LAN IP address must be part of the same IP range as the PLC LAN.<br />
2. The <strong>eWON</strong> WAN and LAN IP addresses must be in different IP ranges. The WAN<br />
port of the <strong>eWON</strong> is generally DHCP-enabled, which is a good way to make sure<br />
that it will be compatible with the company network.<br />
3. The remote PLC network (<strong>eWON</strong> LAN) must be in a different IP range than the<br />
company network on which your PC is connected (Company LAN).<br />
Network 3 = <strong>eWON</strong> LAN = PLC LAN (all in same range).<br />
Network 3 ≠ Network 2<br />
Network 3 ≠ Network 1<br />
<strong>Remote</strong> <strong>Access</strong> <strong>for</strong> <strong>Schneider</strong> Electric Modicon Micro & Premium Series <strong>PLCs</strong> (How to) Page 7/47
Reaching your <strong>eWON</strong> through the Internet<br />
5. Reaching your <strong>eWON</strong> through the Internet<br />
5.1 Step 1: Setting IP address of <strong>eWON</strong> LAN<br />
Chapter 5.<br />
Once you have selected your IP addresses, you can start configuring your <strong>eWON</strong>.<br />
In our example, we will change the default factory address 10.0.0.53 to 192.168.0.53.<br />
To configure your <strong>eWON</strong> LAN IP:<br />
1. This connection will usually be made through the Company network. It can also<br />
be made with a point-to-point link. At this stage there is no constraint on the IP<br />
range of your PC. For this step, eBuddy can access the <strong>eWON</strong> even if your PC<br />
and the <strong>eWON</strong> have different network address ranges. eBuddy – <strong>eWON</strong><br />
detection and firmware maintenance utility<br />
http://support.ewon.biz/softwares.htm<br />
Connection through company LAN<br />
Point-to-point connection<br />
(if <strong>eWON</strong> model has only 1 LAN port use crossed cable).<br />
2. Start the eBuddy utility on your PC<br />
<strong>Remote</strong> <strong>Access</strong> <strong>for</strong> <strong>Schneider</strong> Electric Modicon Micro & Premium Series <strong>PLCs</strong> (How to) Page 8/47
5. Reaching your <strong>eWON</strong> through the Internet<br />
3. In the home page, select Set IP Address<br />
4. You don't need to fill out the Serial Number, just click on Browse<br />
eBuddy finds your <strong>eWON</strong>. Select it by double-clicking on it and the IP Address<br />
window opens.<br />
5. Enter new LAN IP address and Subnet Mask. Click Next<br />
<strong>Remote</strong> <strong>Access</strong> <strong>for</strong> <strong>Schneider</strong> Electric Modicon Micro & Premium Series <strong>PLCs</strong> (How to) Page 9/47
5. Reaching your <strong>eWON</strong> through the Internet<br />
6. Wait until address update and device reboot are completed. Click Finish.<br />
In our example the <strong>eWON</strong> was set to LAN IP address 192.168.0.53.<br />
As shown below, this address fits into the PLC-range and does not interfere with<br />
the Company LANs.<br />
7. End of step 1<br />
<strong>Remote</strong> <strong>Access</strong> <strong>for</strong> <strong>Schneider</strong> Electric Modicon Micro & Premium Series <strong>PLCs</strong> (How to) Page 10/47
5. Reaching your <strong>eWON</strong> through the Internet<br />
5.2 Step 2: Configure <strong>eWON</strong> <strong>for</strong> Internet connection<br />
To configure your <strong>eWON</strong> Internet connection :<br />
1. Configure the network parameters of your configuration PC to encompass the IP<br />
range of the <strong>eWON</strong> LAN. To do this, go to START, Settings, Network<br />
Connections. Open the currently used connection, select the TCP/IP parameter<br />
row and select a fixed IP address within the range of the <strong>eWON</strong> LAN. Click OK to<br />
close the wizard.<br />
2. Connect the PC to one of the LAN ports of the <strong>eWON</strong>.<br />
3. Open your Internet browser and access the <strong>eWON</strong> internal Web page by typing<br />
the LAN address you just configured (in our example http://192.168.0.53)<br />
4. To open the <strong>eWON</strong> wizard page, click on Configuration in the toolbar and then<br />
on the wizard icon. The following page will be displayed:<br />
5. Click on the icon next to Configure INTERNET Connection to launch the wizard.<br />
Following window will be displayed (options in drop down are depending on<br />
hardware configuration) :<br />
<strong>Remote</strong> <strong>Access</strong> <strong>for</strong> <strong>Schneider</strong> Electric Modicon Micro & Premium Series <strong>PLCs</strong> (How to) Page 11/47
5. Reaching your <strong>eWON</strong> through the Internet<br />
6. According to your <strong>eWON</strong> type (with a modem or a second Ethernet interface), you<br />
will have the possibility to choose between different connections:<br />
● Modem Connection<br />
● Ethernet WAN* connection<br />
● ADSL<br />
*WAN refers to wide area network , which is network that covers a broad<br />
external area using the Internet infrastructure, as opposed to LAN referring to<br />
local area network that is restricted to internal networks.<br />
From the next step onwards, we will address the most current access which is<br />
Ethernet WAN connection (<strong>for</strong> modem connection refer to appendix 1).<br />
7. Make sure the WAN port of the <strong>eWON</strong> is physically connected with the company<br />
network. Traffic LEDs are normally not yet lit as the connection is not yet defined.<br />
8. Select Ethernet WAN connection. The usual configuration <strong>for</strong> Ethernet is DHCP<br />
enabled (device obtains IP address and Internet access automatically from host).<br />
Use a fixed IP address, Gateway and DNS only if this is clearly required by the<br />
network admin.<br />
<strong>Remote</strong> <strong>Access</strong> <strong>for</strong> <strong>Schneider</strong> Electric Modicon Micro & Premium Series <strong>PLCs</strong> (How to) Page 12/47
5. Reaching your <strong>eWON</strong> through the Internet<br />
9. Click Next and go to step 10 Internet Connection Test.<br />
10. The last step of the Internet configuration consist in a communication test. This<br />
test should end up successfully as shown in the snapshot below:<br />
The Internet Connection means that the <strong>eWON</strong> is correctly configured <strong>for</strong> an<br />
Internet connection. If this test is not successful, then go back to the previous<br />
configuration steps and recheck all settings <strong>for</strong> compatibility and accuracy.<br />
The Online IP Check means that the <strong>eWON</strong> was actually able to reach an IP<br />
address on Internet. It might not be so critical if this particular test fails. Go<br />
ahead with the procedure without being too much concerned.<br />
You normally do not need to read this manual to complete the present procedure,<br />
but we mention <strong>for</strong> reference the detailed document describing the use of the<br />
wizard: AUG-019-0-EN-(<strong>eWON</strong> Configuration <strong>for</strong> Internet <strong>Access</strong> Using the<br />
Wizard). http://support.ewon.biz/docs/Talk2M_Free.htm<br />
11. End of step 2.<br />
<strong>Remote</strong> <strong>Access</strong> <strong>for</strong> <strong>Schneider</strong> Electric Modicon Micro & Premium Series <strong>PLCs</strong> (How to) Page 13/47
5. Reaching your <strong>eWON</strong> through the Internet<br />
5.3 Step 3: Creating the <strong>eWON</strong> in your Talk2M account<br />
To connect to your <strong>eWON</strong> remotely, we will use eCatcher and Talk2M.<br />
1. You can skip the present point if you already created a Talk2M account. If you<br />
haven't created your Talk2M account yet, install eCatcher and create your Talk2M<br />
account as per § 3 of the guide "Talk2M – Getting started on Service Free+"<br />
available at http://support.ewon.biz/docs/Talk2M_Free.htm. You can download<br />
eCatcher from this link as well.<br />
2. Connect your configuration PC to the company LAN and configure its network<br />
parameters to DHCP enabled (acquiring an IP address automatically).<br />
3. On the menu on the left side of the eCatcher interface click on the "+" (New<br />
<strong>eWON</strong>) icon in the <strong>eWON</strong> list section. The following window appears:<br />
4. Enter the <strong>eWON</strong> name you want to use on the Talk2M server to identify the<br />
remote connection to your <strong>eWON</strong>.<br />
5. The <strong>eWON</strong> Serial Number can be left empty. It will be encoded automatically<br />
during the Talk2M connection configuration of the <strong>eWON</strong>.<br />
6. Select the Connection Type to specify how your <strong>eWON</strong> will be connected to the<br />
Talk2M server using:<br />
� a LAN/ADSL connection<br />
� a GPRS/EDGE connection or<br />
� an Internet connection over a PSTN connection (analog modem).<br />
If you specify a GPRS/Edge connection, then you will be asked to specify the<br />
phone number. This will allow Talk2M to wake up your <strong>eWON</strong> remotely<br />
using a Wake-Up SMS as described in Appendix 1.<br />
<strong>Remote</strong> <strong>Access</strong> <strong>for</strong> <strong>Schneider</strong> Electric Modicon Micro & Premium Series <strong>PLCs</strong> (How to) Page 14/47
5. Reaching your <strong>eWON</strong> through the Internet<br />
Click on Next.<br />
In older versions, you were asked to specify the <strong>Remote</strong> Network to reach behind<br />
the <strong>eWON</strong> like shown below. Since firmware version 6.2s0, when launching the<br />
<strong>eWON</strong> Talk2M wizard to enter the Talk2M-key, the wizard transfers the <strong>eWON</strong><br />
LAN IP address to Talk2M automatically. This makes that step is skipped.<br />
7. Click on Next.<br />
Here you can enter additional in<strong>for</strong>mation concerning your remote connection.<br />
The Custom Fields can be used to classify or filter your different remote<br />
connections. This will allow you to find easily the <strong>eWON</strong> you need to connect to.<br />
<strong>Remote</strong> <strong>Access</strong> <strong>for</strong> <strong>Schneider</strong> Electric Modicon Micro & Premium Series <strong>PLCs</strong> (How to) Page 15/47
5. Reaching your <strong>eWON</strong> through the Internet<br />
8. Click on Finish to add the <strong>eWON</strong> to the <strong>eWON</strong> list of your Talk2M account.<br />
The new <strong>eWON</strong> account will now be displayed in the <strong>eWON</strong> List section on the<br />
lower part of the window.<br />
9. End of step 3.<br />
<strong>Remote</strong> <strong>Access</strong> <strong>for</strong> <strong>Schneider</strong> Electric Modicon Micro & Premium Series <strong>PLCs</strong> (How to) Page 16/47
5. Reaching your <strong>eWON</strong> through the Internet<br />
5.4 Step 4: Getting the Talk2M activation key <strong>for</strong> the <strong>eWON</strong><br />
Up to now we only added the <strong>eWON</strong> on our Talk2M account, but we did not yet<br />
configure the <strong>eWON</strong> to connect to the Talk2M server.<br />
To enable the <strong>eWON</strong> connecting to the Talk2M server, an activation key is needed.<br />
This key will allow the <strong>eWON</strong> to get back the VPN keys and certificates needed <strong>for</strong> the<br />
VPN connection. This step still uses the DHCP-enabled configuration of the previous<br />
step.<br />
To get the activation key, proceed as follows:<br />
1. Select the <strong>eWON</strong> in the <strong>eWON</strong> list and click on the Detail button.<br />
The <strong>eWON</strong> Detail window opens.<br />
2. Click on the <strong>eWON</strong> Setup button.<br />
<strong>Remote</strong> <strong>Access</strong> <strong>for</strong> <strong>Schneider</strong> Electric Modicon Micro & Premium Series <strong>PLCs</strong> (How to) Page 17/47
5. Reaching your <strong>eWON</strong> through the Internet<br />
The following window opens:<br />
3. Under the Configure via Activation Key section you will find the Activation Key<br />
needed <strong>for</strong> the <strong>eWON</strong> configuration. Click on the Copy icon to copy the activation<br />
key into the clipboard of your PC. Keep this in<strong>for</strong>mation on your clipboard to<br />
complete Step 5 (go to this step).<br />
Note: Using the Activation Key is the standard procedure. Next to this method,<br />
there are 2 alternative methods:<br />
� Configure via <strong>eWON</strong> Name: During the <strong>eWON</strong> Talk2M wizard, instead of<br />
using the Activation Key you can alternatively specify the <strong>eWON</strong> Name and<br />
use the user name and password of your Free+ account.<br />
� Configure via SMS: If your <strong>eWON</strong> has a GSM modem and if the <strong>eWON</strong> is<br />
already configured <strong>for</strong> Internet connection, then you can also send an SMS to<br />
the <strong>eWON</strong> containing the activation key. When <strong>eWON</strong> receives the SMS, it will<br />
then trigger automatically the Talk2M connection wizard and will configure<br />
itself to connect to the Talk2M server.<br />
4. End of step 4.<br />
<strong>Remote</strong> <strong>Access</strong> <strong>for</strong> <strong>Schneider</strong> Electric Modicon Micro & Premium Series <strong>PLCs</strong> (How to) Page 18/47
5. Reaching your <strong>eWON</strong> through the Internet<br />
5.5 Step 5: Configuring your <strong>eWON</strong> to connect to Talk2M<br />
1. Configure the network parameters of your configuration PC to encompass the IP<br />
range you used to allocate the LAN IP address to the <strong>eWON</strong>.<br />
2. Connect the PC to one of the LAN ports of the <strong>eWON</strong>.<br />
3. Open your Internet browser and access it's internal Web page by typing the LAN<br />
address you just configured (in our example http://192.168.0.53)<br />
4. To open the <strong>eWON</strong> wizard page, click on Configuration in the toolbar and then<br />
on the Wizard icon.<br />
The wizard window will open:<br />
5. Click on the Talk2M wizard.<br />
The following window will be displayed:<br />
<strong>Remote</strong> <strong>Access</strong> <strong>for</strong> <strong>Schneider</strong> Electric Modicon Micro & Premium Series <strong>PLCs</strong> (How to) Page 19/47
5. Reaching your <strong>eWON</strong> through the Internet<br />
6. Click on Next to register the <strong>eWON</strong> on the Talk2M server.<br />
7. Click on Register with ACTIVATION KEY, as in the previous step, we copied the<br />
Activation Key to the clipboard of your PC. Paste the Activation Key<br />
(Ctrl+V).<br />
8. Click Next<br />
Note: If you choose the Registration with <strong>eWON</strong> NAME method, then you will<br />
be asked to enter the Name you specified <strong>for</strong> the remote connection in your<br />
Talk2M account. You will also need to specify your Talk2M account name and<br />
enter the user name and the password which you use to connect to your Talk2M<br />
account.<br />
The next window of the wizard will ask you if you need to connect through a Proxy<br />
server.<br />
9. Check this option only if you need to specify a Proxy server <strong>for</strong> the Internet<br />
connection. Otherwise leave this option unchecked and click Next.<br />
<strong>Remote</strong> <strong>Access</strong> <strong>for</strong> <strong>Schneider</strong> Electric Modicon Micro & Premium Series <strong>PLCs</strong> (How to) Page 20/47
5. Reaching your <strong>eWON</strong> through the Internet<br />
10. The Talk2M registration will now start and the result will be displayed on the<br />
wizard page:<br />
The <strong>eWON</strong> will first test the different connections needed to connect to the Talk2M<br />
server (UDP and HTTP or HTTP using a Proxy). Then the <strong>eWON</strong> will connect to<br />
the Talk2M server and retrieve the VPN keys. At the end, the <strong>eWON</strong> will establish<br />
the VPN connection to the Talk2M server.<br />
Once the registration and configuration of the <strong>eWON</strong> are completed, the result will<br />
be displayed on the Wizard page as shown in the following picture:<br />
11. Click on the Done button to close the wizard.<br />
Your <strong>eWON</strong> is now configured to connect to the Talk2M server.<br />
12. End of step 5.<br />
<strong>Remote</strong> <strong>Access</strong> <strong>for</strong> <strong>Schneider</strong> Electric Modicon Micro & Premium Series <strong>PLCs</strong> (How to) Page 21/47
5. Reaching your <strong>eWON</strong> through the Internet<br />
5.6 Step 6: Connecting the <strong>eWON</strong> remotely<br />
Now that the <strong>eWON</strong> is configured to connect to Talk2M, we can establish the remote<br />
connection to the <strong>eWON</strong>.<br />
1. Connect your configuration PC to the company LAN and configure its network<br />
parameters to DHCP enabled (acquiring an IP address automatically).<br />
2. Launch eCatcher and open your Talk2M account.<br />
3. In the <strong>eWON</strong> list section select the <strong>eWON</strong> you want to use <strong>for</strong> the remote<br />
connection.<br />
The <strong>eWON</strong> which you just configured should now be displayed as on line (green<br />
tick in the action column). This means that the <strong>eWON</strong> has established its VPN<br />
connection to the Talk2M server.<br />
4. Double-click the online icon or click on the Connect button displayed in the<br />
<strong>eWON</strong> list menu to establish the remote connection to this <strong>eWON</strong>. eCatcher will<br />
now establish the VPN connection to the Talk2M server.<br />
5. Once the VPN connection to the <strong>eWON</strong> is established, the <strong>eWON</strong> will be<br />
displayed in the "Active connection" section on the top of the window.<br />
<strong>Remote</strong> <strong>Access</strong> <strong>for</strong> <strong>Schneider</strong> Electric Modicon Micro & Premium Series <strong>PLCs</strong> (How to) Page 22/47
5. Reaching your <strong>eWON</strong> through the Internet<br />
6. The PC is now connected to the <strong>eWON</strong> using the VPN tunnel and you can start to<br />
use the remote connection.<br />
7. If you want/need to connect to the <strong>eWON</strong> itself, you can click on the IP address<br />
link in the Active Connection section, as displayed in the following picture. Once<br />
the home page of the <strong>eWON</strong> web interface is displayed, you know <strong>for</strong> sure that<br />
your connection is effective.<br />
Note: For specifics related to modem connection (including GPRS/Edge) please<br />
go to Appendix 1 – Specifics <strong>for</strong> Modem connections at the end of this guide.<br />
8. End of step 6.<br />
<strong>Remote</strong> <strong>Access</strong> <strong>for</strong> <strong>Schneider</strong> Electric Modicon Micro & Premium Series <strong>PLCs</strong> (How to) Page 23/47
5. Reaching your <strong>eWON</strong> through the Internet<br />
5.7 Step 7: Terminating the remote connection<br />
1. Click on the disconnect button in the Active connection section. This will close the<br />
VPN connection with the <strong>eWON</strong>.<br />
2. Note: For specifics related to modem connection (including GPRS/Edge) please<br />
go to Appendix 1 – Specifics <strong>for</strong> Modem connections at the end of this guide.<br />
3. End of step 7.<br />
<strong>Remote</strong> <strong>Access</strong> <strong>for</strong> <strong>Schneider</strong> Electric Modicon Micro & Premium Series <strong>PLCs</strong> (How to) Page 24/47
Linking <strong>eWON</strong> and PLC<br />
6. Linking <strong>eWON</strong> and PLC<br />
6.1 Local link capabilities<br />
Chapter 6.<br />
Depending on whether the PLC will be connected to the <strong>eWON</strong> with a Unitelway or<br />
Ethernet link, the <strong>eWON</strong> configuration and the connection to the PLC will be different.<br />
Both types of connections will be explained.<br />
Keep in mind that you can combine both connection types without any problem. For<br />
example, you can connect at the same time to one or more Modicon TSX Micro &<br />
Premium using the Unitelway port of the <strong>eWON</strong> and connect to one or more Modicon<br />
TSX Micro & Premium PLC(s) using the Ethernet connection between the <strong>eWON</strong> and<br />
the PLC.<br />
6.2 Serial link (Unitelway) configuration<br />
<strong>Remote</strong> <strong>Access</strong> <strong>for</strong> <strong>Schneider</strong> Electric Modicon Micro & Premium Series <strong>PLCs</strong> (How to) Page 25/47
6. Linking <strong>eWON</strong> and PLC<br />
1. Set the serial port dip switch of the <strong>eWON</strong> to RS485 mode (1 ON and all others OFF)<br />
to allow the Unitelway communication with the PLC. The settings of the switches are<br />
indicated on the <strong>eWON</strong> sticker on the left hand side of its housing.<br />
ON<br />
OFF<br />
1 4 On earlier models, the<br />
layout was inverted, but<br />
switch numbers and<br />
positions remain the<br />
same.<br />
2. Go to the <strong>eWON</strong> Web page either using the just configured VPN tunnel or a point-topoint<br />
connection to the <strong>eWON</strong> LAN port.<br />
4. Open the <strong>eWON</strong> IO Server configuration and go to the IOServer page<br />
5. In the drop down field select the "Unitelway" IO Server<br />
6. Set the Baud Rate, Parity, Stop Bits, HW Mode, Master Response Timeout<br />
corresponding to those actually configured in the PLC you want to communicate with<br />
(shown values are <strong>eWON</strong>'s default values). It is recommended to have the option<br />
Force Unitelway V2 checked (uncheck only if you are using older PLC-Series AND<br />
facing communication problems).<br />
<strong>Remote</strong> <strong>Access</strong> <strong>for</strong> <strong>Schneider</strong> Electric Modicon Micro & Premium Series <strong>PLCs</strong> (How to) Page 26/47
6. Linking <strong>eWON</strong> and PLC<br />
In most cases, you can leave the AD0 field empty (= default value which is 4).<br />
In XWAY Network.Station you have to introduce the XWAY address of the <strong>eWON</strong><br />
(which is a set of two numbers). This address will have to match with those<br />
configured in the XIP Driver (as shown in the pictures inserted in the snapshot<br />
above, see § 7.2. XIP Driver Configuration <strong>for</strong> serial connection).<br />
Note: For the Unitelway link communication parameters, the corresponding fields in<br />
the PL7 PRO interface are part of the hardware configuration, like shown below:<br />
<strong>Remote</strong> <strong>Access</strong> <strong>for</strong> <strong>Schneider</strong> Electric Modicon Micro & Premium Series <strong>PLCs</strong> (How to) Page 27/47
6. Linking <strong>eWON</strong> and PLC<br />
7. Save your settings by clicking on Update Config and leave the Web configuration<br />
interface open.<br />
8. Interconnect the Unitelway port of the <strong>eWON</strong> with your PLC using the TSX CX 100<br />
cable (mini-DIN connector in TER at the PLC side – cable pinout see 13. Appendix 4<br />
– Unitelway cable).<br />
9. End of serial link configuration.<br />
6.3 Ethernet link configuration<br />
1. Connect your configuration PC (set with a fixed IP in the IP range of Ethernet card<br />
module of the PLC). <strong>Schneider</strong> Ethernet modules feature a web server allowing to<br />
make the IP configuration.<br />
2. Open your web<br />
browser and type the<br />
PLC IP in the URL<br />
field.<br />
3. Click on the Online<br />
Configuration link .<br />
The access to this<br />
page is protected by<br />
login and password. If<br />
they have not been<br />
changed, the default<br />
values are :<br />
Log in: USER<br />
Password: USER<br />
<strong>Remote</strong> <strong>Access</strong> <strong>for</strong> <strong>Schneider</strong> Electric Modicon Micro & Premium Series <strong>PLCs</strong> (How to) Page 28/47
6. Linking <strong>eWON</strong> and PLC<br />
4. Configure an IP address that is in the same range as the <strong>eWON</strong> (in our example<br />
192.168.0.61). The XWAY address is the one of the PLC as well (in our example<br />
13.11).<br />
5. Click on Apply on the bottom of<br />
the page, the server asks <strong>for</strong> the<br />
configuration password. If it was<br />
not modified, the default<br />
password is: USER<br />
6. You need to<br />
reboot the<br />
Ethernet card after<br />
sending the new<br />
parameters. To do<br />
this, go back to the<br />
home page and<br />
click on the<br />
Reboot link (you<br />
are again asked<br />
your password).<br />
7. 1. You can now make the physical link between the PLC to the Ethernet LAN port of<br />
the <strong>eWON</strong>.<br />
8. From <strong>eWON</strong> firmware version 6.2s1 onwards, the Plug'nRoute function<br />
automatically configures the Ethernet routing. With this configuration, it is - in most<br />
cases - no longer necessary to set the <strong>eWON</strong> address as Gateway into the PLC.<br />
<strong>Remote</strong> <strong>Access</strong> <strong>for</strong> <strong>Schneider</strong> Electric Modicon Micro & Premium Series <strong>PLCs</strong> (How to) Page 29/47
6. Linking <strong>eWON</strong> and PLC<br />
If, <strong>for</strong> any reason, you are using an earlier firmware version (not recommended) OR<br />
would the Plugn'Route function not work in your specific application , then you should<br />
refer to Appendix 2 – <strong>eWON</strong> as Gateway in PLC.<br />
Note 2: The <strong>eWON</strong> types with 4 LAN ports (2005CD or 4005CD) can be connected to<br />
the Ethernet port of the PLC directly. Whereas the <strong>eWON</strong> types with a single LAN port<br />
(2101CD or 4101CD) need to be connected with a crossed cable (single PLC) or an<br />
external switch (multiple PLC).<br />
1. End of Ethernet link configuration.<br />
<strong>Remote</strong> <strong>Access</strong> <strong>for</strong> <strong>Schneider</strong> Electric Modicon Micro & Premium Series <strong>PLCs</strong> (How to) Page 30/47
PLC software mapping configuration<br />
7. PLC software mapping configuration<br />
7.1 Understanding XIP<br />
The next step in the configuration is to set up the PL7 software to use XIP.<br />
Chapter 7.<br />
XIP is one of the Ethernet protocols used by <strong>Schneider</strong>. The <strong>eWON</strong> provides XIP to<br />
Unitelway Gateway.<br />
The routing flow can be described as follows:<br />
both in serial and in Ethernet mode:<br />
● the PL7 software is configured to address the PLC as if it is connected by Ethernet,<br />
even when it is connected in serial link, and sends a request through the XIP driver<br />
installed on the PC<br />
● the PLC replies to the <strong>eWON</strong> request in the corresponding <strong>for</strong>mat (XIP or Unitelway<br />
depending on the local interface) which <strong>for</strong>wards the answer to the address of the XIP<br />
driver on the PC.<br />
in serial link only:<br />
● the <strong>eWON</strong> picks the packet from this address and converts it in Unitelway be<strong>for</strong>e<br />
<strong>for</strong>warding it<br />
● from the PC-side (XIP driver), the <strong>eWON</strong> is seen as an XWAY master. From the <strong>PLCs</strong>ide,<br />
the <strong>eWON</strong> is seen as an Unitelway client.<br />
7.2 XIP Driver Configuration <strong>for</strong> serial connection<br />
1. If it is still connected as described in § 5.6. Step 6: Connecting the <strong>eWON</strong> remotely,<br />
temporarily disconnect the VPN link with the <strong>eWON</strong>. If you discard doing so, you might face<br />
routing issues with the Xway Drivers Manager.<br />
2. Start XWAY Drivers Manager<br />
3. Select the XIP Driver tab (1) from the Drivers<br />
Management Properties window and click on<br />
Configuration (2).<br />
<strong>Remote</strong> <strong>Access</strong> <strong>for</strong> <strong>Schneider</strong> Electric Modicon Micro & Premium Series <strong>PLCs</strong> (How to) Page 31/47
7. PLC software mapping configuration<br />
4. In our example, the defined Profile is<br />
XP01 and the Local Host 13.2 is the<br />
XWAY address is the address the PC<br />
(XIP driver). This XWAY address is not<br />
that important, it just needs to be in the<br />
same range as the as the XWAY<br />
address of the <strong>eWON</strong>.<br />
In New remote host set the XWAY<br />
address as defined in the IO Server of<br />
the <strong>eWON</strong> (see § 6.2 Serial link<br />
(Unitelway) configuration) and the<br />
<strong>eWON</strong> LAN IP address (1).<br />
Click on Add (2) and then on Save (3).<br />
5. Then click on Start from the XIP menu<br />
6. Select ICMP Ping in the Test menu:<br />
7. Then click on Ping, you should get the<br />
following screen confirming that the<br />
<strong>eWON</strong> is physically responding (if not,<br />
check § 9. Troubleshooting).<br />
<strong>Remote</strong> <strong>Access</strong> <strong>for</strong> <strong>Schneider</strong> Electric Modicon Micro & Premium Series <strong>PLCs</strong> (How to) Page 32/47
7. PLC software mapping configuration<br />
8. The XIP protocol connection is tested by<br />
sending a mirror request to the PLC. To<br />
do this, close the ICMP Ping window and<br />
the CNFXIP window to return to the<br />
XWAY Drivers Management window.<br />
Select the XWAY Test Tab (1), select<br />
XIP01 in the driver name drop down box:<br />
set the <strong>Remote</strong> Address to 13.14 (2) this<br />
si the <strong>eWON</strong> XWAY address - see § 6.2<br />
Serial link (Unitelway) configuration.<br />
Click on Connect (3)<br />
Click on Start (4)<br />
9. You should see the Request counter<br />
increasing quickly<br />
Click on Stop.<br />
10. End of serial PLC software mapping<br />
configuration<br />
7.3 XIP Driver Configuration <strong>for</strong> Ethernet connection<br />
1. If it is still connected as described in § 5.6. Step 6: Connecting the <strong>eWON</strong> remotely,<br />
temporarily disconnect the VPN link with the <strong>eWON</strong>. If you discard doing so, you might face<br />
routing issues with the Xway Drivers Manager.<br />
2. Start XWAY Drivers Manager<br />
3. Select the XIP Driver tab (1) from the Drivers<br />
Management Properties window and click on<br />
Configuration (2)<br />
<strong>Remote</strong> <strong>Access</strong> <strong>for</strong> <strong>Schneider</strong> Electric Modicon Micro & Premium Series <strong>PLCs</strong> (How to) Page 33/47
7. PLC software mapping configuration<br />
4. In our example, the defined Profile is<br />
XP01 and the Local Host 13.2 is the<br />
XWAY address is the address the PC<br />
(XIP driver). This XWAY address is not<br />
that important, it just needs to be in the<br />
same range as the XWAY address of the<br />
<strong>eWON</strong>.<br />
5. In New remote host set the XWAY<br />
address and the IP address (1) of the<br />
PLC (see § 6.3 Ethernet link<br />
configuration) .<br />
Click on Add (2) and then on Save (3).<br />
6. End of Ethernet PLC software mapping<br />
configuration<br />
<strong>Remote</strong> <strong>Access</strong> <strong>for</strong> <strong>Schneider</strong> Electric Modicon Micro & Premium Series <strong>PLCs</strong> (How to) Page 34/47
Establishing remote connection<br />
8. Establishing remote connection<br />
Chapter 8.<br />
It is supposed you have been going through the previous steps. Hence, your PLC and the<br />
<strong>eWON</strong> are physically connected either by Unitelway or by Ethernet connection. The steps<br />
below are the same <strong>for</strong> both connection type.<br />
1. Establish the VPN<br />
connection to the<br />
<strong>eWON</strong> as explained in<br />
Step 6 of the <strong>eWON</strong><br />
configuration part.<br />
2. Once the Talk2M VPN<br />
tunnel towards the<br />
<strong>eWON</strong> is established<br />
by eCatcher, start PL7<br />
PRO®<br />
3. Open your project and<br />
select Define PLC<br />
Address... (2) from the<br />
PLC (1) entry in the<br />
menu :<br />
4. Configure the sub-window <strong>for</strong> XIP, set the <strong>Remote</strong> Address depending on the type of<br />
connection you are using:<br />
For a serial connection:<br />
Select the driver profile corresponding<br />
to the one defined in XIP configuration<br />
(1) in our example XP01<br />
set the XWAY address of the <strong>eWON</strong><br />
(2) see § 6.2 Serial link (Unitelway)<br />
configuration<br />
Click on OK (3)<br />
For an Ethernet connection:<br />
Select the driver profile corresponding to<br />
the one defined in XIP configuration (1)<br />
in our example XP01<br />
set the XWAY address of the PLC - see<br />
(2) § 6.3 Ethernet link configuration<br />
<strong>Remote</strong> <strong>Access</strong> <strong>for</strong> <strong>Schneider</strong> Electric Modicon Micro & Premium Series <strong>PLCs</strong> (How to) Page 35/47
8. Establishing remote connection<br />
5. Click on the icon from the<br />
toolbar or on Connect from the<br />
PLC entry of the main menu<br />
6. If the communication is<br />
OK , you should see<br />
ONLINE in status bar<br />
and a progress bar if<br />
you download/upload your project file.<br />
(if not, check the section 9. Troubleshooting).<br />
7. Your setup is now connected and ready to work in remote programming mode.<br />
8. Once you finished your work with PL7 PRO®...<br />
� ...terminate the PL7 PRO® connection through PLC > Disconnect and close the<br />
application.<br />
� ...terminate the Talk2M connection of the <strong>eWON</strong> explained in Step 7 of the <strong>eWON</strong><br />
configuration part.<br />
9. End of PLC remote access.<br />
<strong>Remote</strong> <strong>Access</strong> <strong>for</strong> <strong>Schneider</strong> Electric Modicon Micro & Premium Series <strong>PLCs</strong> (How to) Page 36/47
Troubleshooting<br />
9. Troubleshooting<br />
9.1 Cannot reach the PLC on its Unitelway port?<br />
Chapter 9.<br />
If you cannot reach the serial PLC connected to the <strong>eWON</strong> then verify the following:<br />
– Check serial link configuration of the <strong>eWON</strong> (1 ON all others OFF <strong>for</strong> RS485).<br />
– Make sure you are not connected through VPN tunnel when mapping your PLC<br />
with XWAY Driver Manager. Establish the tunnel only AFTER taht the XIP driver<br />
configuration was made and started.<br />
In XWAY Driver Manager check if the correct IP address has been configured:<br />
You must use either the <strong>eWON</strong> LAN IP address or the <strong>eWON</strong> VPN IP address.<br />
Check that you use an XIP driver (not the Unitelway one) and that this driver is<br />
started (runs in the background). Check <strong>eWON</strong>'s XWAY address.<br />
– Check IOServer configuration in <strong>eWON</strong> page (Unite protocol settings, <strong>eWON</strong><br />
XWAY address , etc.)<br />
– Open the <strong>eWON</strong> Event Log [Main Menu, Diagnostic, Event Log] to check <strong>for</strong><br />
error messages.<br />
– To verify if the <strong>eWON</strong> serial port and the <strong>eWON</strong> IOServer is correctly configured<br />
you can create a Tag inside the <strong>eWON</strong> which will poll a register on the PLC. If the<br />
polling succeeds, this indicates that the serial connection is working correctly.<br />
9.2 Cannot reach PLC by Ethernet ?<br />
To be able to reach the PLC by Ethernet, the following conditions must be fulfilled:<br />
– Reboot the PLC after IP address and/or gateway change.<br />
– Check that the network LEDs are lighting at both ends. If they aren't, it means<br />
there is an issue with the Ethernet cable(s). If you use an <strong>eWON</strong> having a single<br />
Ethernet LAN port (no integrated switch), then you have to use either a crossed<br />
Ethernet cable (point-to-point with single PLC) or an intermediate switch (multiple<br />
<strong>PLCs</strong>).<br />
– Make sure you are not connected through VPN tunnel when mapping your PLC<br />
with XWAY Driver Manager. Establish the tunnel only AFTER That the XIP driver<br />
configuration was made and started.<br />
In XWAY Driver Manager check if the correct IP address has been configured:<br />
You must use either the <strong>eWON</strong> LAN IP address or the <strong>eWON</strong> VPN IP address.<br />
Check that you use an XIP driver (not the Unitelway one) and that this driver is<br />
started (runs in the background). Check <strong>eWON</strong>'s XWAY address.<br />
<strong>Remote</strong> <strong>Access</strong> <strong>for</strong> <strong>Schneider</strong> Electric Modicon Micro & Premium Series <strong>PLCs</strong> (How to) Page 37/47
9. Troubleshooting<br />
– You might have a mismatch between the actual IP configuration of the <strong>eWON</strong> and<br />
the <strong>eWON</strong> LAN IP address configured as <strong>Remote</strong> Network in your Talk2M<br />
account. You can check, and if necessary, modify these settings, in eCatcher.<br />
Under the <strong>eWON</strong> list select the Name of the remote connection and click on the<br />
Detail button.<br />
The <strong>eWON</strong> Detail window will open:<br />
Here you will find the different in<strong>for</strong>mation you entered earlier. The <strong>Remote</strong><br />
Network is specified under the <strong>Remote</strong> connection section.<br />
To change the <strong>Remote</strong> Connection settings, click on the Edit button on the top of<br />
the page.<br />
– Once the modification is finished, click on the Save button which is displayed on<br />
the top of the window when in edit mode. After the change you would then have to<br />
save and Disconnect and Connect the VPN bridge to the <strong>eWON</strong> <strong>for</strong> Talk2M to<br />
take the modification into account.<br />
– The remote PLC network must be in a different range than the company network<br />
on which your PC is connected. (see Step 1).<br />
<strong>Remote</strong> <strong>Access</strong> <strong>for</strong> <strong>Schneider</strong> Electric Modicon Micro & Premium Series <strong>PLCs</strong> (How to) Page 38/47
Appendix 1 – Specifics <strong>for</strong> Modem connections<br />
Chapter 10.<br />
10. Appendix 1 – Specifics <strong>for</strong> Modem connections<br />
10.1 General<br />
The basic configuration principles remain the same except <strong>for</strong> typical modem settings.<br />
Allow enough time <strong>for</strong> tasks to be executed when you use a modem link.<br />
In the following explanations, we took the most current example of GPRS/Edge<br />
modem. Extrapolating to other modem technologies is rather straight <strong>for</strong>ward.<br />
Only those steps that are different from the LAN/WAN connection are addressed.<br />
10.2 Configuring the <strong>eWON</strong> <strong>for</strong> Internet connection (Step 2)<br />
1. In the Internet configuration wizard of the <strong>eWON</strong>, select Modem Connection<br />
option and, depending on the modem installed in the <strong>eWON</strong>, the interface asks<br />
the user to fill out the different parameters of the relevant modem. Fill out the<br />
different fields (PIN code, APN and user name/password) according those you<br />
received from your Service Provider. For most Service Providers, User Name and<br />
Password can be left empty. Click Next.<br />
2. Configure how the <strong>eWON</strong> should go online, and click Next.<br />
<strong>Remote</strong> <strong>Access</strong> <strong>for</strong> <strong>Schneider</strong> Electric Modicon Micro & Premium Series <strong>PLCs</strong> (How to) Page 39/47
10. Appendix 1 – Specifics <strong>for</strong> Modem connections<br />
In most cases, it will be Triggered by outgoing actions. This option is needed to<br />
be able to use the Wake-Up function. Only check Maintain connection if you<br />
want to use a permanent connection to your <strong>eWON</strong> device (which can be very<br />
expensive using a GPRS/Edge line).<br />
3. Configure your online time parameters, and click Next<br />
In most cases, you can leave the default parameters.<br />
The Max outgoing call duration is set by default to 60 minutes. The <strong>eWON</strong> will<br />
drop the Talk2M connection after 1 hour. If you need longer connection times,<br />
enter a higher value or set it to 0 <strong>for</strong> no limit.<br />
By default, the Idle time be<strong>for</strong>e hanging up is set to 120 seconds. You can leave<br />
this value as is. In fact, it is not a useful parameter <strong>for</strong> a Talk2M connection<br />
because a VPN life bit is periodically exchanged preventing connection<br />
interruptions due to idle times.<br />
4. End of Step 2 in Appendix 1.<br />
<strong>Remote</strong> <strong>Access</strong> <strong>for</strong> <strong>Schneider</strong> Electric Modicon Micro & Premium Series <strong>PLCs</strong> (How to) Page 40/47
10. Appendix 1 – Specifics <strong>for</strong> Modem connections<br />
10.3 Creating the <strong>eWON</strong> in your Talk2M account (Step 3)<br />
1. In the creation process of the <strong>eWON</strong> in your Talk2M account, the sole additional<br />
steps are:<br />
- specifying the connection type (in our example GPRS/Edge)<br />
- entering the phone number<br />
2. End of Step 3 in Appendix 1.<br />
10.4 Connecting the <strong>eWON</strong> remotely (Step 6)<br />
1. If you use an <strong>eWON</strong> GPRS, then you probably configured the <strong>eWON</strong> not to stay<br />
connected all the time to the Talk2M server. Be<strong>for</strong>e being able to connect to the<br />
<strong>eWON</strong> over Talk2M you will first need to wake-up the modem of the <strong>eWON</strong>. To do<br />
this, click on the Wake-up icon in front of the <strong>eWON</strong> name as shown in the<br />
following picture:<br />
<strong>Remote</strong> <strong>Access</strong> <strong>for</strong> <strong>Schneider</strong> Electric Modicon Micro & Premium Series <strong>PLCs</strong> (How to) Page 41/47
10. Appendix 1 – Specifics <strong>for</strong> Modem connections<br />
2. Talk2M sends an SMS (text message) to the <strong>eWON</strong> to ask the <strong>eWON</strong> to start its<br />
Internet connection and to connect to the Talk2M server. This can take up to<br />
several minutes; do not interfere until this process is completed.<br />
Note: You do not necessarily need Talk2M to send the wake-up SMS to the<br />
<strong>eWON</strong>. You can do this using your own GSM (cellular phone). All you need is to<br />
have the dial number of the <strong>eWON</strong> by the hand and to send the following SMS<br />
(text-message) to it: “Talk2MConnect” (without quotes).<br />
3. Once the modem is online, the green Connect icon is shown to allow to bridge the<br />
VPN tunnel.<br />
4. You can now click on the Connect button as explained in the LAN/WAN<br />
procedure to establish the remote connection.<br />
5. Once the VPN tunnel is bridged the red Disconnect icon is shown to allow you to<br />
cut the bridge of the VPN connection.<br />
6. End of Step 6 in Appendix 1.<br />
10.5 Terminating the remote connection (Step 7)<br />
If the <strong>eWON</strong> to which you were connected uses a Modem connection <strong>for</strong> the Internet<br />
access, then you probably want to close the Internet connection of the <strong>eWON</strong> (to save<br />
GPRS communication costs). This is done with eCatcher.<br />
Note that there are 2 distinct notions to be considered: Connect / Disconnect that<br />
applies to bridging the VPN tunnel and Go Offline that closes the VPN link and hence<br />
the modem connection (on hook)<br />
1. Click on Disconnect to cut the VPN bridge.<br />
2. Right-click on the Online icon<br />
in front of the <strong>eWON</strong>. In the<br />
context menu click on the Go<br />
offline button to send the<br />
disconnect request to the<br />
<strong>eWON</strong>. The <strong>eWON</strong> will then<br />
close its Internet connection<br />
and after a while the <strong>eWON</strong><br />
will be displayed as offline in<br />
your Talk2M account.<br />
3. End of Step 7 in Appendix 1.<br />
<strong>Remote</strong> <strong>Access</strong> <strong>for</strong> <strong>Schneider</strong> Electric Modicon Micro & Premium Series <strong>PLCs</strong> (How to) Page 42/47
Appendix 2 – <strong>eWON</strong> as Gateway in PLC<br />
11. Appendix 2 – <strong>eWON</strong> as Gateway in PLC<br />
Chapter 11.<br />
If, <strong>for</strong> any reason, the Plug'nRoute function is not working in your configuration, then<br />
you will need to disable the Plug'nRoute feature in the <strong>eWON</strong> and configure manually<br />
the <strong>eWON</strong> LAN IP address as default Gateway in the configuration of the PLC.<br />
1. To disable the Plug'nRoute function, connect to the <strong>eWON</strong> web site and click on<br />
Configuration, System Setup from the Main Menu. Navigate further to<br />
Communication, Networking Config, Routing and the screen below should be<br />
displayed:<br />
Select NAT and TF disabled <strong>for</strong>m the drop-down menu in the Apply NAT and TF<br />
to connection click Update AND reboot the <strong>eWON</strong>.<br />
2. Connect your configuration PC (set with a fixed IP in the IP range of Ethernet card<br />
module of the PLC). Open your web browser and type the PLC IP in the URL field.<br />
Click on the Online Configuration and follow the same steps as explained in § 6.3<br />
Ethernet link configuration.<br />
3. Configure the IP address of the PLC module and set the <strong>eWON</strong> LAN IP address as<br />
Gateway Address and check the XWAY Address of the module : Remember that the<br />
IP range of the <strong>eWON</strong> and the Ethernet module has to be the same (here<br />
192.168.X.X).<br />
<strong>Remote</strong> <strong>Access</strong> <strong>for</strong> <strong>Schneider</strong> Electric Modicon Micro & Premium Series <strong>PLCs</strong> (How to) Page 43/47
11. Appendix 2 – <strong>eWON</strong> as Gateway in PLC<br />
Note: The XWAY address configured here should not be changed as it is the<br />
address of the Ethernet card of the PLC (not the one of the <strong>eWON</strong>).<br />
4. Click on Apply and reboot the Ethernet card (see § 6.3 Ethernet link configuration).<br />
5. You can now make the physical link between the PLC to the Ethernet LAN port of the<br />
<strong>eWON</strong>.<br />
6. End of <strong>eWON</strong> as Gateway configuration.<br />
What if you cannot set Gateway on PLC?<br />
Setting the <strong>eWON</strong> as Gateway in the PLC is not always possible. In such case, you<br />
should first make sure the Plug'nRoute feature does not work in your specific case. If<br />
so, disable Plug'nRoute like explained in point 1 above and reboot your <strong>eWON</strong>.<br />
You can now use the <strong>eWON</strong> Proxy feature to allow remote connection to the PLC<br />
without mapping the <strong>eWON</strong> IP address as gateway.<br />
Detailed in<strong>for</strong>mation on how to do this can be found on the <strong>eWON</strong> Web site: "How to<br />
proxy a PLC protocol" http://support.ewon.biz/docs/Proxy_PLC.htm<br />
When using a Proxy, in combination with a Talk2M Connection, then you need to map<br />
the VPN IP address of the <strong>eWON</strong> in PL7 to allow the remote connection.<br />
This is impacting:<br />
§ 5.6 Step 6: Connecting the <strong>eWON</strong> remotely - point 5 – you need to fetch the VPN IP<br />
address allocated by Talk2M. Keep only the core IP, not the port part, this would be<br />
10.8.129.82 in the example below.<br />
§ 6 Linking <strong>eWON</strong> and PLC – you need to configure the proxy feature of the <strong>eWON</strong>. See<br />
detailed description in document referenced above.<br />
§ 7 PLC software mapping configuration –<br />
you need to map the VPN IP address<br />
instead of the <strong>eWON</strong> LAN IP address.<br />
<strong>Remote</strong> <strong>Access</strong> <strong>for</strong> <strong>Schneider</strong> Electric Modicon Micro & Premium Series <strong>PLCs</strong> (How to) Page 44/47
Appendix 3 – Security aspects<br />
12. Appendix 3 – Security aspects<br />
Chapter 12.<br />
When using a Talk2M connection, the data you are exchanging is protected by the<br />
VPN tunnel.<br />
Your <strong>eWON</strong> could however still be reached through its WAN connection. You can<br />
block this access by setting the WAN protection level to Discard all traffic excepted<br />
VPN and initiated traffic (5) in the <strong>eWON</strong> configuration via System Setup (1),<br />
Communication (2), Networking Config (3), Security (4)<br />
Click Update (6).<br />
When this option is ticked, the WAN connection will only allow traffic using the VPN<br />
connection.<br />
If the <strong>eWON</strong> is configured to use a modem to go out on the Internet, then the WAN<br />
connection is the GPRS/EDGE connection. This type of access definitely requires<br />
protection.<br />
If the <strong>eWON</strong> is configured to use its second Ethernet Interface to go out on the<br />
Internet, then the WAN connection is the Ethernet WAN port that uses the company<br />
infrastructure and benefits from the IT protections in place. Hence, this type of access<br />
is less exposed to security issues.<br />
Note: The changes applied on this page will only be effective from the next WAN<br />
connection. So from the next GPRS connection, or after an <strong>eWON</strong> reboot if you use<br />
the 2 nd Ethernet port of the <strong>eWON</strong> <strong>for</strong> the Internet connection.<br />
Since the <strong>eWON</strong> firmware version 6.2s0, when the Talk2M wizard is executed, the<br />
WAN Security setting is set automatically to Discard all traffic excepted VPN and<br />
initiated traffic.<br />
<strong>Remote</strong> <strong>Access</strong> <strong>for</strong> <strong>Schneider</strong> Electric Modicon Micro & Premium Series <strong>PLCs</strong> (How to) Page 45/47
Appendix 4 – Unitelway cable<br />
13. Appendix 4 – Unitelway cable<br />
Chapter 13.<br />
As serial cable, you can use the standard TSX CX 100 cable from <strong>Schneider</strong> Electric.<br />
Note that the present manual is assuming you are using an RS485 connection.<br />
RS232 cables also exist and can be used, but the dip switches have to be configured<br />
accordingly (see 6.2 Serial link (Unitelway) configuration).<br />
<strong>eWON</strong> is proposing a compatible cable:<br />
P/N EW40906 - For PLC <strong>Schneider</strong> Micro, Premium and Twido, Length: 2 meter<br />
Pinout of RS485 cable:<br />
<strong>Remote</strong> <strong>Access</strong> <strong>for</strong> <strong>Schneider</strong> Electric Modicon Micro & Premium Series <strong>PLCs</strong> (How to) Page 46/47
Revision history<br />
Revision Level Date Description<br />
1.0 16/02/12 First issue<br />
i Microsoft, Internet Explorer, Windows and Windows XP are either registered trademarks or trademarks of<br />
Microsoft Corporation<br />
ii Firefox is a registered trademark of the Mozilla Foundation<br />
iii PL7 PRO® and Unitelway® are registered trademarks of <strong>Schneider</strong> Electric.<br />
Document build number: 85<br />
Note concerning the warranty and the rights of ownership:<br />
The in<strong>for</strong>mation contained in this document is subject to modification without notice. The vendor<br />
and the authors of this manual are not liable <strong>for</strong> the errors it may contain, nor <strong>for</strong> their eventual<br />
consequences.<br />
No liability or warranty, explicit or implicit, is made concerning quality, the accuracy and the<br />
correctness of the in<strong>for</strong>mation contained in this document. In no case the manufacturer's responsibility could<br />
be called <strong>for</strong> direct, indirect, accidental or other damage occurring from any defect of the product or errors<br />
coming from this document.<br />
The product names are mentioned in this manual <strong>for</strong> in<strong>for</strong>mation purposes only. The trade marks<br />
and the product names or marks contained in this document are the property of their respective owners.<br />
This document contains materials protected by the International Copyright Laws. All reproduction<br />
rights are reserved. No part of this handbook can be reproduced, transmitted or copied in any way without<br />
written consent from the manufacturer and/or the authors of this handbook<br />
<strong>eWON</strong> sa, Member of ACT'L Group.<br />
<strong>Remote</strong> <strong>Access</strong> <strong>for</strong> <strong>Schneider</strong> Electric Modicon Micro & Premium Series <strong>PLCs</strong> (How<br />
to)<br />
Page 47/47