view user manual (pdf) - dyna-flo control valves
view user manual (pdf) - dyna-flo control valves
view user manual (pdf) - dyna-flo control valves

Create successful ePaper yourself
Turn your PDF publications into a flip-book with our unique Google optimized e-Paper software.
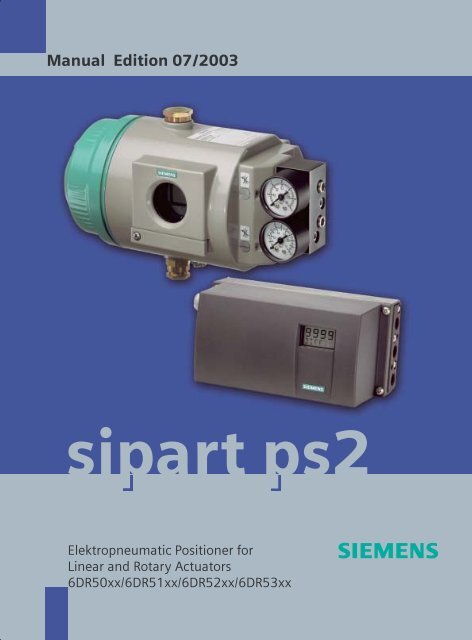
Manual Edition 07/2003<br />
sipart ps2<br />
Elektropneumatic Positioner for<br />
Linear and Rotary Actuators<br />
6DR50xx/6DR51xx/6DR52xx/6DR53xx
SIPART PS2<br />
6DR50xx<br />
6DR51xx<br />
6DR52xx<br />
6DR53xx<br />
Edition 07/2003<br />
Manual<br />
Electropneumatic Positioner for<br />
Linear and Rotary Actuators<br />
SIPART PS2 Manual<br />
A5E00074631--03<br />
1
Copyright e Siemens AG 2000 All rights reserved<br />
The reproduction, transmission or use of this document<br />
or its contents is not permitted without express<br />
written authority. Offenders will be liable for<br />
damages. All rights, including rights created by patent<br />
grant or registration of a utility model or design,<br />
are reserved.<br />
Siemens AG<br />
Bereich Automatisierungs-- und Antriebstechnik<br />
Geschäftsgebiet Prozessinstrumentierung-- und<br />
Analytik<br />
D--76181 Karlsruhe<br />
Disclaimer of Liability<br />
We have checked the contents of this <strong>manual</strong> for<br />
agreement with the hardware and software described.<br />
Since deviations cannot be precluded entirely,<br />
we cannot guarantee full agreement. However, the<br />
data in this <strong>manual</strong> are re<strong>view</strong>ed regularly and any<br />
necessary corrections included in subsequent editions.<br />
Suggestions for improvement are welcomed.<br />
e Siemens AG 2000<br />
Technical data subject to change.<br />
Trademarks<br />
SIMATIC, SIPART, SIREC, SITRANS are registered trademarks of Siemens AG.<br />
Third parties using for their own purposes any other names in this document which refer to trademarks<br />
might infringe upon the rights of the trademark owners.<br />
2<br />
SIPART PS2 Manual<br />
A5E00074631--03
Contents<br />
0 Information for the Operator ............................................. 5<br />
0.1 General information ........................................... 5<br />
0.2 Classification of Safety Related Notices ......................... 6<br />
0.3 Qualified Personnel ........................................... 7<br />
0.4 Use as intended .............................................. 9<br />
0.5 Technical Documentation ...................................... 9<br />
0.6 Warranty Information .......................................... 10<br />
0.7 Delivery Notes ............................................... 10<br />
0.8 Standards and Regulations .................................... 10<br />
1 Introduction ............................................................ 11<br />
1.1 General information about the positioner ......................... 11<br />
2 Design and Method of Operation ........................................ 15<br />
2.1 Over<strong>view</strong> .................................................... 15<br />
2.2 Instrument Components ....................................... 16<br />
2.2.1 Motherboard ................................................. 17<br />
2.2.2 Electrical Connections ......................................... 17<br />
2.2.3 Pneumatic Connections ....................................... 18<br />
2.2.4 Mounting Kit ................................................. 21<br />
2.2.5 Purge air switching (not in the explosion proof version) ............ 21<br />
2.2.6 Restrictors ................................................... 21<br />
2.3 Method of Operation .......................................... 22<br />
2.4 State as supplied ............................................. 24<br />
2.5 Options modules ............................................. 25<br />
2.5.1 Options modules in normal and intrinsically safe versions .......... 25<br />
2.5.2 Options modules in explosion proof version ...................... 29<br />
2.5.3 HART-function ............................................... 31<br />
2.5.4 Alarm module ................................................ 31<br />
2.5.5 Jy-module ................................................... 32<br />
2.5.6 SIA module .................................................. 32<br />
2.5.7 Accessories ................................................. 33<br />
3 Preparing for Operation ................................................. 35<br />
3.1 Instrument identification (type key) .............................. 35<br />
3.2 Dimensional drawings ......................................... 35<br />
3.3 Assembly .................................................... 37<br />
3.3.1 Instructions for using positioners in a wet environment ............. 38<br />
3.3.2 Instructions for using positioners which are exposed to strong accelerations<br />
or vibrations ................................................. 40<br />
3.3.3 Mounting kit ”linear actuator” 6DR4004-8V and 6DR4004-8L ....... 42<br />
3.3.4 Assembly procedure (see figure 3-7, page 44) .................... 43<br />
3.3.5 Mounting kit ”rotary actuator” 6DR4004-8D ....................... 45<br />
3.3.6 Assembly procedure (see figure 3-8 and figure 3-9) ............... 46<br />
3.4 Electrical Connection .......................................... 50<br />
3.4.1 Connection in non-intrinsically safe and explosion proof version ..... 52<br />
SIPART PS2 Manual<br />
A5E00074631--03<br />
3
3.4.2 Connection in intrinsically safe version ........................... 55<br />
3.4.3 Connection in type of protection “n” version ...................... 59<br />
3.5 Pneumatic Connection ........................................ 62<br />
3.6 Commissioning ............................................... 63<br />
3.6.1 Preparations for linear actuators ................................ 64<br />
3.6.2 Automatic initialization of linear actuator ......................... 65<br />
3.6.3 Manual initialization of linear actuator ............................ 67<br />
3.6.4 Preparations for rotary actuator ................................. 70<br />
3.6.5 Automatic initialization of rotary actuator ......................... 71<br />
3.6.6 Manual initialization of rotary actuators .......................... 72<br />
3.6.7 Automatic initialization (structograms) ........................... 74<br />
3.7 Copying initialization data (positioner exchange) .................. 78<br />
4 Operation .............................................................. 79<br />
4.1 Display ...................................................... 79<br />
4.2 Input keys ................................................... 79<br />
4.3 Operating modes ............................................. 82<br />
4.4 Parameters .................................................. 84<br />
4.5 Diagnosis ................................................... 98<br />
4.5.1 Diagnostic display ............................................ 98<br />
4.5.2 Meaning of the diagnostic values ............................... 99<br />
4.5.3 Online-Diagnosis ............................................. 103<br />
4.6 Meanings of other display texts ................................. 106<br />
4.7 Optimization of the <strong>control</strong> data ................................. 110<br />
5 Service and Maintenance ................................................ 111<br />
6 Technical Data ......................................................... 113<br />
7 Scope of Delivery ....................................................... 119<br />
7.1 Ordering data ................................................ 120<br />
7.2 Scope of delivery of standard <strong>control</strong>ler .......................... 121<br />
7.3 Scope of delivery of options .................................... 121<br />
7.4 Scope of delivery of accessories ................................ 122<br />
8 Index .................................................................. 123<br />
9 Appendix .............................................................. 125<br />
9.1 Literature and catalogs ........................................ 125<br />
9.2 Certificates .................................................. 126<br />
9.2.1 EC Declaration of Conformity (EEx d) ........................... 126<br />
9.2.2 EC Declaration of Conformity .................................. 127<br />
9.2.3 EC Type-Examination Certificate PTB 99 ATEX 1101 (EEx d) ...... 128<br />
9.2.4 EC Type-Examination Certificate TÜV 00 ATEX 1654 ............. 131<br />
9.2.5 Statement of conformity TÜV 01 ATEX 1786 X ................... 139<br />
9.2.6 FM Approval Report (EEx d) ................................... 142<br />
9.2.7 FM Approval Report .......................................... 144<br />
9.2.8 CSA Certificate of Compliance ................................. 146<br />
9.2.9 Control Drawing A5E00065622D ............................... 148<br />
4<br />
SIPART PS2 Manual<br />
A5E00074631--03
Information for the Operator<br />
Information for the Operator<br />
0<br />
Dear customer,<br />
Please read this <strong>manual</strong> before starting work!<br />
It contains important information and data which, when observed,<br />
ensure full availability of the equipment and save service costs. This<br />
simplifies handling of this <strong>control</strong> instrument considerably and provides<br />
accurate measuring results.<br />
You have purchased an instrument which can be installed in various<br />
configurations:<br />
S SIPART PS2 without Ex-protection in a metal-- or plastic housing.<br />
S SIPART PS2 with EEx ia/ib-protection in a metal-- or plastic housing.<br />
S SIPART PS2 EEx d in a pressurized explosion proof metal housing<br />
This <strong>manual</strong> takes each of these possibilities into consideration. Any<br />
differences between the devices are indicated specially.<br />
Scope of delivery, see chapter 7, page 119.<br />
0.1 General information<br />
The product described in this <strong>manual</strong> left the factory in a perfectly safe<br />
and tested condition. To maintain this condition and to achieve perfect<br />
and reliable operation of this product, it must only be used in the way<br />
described by the manufacturer. Successful and safe operation of this<br />
equipment is dependent on proper handling, installation, operation and<br />
maintenance.<br />
This <strong>manual</strong> contains the information required for use as intended of<br />
the product it describes. It is addressed to technically qualified<br />
personnel specially trained or having relevant knowledge of instrumentation<br />
and <strong>control</strong> technology, hereafter called automation technology.<br />
Familiarity with and proper technical observance of the safety notes<br />
and warnings contained in this <strong>manual</strong> are essential for safe installation<br />
and commissioning and for safety in operation and maintenance of the<br />
product described. Only qualified personnel as defined in Chapter 0.3<br />
has the necessary specialist knowledge to interpret the general safety<br />
notes and warnings given in this document in specific cases and to<br />
take the necessary action.<br />
The documentation supplied with the instrument is listed in Chapter<br />
0.5.<br />
SIPART PS2 Manual<br />
A5E00074631-03<br />
5
Information for the Operator<br />
This <strong>manual</strong> is not a permanent part of the scope of supply. For<br />
reasons of clarity, it does not contain every detail about every version<br />
of the product described and cannot take every eventuality in installation,<br />
operation, maintenance and use in systems into account. If you<br />
require further information or if problems occur that have not been dealt<br />
with in sufficient detail in this document, please request the required<br />
information from your local Siemens office or the office responsible for<br />
you.<br />
Functionality, commissioning and operation are described in this<br />
<strong>manual</strong>.<br />
Please pay special attention to the Warning and Note texts. These are<br />
separated from the remaining text by horizontal lines and specially<br />
marked with symbols (see Chapter 0.2).<br />
0.2 Classification of Safety Related Notices<br />
This <strong>manual</strong> contains notices which you should observe to ensure your<br />
own personal safety, as well as to protect the product and connected<br />
equipment. These notices are highlighted in the <strong>manual</strong> by a warning<br />
triangle and are marked as follows according to the level of danger:<br />
!<br />
DANGER<br />
indicates an immenently hazardous situation which, if not avoided, will<br />
result in death or serious inury.<br />
!<br />
WARNING<br />
indicates a potentially hazardous situation which, if not avoided, could<br />
result in death or serious injury.<br />
!<br />
CAUTION<br />
used with the safety alert symbol indicates a potentially hazardous situation<br />
which, if not avoided, may result in minor or moderate injury.<br />
CAUTION<br />
used without the safety alert symbol indicates a potentially hazardous<br />
situation which, if not avoided, may result in property damage.<br />
6<br />
SIPART PS2 Manual<br />
A5E00074631-03
Information for the Operator<br />
NOTICE<br />
indicates a potential situation which, if not avoided, may result in an<br />
undesirable result or state.<br />
. NOTE<br />
highlights important information on the product, using the product, or<br />
part of the documentation that is of particular importance and that will<br />
be of benefit to the <strong>user</strong>.<br />
0.3 Qualified Personnel<br />
The result of unqualified intervention in the instrument or<br />
nonobservance of the warnings given in this <strong>manual</strong> or on product<br />
labels can be severe personal injury and/or serious material damage.<br />
Therefore only properly qualified personnel must make changes and<br />
settings in the instrument.<br />
For the purpose of the safety information in this <strong>manual</strong> and on the<br />
product labels, qualified personnel are those who<br />
S<br />
S<br />
S<br />
S<br />
S<br />
in the case of ex-proof equipment, are trained, instructed or<br />
authorized to perform work on electrical circuits of equipment<br />
subject to explosion hazard.<br />
if they are configuration personnel, are familiar with the safety<br />
concepts of automation technology<br />
if they are operating personnel, have been instructed in the handling<br />
of automation equipment and know the content of this <strong>manual</strong><br />
relating to operation<br />
if they are commissioning and/or service personnel, are trained to<br />
repair such automation equipment and authorized to energize,<br />
de-energize, clear ground and tag circuits and equipment according<br />
to safety engineering standards.<br />
and instructed additionally in first aid<br />
SIPART PS2 Manual<br />
A5E00074631-03<br />
7
Information for the Operator<br />
!<br />
WARNING<br />
The instrument must only be installed and commissioned by qualified<br />
personnel.<br />
The device may be used solely for the purposes described in this<br />
<strong>manual</strong>.<br />
The instrument is designed for connection to functional and safety<br />
extra low voltage.<br />
Electrical safety depends only on the power supply equipment.<br />
Pneumatic actuators exert considerable positioning forces. The safety<br />
precautions of the actuator used must therefore be scrupulously<br />
observed during installation and commissioning in order to prevent<br />
injuries.<br />
We explicitly draw your attention to the necessity of observing safety<br />
regulations regarding operation in zones subject to explosion hazard, if<br />
applicable.<br />
The specifications of the examination certificate valid in your country<br />
must be observed. Laws and regulations valid in your country must be<br />
observed for the electrical installation in explosions hazardous areas.<br />
In Germany these are for example:<br />
-- Working reliability regulations<br />
-- Regulations for installing electrical equipment in hazardous areas,<br />
DIN EN 60079--14 (in the past VDE 0165, T1).<br />
It should be checked whether the available power supply, insofar as<br />
this is required, is compliant with the power supply specified on the<br />
rating plate and specified in the examination certificate valid in your<br />
country.<br />
Take care to avoid electrostatic discharges within the hazardous area,<br />
such as can arise if a dry cloth is used to clean the positioner in the<br />
plastic housing.<br />
Devices with the protection type ”flameproof enclosure” may only be<br />
opened when the power is off.<br />
!<br />
WARNING<br />
Devices with the protection type ”intrinsically safe” lose their certification<br />
as soon as they are operated with circuits that do not conform to<br />
the specifications laid down in the examination certificate valid in your<br />
country.<br />
The successful and safe operation of this equipment is dependent<br />
upon its proper handling, installation, operation and maintenance.<br />
8<br />
SIPART PS2 Manual<br />
A5E00074631-03
Information for the Operator<br />
0.4 Use as intended<br />
Use as intended for the purpose of this <strong>manual</strong> means that this product<br />
must only be used for the applications described in the technical<br />
description (see also Chapter 3 of this <strong>manual</strong>).<br />
The product described in this <strong>manual</strong> has been developed, manufactured,<br />
tested and documented observing the relevant safety standards.<br />
If the handling rules and safety information for configuration, installation,<br />
use as intended and maintenance are observed, there is normally<br />
no danger with regard to material damage or for the health of<br />
personnel. Extra low voltages that are connected must be fed in by<br />
safe isolation.<br />
0.5 Technical Documentation<br />
In addition to this <strong>manual</strong>, the following documentation is also supplied<br />
with the instrument:<br />
S<br />
S<br />
Leaflet “Operation -- Concise Over<strong>view</strong>”<br />
explains in visualized form the principle of operation and<br />
parameterization and automatic commissioning.<br />
“Operating Instructions”<br />
contains the information required for assembly, connection and<br />
commissioning.<br />
The following list contains all the documents available for these<br />
instruments:<br />
Title Language Order no.<br />
Operating Instructions<br />
Manual<br />
German/English<br />
French/Italien/Spanish<br />
German<br />
English<br />
A5E00074600<br />
A5E00074601<br />
A5E00074630<br />
A5E00074631<br />
Leaflet<br />
German<br />
English<br />
French<br />
Italien<br />
Spanish<br />
A5E00074610<br />
A5E00074611<br />
A5E00074612<br />
A5E00074613<br />
A5E00074614<br />
SIPART PS2 Manual<br />
A5E00074631-03<br />
9
Information for the Operator<br />
The following list contains all the documents available for explosionproof<br />
version:<br />
Title Language Order no.<br />
Operating instructions<br />
Leaflet<br />
German/English<br />
French/Italian/Spanish<br />
German<br />
English<br />
French<br />
Italien<br />
Spanish<br />
A5E00165376<br />
A5E00165377<br />
A5E00165371<br />
A5E00165372<br />
A5E00165373<br />
A5E00165374<br />
A5E00165375<br />
This document is also available in electronic form on the Internet<br />
under the address www.fielddevices.com.<br />
0.6 Warranty Information<br />
We should like to point out that the content of this <strong>manual</strong> is not part of<br />
and does not modify a previous or current agreement, undertaking or<br />
legal relationship. Siemens is bound solely by the contract of sale,<br />
which also contains the complete and exclusive warranty. The<br />
contractual warranty conditions are neither extended nor restricted by<br />
this document.<br />
0.7 Delivery Notes<br />
The scope of delivery is listed on the dispatch papers accompanying<br />
the delivery in accordance with the valid contract of sale.<br />
When you open the packaging please observe the information on the<br />
packaging. Check that the delivery is complete and undamaged. If<br />
possible, compare the order number on the rating plates with the<br />
ordering data.<br />
For the scope of delivery please see Chapter 7, page 119.<br />
0.8 Standards and Regulations<br />
As far as possible, the harmonized European standards were used to<br />
specify and manufacture this equipment. If harmonized European<br />
standards have not been applied, the standards and regulations of the<br />
Federal Republic of Germany apply (see also the Technical Data in<br />
Chapter 6, page 113).<br />
If this product is used outside the area of applicability of these<br />
standards and regulations, please observe the standards and<br />
regulations in force in the country where the product is operated.<br />
10<br />
SIPART PS2 Manual<br />
A5E00074631-03
Introduction<br />
Introduction<br />
1<br />
1.1 General information about the positioner<br />
The positioner is used to adjust and <strong>control</strong> pneumatic actuators. The<br />
<strong>control</strong>ler operates electropneumatically with compressed air as an<br />
energy supply.<br />
Purpose<br />
For example, the positioner can be used to <strong>control</strong> <strong>valves</strong> as follows:<br />
S<br />
with linear actuator (figure 1-1, page 13) or<br />
S with rotary actuator VDI/VDE 3845 (figure 1-2, page 13)<br />
Different mounting types are available for linear actuators:<br />
S NAMUR or IEC 534<br />
S integrated mounting to ARCA<br />
S integrated mounting to SAMSON (non-explosion-proof version)<br />
This means the positioner can be installed and operated on all common<br />
actuator systems.<br />
Versions<br />
The positioner is available for the following actuators:<br />
S double-acting and<br />
S single-acting<br />
For following applications:<br />
S potentially explosive or<br />
S not potentially explosive applications.<br />
Housing<br />
The electronics with display, position feedback and valve block are<br />
integrated in the housing.<br />
The housing is available in three versions:<br />
S Plastic housing for single and double-acting actuators<br />
S Metal housing for single-acting actuators<br />
S Explosion proof metal housing for single and double-acting actuators<br />
SIPART PS2 Manual<br />
A5E00074631-03<br />
11
Introduction<br />
Degree of<br />
protection<br />
Explosion<br />
Protection<br />
The device is designed with IP65/NEMA4x degree of protection.<br />
The intrinsically safe version can be used in hazardous areas in zone 1<br />
or zone 2.<br />
The explosion proof version can be used in hazardous areas in zone 1<br />
or zone 2.<br />
Options<br />
The positioner can be expanded with various options modules (chapter<br />
2.5, page 25). The following modules are available in all:<br />
S<br />
S<br />
S<br />
J y -module: Two--wire current output 4 to 20 mA for position feedback<br />
Alarm module: 3 digital outputs and 1 digital input<br />
SIA module: one digital output for fault messages, two digital outputs<br />
for limit value alarms<br />
Accessories<br />
S Manometer block: 2 or 3 manometers for single and doubleacting<br />
positioners<br />
S Connection block (NAMUR) for safety valve block<br />
S Mounting kits for linear and rotary actuator<br />
For decentralized installation of the positioner and position sensor:<br />
S External position detection system<br />
S Non-Contacting Position Sensor (NCS)<br />
Environmental<br />
Protection<br />
Only environmentally friendly materials have been used in the<br />
construction of the positioner.<br />
The technical <strong>manual</strong> is printed on chlorine-free bleached paper.<br />
12<br />
SIPART PS2 Manual<br />
A5E00074631-03
Introduction<br />
1<br />
2<br />
4<br />
3<br />
5<br />
1 Actuator<br />
2 Positioner, single-acting in metal housing<br />
3 Lantern<br />
4 Manometer block, single-acting<br />
5 Valve<br />
Figure 1-1<br />
Positioner mounted on linear actuator (single-acting)<br />
1<br />
3<br />
2<br />
1 Positioner double-acting in plastic housing<br />
2 Rotary actuator<br />
3 Manometer block, double-acting<br />
Figure 1-2<br />
Positioner mounted on rotary actuator (double-acting)<br />
SIPART PS2 Manual<br />
A5E00074631-03<br />
13
Introduction<br />
1<br />
2<br />
4<br />
3<br />
1 Actuator<br />
2 Positioner, single-acting in explosion proof metal housing<br />
3 Lantern<br />
4 Manometer block, single-acting<br />
Figure 1-3<br />
Explosion proof positioner mounted on linear actuator (single-acting)<br />
1<br />
3<br />
2<br />
1 Positioner double-acting in explosion proof metal housing<br />
2 Rotary actuator<br />
3 Manometer block, double-acting<br />
Figure 1-4<br />
Explosion proof positioner mounted on rotary actuator (double-acting)<br />
14<br />
SIPART PS2 Manual<br />
A5E00074631-03
Design and Functional Principle<br />
Design and Method of Operation<br />
2<br />
The following chapter describes the mechanical and electrical design,<br />
the instrument components and method of operation of the positioner.<br />
2.1 Over<strong>view</strong><br />
Introduction<br />
The electropneumatic positioner forms a <strong>control</strong> system in connection<br />
with an actuator. The current position of the actuator is detected by a<br />
servo potentiometer and fed back as actual value x. The setpoint and<br />
actual value are output simultaneously on the display.<br />
The setpoint w is formed by a current fed to the positioner which at the<br />
same time serves to supply the positioner in two-wire operation. In 3 /<br />
4-wire operation the supply comes from a 24 V voltage input.<br />
The positioner operates as a predictive five--point switch by the output<br />
variable ±∆y of which the integrated actuating <strong>valves</strong> are <strong>control</strong>led with<br />
pulse length modulation.<br />
These actuating signals cause fluctuations in pressure in the actuator<br />
chamber(s) and thus adjustment of the actuator until the <strong>control</strong> error is<br />
zero.<br />
Operation (<strong>manual</strong>) and configuration (structuring, initialization and parameterization)<br />
is effected by three keys and a display with the housing<br />
cover removed.<br />
The standard <strong>control</strong>ler has one digital input (DI1). This can be configured<br />
individually and can be used for blocking the operating modes for<br />
example.<br />
With the J y -option module, the current actuator position can be output<br />
as a two wire signal J y =4to20mA.<br />
In addition the actuator can be monitored for two programmable limit<br />
values which respond on exceeding or dropping below the stroke or<br />
angle of rotation.<br />
The limit value alarms are output by the alarm option module which can<br />
monitor and report the function of the positioner and the actuator additionally<br />
through a fault message output. The value of the <strong>control</strong> difference<br />
dependent on the travel time is monitored in automatic mode.<br />
The fault signal is always set when the <strong>control</strong> error cannot be leveled<br />
after a certain time because for example the valve is blocked or the<br />
mains pressure is insufficient. The three digital outputs are implemented<br />
as semiconductor outputs and are error self--reporting, i.e. the out-<br />
SIPART PS2 Manual<br />
A5E00074631-03<br />
15
Design and Functional Principle<br />
puts respond even when the power supply fails or the electronics are<br />
defective.<br />
The actuator can also be blocked or driven to its final positions depending<br />
on the configuration for example by an external event via a digital<br />
input (DI2) on the alarm module.<br />
If you require electrically independent limit value messages from the<br />
standard <strong>control</strong>ler, you will have to use the SIA module with the slot<br />
initiators instead of the alarm module.<br />
Communication with the <strong>control</strong>ler is possible via the optional HART<br />
interface.<br />
2.2 Instrument Components<br />
14<br />
3<br />
15<br />
2W<br />
3/4 W<br />
O<br />
33<br />
90∞<br />
2<br />
13<br />
4...20 mA<br />
0/4...20 mA<br />
1<br />
DI1<br />
O<br />
90<br />
33∞<br />
4<br />
12<br />
6.1 6.2<br />
11<br />
10<br />
9<br />
8<br />
7<br />
6<br />
5<br />
1 Input: Supply air 7 Silencer<br />
2 Output: Actuating pressure Y1 8 Transmission ratio selector<br />
3 Display 9 Adjusting wheel slip clutch<br />
4 Output: Actuating pressure Y2 *) 10 Terminals options modules<br />
5 Operating keys 12 Dummy plug<br />
6 Restrictor 13 Screw--type cable gland<br />
6.1 Restrictor Y1 14 Terminal plate on cover<br />
6.2 Restrictor Y2 *) 15 Purging air switch<br />
*) in double--acting actuators<br />
Figure 2-1<br />
View of the positioner in normal version (cover open)<br />
16<br />
SIPART PS2 Manual<br />
A5E00074631-03
Design and Functional Principle<br />
9<br />
3 6.1 2 1 12 7<br />
1<br />
138<br />
10<br />
--<br />
+<br />
238 9<br />
10<br />
5<br />
6.2<br />
4<br />
8<br />
1 Input: Supply air 7 Transmission ratio selector<br />
2 Output: Actuating pressure Y1 (only possible with positioner open)<br />
3 Display 8 Adjusting wheel slip clutch<br />
4 Output: Actuating pressure Y2 *) 9 Terminals standard <strong>control</strong>ler<br />
5 Operating keys 10 Terminals options modules<br />
6.1 Restrictor Y1 12 Safety catch<br />
6.2 Restrictor Y2 *)<br />
*) in double--acting actuators<br />
Figure 2-2<br />
View of the explosion proof version of the positioner<br />
2.2.1 Motherboard<br />
2.2.2 Electrical Connections<br />
The motherboard contains all the electronic elements such as the CPU,<br />
memory, A/D converter. It also contains the display and the operating<br />
keys.<br />
In addition, the terminal strips for connecting the options modules are<br />
also on the motherboard.<br />
The terminals of the standard <strong>control</strong>ler, the J y - and alarm-option module<br />
are arranged at the left--hand front edges and offset against each<br />
other in staircase form.<br />
A module cover protects the modules from being pulled out and prevents<br />
incorrect installation.<br />
SIPART PS2 Manual<br />
A5E00074631-03<br />
17
Design and Functional Principle<br />
2.2.3 Pneumatic Connections<br />
The pneumatic connections are on the right hand side of the positioner<br />
(figure 2-3 and figure 2-4).<br />
1<br />
2<br />
3<br />
4<br />
5<br />
1 Actuating pressure Y1 in single-- and double--acting actuators<br />
2 Feedback shaft<br />
3 Supply air P z<br />
4 Actuating pressure Y2 in double--acting actuators<br />
5 Exhaust air output E with silencer on the bottom of the instrument<br />
Figure 2-3<br />
Pneumatic connection in normal version<br />
1<br />
2<br />
3<br />
4<br />
5<br />
6<br />
7<br />
1 Restrictor Y2 *) 5 Actuating pressure Y1<br />
2 Restrictor Y1 6 Exhaust air output E<br />
3 Actuating pressure Y2 *) 7 Housing ventilation (2x)<br />
4 Supply air PZ<br />
*) in double--acting actuators<br />
Figure 2-4<br />
Pneumatic connection in explosion proof version<br />
In addition, there are pneumatic connections on the back of the positioner<br />
for integrated installation in single--acting linear actuators.<br />
S Actuating pressure Y1<br />
S Exhaust air output E (not in explosion proof version)<br />
In the ex--factory state, these connections are sealed by screws (see<br />
figure 3-1, page 35, figure 3-3, page 36 and figure 3-4, page 37).<br />
18<br />
SIPART PS2 Manual<br />
A5E00074631-03
Design and Functional Principle<br />
The exhaust air output E can be provided for supplying dry instrument<br />
air to the tapping chamber and spring chamber to prevent corrosion.<br />
Figure 2-5, page 20 shows the pneumatic connection variants for the<br />
different actuator types, the positioning action and the safety position<br />
after power failure.<br />
SIPART PS2 Manual<br />
A5E00074631-03<br />
19
Design and Functional Principle<br />
Positioning<br />
pressure<br />
Connection<br />
Y1<br />
Closed<br />
Actuator type<br />
Open<br />
Safety position after power failure<br />
electrical<br />
pneumatic<br />
Closed<br />
Closed<br />
In rotary actuators the<br />
direction of rotation<br />
counterclockwise looking<br />
onto the actuating shaft of<br />
the valve is usually defined<br />
as ”Open”.<br />
Y1<br />
Open<br />
Open<br />
Closed<br />
Open<br />
Y2<br />
Y1<br />
Open<br />
Closed<br />
Open<br />
Y1<br />
Closed<br />
Open<br />
Last position<br />
(before power<br />
failure)<br />
Y2<br />
Closed<br />
Closed<br />
Open<br />
Y1<br />
up<br />
down<br />
Down<br />
Down<br />
Y1<br />
up<br />
down<br />
Up<br />
Up<br />
Y2<br />
Y1<br />
up<br />
down<br />
Up<br />
Y1<br />
Last position<br />
(before power<br />
failure)<br />
up<br />
down<br />
Y2<br />
up<br />
down<br />
Down<br />
Figure 2-5<br />
Pneumatic connection positioning<br />
20<br />
SIPART PS2 Manual<br />
A5E00074631-03
Design and Functional Principle<br />
2.2.4 Mounting Kit<br />
The positioner can be mounted on almost all actuators with the appropriate<br />
mounting kit.<br />
2.2.5 Purge air switching (not in the explosion proof version)<br />
The purge air switch is accessible above the pneumatic terminal strip<br />
with the housing open (figure 2-6). In the IN position the inside of the<br />
housing is purged with very small amounts of clean, dry instrument air.<br />
In the OUT position the purge air is fed directly to the outside air.<br />
Figure 2-6<br />
Purge air switch on the valve block, <strong>view</strong> of the positioner onto pneumatic connection side<br />
with cover open<br />
2.2.6 Restrictors<br />
In order to achieve travel times of > 1.5 s in small actuators, the air rate<br />
can be reduced with the restrictors Y1 and Y2 (figure 2-7, in explosion<br />
proof version, see figure 2-4, page 18). By turning to the right the air<br />
rate is reduced up to shutting off. To set the restrictors it is advisable to<br />
close them and then open them slowly (see initialization RUN3).<br />
In the case of double-acting <strong>valves</strong> make sure that both chokes are set<br />
approximately equal.<br />
Hexagon socket 2.5 mm<br />
Y1 Y2<br />
Figure 2-7<br />
Restrictors<br />
SIPART PS2 Manual<br />
A5E00074631-03<br />
21
Design and Functional Principle<br />
2.3 Method of Operation<br />
The electropneumatic positioner SIPART PS2 forms a <strong>control</strong> circuit<br />
with the pneumatic actuator in which the actual value x is the position<br />
of the actuator bar in linear actuators or the position of the actuator<br />
shaft in rotary actuators and the command variable w is the actuating<br />
current of a <strong>control</strong>ler or a <strong>manual</strong> <strong>control</strong> station of 4 to 20 mA.<br />
The stroke or rotary movement of the actuator is transferred by the<br />
appropriate mounting accessories, the feedback shaft and a play--free<br />
switchable gearwheel to a high quality conductive plastic potentiometer<br />
and to the analog input of the micro<strong>control</strong>ler.<br />
This may correct the angle error of the stroke tap, compares the<br />
potemtiometer voltage as actual value x with the setpoint w fed in at<br />
the terminals 3 and 7 and calculates the manipulated variable<br />
increments Δy. Depending on the size and direction of the <strong>control</strong><br />
error (x-w) the piezo--<strong>control</strong>led supply air or exhaust air valve is<br />
opened. The volume of the actuator integrates the positioning<br />
increments to actuating pressure y open which moves the actuator bar<br />
or actuator shaft approximately proportionally. These positioning<br />
increments change the actuating pressure until the <strong>control</strong> error<br />
becomes zero.<br />
The pneumatic actuators are available in single and double-acting<br />
versions. Only one pressure chamber is aerated or deaerated in the<br />
single-acting version. The resulting pressure operates against a spring.<br />
In the double-acting version, two pressure chambers are counteractive.<br />
In this case the one volume is deaerated when the other volume is<br />
aerated. See the block diagram figure 2-9, page 24.<br />
The <strong>control</strong> algorithm is an adaptive predictive five--point switch (see<br />
figure 2-8, page 23).<br />
The <strong>valves</strong> are <strong>control</strong>led with continuous contact at large <strong>control</strong> errors<br />
(fast step zone). At medium <strong>control</strong> errors the valve is <strong>control</strong>led by<br />
pulse length modulated pulses (short step zone).<br />
No actuating pulses are output in the small <strong>control</strong> error zone (adaptive<br />
dead zone). The dead zone adaptation and the continuous adaptation<br />
of the minimum pulse lengths in automatic operation cause the best<br />
possible <strong>control</strong> accuracy to be achieved at the lowest switching frequency.<br />
The start parameters are determined during the initialization<br />
phase and stored in a non--volatile memory. These are basically the<br />
real travel with the mechanical limit stops, the travel times, the size of<br />
the dead zone etc.<br />
In addition the number of fault messages, changes in direction and the<br />
number of strokes are determined and stored every 15 minutes during<br />
operation. These parameters can be read out and documented by the<br />
communication programs such as PDM and AMS. Conclusions as to<br />
the wear on the fitting can be drawn (diagnostic function) especially by<br />
comparing the old value with the currently determined values.<br />
Figure 2-9, page 24 shows the block diagrams for single-- and double--<br />
acting actuators with the linear actuator as an example.<br />
22<br />
SIPART PS2 Manual<br />
A5E00074631-03
Design and Functional Principle<br />
. NOTE<br />
The exhaust air valve is always open when there is no current.<br />
Figure 2-8<br />
Method of operation five--point switch<br />
SIPART PS2 Manual<br />
A5E00074631-03<br />
23
Design and Functional Principle<br />
1<br />
BE1<br />
I W+<br />
3 V<br />
W<br />
2<br />
+24 V<br />
+5 V<br />
A<br />
D<br />
HART<br />
_<br />
+<br />
Micro-<br />
_<br />
y<br />
+ y<br />
3<br />
Supply Zuluft air<br />
p Z<br />
Exhaust Abluft air<br />
p 1<br />
p 2<br />
p 1<br />
I W-<br />
y 0<br />
x 0<br />
A<br />
D<br />
<strong>control</strong>ler<br />
p 2<br />
+<br />
_<br />
+U<br />
Exhaust Abluft<br />
air<br />
W<br />
x<br />
U<br />
4<br />
6<br />
U I<br />
5<br />
BE2<br />
A1<br />
A2<br />
I<br />
I<br />
8 9<br />
7<br />
p 2<br />
A1<br />
A2<br />
p 1<br />
stroke<br />
p 1<br />
stroke<br />
1 Motherboard with micro<strong>control</strong>ler and input circuit<br />
2 Control panel with LC-display and momentary action switch<br />
3 Piezo--valve unit, always built--in<br />
4 Valve unit with double-acting positioner always built--in<br />
5 Iy-module for positioner SIPART PS2<br />
6 Alarm module for three alarm outputs and one digital input<br />
7 SIA-module (Slot Initiator-Alarm-module)<br />
8 Spring--loaded pneumatic actuator (single-acting)<br />
9 Spring--loaded pneumatic actuator (double-acting)<br />
Figure 2-9<br />
Block diagram of the electro-pneumatic positioner, functional diagram<br />
. NOTE<br />
Alarm module (6) and SIA module (7) can only be used alternatively.<br />
2.4 State as supplied<br />
There are no mechanical mounting accessories on the <strong>control</strong>ler in the<br />
state as supplied These must be ordered and installed according to the<br />
“operating instructions” depending on the application.<br />
The respective connections for single or double-acting versions are<br />
prepared at the factory as ordered.<br />
The pneumatic connections on the rear are sealed.<br />
24<br />
SIPART PS2 Manual<br />
A5E00074631-03
Design and Functional Principle<br />
2.5 Options modules<br />
2.5.1 Options modules in normal and intrinsically safe versions<br />
The options modules are protected and mechanically fixed by a module<br />
cover ((1), see figure 2-10, page 28 and figure 2-11, page 30).<br />
. NOTE<br />
The housing must be opened to install the options modules. The<br />
degree of protection IP65 is not guaranteed as long as the positioner is<br />
open.<br />
Opening the<br />
instrument<br />
To open the positioner, the four screws of the housing cover must be<br />
loosened with a Phillips screwdriver.<br />
Disconnect or isolate the power supply cables.<br />
Remove the module cover (1). To do this, the two screws (1.1) must be<br />
removed with a screwdriver.<br />
. NOTE<br />
To prevent premature wearing of the fixture by the self--tapping screws<br />
(1.1), the following method of mounting the module cover (1) has<br />
proven effective.<br />
1. Turn the screws counterclockwise until you feel them snap into the<br />
thread<br />
2. Tighten both screws carefully in clockwise direction<br />
J y -module<br />
Insert the J y -module (3) in bottom pcb rails of the container, establish<br />
the electrical connection with the enclosed ribbon cable (6).<br />
Alarm module<br />
Insert the alarm module (4) in the top pcb rails of the container,<br />
establish the electrical connection with the enclosed ribbon cable (5).<br />
SIA-module<br />
(Slot Initiator Alarm module) Proceed as follows for installation:<br />
1. Remove all the electrical connections from the basic electronics<br />
(2).<br />
2. Loosen the two fixing screws (2.1) of the basic electronics.<br />
3. Snap out the basic electronic board by carefully bending the four<br />
holders.<br />
4. Insert the SIA-module (7) from above up to the top pcb rail of the<br />
container.<br />
SIPART PS2 Manual<br />
A5E00074631-03<br />
25
Design and Functional Principle<br />
5. Push the SIA module in the pcb rail of the container about 3 mm to<br />
the right.<br />
6. Screw the special screw (7.1) through the SIA module into the axle<br />
of the positioner (Torque: 2 Nm):<br />
CAUTION<br />
The pin pressed into the actuating disc bearing (11) must be adjusted<br />
to just before touching with the special screw. The actuating disc bearing<br />
and the special screw must then be turned simultaneously so that<br />
the pins slot into the special screw.<br />
7. Place the insulating cover (10) over the SIA module underneath<br />
the surface of the basic electronics board at the container wall on<br />
one side. The recesses in the insulating cover must slot into the<br />
corresponding lugs on the container wall. Place the insulating<br />
cover on the SIA module by carefully bending the container walls.<br />
8. Snap the basic electronics board into the four holders and screw it<br />
tight again with the two fixing screws (2.1).<br />
9. Make all the electrical connections between the motherboard and<br />
the options with the ribbon cables provided and between the motherboard<br />
and potentiometers with the potentiometer cable.<br />
10. Fix the enclosed module cover instead of the standard version with<br />
the two screws.<br />
11. Select the plates which already exist on the standard version of the<br />
module cover from the set of plates enclosed. Stick the selected<br />
plates according to the standard version to the mounted module<br />
cover.<br />
12. Make the electrical connections.<br />
Setting the two limit values:<br />
. NOTE<br />
Connect a suitable display instrument such as the Initiator--Tester type<br />
2/Ex made by Peperl+Fuchs to the terminals 41 and 42 or terminals 51<br />
and 52 of the SIA module to be able to see the switching state of the<br />
slot initiators.<br />
13. Drive the actuator to the first desired mechanical position.<br />
14. Adjust the top actuating disc (7.2) by hand until the output signal<br />
on terminals 41 and 42 changes.<br />
26<br />
SIPART PS2 Manual<br />
A5E00074631-03
Design and Functional Principle<br />
. NOTE<br />
15. Drive the actuator to the second desired mechanical position.<br />
16. Adjust the bottom actuating disc (7.3) by hand until the output signal<br />
on terminals 51 and 52 changes.<br />
If you turn the actuating disc beyond the switching point up to the next<br />
switching point, you can set a high-low or a low-high change.<br />
To avoid the actuating discs being accidentally adjusted during operating,<br />
they are relatively sluggish. The following remedy might be of help<br />
if you are having trouble with the adjustment: open and close the actuator<br />
several times while holding the actuating discs. This temporarily<br />
reduces the friction. This allows an easier and finer adjustment.<br />
EMC filter module<br />
for connection of<br />
external position<br />
sensor<br />
The positioner can also be driven by an external position sensor (pot<br />
ent iom et er or NCS ) ( s ee page 40 ) . A n E M C f ilt er m odule, or der num -<br />
ber C73451--A430--D23, is required for this.<br />
SIPART PS2 Manual<br />
A5E00074631-03<br />
27
Design and Functional Principle<br />
6 1<br />
1.1<br />
5<br />
2.1<br />
1.1<br />
2.1<br />
2<br />
11<br />
10<br />
3<br />
4<br />
7<br />
7.2<br />
7.3<br />
7.1 8 9<br />
1 Module cover 7 SIA-module<br />
1.1 Fixing screws 7.1 Special screw<br />
2 Motherboard 7.2 Actuating disc for A1 (terminals 41 and 42)<br />
2.1 Fixing screws 7.3 Actuating disc for A2 (terminals 51 and 52)<br />
3 J y -module with ribbon cable (6) 8 Adjusting wheel slip clutch<br />
4 Alarm module with ribbon cable (5) 9 Transmission ratio selector<br />
5 Ribbon cable for alarm module 10 Insulating cover<br />
6 Ribbon cable for Jy-module 11 Actuating disc bearings<br />
Figure 2-10<br />
Installation of Options Modules<br />
28<br />
SIPART PS2 Manual<br />
A5E00074631-03
Design and Functional Principle<br />
2.5.2 Options modules in explosion proof version<br />
The options modules are protected and mechanically fixed by a module<br />
cover ((1), see figure 2-11, page 30).<br />
. NOTE<br />
The housing must be opened to install the options modules. The<br />
degree of protection IP65/NEMA4x is not guaranteed as long as the<br />
positioner is open.<br />
!<br />
WARNING<br />
The explosion proof positioner may only be supplied with electrical<br />
power in areas in which the atmosphere may be potentially explosive<br />
when the housing is closed.<br />
The feed--though openings for the electronic connections must be<br />
sealed with EEX-d certified cable glands or EEx-d certified plugs or an<br />
ignition lock must be mounted at a maximum distance of 46 cm<br />
(18 inches) when using the “conduit”--system.<br />
Open the positioner<br />
Disconnect or isolate the power supply cables first.<br />
To open the positioner, the safety catch (12) must be opened and the<br />
screw--on cover unscrewed.<br />
After loosening the four fixing screws (13.1) the complete rack (13) can<br />
be removed. The actuator may have to be turned so that the clutch can<br />
be easily disengaged.<br />
Remove the module cover (1). To do this, the two screws (1.1) must be<br />
removed with a screwdriver.<br />
. NOTE<br />
To prevent premature wearing of the fixture by the self--tapping screw<br />
(1.1) next to the display, the following method of mounting the module<br />
cover (1) has proven effective.<br />
1. Turn the screws counterclockwise until you feel them snap into the<br />
thread.<br />
2. Tighten both screws carefully in clockwise direction.<br />
SIPART PS2 Manual<br />
A5E00074631-03<br />
29
Design and Functional Principle<br />
1.1<br />
13.1<br />
1<br />
2<br />
1.1<br />
4<br />
3<br />
11<br />
10<br />
12<br />
13.1<br />
7<br />
5 6<br />
13<br />
8<br />
1 Module cover 7 Transmission ratio selector<br />
1.1 Fixing screws 8 Adjusting wheel for slipping clutch<br />
2 PA module 10 Housing<br />
3 J y module with ribbon cable 11 Screw--on cover<br />
4 Alarm module with ribbon cable 12 Safety catch<br />
5 Ribbon cable for alarm module 13 Rack<br />
6 Ribbon cable for J y module 13.1 Fixing screws<br />
Figure 2-11<br />
Installation of the options modules in the explosion proof version<br />
30<br />
SIPART PS2 Manual<br />
A5E00074631-03
Design and Functional Principle<br />
2.5.3 HART-function<br />
Function<br />
The positioner is also available with built--in HART-functions. The<br />
HART protocol allows you to communicate with your instrument with a<br />
handheld communicatorR, PC or programming unit. This enables you<br />
to configure your instrument comfortably, save configurations, call diagnostic<br />
data, display online measured values and much more. Communication<br />
takes place as frequency modulation over the existing signal<br />
lines for the command variable from 4 to 20 mA.<br />
The SPART PS2 is integrated in the following parameterization tools:<br />
S Handheld communicatorR<br />
S<br />
S<br />
S<br />
PDM (Process Device Manager)<br />
AMS (Asset Management System; update in preparation)<br />
Cornerstone<br />
. NOTE<br />
Operation on the positioner has priority over the settings via the HART<br />
inetrface.<br />
Communication is aborted by a power failure at the positioner.<br />
2.5.4 Alarm module<br />
Function<br />
The alarm module contains<br />
S 3 digital outputs and<br />
S 1 digital input<br />
The digital outputs serve to output fault messages and alarms. The<br />
configuration is described in chapter 4.4, page 85, with the parameters<br />
44 to 54.<br />
By an external signal applied at digital input (DI2) the actuator can be<br />
blocked or driven to its limit positions for example depending on the<br />
configuration. The configuration is described in chapter 4.4, page 85,<br />
with the parameters 43.<br />
The alarm module is available in two versions:<br />
S explosion protected for connecting to switching amplifier DIN 19234<br />
S non--explosion protected for connection to voltage sources with a<br />
maximum 35 V<br />
The semiconductor outputs of the alarm module report an alarm (signal<br />
state Low) by switching off with high resistance. They are conductive in<br />
the High state (without alarm). The <strong>dyna</strong>mic <strong>control</strong> makes them error<br />
self--reporting.<br />
SIPART PS2 Manual<br />
A5E00074631-03<br />
31
Design and Functional Principle<br />
The outputs are potentially isolated from the basic circuit and each<br />
other.<br />
The digital input is double.<br />
S one potential isolated for voltage level<br />
S one not potential isolated for <strong>flo</strong>ating contacts<br />
These two inputs are designed as logic OR links.<br />
Installation<br />
The alarm module is pushed in underneath the motherboard into the<br />
module rack up to the stop and connected by the enclosed 8-wire ribbon<br />
cable (5) to the motherboard (see figure 2-10, page 28).<br />
2.5.5 Jy-module<br />
Function<br />
With the J y -option module, the current actuator position can be output<br />
as a two wire signal J y = 4 to 20 mA – potentially isolated from the<br />
standard <strong>control</strong>ler. The <strong>dyna</strong>mic <strong>control</strong> of the J y -module makes it also<br />
error self--reporting.<br />
Installation<br />
The J y - module is pushed in to the bottom compartment of the module<br />
rack up to the stop and connected by the enclosed 6-wire ribbon cable<br />
(6) to the motherboard (see figure 2-10, page 28).<br />
2.5.6 SIA module<br />
The SIA module contains:<br />
S a digital output for outputting a group fault message (see alarm<br />
module)<br />
The <strong>flo</strong>ating digital output is implemented as a self error reporting<br />
semiconductor output.<br />
S two digital outputs for reporting two mechanically adjustable limit<br />
values (L1, L2) by slot initiators.<br />
These two outputs are electrically independent of the rest of the<br />
electronics.<br />
32<br />
SIPART PS2 Manual<br />
A5E00074631-03
Design and Functional Principle<br />
2.5.7 Accessories<br />
Y1<br />
Y1<br />
PZ<br />
PZ<br />
Y2<br />
Figure 2-12<br />
Manometer block (left for single-acting, right for double-acting actuators)<br />
Manometer block<br />
The manometer block for single-acting actuator contains two<br />
manometers which are screwed to the lateral pneumatic connection of<br />
the positioner with O-rings. The values for the input pressure (supply<br />
air PZ) and output pressure (actuating pressure Y1) are displayed.<br />
The manometer block for double-acting actuators contains three<br />
manometers which are screwed to the lateral pneumatic connection of<br />
the positioner with O-rings. The values for the input pressure (supply<br />
air PZ) and output pressure (actuating pressure Y1 and Y2) are<br />
displayed.<br />
SIPART PS2 Manual<br />
A5E00074631-03<br />
33
Design and Functional Principle<br />
34<br />
SIPART PS2 Manual<br />
A5E00074631-03
Preparing for Operation<br />
Preparing for Operation<br />
3<br />
This chapter describes all the preparations necessary for operating the<br />
positioner.<br />
3.1 Instrument identification (type key)<br />
The order number of the positioner is printed on the rating plate and on<br />
the packaging. Compare this with the order number in chapter 7.2,<br />
page 121.<br />
Installation of any modules required is described in chapter 2.5,<br />
page 25 of this technical <strong>manual</strong>.<br />
3.2 Dimensional drawings<br />
60<br />
50x4xM6<br />
Y1<br />
80<br />
65<br />
Y1<br />
2<br />
E<br />
33<br />
M8, 9 deep<br />
7<br />
9 deep<br />
48<br />
37<br />
29<br />
95<br />
PZ<br />
Y2<br />
29,5 29,5<br />
72<br />
23<br />
58<br />
182<br />
All air connections<br />
G 1/4 or 1/4” NPT<br />
11,2<br />
96,6<br />
13,5<br />
8<br />
h9<br />
M20 x 1.5 or NPT-adapter<br />
1<br />
15<br />
7<br />
14,5<br />
88,5<br />
38,5<br />
Figure 3-1<br />
Dimensional drawing version plastic housing 6DR5xx0<br />
SIPART PS2 Manual<br />
A5E00074631-03<br />
35
Preparing for Operation<br />
90<br />
14<br />
3x<br />
G1/4or<br />
1/4” NPT<br />
79.5<br />
50<br />
20.5<br />
9.5<br />
9<br />
12<br />
25<br />
2xM6<br />
29.5<br />
58.75<br />
82<br />
M4<br />
Thread depth 5.5<br />
5<br />
3.5<br />
5<br />
10<br />
9.5<br />
5.3<br />
Figure 3-2<br />
Dimensional drawing terminal strip for plastic housing<br />
12<br />
6.5<br />
Y1<br />
50x4xM6<br />
9 deep<br />
96.5<br />
13.5 65<br />
Y1<br />
2<br />
E<br />
M8, 9 deep<br />
23<br />
58<br />
182<br />
8<br />
h9<br />
7<br />
34.5<br />
29<br />
84<br />
27.5<br />
29,5<br />
All air connections<br />
G 1/4 or 1/4” NPT<br />
14<br />
29.5<br />
59<br />
PZ<br />
11.2<br />
15<br />
M20 x 1.5 or NPT-adapter<br />
1<br />
7<br />
14.5<br />
88.5<br />
38.5<br />
Figure 3-3<br />
Dimensional drawing version metal housing 6DR5xx1<br />
36<br />
SIPART PS2 Manual<br />
A5E00074631-03
Preparing for Operation<br />
M8, 14 deep (4x)<br />
23<br />
All air connections<br />
G 1/ 4 or 1 / 4 ”NPT<br />
10.25<br />
E<br />
65<br />
43<br />
7.75<br />
34<br />
25<br />
4.5<br />
12<br />
7<br />
33.5 33.5<br />
M6, 11 deep (4x)<br />
60<br />
∅<br />
50<br />
19,25<br />
1)<br />
M6, 8 deep (2x)<br />
M20, M25 or<br />
1/ 2 ”NPT (2x)<br />
87.2<br />
7.5 25.7 14,3<br />
129.5<br />
3.5<br />
1) Connection 238/Y2 only in<br />
double action version<br />
∅ 136.5<br />
82,5<br />
158.5<br />
235,3<br />
∅ 8h9<br />
Figure 3-4<br />
Dimensional drawing for positioner with metal housing in explosion proof<br />
version 6DR5xx5<br />
3.3 Assembly<br />
General<br />
!<br />
WARNING<br />
To avoid injury or mechanical damage to the positioner/mounting kit,<br />
the following order must be observed for assembly:<br />
1. Mechanical fitting of positioner this chapter<br />
2. Connection of electric power supply see chapter 3.4, p. 50<br />
3. Connection of pneumatic power supply see chapter 3.5, p. 62<br />
4. Put into operation see chapter 3.6, p. 63<br />
Please also observe the warning on page 51!<br />
SIPART PS2 Manual<br />
A5E00074631-03<br />
37
Preparing for Operation<br />
. NOTE<br />
The positioner will be equipped at the factory and delivered complete<br />
with the necessary options at the customer’s request. Options modules<br />
may only be retrofitted by our service technicians.<br />
The positioner must be assembled – especially in a moist environment<br />
– in such a way as to rule out freezing of the positioner axle at low<br />
ambient temperature.<br />
The operating keys must be covered to prevent liquid getting in.<br />
!<br />
WARNING<br />
In the combination of components it must be ensured that only<br />
positioners and options modules are combined which are approved for<br />
the respective area of application. This applies especially for safe<br />
operation of the positioner in areas in which the atmosphere is<br />
potentially explosive (zone 1 and 2). The instrument categories (2 and<br />
3) of the instrument itself and those of its options must be observed.<br />
In addition, you must always make sure that no water gets into an open<br />
housing or screw--type gland. This may be the case for example when<br />
the positioner cannot be finally assembled and connected immediately.<br />
It generally applies that the positioner may only be operated with dry<br />
compressed air. Therefore use the normal water traps. An additional<br />
drying unit may even be necessary in extreme cases. This is<br />
particularly important when operating the positioner at low ambient<br />
temperatures. Please set the purge air switch (on the valve block<br />
above the pneumatic terminals) additionally to the “OUT” position.<br />
Use a sufficiently rugged console (e.g. plate thickness > 4 mm with<br />
reinforcements) for rotary actuators and the mounting kit “linear<br />
actuator” or integrated connection for linear actuators.<br />
3.3.1 Instructions for using positioners in a wet environment<br />
This information gives you important instructions for the assembly and<br />
operation of the positioner in a wet environment (frequent, heavy rain<br />
and/or prolonged tropical condensation) in which the IP65 degree of<br />
protection is no longer sufficient and especially when there is a danger<br />
that water may freeze.<br />
To prevent water getting into the instrument in normal operation (e.g.<br />
through the exhaust air openings) or the display being poorly legible,<br />
please avoid the unfavorable installation positions illustrated in<br />
figure 3-5.<br />
38<br />
SIPART PS2 Manual<br />
A5E00074631-03
Preparing for Operation<br />
Figure 3-5<br />
Favorable and unfavorable installation positions<br />
If conditions oblige you to operate the positioner in a unfavorable<br />
installation position, you can take additional precautionary measures to<br />
prevent penetration by water.<br />
. NOTE<br />
Never clean the positioner with a high pressure water jet because the<br />
IP65 degree of protection is inadequate protection for this.<br />
The necessary additional measures to prevent penetration by water<br />
depend on the installation position chosen and you may additionally<br />
require:<br />
S screw--type gland with sealing ring (e.g. FESTO: CK –1 / 4–PK–6)<br />
S plastic hose approx. 20 to 30 cm (e.g. FESTO PUN-- 8X1,25 SW)<br />
S cable straps (number and length depends on local conditions)<br />
Procedure<br />
S<br />
S<br />
S<br />
S<br />
Connect the pipes in such a way that rain water which runs along<br />
the pipes can drip off before it reaches the terminal strip of the positioner.<br />
Check the electrical connections for perfect firm contact.<br />
Check the seal in the housing cover for damage and contamination.<br />
Clean and replace if necessary.<br />
Mount the positioner if possible so that the sinter bronze silencer<br />
faces downwards on the underside of the housing (vertical installation<br />
position). If this is not possible, the silencer should be replaced<br />
by a suitable screw--type gland with a plastic hose.<br />
SIPART PS2 Manual<br />
A5E00074631-03<br />
39
Preparing for Operation<br />
Assembly of the screw--type gland with plastic hose<br />
S<br />
S<br />
S<br />
S<br />
S<br />
Unscrew the sinter bronze silencer from the exhaust air opening on<br />
the underside of the housing.<br />
Screw the screw--type gland mentioned above into the exhaust air<br />
opening.<br />
Mount the above mentioned plastic hose on the screw--type gland<br />
and check the good fit.<br />
Fix the plastic hose with a cable strap to the fitting so that the<br />
opening faces downwards.<br />
Make sure that the hose has no kinks and the exhaust air can <strong>flo</strong>w<br />
out unhindered.<br />
3.3.2 Instructions for using positioners which are exposed to strong<br />
accelerations or vibrations<br />
Fittings under heavy mechanical stresses such as from breakaway<br />
flaps, violently shaking or vibrating <strong>valves</strong>, or steam jets can be<br />
exposed to strong acceleration forces far above those specified. This<br />
can result, in extreme cases, to a shifting of the friction clutch.<br />
For such cases the position <strong>control</strong>ler equipped with a fixing device for<br />
the slip clutch with which adjustment due to the above mentioned<br />
influences can be prevented. The setting possibility is accessible below<br />
the black knurled wheel and is recognizable from slots on the yellow<br />
wheel. The zero point adjustment and the setting possibility of the slip<br />
clutch are identified by symbols on an additional plate (see figure 3-6,<br />
page 41).<br />
Procedure<br />
After you have mounted the position <strong>control</strong>ler and commissioned it<br />
completely, you can set the slip clutch torque as follows:<br />
S<br />
S<br />
S<br />
S<br />
Plug a conventional 4 mm wide screwdriver into a slot in the yellow<br />
wheel.<br />
Then turn the yellow wheel to the left with the screwdriver until it<br />
snaps in audibly. This increases the torque of the slip clutch.<br />
A fixed slip clutch is recognizable from an approx. 1 mm wide gap<br />
between the yellow and black wheel.<br />
If you have to make a zero point setting, e.g. after changing the<br />
drive, please reduce the torque first by turning the yellow wheel to<br />
the right stop. After the zero point setting, you can fix the slip clutch<br />
as described above.<br />
40<br />
SIPART PS2 Manual<br />
A5E00074631-03
Preparing for Operation<br />
IP65<br />
NEMA<br />
D--76181 Karlsruhe<br />
Type 4x<br />
SIPARTPS2 i/ p Posi ti oner 6DR5010--0NG00--0AA0<br />
Iw = 4...20mA<br />
O<br />
Ta = --30 ... +80 C<br />
p = 1,4 ... 7bar<br />
F--Nr. N1--P212 --1234567 Made in France<br />
Iy<br />
SIA<br />
Alarm<br />
module<br />
module<br />
module<br />
Figure 3-6 Fixing device for the slip clutch<br />
External external<br />
travel detection<br />
Applications in which the measures described above are inadequate<br />
are also conceivable. This applies for instance with continuous and<br />
heavy vibration, increased or too low ambient temperatures and in the<br />
case of nuclear radiation.<br />
The separate attachment of position displacement sensor and<br />
<strong>control</strong>ler unit can help here. A universal component is available which<br />
is suitable both for linear and rotary actuators.<br />
You require the following:<br />
S The external position detection system (order no. C73451-<br />
A430-D78). This consists of a SIPART-PS2- housing with integrated<br />
slip clutch, built-in potentiometer and various dummy plugs and<br />
seals.<br />
S or a Non-Contacting Position Sensor (e.g. 6DR4004--6N)<br />
S The <strong>control</strong>ler unit, any positioner version.<br />
S<br />
S<br />
The EMC filter module, this is is a set together with cable clips and<br />
M-20 screw--type cable gland and has the order number<br />
C73451-A430-D23. The EMC filter module must be installed in the<br />
positioner. The installation instructions enclosed with the EMC filter<br />
module explain how to assemble the components.<br />
A 3-wire cable for connecting the components.<br />
This EMC filter module should always be used for the <strong>control</strong>ler unit<br />
when any actuator--mounted potentiometer (resistance 10 kohms) is to<br />
be used instead of the external position detection system<br />
C73451-A430-D78.<br />
SIPART PS2 Manual<br />
A5E00074631-03<br />
41
Preparing for Operation<br />
3.3.3 Mounting kit ”linear actuator” 6DR4004-8V and 6DR4004-8L<br />
The scope of delivery of the mounting kit” linear actuator IEC 534<br />
(3 mm to 35 mm)” are contained (ser. no. see figure 3-7, page 44):<br />
Ser. no. pieces Designation Note<br />
1 1 NAMUR mounting kit bracket<br />
IEC 534<br />
Standardized connection for mounting console with<br />
ledge, column or plane surface<br />
2 1 Pick-up bracket Guides the roller with carrier pin and turns lever<br />
arm<br />
3 2 Clamping assembly Mounting of pick-up bracket on actuator spindle<br />
4 1 Carrier pin Assembly with roll (5) on lever (6)<br />
6 1 Lever NAMUR Forstrokerange3mmto35mm<br />
For stroke ranges> 35 mm to 130 mm (special delivery),<br />
lever 6DR4004-8L is required additionally<br />
7 2 U bolt Only for actuators with columns<br />
8 4 Hexagon head screw M8 x 20 DIN 933-A2<br />
9 2 Hexagon head screw M8 x 16 DIN 933-A2<br />
10 6 Lock washer A8 -- DIN 127-A2<br />
11 6 Flat washer B 8,4 -- DIN 125-A2<br />
12 2 Flat washer B 6,4 -- DIN 125-A2<br />
14 1 Spring washer A6 -- DIN 137A-A2<br />
15 1 Lock washer 3.2 -- DIN 6799-A2<br />
16 3 Spring washer A6 -- DIN 127-A2<br />
17 3 Socket cap screw M6 x 25 DIN 7984-A2<br />
18 1 Hexagon nut M6 -- DIN 934-A4<br />
19 1 Square nut M6 -- DIN 557-A4<br />
21 4 Hexagon nut M8 -- DIN 934-A4<br />
Table 3-1<br />
Scope of delivery of the mounting kit “linear actuator”<br />
42<br />
SIPART PS2 Manual<br />
A5E00074631-03
Preparing for Operation<br />
3.3.4 Assembly procedure (see figure 3-7, page 44)<br />
1. Mount clamping assembly (3) with hexagon socket cap screws<br />
(17) and lock washer (16) on the actuator spindle.<br />
2. Insert the pick--up bracket (2) into the recesses of the clamping<br />
assembly. Set the necessary length and tighten the screws so that<br />
the pick--up bracket can still be shifted.<br />
3. Insert the pin in the lever (6) and assemble with nut (18), spring<br />
washer (14) and washer (12).<br />
4. The value of the stroke range specified on the actuator or if this<br />
does not exist as a scaling value, the next greatest scaling value is<br />
set. The center of the pin must be in line with the scaling value.<br />
The same value can be set later under parameter 3.YWAY in<br />
commissioning to display the way in mm after initialization.<br />
5. Assemble the hexagon socket cap screw (17), spring washer (16),<br />
washer (12) and square nut (19) on the lever.<br />
6. Push the premounted lever onto the positioner axis up to the stop<br />
and fix with the hexagon socket cap screw (17).<br />
7. Fit the mounting bracket (1) with two hexagon head screws (9),<br />
lock washer (10) and flat washer (11) on the rear of the positioner.<br />
8. Selection of the row of holes depends on the width of the actuator<br />
yoke. The roll (5) should engage in the pick-up bracket (2) as close<br />
as possible to the spindle but may not touch the clamping<br />
assembly.<br />
9. Hold the positioner with the mounting bracket on the actuator so<br />
that the pin (4) is guided within the pick-up bracket (2).<br />
10. Tighten the pick-up bracket.<br />
11. Position the mounting parts according to the type of actuator.<br />
-- Actuator with ledge: Hexagon head screw (8), flat washer (11)<br />
and lock washer (10).<br />
-- Actuator with plane surface: Four hexagon head screws (8), flat<br />
washer (11) and lock washer (10).<br />
-- Actuator with columns: Two U bolts (7), four hexagon nuts (21)<br />
with flat washer (11) and lock washer (10).<br />
12. Secure positioner onto the yoke using the previously positioned<br />
mounting parts.<br />
. NOTE<br />
Set the height of the positioner so that the horizontal lever position is<br />
reached as close to the stroke center as possible. You can use the<br />
lever scale as orientation. It must be guaranteed that the horizontal<br />
lever position is passed through within the stroke range.<br />
SIPART PS2 Manual<br />
A5E00074631-03<br />
43
Preparing for Operation<br />
2<br />
17<br />
16<br />
12<br />
16<br />
17<br />
3<br />
19<br />
6<br />
14<br />
12<br />
18<br />
1)<br />
4<br />
Without explosion-proof version<br />
1<br />
9<br />
10 11<br />
3)<br />
9<br />
11<br />
10<br />
Explosion-proof version:<br />
9<br />
10<br />
11<br />
1<br />
3)<br />
9<br />
10<br />
11<br />
Figure 3-7 Assembly procedure (linear actuator)<br />
44<br />
SIPART PS2 Manual<br />
A5E00074631-03
Preparing for Operation<br />
1<br />
11<br />
10<br />
10<br />
8<br />
Mounting on yoke<br />
11 with ledge<br />
8<br />
Mounting on yoke<br />
with plane surface<br />
11 10<br />
Mounting on yoke<br />
with columns<br />
7<br />
4)<br />
21<br />
as required<br />
Figure 3-7<br />
Assembly procedure (linear actuator) continued<br />
3.3.5 Mounting kit ”rotary actuator” 6DR4004-8D<br />
The scope of delivery of the mounting kit ”Rotary actuator” contains (ser. no. see figures 3-8<br />
and 3-9):<br />
Ser. no. Pieces Designation Note<br />
2 1 Coupling wheel Mounting on position feedback shaft of the<br />
SIPART PS2<br />
3 1 Carrier Mounting on end of actuator shaft<br />
4 1 Multiple plate Indication of actuator position, comprising 4.1<br />
and 4.2<br />
4.1 8 Scales Different divisions<br />
4.2 1 Pointer mark Reference point for scale<br />
14 4 Hexagon head screw DIN 933 -- M6 x 12<br />
15 4 Lock washer S6<br />
16 1 Fillister head screw DIN84--M6x12<br />
17 1 Washer DIN125–6.4<br />
18 1 Hexagon socket head screw Premounted with coupling wheel<br />
19 1 Allen key For item 18<br />
Table 3-2<br />
Scope of delivery of the mounting kit “rotary actuator”<br />
SIPART PS2 Manual<br />
A5E00074631-03<br />
45
Preparing for Operation<br />
3.3.6 Assembly procedure (see figure 3-8 and figure 3-9)<br />
1. Attach VDI/VDE 3845 mounting console ((9), actuator-specific,<br />
scope of delivery actuator manufacturer) onto rear of positioner<br />
and secure using hexagon head screws (14) and lock washers<br />
(15).<br />
2. Adhere pointer (4.2) onto mounting console in the center of the<br />
centering hole.<br />
3. Push the coupling wheel (2) onto positioner axis, pull back by<br />
about 1 mm and tighten the hexagon socket head screw (18) with<br />
the Allen key provided.<br />
4. Place the carrier (3) onto the end of the actuator and secure using<br />
Fillister head screw (16) and washer (17).<br />
5. Carefully place positioner with mounting console onto the actuator<br />
such that the pin of the coupling wheel engages in the driver.<br />
6. Align the positioner/mounting console assembly in the center of the<br />
actuator and screw tight.<br />
(Screws not included in delivery; they are part of the actuator<br />
mounting console!)<br />
7. Following startup as described in Chapter 3.6, page 63: Drive the<br />
actuator to the end position and adhere scale (4.1) on the coupling<br />
wheel (2) according to direction of rotation and rotary actuator. The<br />
scale is self--adhesive!<br />
46<br />
SIPART PS2 Manual<br />
A5E00074631-03
Preparing for Operation<br />
4.2<br />
15<br />
14<br />
9<br />
9<br />
1) 2)<br />
18<br />
2<br />
3<br />
16<br />
17<br />
3)<br />
2<br />
2<br />
4.1<br />
3<br />
0%20 40 60 80 100%<br />
4)<br />
5)<br />
Figure 3-8<br />
Assembly procedure (rotary actuator)<br />
SIPART PS2 Manual<br />
A5E00074631-03<br />
47
Preparing for Operation<br />
15<br />
14<br />
4.2<br />
9<br />
1)<br />
3<br />
16<br />
17<br />
18<br />
9<br />
2)<br />
2<br />
3)<br />
2<br />
3<br />
2<br />
4.1<br />
0%20 40 60 80 100%<br />
4)<br />
Figure 3-9<br />
Assembly procedure for explosion proof version (rotary actuator)<br />
5)<br />
48<br />
SIPART PS2 Manual<br />
A5E00074631-03
Preparing for Operation<br />
CUT A -- B<br />
4.2 14, 15<br />
15<br />
14, 15<br />
positioner<br />
2<br />
G1/4<br />
A<br />
25<br />
B<br />
rotary actuator<br />
3 16, 17 10 4.1 9<br />
2 Coupling wheel 10 Feedback shaft<br />
3 Carrier 14 Hexagon head screw M6 x 12<br />
4 Multiple plate 15 Lock washer S6<br />
4.1 Scale 16 Fillister head screw M6 x 12<br />
4.2 Pointer mark 17 Washer<br />
9 VDI/VDE 3845-mounting bracket 18 Hexagon socket head screw<br />
Figure 3-10<br />
Mounted positioner for rotary actuator<br />
SIPART PS2 Manual<br />
A5E00074631-03<br />
49
Preparing for Operation<br />
fastening Befestigungsebene level<br />
positioner Stellungsregler<br />
M6<br />
4<br />
+0,1<br />
rotary Schwenkantrieb actuator<br />
35<br />
F05-Lkr.- 50<br />
Figure 3-11<br />
Attachment of rotary actuator, mounting console (scope of delivery actuator manufacturer),<br />
dimensions<br />
3.4 Electrical Connection<br />
. NOTE<br />
Any necessary options modules must be installed before electrical<br />
connection (see chapter 2.5, page 25).<br />
N.B.: The transmission ratio selector can only be set when the<br />
positioner is open. Therefore check this setting before closing the<br />
<strong>control</strong>ler.<br />
!<br />
WARNING<br />
The specifications of the examination certificate valid in your country<br />
must be observed. Laws and regulations valid in your country must be<br />
observed for the electrical installation in explosions hazardous areas.<br />
In Germany these are for example:<br />
-- Working reliability regulations<br />
-- Regulations for installing electrical equipment in hazardous areas,<br />
DIN EN 60079--14 (in the past VDE 0165, T1).<br />
-- The EC Type-Examination Certificates<br />
50<br />
SIPART PS2 Manual<br />
A5E00074631-03
Preparing for Operation<br />
WARNING<br />
!<br />
If the intrinsically safe version is operated with a higher operating voltage<br />
by mistake, the positioner must no longer be used for intrinsically<br />
safe application.<br />
The explosion-proof positioner may only be supplied with electrical<br />
power in areas in which the atmosphere may be potentially explosive<br />
when the housing is closed.<br />
The feed-though openings in the explosion-proof version for the<br />
electronic connections must be sealed with EEX-d certified cable<br />
glands or EEx-d certified plugs or an ignition lock must be mounted at<br />
a maximum distance of 46 cm (18 inches) when using the<br />
“conduit”-system.<br />
The plastic housing is metal lined to increase the electromagnetic<br />
compatibility (EMC) against high frequency radiation. This screen is<br />
connected electrically to the threaded bushes shown in figure 3-12,<br />
page 51.<br />
Please bear in mind that this protection can only be effective if you connect<br />
at least one of these bushes with grounded fittings by electrically<br />
conductive (blank) mounting parts.<br />
Shield<br />
Figure 3-12<br />
Base plate<br />
SIPART PS2 Manual<br />
A5E00074631-03<br />
51
Preparing for Operation<br />
. NOTE<br />
Use standard M20 x 1.5 cable gland nuts to ensure leakage (IP--<br />
protection of the housing) and for the necessary tensile strength use<br />
only cables with a cable diameter ≥ 8 mm, or for smaller diameters<br />
use a suitable sealing insert.<br />
NOTE for use in zone 2:<br />
Non-sparking equipment for Zone 2 may not be connected or disconnected<br />
under power in normal operation.<br />
However, during installation or repair work the positioner may be connected<br />
or disconnected even under power (see also certificate for zone<br />
2).<br />
NOTE for use in two-wire systems:<br />
Never connect the current input (terminal 6 and 7) to a voltage source<br />
as this could destroy the positioner.<br />
Always use a current source with a maximum output current of 20 mA.<br />
To maintain the power supply, the input current must be ≥3.6 mA.<br />
3.4.1 Connection in non-intrinsically safe and explosion proof version<br />
J<br />
+<br />
4to20mA<br />
6<br />
7<br />
8<br />
9<br />
10<br />
E<br />
A<br />
Positioner<br />
Digital input 1<br />
6DR50x0-xNxxx<br />
6DR5011-xNxxx<br />
6DR51x0-xNxxx<br />
6DR5111-xNxxx<br />
6DR50x5-xExxx<br />
6DR51x5-xExxx<br />
HART Communicator<br />
Only for:<br />
6DR51x0-xNxxx<br />
6DR5111-xNxxx<br />
6DR51x5-xExxx<br />
Figure 3-13<br />
Two-wire connection<br />
52<br />
SIPART PS2 Manual<br />
A5E00074631-03
Preparing for Operation<br />
J<br />
+ 4to20mA<br />
2<br />
3<br />
4<br />
5<br />
Positioner<br />
6DR53x0-xNxxx<br />
6DR52x5-xExxx<br />
6DR53x5-xExxx<br />
6<br />
7<br />
8<br />
9<br />
10<br />
E<br />
A<br />
Digital input 1<br />
HART Communicator<br />
Only for:<br />
6DR52x5-xExxx<br />
Figure 3-14<br />
Two-wire connection<br />
U<br />
+<br />
18 to 30 V<br />
2<br />
3<br />
4<br />
5<br />
Positioner<br />
6DR53x0-Nxxx<br />
6DR52x5-Exxx<br />
6DR53x5-Exxx<br />
J<br />
+<br />
*)<br />
0/4to20mA<br />
*)<br />
6<br />
7<br />
8<br />
9<br />
10<br />
E<br />
A<br />
Digital input 1<br />
HART Communicator<br />
Only for:<br />
6DR52x5-xExxx<br />
*) only for three-wire connection<br />
Figure 3-15<br />
Three-/four--wire connection<br />
SIPART PS2 Manual<br />
A5E00074631-03<br />
53
Preparing for Operation<br />
Current output<br />
+<br />
61 E<br />
U H ≤35 V<br />
62 J<br />
+<br />
J y module:<br />
6DR4004-8J<br />
Figure 3-16<br />
J y- module 6DR4004-8J<br />
Digital inputs and outputs<br />
Alarm module<br />
6DR4004-8A<br />
+13 V<br />
+4,5 V<br />
+<br />
≤30 V<br />
11<br />
12<br />
≥1 Digital input 2<br />
21<br />
22<br />
+3 V<br />
+<br />
35 V<br />
31<br />
32<br />
1K<br />
Fault<br />
message<br />
+<br />
35 V<br />
41<br />
42<br />
1K<br />
Limit value A1<br />
+<br />
35 V<br />
51<br />
52<br />
1K<br />
Limit value A2<br />
Figure 3-17<br />
Alarm module 6DR4004--8A<br />
54<br />
SIPART PS2 Manual<br />
A5E00074631-03
Preparing for Operation<br />
SIA module<br />
SIA module<br />
6DR4004-8G<br />
+<br />
8.2 V<br />
31<br />
32<br />
2K1<br />
10K<br />
Fault<br />
message<br />
+<br />
8.2 V<br />
41<br />
42<br />
Limit value A1<br />
+<br />
8.2 V<br />
51<br />
52<br />
Limit value A2<br />
Figure 3-18<br />
SIA module 6DR4004-8G<br />
3.4.2 Connection in intrinsically safe version<br />
. NOTE<br />
Only certified intrinsically safe circuits may be connected as power<br />
supply, <strong>control</strong> and signal circuits.<br />
Standard <strong>control</strong>ler<br />
Non-hazardous<br />
area<br />
Hazardous area zone 1 or zone 2<br />
EEx<br />
J<br />
Intrinsically<br />
safe power<br />
source<br />
+<br />
4to20mA<br />
6<br />
7<br />
8<br />
9<br />
10<br />
E<br />
A<br />
Positioner<br />
Digital input 1<br />
6DR5010-xExxx<br />
6DR5020-xExxx<br />
6DR5011-xExxx<br />
Figure 3-19<br />
Two-wire connection, EEx i<br />
SIPART PS2 Manual<br />
A5E00074631-03<br />
55
Preparing for Operation<br />
Non-hazardous<br />
area<br />
Hazardous area zone 1 or zone 2<br />
EEx<br />
J<br />
+<br />
4to20mA<br />
2<br />
3<br />
4<br />
5<br />
Positioner<br />
6DR5210-xExxx<br />
6DR5220-xExxx<br />
6DR5211-xExxx<br />
Intrinsically<br />
safe power<br />
source<br />
6<br />
7<br />
8<br />
9<br />
10<br />
E<br />
A<br />
Digital input 1<br />
HART Communicator<br />
Figure 3-20<br />
Two-wire connection, EEx i<br />
Non-hazardous<br />
area<br />
Hazardous area zone 1 or zone 2<br />
EEx<br />
U<br />
+ 18 to 30 V<br />
2<br />
3<br />
4<br />
5<br />
Positioner<br />
6DR5210-xExxx<br />
6DR5220-xExxx<br />
6DR5211-xExxx<br />
EEx<br />
J<br />
Intrinsically<br />
safe power<br />
source<br />
+<br />
*)<br />
4to20mA<br />
*)<br />
6<br />
7<br />
8<br />
9<br />
10<br />
E<br />
A<br />
Digital input 1<br />
HART Communicator<br />
*) Only for three-wire connection<br />
Figure 3-21<br />
Three-/four--wire connection, EEx i<br />
56<br />
SIPART PS2 Manual<br />
A5E00074631-03
Preparing for Operation<br />
Split-range<br />
intrinsically safe feed sources<br />
Non-hazardous<br />
area<br />
Power supply<br />
EEx<br />
EEx<br />
U<br />
I<br />
total setting<br />
range Iy<br />
L+<br />
Iy<br />
M<br />
M<br />
Hazardous area zone 1 or zone 2<br />
+18to30V<br />
+0/4 to 20 mA<br />
#<br />
Instrument 1<br />
Positioner<br />
6DR5210--xExxx<br />
6DR5220--xExxx<br />
6DR5211--xExxx<br />
setting range 1<br />
Digital input 1<br />
Instrument 2<br />
Positioner<br />
6DR5210--xExxx<br />
6DR5220--xExxx<br />
6DR5211--xExxx<br />
setting range 1<br />
#<br />
Digital input 1<br />
Figure 3-22<br />
Series circuit of two positioners, e.g. split range (separate power supply), EEx i<br />
SIPART PS2 Manual<br />
A5E00074631-03<br />
57
Preparing for Operation<br />
Current output<br />
Non-hazardous area<br />
Hazardous area zone 1 or zone 2<br />
EEx<br />
+<br />
+<br />
U 61 E<br />
H U<br />
62 J<br />
≤30 V<br />
J<br />
+<br />
J y module<br />
6DR4004-6J<br />
Intrinsically safe power source<br />
Figure 3-23<br />
J y -module 6DR4004-6J, EEx i<br />
Digital inputs and outputs<br />
Non-hazardous area<br />
Hazardous area zone 1 or zone 2<br />
Alarm module<br />
6DR4004-6A<br />
EEx<br />
+<br />
≤25.2 V<br />
11<br />
12 ≥1<br />
Digital<br />
input 2<br />
21<br />
22<br />
+<br />
3V<br />
Intrinsically<br />
safe<br />
Switching amplifier<br />
to<br />
EN 50227<br />
EEx<br />
EEx<br />
+<br />
+<br />
8.2 V<br />
8.2 V<br />
31<br />
32<br />
41<br />
42<br />
2K1<br />
10K<br />
2K1<br />
10K<br />
Fault<br />
message<br />
Limit value A1<br />
EEx<br />
+<br />
8.2 V<br />
51<br />
52<br />
2K1<br />
10K<br />
Limit value A2<br />
Figure 3-24<br />
Alarm module 6DR4004-6A, EEx i<br />
58<br />
SIPART PS2 Manual<br />
A5E00074631-03
Preparing for Operation<br />
SIA module<br />
Non-hazardous area<br />
Hazardous area zone 1 or zone 2<br />
SIA module<br />
6DR4004-6G<br />
Intrinsically safe<br />
Switching amplifier<br />
to EN 50227<br />
EEx<br />
+<br />
8.2 V<br />
31<br />
32<br />
2K1<br />
10K<br />
Fault<br />
message<br />
EEx<br />
+<br />
8.2 V<br />
41<br />
42<br />
Limit value A1<br />
EEx<br />
+<br />
8.2 V<br />
51<br />
52<br />
Limit value A2<br />
Figure 3-25<br />
SIA module 6DR4004-6G, EEx i<br />
3.4.3 Connection in type of protection “n” version<br />
Standard <strong>control</strong>ler<br />
Non-hazardous area<br />
Hazardous area zone 2<br />
J<br />
+<br />
4to20mA<br />
6<br />
7<br />
8<br />
9<br />
10<br />
E<br />
A<br />
Positioner<br />
Digital input 1<br />
6DR5010-xGxxx<br />
6DR5020-xGxxx<br />
6DR5011-xGxxx<br />
Figure 3-26<br />
Two-wire connection, EEx n<br />
SIPART PS2 Manual<br />
A5E00074631-03<br />
59
Preparing for Operation<br />
Non-hazardous area<br />
Hazardous area zone 2<br />
J<br />
+ 4to20mA<br />
2<br />
3<br />
4<br />
5<br />
Positioner<br />
6DR5210-xGxxx<br />
6DR5220-xGxxx<br />
6DR5211-xGxxx<br />
6<br />
7<br />
8<br />
9<br />
10<br />
E<br />
A<br />
Digital input 1<br />
HART Communicator<br />
Figure 3-27<br />
Two-wire connection, EEx n<br />
Non-hazardous area<br />
Hazardous area zone 2<br />
U<br />
+<br />
18 to 30 V<br />
2<br />
3<br />
4<br />
5<br />
Positioner<br />
6DR5210-Gxxx<br />
6DR5220-Gxxx<br />
6DR5211-Gxxx<br />
J<br />
+<br />
*)<br />
0/4to20mA<br />
*)<br />
6<br />
7<br />
8<br />
9<br />
10<br />
E<br />
A<br />
Digital input 1<br />
HAR Communicator<br />
*) Only for three-wire connection<br />
Figure 3-28<br />
Three-/Four-wire connection, EEx n<br />
60<br />
SIPART PS2 Manual<br />
A5E00074631-03
Preparing for Operation<br />
Current output<br />
Non-hazardous area Hazardous area zone 1 or zone 2<br />
+<br />
+<br />
U 61 E<br />
H 62 J<br />
≤30 V<br />
+<br />
J y module<br />
6DR4004-6J<br />
Figure 3-29<br />
J y -module 6DR4004-6J, EEx n<br />
Digital inputs and outputs<br />
Non-hazardous area<br />
Hazardous area zone 2<br />
Alarm module<br />
6DR4004-6A<br />
+<br />
11<br />
12 ≥1<br />
Digital<br />
input 2<br />
21<br />
22<br />
+3 V<br />
+<br />
8.2 V<br />
31<br />
32<br />
2K1<br />
10K<br />
Fault<br />
message<br />
+<br />
8.2 V<br />
41<br />
42<br />
2K1<br />
10K<br />
Limit value A1<br />
+<br />
8.2 V<br />
51<br />
52<br />
2K1<br />
10K<br />
Limit value A2<br />
Figure 3-30<br />
Alarm module 6DR4004--6A, EEx n<br />
SIPART PS2 Manual<br />
A5E00074631-03<br />
61
Preparing for Operation<br />
SIA module<br />
Non-hazardous area<br />
Hazardous area zone 2<br />
SIA module<br />
6DR4004-6G<br />
+<br />
8.2 V<br />
31<br />
32<br />
2K1<br />
10K<br />
Fault<br />
message<br />
+<br />
8.2 V<br />
41<br />
42<br />
Limit value A1<br />
+<br />
8.2 V<br />
51<br />
52<br />
Limit value A2<br />
Figure 3-31<br />
SIA module 6DR4004-6G, EEx n<br />
3.5 Pneumatic Connection<br />
!<br />
WARNING<br />
For reasons of safety, the pneumatic power may only be supplied after<br />
assembly when the positioner is switched to operating level P <strong>manual</strong><br />
operation with electrical signal applied (as--delivered state, see figure<br />
4-4, page 82).<br />
. NOTE<br />
Note the air quality! Oil-free industrial air, solid content < 30 μm, pressure<br />
dew point 20 K below the lowest ambient temperature (chapter 7 “Technical<br />
Data”, page 119).<br />
S<br />
S<br />
Connect a manometer block for supply air and actuating pressure if<br />
necessary.<br />
Connection by female thread G 1/4 DIN 45141 or 1/4” NPT:<br />
P Z Supply air 1.4 to 7 bar<br />
Y1 actuating pressure 1 for single- and double-acting actuators<br />
Y2 actuating pressure 2 for double-acting actuators<br />
E exhaust air outlet (remove silencer if necessary)<br />
see figure 2-3 and 2-4, page 18.<br />
62<br />
SIPART PS2 Manual<br />
A5E00074631-03
Preparing for Operation<br />
S<br />
S<br />
.Safety position when the electric power supply fails:<br />
single-acting: Y1 deaerated<br />
double-acting: Y1 Max. Actuating pressure<br />
(supply air pressure)<br />
Y2 deaerated<br />
Connect actuating pressure Y1 or Y2 (only in double-acting actuators)<br />
according to the desired safety position.<br />
S Connect supply air to P Z .<br />
. NOTE<br />
In order for spring-loaded pneumatic actuators to be able to reliably<br />
exploit the maximum possible travel, the supply pressure must be<br />
sufficiently greater than the maximum required final pressure of the<br />
actuator.<br />
After installing the device, check the pneumatic connections of the entire<br />
assembly for leakage. Any leakage would cause not only continuous<br />
consumption of compressed air but also would cause the positioner to<br />
continually endeavor to compensate for the variance in position, leading<br />
in time to premature wear of the whole <strong>control</strong> mechanism.<br />
3.6 Commissioning<br />
Once the positioner has been fitted to a pneumatic actuator, it must be<br />
provided with electrical and pneumatic auxiliary power.<br />
Then you can then adapt the position <strong>control</strong>ler to the respective actuator<br />
by parameterizing and initializing it.<br />
Mode” operating mode (which can also if necessary be attained by<br />
”PRST”) -- ”NOINI” will flash.<br />
If the positioner has not been initialized it will be in the ”P Manual<br />
Mode” operating mode (which can also if necessary be attained by<br />
”PRST”) -- ”NOINI” will flash.<br />
This initialization can be effected in three different ways:<br />
S Automatic initialization<br />
Initialization takes place automatically. Hereby the positioner determines<br />
the direction of action, the stem travel and the angle of rotation,<br />
the travel times of the actuator one after the other and adapts<br />
the <strong>control</strong> parameters to the <strong>dyna</strong>mic behavior of the actuator.<br />
S<br />
S<br />
Manual initialization<br />
The stem travel or angle of rotation of the actuator can be set <strong>manual</strong>ly,<br />
the other parameters are determined as in automatic initialization.<br />
This function is useful in actuators with soft limit stops.<br />
Copying initialization data (positioner exchange)<br />
In the devices with HART function the initialization data of a positioner<br />
can be read out and copied to another positioner. This enables a<br />
defective device to be changed without having to interrupt an ongoing<br />
process by initialization.<br />
SIPART PS2 Manual<br />
A5E00074631-03<br />
63
Preparing for Operation<br />
Only a few parameters need to be set in the positioner prior to initialization.<br />
The others are defaulted so that they do not normally need to be<br />
adjusted. You will have no problems with commissioning if you observe<br />
the following points.<br />
The possible operating modes and parameters, together with the<br />
adjustment capabilities and their effects are described in chapter 4<br />
page 79 ”Operation”.<br />
. NOTE<br />
N.B.: The operating pressure should be at least one bar greater than is<br />
necessary for closing/opening the valve during initialization.<br />
N.B.: The transmission ratio selector can only be set when the<br />
positioner is open. Therefore check this setting before closing the<br />
housing.<br />
3.6.1 Preparations for linear actuators<br />
1. Assemble the positioner with the appropriate mounting kit (see<br />
chapter 3.3.3, page 39).<br />
. NOTE<br />
Particularly important is the position of the transmission ratio selector<br />
(8, figure 2-1, page 16) in the positioner:<br />
Stroke Lever Position of the transmission ratio<br />
selector<br />
5to20mm short 33° (i.e. down)<br />
25 to 35 mm short 90° (i.e. up)<br />
40 to 130 mm long 90° (i.e. up)<br />
2. Push the carrier pin (4, figure 3-7 (page 44) 2) onto the lever (6,<br />
figure 3-7, 2) to the scale position corresponding to the rated<br />
stroke or next highest position and screw the carrier pin tight with<br />
the nut (18, figure 3-7, 2).<br />
3. Connect the actuator and the positioner with the pneumatic lines<br />
and supply pneumatic power to the positioner (figure 2-3 and 2-4,<br />
page 18 ).<br />
4. Connect a suitable current or voltage source (see figure 3-13,<br />
page 52 and figure 3-19, page 55).<br />
5. The positioner is now in the operating mode ”P-<strong>manual</strong> operation”<br />
The current potentiometer voltage (P) is displayed in percent<br />
in the top line of the display, e.g.: ”P12.3”, and ”NOINI” flashes in<br />
the bottom line:<br />
64<br />
SIPART PS2 Manual<br />
A5E00074631-03
Preparing for Operation<br />
6. Check the free running of the mechanics in the whole actuating<br />
range by moving the actuator with the keys and and driving<br />
to the respective end position.<br />
. NOTE<br />
You can move the actuator quickly by pressing the other direction key<br />
additionally whilst keeping the direction key selected first pressed.<br />
7. Now move the actuator to the horizontal position of the lever. A<br />
value between P48.0 and P52.0 should be visible in the display. If<br />
this is not the case, adjust the slip clutch (8, figure 2-10, page 28)<br />
until ”P50.0” is displayed with a horizontal lever. The more<br />
accurately you hit this value, the more exactly the positioner can<br />
determine the path.<br />
3.6.2 Automatic initialization of linear actuator<br />
If you can move the actuator correctly, leave it standing in a central position<br />
and start automatic initialization:<br />
1. Press the operation mode key for longer than 5 s. This brings<br />
you to the Configuration mode.<br />
Display:<br />
2. Switch to the second parameter by pressing the operation mode<br />
key briefly.<br />
Display:<br />
or<br />
. NOTE<br />
It is vital that this value corresponds to the setting of the transmission<br />
ratio selector (8, figure 2-1, page 16) (33° or 90°).<br />
SIPART PS2 Manual<br />
A5E00074631-03<br />
65
Preparing for Operation<br />
3. Switch on to the following display with the operation mode key :<br />
You only need to set this parameter if you want to have the total<br />
stroke in mm displayed at the end of the initialization phase. To do<br />
this, select the same value in the display to which you have set the<br />
carrier pin to the scale on the lever.<br />
4. Switch on to the following display with the operation mode key :<br />
5. Start initialization by pressing the key for longer than 5 s.<br />
Display:<br />
During the initialization phase ”RUN1” to”RUN5” appear one after another<br />
in the bottom display (see also structograms figure 3-33, page 74<br />
to figure 3-36, page 77).<br />
. NOTE<br />
The initialization process may last up to 15 minutes depending on the<br />
actuator.<br />
The initialization is complete when the following display appears:<br />
The following display appears after pressing the operation mode key<br />
briefly:<br />
To exit the Configuration mode, press the operation mode key for<br />
longer than 5 s. The software version is displayed after about 5 s. The<br />
instrument is in <strong>manual</strong> operation after releasing the operation mode<br />
key.<br />
66<br />
SIPART PS2 Manual<br />
A5E00074631-03
Preparing for Operation<br />
. NOTE<br />
You can abort an ongoing initialization at any time by pressing the<br />
operation mode key. Your previous settings are retained. All the parameters<br />
are reset to the factory setting only after performing a “Preset”.<br />
3.6.3 Manual initialization of linear actuator<br />
The positioner can be initialized with this function without the actuator<br />
being driven hard against the limit stop. The start and end positions of<br />
the travel are set <strong>manual</strong>ly. The other initialization steps (optimization<br />
of the <strong>control</strong> parameters) run automatically as in automatic initialization.<br />
Manual initialization<br />
procedure in<br />
linear actuator<br />
1. Make preparations as described in chapter 3.6.1, page 64 for<br />
linear actuator. In particular, make sure by <strong>manual</strong>ly driving the whole<br />
travel that the displayed potentiometer setting moves<br />
in the permissible range between P5.0 and P95.0.<br />
Press the operation mode key<br />
you to the Configuration mode.<br />
Display:<br />
for longer than 5 s. This brings<br />
3. Switch to the second parameter by pressing the operation key<br />
briefly. One of the following displays appears:<br />
or<br />
. NOTE<br />
It is vital that this value corresponds to the setting of the transmission<br />
ratio selector (33_ or 90°).<br />
SIPART PS2 Manual<br />
A5E00074631-03<br />
67
Preparing for Operation<br />
4. Switch on to the following display with the operation mode key:<br />
You only need to set this parameter if you want to have the total<br />
stroke in mm displayed at the end of the initialization phase. To do<br />
this, select the same value in the display to which you have set<br />
the carrier pin to the scale on the lever or the next highest position<br />
in intermediate positions.<br />
5. Switch on to the following display by pressing the operation<br />
mode key twice:<br />
6. Start initialization by pressing the increment key for longer<br />
than5s.<br />
Display:<br />
7. After 5 s the display changes to:<br />
(The display of the potentiometer setting is shown here and below<br />
as an example only).<br />
Now move the actuator to the position which you want to define as<br />
the first of the two end positions with the increment and decrement<br />
key. Then press the operation mode key . This accepts<br />
the current position as end position 1 and switches on to the next<br />
position.<br />
68<br />
SIPART PS2 Manual<br />
A5E00074631-03
Preparing for Operation<br />
. NOTE<br />
If the message “RANGE” appears in the bottom line, the selected end<br />
position is outside the permissible measuring range. There are several<br />
ways to correct the error:<br />
S Adjust the slip clutch until “OK” appears and press the operation mode<br />
key again or<br />
S<br />
S<br />
move to another end position with the increment and decrement key<br />
or<br />
abort initialization by pressing the operation mode key. You then have<br />
to change to P <strong>manual</strong> operation and correct the travel and the position<br />
detection according to step 1.<br />
8. If step 7 was successful, the following display appears:<br />
Now move the actuator to the position which you want to define as<br />
the second end position with the increment and decrement<br />
key. Then press the operation mode key . This enters<br />
the current position as end position 2.<br />
. NOTE<br />
If the message “RANGE” appears in the bottom line, the selected end<br />
position is outside the permissible measuring range. There are several<br />
ways to correct the error:<br />
S move to another end position with the increment and decrement key<br />
or<br />
S<br />
abort initialization by pressing the operation mode key. You then have<br />
to change to P <strong>manual</strong> operation and correct the travel and the position<br />
detection according to step 1.<br />
If the message “Set Middl” appears, the lever arm must be driven to<br />
horizontal position using the increment and decrement key and then<br />
the operation mode key pressed. This sets the reference point of the<br />
sine correction in linear actuators.<br />
9. The rest of the initialization now runs automatically. “RUN1” to<br />
“RUN5” appear one after another in the bottom line of the display.<br />
The following display appears on successful completion of initialization:<br />
SIPART PS2 Manual<br />
A5E00074631-03<br />
69
Preparing for Operation<br />
The first line additionally contains the determined stroke in millimeters if<br />
the set lever length was specified with parameter 3 YWAY.<br />
5 INITM appears in the bottom line again after pressing the operation<br />
mode key briefly. This brings you back to the Configuration<br />
operating mode.<br />
To exit the Configuration mode, press the operation mode key for<br />
longer than 5 seconds. The software version is displayed after about<br />
5 seconds. The instrument is in <strong>manual</strong> operation after releasing the<br />
operation mode key.<br />
3.6.4 Preparations for rotary actuator<br />
. NOTE<br />
Very important: Switch the transmission ratio selector in the<br />
positioner (8, figure 2-1, page 16) to position 90° (normal angle for<br />
rotary actuator).<br />
1. Mount the positioner with the appropriate mounting kit (see chapter<br />
3.3.5, page 45).<br />
2. Connect the actuator and the positioner with the pneumatic lines<br />
and supply pneumatic power to the positioner (figure 2-3 and 2-4,<br />
page 18).<br />
3. Connect a suitable current or voltage source (see figure 3-13,<br />
page 52 and figure 3-19, page 55).<br />
4. The positioner is now in the operating mode ”P-<strong>manual</strong><br />
operation” The current potentiometer voltage (P) is displayed in %<br />
in the top line of the display, e.g.: ”P12.3”, and ”NOINI” flashes in<br />
the bottom line:<br />
5. Check the free running of the mechanics in the whole actuating<br />
range by moving the actuator with the keys and and driving<br />
to the respective end position.<br />
. NOTE<br />
You can move the actuator quickly by pressing the other direction key<br />
additionally whilst keeping the direction key selected first pressed.<br />
70<br />
SIPART PS2 Manual<br />
A5E00074631-03
Preparing for Operation<br />
3.6.5 Automatic initialization of rotary actuator<br />
If you can move the actuator correctly through the actuating range,<br />
leave it standing in a central position and start automatic initialization:<br />
1. Press the operation mode key for longer than 5 s. This brings<br />
you to the Configuration operating mode.<br />
Display<br />
2. Set the parameter with the -key to ”turn”<br />
Display:<br />
3. Switch to the second parameter by pressing the operation mode<br />
key briefly. This has set automatically to 90°.<br />
Display:<br />
4. Switch on to the following display with the operation mode key :<br />
5. Start initialization by pressing the key for longer than 5 s.<br />
Display:<br />
During the initialization phase ”RUN1” to”RUN5” appear one after<br />
another in the bottom display (see also structograms in figure 3-33,<br />
page 74 to figure 3-36, page 77).<br />
. NOTE<br />
The initialization process may last up to 15 minutes depending on the<br />
actuator.<br />
SIPART PS2 Manual<br />
A5E00074631-03<br />
71
Preparing for Operation<br />
The initialization is complete when the following display<br />
appears:<br />
The top value indicates the total angle of rotation of the actuator<br />
(example 93.5°).<br />
The following display appears after pressing the operation mode key<br />
briefly:<br />
To exit the Configuration mode, press the operation mode key for<br />
longer than 5 s. The software version is displayed after about 5 s. The<br />
instrument is in <strong>manual</strong> operation after releasing the operation mode<br />
key.<br />
. NOTE<br />
You can abort an ongoing initialization at any time by pressing the operation<br />
mode key. Your previous settings are retained. All the parameters<br />
are set to the factory setting only after performing a “Preset”.<br />
3.6.6 Manual initialization of rotary actuators<br />
The positioner can be initialized with this function without the actuator<br />
being driven hard against the limit stop. The start and end positions of<br />
the travel are set <strong>manual</strong>ly. The other initialization steps (optimization<br />
of the <strong>control</strong> parameters) run automatically as in automatic initialization.<br />
Manual initialization<br />
procedure in<br />
rotary actuators<br />
1. Make preparations as described in chapter 3.6.4, page 70 for<br />
rotary actuators. In particular, make sure by <strong>manual</strong>ly driving the<br />
whole travel that the displayed potentiometer setting<br />
moves in the permissible range between P5.0 and P95.0.<br />
2. Press the operation mode key for longer than 5 s. This brings<br />
you to the Configuration mode.<br />
Display:<br />
72<br />
SIPART PS2 Manual<br />
A5E00074631-03
Preparing for Operation<br />
3. Set the parameter YFCT to “turn” with the decrement key.<br />
Display:<br />
4. Switch to the second parameter by pressing the operation mode<br />
key briefly.<br />
Display:<br />
. NOTE<br />
Make sure that the transmission ratio selector is in position 90 °!<br />
5. Switch on to the following display by pressing the operation mode<br />
key twice:<br />
The following steps are identical with the steps 6) to 9) for initialization<br />
of linear actuators.<br />
After successful initialization the determined rotary range appears<br />
in the top display.<br />
“5.INITM” appears in the bottom line again after pressing the operation<br />
mode key briefly. This brings you back to the Configuration<br />
mode.<br />
To exit the Configuration mode, press the operation mode key<br />
for longer than 5 seconds. The software version is displayed after<br />
about 5 seconds. The instrument is in <strong>manual</strong> operation after releasing<br />
the operation mode key.<br />
SIPART PS2 Manual<br />
A5E00074631-03<br />
73
Preparing for Operation<br />
3.6.7 Automatic initialization (structograms)<br />
Linear actuator<br />
Rotary actuator<br />
Up<br />
Down<br />
Closed<br />
Open<br />
Figure 3-32<br />
Direction of action of the actuators<br />
The initialization procedure should be taken from the following structogram<br />
(figure 3-33 to figure 3-36). The terms Open/Closed and up/down<br />
in the structogram refer to the direction of action of the actuators as<br />
illustrated in figure 3-32.<br />
configure<br />
start: press<br />
>5s<br />
1<br />
move the actuator<br />
into the travel range<br />
with:<br />
piezo valve 1 opens<br />
continue with:<br />
RUN 1<br />
dy > 4 % ?<br />
no<br />
t>60s?<br />
no<br />
yes<br />
yes<br />
piezo valve 2 opens<br />
dy > 4 % ?<br />
no<br />
t>60s?<br />
no<br />
yes<br />
yes<br />
2<br />
<strong>manual</strong> intervention<br />
Figure 3-33 Automatic initialization, part 1<br />
74<br />
SIPART PS2 Manual<br />
A5E00074631-03
Preparing for Operation<br />
2<br />
actuator moves<br />
into closed<br />
position<br />
RUN 2<br />
tolerance band<br />
4% < dw < 10%<br />
?<br />
yes<br />
no<br />
turn slip clutch<br />
until 0 appears<br />
in the bottom line<br />
of the display<br />
continue with:<br />
actuator moves<br />
into open<br />
position<br />
hard stop<br />
up < 97 % ?<br />
no<br />
yes<br />
span<br />
up--dw > 25 % ?<br />
no<br />
continue with:<br />
check<br />
mechanics<br />
1<br />
3<br />
yes<br />
continue with:<br />
<strong>manual</strong> intervention<br />
Figure 3-34<br />
Automatic initialization part 2 (in rotary actuators)<br />
SIPART PS2 Manual<br />
A5E00074631-03<br />
75
Preparing for Operation<br />
2<br />
set lever arm vertical to stem with:<br />
continue with:<br />
actuator moves<br />
into closed<br />
position<br />
continue with:<br />
no<br />
yes<br />
has slip<br />
clutch been<br />
moved?<br />
continue with:<br />
tolerance band<br />
4% < dw<br />
?<br />
no<br />
correct height<br />
adjustment or<br />
turn slip clutch<br />
until 0 appears<br />
in the bottom line<br />
of the display<br />
RUN 2<br />
yes<br />
actuator moves<br />
into open<br />
position<br />
hard stop<br />
up < 97 % ?<br />
yes<br />
no<br />
continue with:<br />
set the next lowest travel<br />
value on the lever and<br />
check the setting of the<br />
transmission ratio selector<br />
1<br />
span<br />
up--dw > 25 % ?<br />
yes<br />
no<br />
continue with:<br />
set the next highest travel<br />
value on the lever and<br />
check the setting of the<br />
transmission ratio selector<br />
1<br />
was the<br />
vertical position<br />
(to stem) of the lever<br />
driven through<br />
?<br />
no<br />
3<br />
yes<br />
<strong>manual</strong> intervention<br />
Figure 3-35<br />
Automatic initialization part 2 (in linear actuators)<br />
76<br />
SIPART PS2 Manual<br />
A5E00074631-03
Preparing for Operation<br />
3<br />
determine travel times<br />
continue with:<br />
or<br />
RUN 3<br />
display travel times<br />
flashes<br />
alternating<br />
if setting of travel<br />
times is desired<br />
set restrictor(s) to<br />
change the travel<br />
times<br />
no<br />
within<br />
5s?<br />
yes<br />
flashes<br />
alternating<br />
display of travel<br />
times in s<br />
within<br />
5s?<br />
yes<br />
actuator comes to standstill<br />
after<br />
1 minute<br />
display of leakage<br />
in % / min<br />
no<br />
if leakage test of<br />
actuator is desired<br />
continue with:<br />
RUN 4<br />
determine minimum<br />
positioning increments<br />
RUN 5<br />
optimizing of transient behavior and<br />
determining of prediction horizon<br />
or<br />
continue with:<br />
display of stroke in mm<br />
or angle of rotation in degrees,<br />
is also the identification for<br />
complete initialization<br />
configure<br />
<strong>manual</strong> intervention<br />
Figure 3-36 Automatic initialization, part 3<br />
SIPART PS2 Manual<br />
A5E00074631-03<br />
77
Preparing for Operation<br />
3.7 Copying initialization data (positioner exchange)<br />
With this function you have the possibility of starting up a positioner<br />
without running the initialization routine. This allows for example a positioner<br />
to be changed on a running system in which automatic or <strong>manual</strong><br />
initialization cannot be performed without disturbing the process.<br />
NOTICE<br />
Initialization (automatic or <strong>manual</strong>) should be performed as soon as<br />
possible afterwards because only then can the positioner be optimally<br />
adapted to the mechanical and <strong>dyna</strong>mic properties of the actuator.<br />
Data are transmitted from the positioner to be replaced to the<br />
replacement instrument via the HART®- communication interface.<br />
The following steps must be performed to exchange a positioner:<br />
1. Read in and save instrument parameters and initialization data<br />
(determined in initialization) of the instrument to be replaced with<br />
PDM (Process Device Manager). This step is unnecessary if the<br />
instrument has been parameterized with PDM and the data have<br />
already been stored.<br />
2. Fix the actuator in its momentary position (mechanical or<br />
pneumatic).<br />
3. Read and note the current position actual value of the positioner to<br />
be changed. If the electronics are defective, determine the current<br />
position by measuring on the actuator or valve.<br />
4. Disassemble the positioner. Mount the lever arm of the positioner<br />
on the replacement instrument. Mount the replacement instrument<br />
on the fitting. Move the transmission ratio selector to the same<br />
position as the defective instrument. Copy the instrument data and<br />
initialization data from the PDM or handheld.<br />
5. If the displayed actual value does not match the noted value of the<br />
defective positioner, set the correct value with the slip clutch.<br />
6. The positioner is now ready to operate.<br />
The accuracy and <strong>dyna</strong>mic behavior may be restricted in relation<br />
to correct initialization. The position of the hard stops and the related<br />
maintenance data may show deviations in particular. Therefore<br />
initialization must be performed at the earliest opportunity.<br />
78<br />
SIPART PS2 Manual<br />
A5E00074631-03
Operation<br />
Operation<br />
4<br />
The following chapter describes the operation of the positioner.<br />
4.1 Display<br />
The LC display has two lines whereby the lines have different<br />
segmentation. The elements of the top line consist of 7, those of the<br />
bottom line of 14 segments. The contents of the display depend on the<br />
selected operating mode (see chapter 4.3, page 82)<br />
. NOTE<br />
If the positioner is operated in ranges with temperatures below --10 °C<br />
the liquid crystal display becomes sluggish and the display refresh rate<br />
is reduced considerably.<br />
Figure 4-1 shows you the various display options. The meaning of further<br />
display capabilities is detailed in chapter 4.6 page 106.<br />
4.2 Input keys<br />
The positioner is operated by three keys (figure 4-2) the function of<br />
which depends on the selected operating mode. In the explosion proof<br />
version of the positioner the input keys are underneath a key cover<br />
which can be lifted up after loosening the cover screw.<br />
. NOTE<br />
The input keys of the explosion proof version must be covered to<br />
prevent liquid getting in. The IP65/NEMA4x degree of protection is not<br />
guaranteed when the housing is open or the key cover is open.<br />
The housing cover must be removed to operate the keys in the normal<br />
and intrinsically safe versions of the positioners.<br />
SIPART PS2 Manual<br />
A5E00074631-03<br />
79
Operation<br />
Figure 4-1<br />
Meaning of the various display options<br />
. NOTE<br />
The degree of protection IP 65/NEMA4x is not guaranteed as long as<br />
the positioner is open.<br />
80<br />
SIPART PS2 Manual<br />
A5E00074631-03
Operation<br />
1<br />
2 3 4<br />
1 Display<br />
2 Operation mode key<br />
3 Decrement key<br />
4 Increment key<br />
Figure 4-2<br />
Display and input keys of the positioner<br />
Explanations of the input keys<br />
S The operation mode key (<strong>manual</strong> key) serves to switch over the<br />
operating mode and pass on parameters.<br />
. NOTE<br />
By pressing and holding the operation mode key and additionally<br />
pressing the decrement key, you can select the parameters in reverse<br />
order.<br />
S The decrement key serves to select parameter values in<br />
configuration and to move the actuator in <strong>manual</strong> operation.<br />
S The increment key serves to select parameter values in<br />
configuration and to move the actuator in <strong>manual</strong> operation.<br />
Firmware version<br />
The current firmware state is displayed when you exit the configuration<br />
menu.<br />
Figure 4-3<br />
Firmware version, example: C4<br />
SIPART PS2 Manual<br />
A5E00074631-03<br />
81
Operation<br />
4.3 Operating modes<br />
The positioner can be operated in five operating modes.<br />
1. P-<strong>manual</strong> mode (ex--factory state)<br />
2. Configuration and initialization<br />
3. Manual mode (MAN)<br />
4. Automatic (AUT)<br />
5. Diagnostic display<br />
Figure 4-4 gives you an over<strong>view</strong> of the possible operating modes and<br />
the change between them.<br />
Figure 4-4<br />
Change between the operating modes<br />
82<br />
SIPART PS2 Manual<br />
A5E00074631-03
Operation<br />
P-<strong>manual</strong> mode<br />
(ex--factory state)<br />
The display of the positioner shows you the current potentiometer<br />
setting in the top line and ”NOINIT” flashes in the second line. You can<br />
move the actuator with the decrement and increment key . In order<br />
to adapt the positioner to your actuator, you have to change to the<br />
Configuration menu. See also chapter 3.6, page 63 “Commissioning”.<br />
Output of alarms and position feedback is possible after successful initialization.<br />
Configuration and<br />
initialization<br />
To go to the Configuration menu, press the operation mode key for<br />
at least 5 seconds. In the Configuration menu you can adapt the<br />
positioner individually to your actuator and start initialization. Only a few<br />
parameters need to be set in the positioner prior to initialization. The<br />
others are defaulted so that they do not normally need to be adjusted.<br />
You can block the Configuration menu against manipulation by an<br />
appropriately parameterized and activated digital input. Which<br />
parameters you need to set and all other parameters are explained in<br />
chapter 4.4, page 84 Parameters.<br />
The configuration mode can be reported by outputting a<br />
parameterizable fault message, a position feedback or output of limit<br />
values A1 and A2 is not possible.<br />
. NOTE<br />
If the electric power supply fails during configuration, the positioner<br />
switches back to the first parameter after recovering the power supply,<br />
values which have already been parameterized are retained. Without a<br />
power failure you re--enter the configuration menu at the point you<br />
exited it when you call the Configuration menu again.<br />
at the same time<br />
at the same time<br />
to<br />
at the same time<br />
at the same time<br />
Figure 4-5<br />
Over<strong>view</strong>: Configuration<br />
SIPART PS2 Manual<br />
A5E00074631-03<br />
83
Operation<br />
Manual 4-1 mode In this operating mode you can move the actuator with the decrement<br />
(MAN)<br />
( ) and increment keys ( ) and the current position is held<br />
regardless of the setpoint current and any leakages.<br />
. NOTE<br />
You can move the actuator quickly by pressing the other direction key<br />
additionally whilst keeping the direction key selected first pressed.<br />
The <strong>manual</strong> mode can be reported by outputting a parameterizable<br />
fault message, a position feedback or output of limit values A1 and A2<br />
is only possible in automatic mode.<br />
. NOTE<br />
The positioner switches over to automatic mode automatically after an<br />
electrical power failure.<br />
Automatic (AUT)<br />
The automatic mode is the normal mode. In this mode the positioner<br />
compares the setpoint current with the current position and moves the<br />
actuator until the <strong>control</strong> deviation reaches the parameterizable dead<br />
zone. Error messages are output if this is not possible for various<br />
reasons.<br />
Diagnostic display<br />
In this operating mode you can have the current operating data (such<br />
as number of strokes, number of changes in direction, number of faults<br />
messages, etc.) displayed (see table 4-1, page 99).<br />
From the automatic or <strong>manual</strong> mode you go to the diagnostic display<br />
by simultaneously pressing all three keys for at least two seconds.<br />
See chapter 4.5, page 98 for further information.<br />
. NOTE<br />
The respective operating mode (MAN or AUT) of the positioner is retained<br />
when you switch to the diagnostic display, i.e. in automatic operation<br />
the specified setpoint is still used for <strong>control</strong>ling and in <strong>manual</strong><br />
operation the position last reached is retained.<br />
4.4 Parameters<br />
All the parameters of the positioner are listed in this chapter. Figure 4-6<br />
shows an over<strong>view</strong> of the parameters.<br />
The parameter name is shown once in plain text and once as it appears<br />
in the display. The function of the parameter is described briefly<br />
in the ”Function” column. In addition, the possible parameter values,<br />
the physical unit and the factory setting of the parameters are shown.<br />
84<br />
SIPART PS2 Manual<br />
A5E00074631-03
Operation<br />
Figure 4-6<br />
Parameter table of the positioner<br />
SIPART PS2 Manual<br />
A5E00074631-03<br />
85
Operation<br />
The following configuration block diagram shows the effects of the parameters.<br />
Figure 4-7<br />
Configuration block diagram<br />
86<br />
SIPART PS2 Manual<br />
A5E00074631-03
Operation<br />
Normally adjustment of the first three following parameters is completely<br />
sufficient to enable a positioner to be operated by a drive. If you<br />
wish to become familiar with all details of the positioner, try out incrementally<br />
the effects of the remaining parameters by selective trials.<br />
. NOTE<br />
In particular if the positioner has previously been operated using a<br />
different actuator, it must always be reinitialized in order to restore the<br />
factory settings. Only in this way can the positioner matching process<br />
start from known conditions. The parameter ”51 PRST” is provided for<br />
this purpose.<br />
This is also recommended if multiple parameters have been changed<br />
in a single session, the effects cannot be assessed and unintended<br />
consequences may result.<br />
1.YFCT<br />
Positioning actuator type<br />
This is to match the positioner with the respective actuator and where<br />
necessary to the position sensor being used. The following adjustment<br />
capabilities are provided:<br />
S YFCT = turn<br />
This adjustment is necessary for the rotary actuator.<br />
If ”turn” is selected, the following parameter ”2. YAGL” is automatically<br />
set to 90_ and cannot be changed.<br />
S<br />
S<br />
S<br />
S<br />
S<br />
YFCT = WAY (Factory setting)<br />
This is necessary for a linear actuator. This allows the positioner to<br />
compensate for the non-linearity that arises due to the conversion of<br />
the linear movement of the linear actuator into the rotary movement<br />
of the feedback shaft. For this the positioner is factory set so that it<br />
shows between ”P 49.0 and P 51.0” when the arm on the feedback<br />
shaft is vertical to the linear actuator spindle.<br />
YFCT = LWAY<br />
This must be adjusted, if an external linear potentiometer is to be<br />
connected to a linear actuator.<br />
TIP: use this adjustment also for rotary actuators with reverse direction<br />
of <strong>control</strong> action.<br />
YFCT = ncSt<br />
Use this when an NCS is fitted to a rotary actuator.<br />
YFCT = --ncSt<br />
This must be set when an NCS is used with a rotary actuator with<br />
reverse direction of <strong>control</strong> action.<br />
YFCT = ncSL<br />
This must be set when an NCS is used with a linear actuator.<br />
SIPART PS2 Manual<br />
A5E00074631-03<br />
87
Operation<br />
. NOTE<br />
After ”LWAY, ncSt, --ncSt or ncSL” have been adjusted, both the<br />
following parameters ”2. YAGL” and ”3. YWAY” will not be displayed.<br />
2.YAGL<br />
Rated angle of rotation of the feedback shaft<br />
In rotary actuators, an angle of 90° is preset automatically by 1.YFCT =<br />
turn (see above). In linear actuators (1.YFCT = WAY) a value of 33° or<br />
90° can be selected depending on the stroke range:<br />
S<br />
33° for strokes ≤ 20 mm<br />
S 90° for strokes > 20 mm<br />
When using the lever up to 35 mm, both angles of rotation (33° and<br />
90°) are possible.<br />
The long lever (> 35 mm stroke) is only designed for an angle of<br />
rotation setting of 90°. It is not part of the mounting kit set 6DR4004-8V<br />
but must be ordered separately under order number 6DR4004-8L.<br />
. NOTE<br />
The setting of the transmission ratio selector on the positioner (see<br />
figure 2-1, page 16 and figure 2-2, page 17) must correspond to the<br />
angle value selected under “2.YAGL”.<br />
3.YWAY<br />
Lever arm transmission<br />
. NOTE<br />
The use of this parameter is optional. You only need to set this<br />
parameter if you want to have the way in mm displayed at the end of<br />
the initialization.<br />
Selection of the lever arm range: serves to display the real stroke after<br />
initialization.<br />
This parameter is only relevant for linear actuator. If the parameter<br />
value ”oFF” is selected here, the real stroke is not displayed after<br />
initialization.<br />
. NOTE<br />
The specification “YWAY” must match the mechanical lever arm transmission.<br />
The carrier must be set to the value of the actuator stroke, if<br />
this is not scaled to the next highest scaled value.<br />
88<br />
SIPART PS2 Manual<br />
A5E00074631-03
Operation<br />
4.INITA<br />
Automatic initialization (see chapter 3.6, page 63)<br />
By selecting “Strt” and pressing the increment key foratleast5<br />
seconds, automatic initialization is started. The initialization process is<br />
displayed by “RUN 1” to “RUN 5” (see figure 3-33, page 74 to figure<br />
3-36, page 77).<br />
5.INITM<br />
Manual initialization<br />
By selecting “Strt” and pressing the increment key foratleast5<br />
seconds, <strong>manual</strong> initialization is started. The <strong>manual</strong> initialization<br />
process is described in chapter 3.6.3, page 67 and chapter 3.6.6, page<br />
72.<br />
. NOTE<br />
If the positioner has already been initialized, for INITA and INITM it is<br />
possible to transfer it to its non-initialized state without changing the<br />
remaining parameters by pressing the decrement key for 5 s.<br />
6.SCUR<br />
Current range of the setpoint<br />
The selection of the current range depends on the connection type.<br />
”0mA” (0 to 20 mA) is only possible in three-/four--wire connections<br />
(see figure 3-22, page 57).<br />
7.SDIR<br />
Setpoint direction (see figure 4-8, page 90)<br />
The setting of the setpoint direction serves to reverse the direction of<br />
action of the setpoint. It is used mainly for the split range mode and in<br />
single--acting actuators with the safety position “up”.<br />
8.SPRA<br />
9.SPRE<br />
Split range start (see figure 4-8)<br />
and<br />
Split range end (see figure 4-8)<br />
The parameters “8.SPRA” and “9.SPRE” in connection with the<br />
parameter “7.SDIR” serve to restrict the active setpoint range. In this<br />
way split range tasks can be solved with the following characteristics.<br />
S rising / falling<br />
S falling / rising<br />
S falling / falling<br />
S rising / rising<br />
SIPART PS2 Manual<br />
A5E00074631-03<br />
89
Operation<br />
y=x<br />
100 %<br />
Positioner 1<br />
6.SDIR = FALL<br />
Total setting range<br />
Positioner 2<br />
6.SDIR = riSE<br />
0%<br />
100 %--SPRE 100 %--SPRA SPRA SPRE<br />
Positioner 1 Positioner 2<br />
Setting range 1 Setting range 2<br />
100 % J W<br />
[0 % to 100 %]<br />
Figure 4-8<br />
Example: Split range-operation with two positioners<br />
10.TSUP<br />
11.TSDO<br />
Setpoint ramp UP<br />
and<br />
Setpoint ramp DOWN<br />
The setpoint ramp is effective in automatic operation and limits the<br />
speed of alteration of the active setpoint. When switching over from<br />
<strong>manual</strong> operation to automatic the active setpoint is adjusted to the setpoint<br />
on the positioner with the setpoint ramp.<br />
This bumpless <strong>manual</strong>/automatic switchover avoids excessive pressure<br />
increases on long pipelines.<br />
In the position TSUP = Auto the slower of the two travel times determined<br />
during initialization is used for the setpoint ramp. TSDO is then<br />
ineffective.<br />
12.SFCT<br />
Setpoint function (see figure 4-9, page 91)<br />
Non--linear valve characteristics can be linearized with this function and<br />
any <strong>flo</strong>w characteristics simulated in linear valve characteristics.<br />
90<br />
SIPART PS2 Manual<br />
A5E00074631-03
Operation<br />
Six valve characteristics are stored in the positioner<br />
S linear (12.SFCT = Lin, factory setting)<br />
S equal percentage 1 : 25 (12.SFCT = 1:25)<br />
S equal percentage 1 : 33 (12.SFCT = 1:33)<br />
S equal percentage 1 : 50 (12.SFCT = 1:50)<br />
S inverse equal percentage 25 : 1 (12.SFCT = n1:25)<br />
S inverse equal percentage 33 : 1 (12.SFCT = n1:33)<br />
S inverse equal percentage 50 : 1 (12.SFCT = n1:50)<br />
S freely adjustable (12.SFCT = FrEE)<br />
13.SL0 to 33.SL20<br />
Setpoint turning points<br />
A <strong>flo</strong>w parameter can be assigned to the respective setpoint turning<br />
value at an interval of 5 %. These points lead to a polygon chain with<br />
20 straight lines which therefore represents a projection of the valve<br />
characteristic.<br />
Tight closing<br />
100%<br />
x<br />
Limit for<br />
tight closing<br />
Example:<br />
39 YVLS = UP<br />
41YCUP = 95.0<br />
90<br />
80<br />
12 SFCT=FrEE<br />
70<br />
60<br />
50<br />
Setpoint turning point<br />
Example:<br />
18 SL5 = 45.0<br />
Modulation duty<br />
12 SFCT=Lin<br />
40<br />
30<br />
Limit for<br />
tight closing<br />
Example:<br />
39 YCLS = DW<br />
40 YCDO = 12.5<br />
20<br />
12 SFCT=1--50<br />
10<br />
0<br />
w<br />
Tight closing<br />
SL 0<br />
0<br />
10 20 30 40 50 60 70 80 90 100 %<br />
1 2 3 4 5 6 7 8 9 10 11 12 13 14 15 16 17 18 19 20<br />
Figure 4-9<br />
Setpoint characteristic, manipulated variable standardization and tight closing function<br />
SIPART PS2 Manual<br />
A5E00074631-03<br />
91
Operation<br />
The setpoint vertex values can only be input at 12.SFCT=FrEE. You<br />
may only enter a strictly monotonous characteristic, and two consecutive<br />
vertex values must differ by at least 0.2 %.<br />
34.DEBA<br />
Dead zone of the <strong>control</strong>ler<br />
At dEbA = AUto the dead zone in automatic operation is adapted continuously<br />
to the requirements of the <strong>control</strong> circuit. The dead zone is<br />
gradually increased on detecting a <strong>control</strong> oscillation. The reverse<br />
adaptation takes place by a time criterion.<br />
In the other discrete settings the fixed value is used for the dead zone.<br />
35.YA<br />
36.YE<br />
Manipulated variable limiting start (see figure 4-9 and 4-10)<br />
and<br />
Manipulated variable limiting end (see figure 4-9 and 4-10)<br />
With the parameters “YA” and “YE” the mechanical actuating distance<br />
(from stop to stop) is limited to the set values. In this way the mechanical<br />
setting range of the actuator can be limited to the active <strong>flo</strong>w and<br />
the integral saturation of the commanding <strong>control</strong>ler avoided.<br />
. NOTE<br />
YE must always be set to greater than YA.<br />
37.YNRM<br />
Manipulated variable standardization (see figure 4-9 and 4-10)<br />
With limiting of the manipulated variable (by “35.YA” and “36.YE”) two<br />
different scalings are produced for the display and the position feedback<br />
via the current output (MPOS or FLOW).<br />
The MPOS scaling shows the mechanical position (0 to 100%) between<br />
the hard stops of the initialization. This is not affected by the parameters<br />
“35.YA” and “36.YE”. The parameters “35.YA” and “36.YE”<br />
are displayed in the MPOS-scale.<br />
The FLOW-scale is the standardization (0 to 100%) to the range between<br />
“35.YA” and “36.YE”. The setpoint w (0 to 100%) is always referred<br />
to this range. This gives (also by using valve characteristics) a<br />
quasi--<strong>flo</strong>w--proportional display and position feedback Iy.<br />
To calculate the <strong>control</strong> difference, the setpoint is also shown in the appropriate<br />
scale on the display.<br />
92<br />
SIPART PS2 Manual<br />
A5E00074631-03
Operation<br />
YNRM = MPOS or YNRM = FLOW<br />
Presetting: YA = 0% and YE = 100%<br />
4mA<br />
0%<br />
0mm<br />
YA = 0%<br />
20%<br />
16mm<br />
40%<br />
32mm<br />
50%<br />
7.2mA 10.4mA 13.6mA 16.8mA<br />
60%<br />
48mm<br />
80%<br />
64mm<br />
20mA<br />
100%<br />
80mm<br />
Input current<br />
(setpoint)<br />
X display<br />
W display<br />
Mechan. Stroke<br />
(actual value)<br />
YE = 100%<br />
Example:<br />
YNRM = MPOS with YA = 10 % and YE = 80 %<br />
4mA<br />
0%<br />
0mm<br />
20%<br />
16mm<br />
40%<br />
32mm<br />
50%<br />
7.2mA 10.4mA 13.6mA 16.8mA<br />
YA = 10%<br />
60%<br />
48mm<br />
80%<br />
64mm<br />
YE = 80%<br />
20mA<br />
100%<br />
80mm<br />
Input current<br />
(setpoint)<br />
X display<br />
W display<br />
Mechan. Stroke<br />
(actual value)<br />
Example:<br />
YNRM = FLOW with YA = 10 % and YE = 80 %<br />
4mA<br />
0mm<br />
0%<br />
20%<br />
16mm<br />
YA = 10%<br />
40%<br />
32mm<br />
50%<br />
7.2mA 10.4mA 13.6mA 16.8mA<br />
60%<br />
48mm<br />
80%<br />
100%<br />
64mm<br />
YE = 80%<br />
20mA<br />
80mm<br />
Input current<br />
(setpoint)<br />
X display<br />
W display<br />
Mechan. Stroke<br />
(actual value)<br />
Figure 4-10<br />
Dependence on the stroke of standardization and on YA and YE in the example of an 80 mm<br />
linear actuator<br />
38.YDIR<br />
Manipulated variable direction of action<br />
The direction of action (rising or falling) of the display and the position<br />
feedback (Iy) can be set with this.<br />
39.YCLS<br />
Tight closing with manipulated variable (see figure 4-9, page 91)<br />
With this function the valve can be driven to the seat with the maximum<br />
actuating force of the actuator (continuous contact of the piezo--<br />
<strong>valves</strong>). The tight closing function can be activated on one side or for<br />
both limit positions. YCLS becomes active when the setpoint is below<br />
the value set with parameter “YCDO” or above that set with parameter<br />
“YCUP”.<br />
SIPART PS2 Manual<br />
A5E00074631-03<br />
93
Operation<br />
40.YCDO<br />
41.YCUP<br />
Value for tight closing, bottom<br />
and<br />
Value for tight closing, top<br />
. NOTE<br />
YCDO must always be set to less than YCUP.<br />
The tight closing function has a fixed hysteresis of 1 %.<br />
42.BIN1<br />
43.BIN2<br />
Function digital input 1 (see figure 4-6, page 85)<br />
and<br />
Function digital input 2 (see figure 4-6)<br />
The parameters “BIN1” and “BIN2” can be set individually depending<br />
on the purpose. The direction of action can be adapted to an NCC or<br />
an NOC.<br />
S BIN1 or BIN2 = on or --on<br />
Digital messages of the periphery (e.g. pressure or temperature<br />
switches) can be read out via the HART interface or lead to responding<br />
of the fault message output by OR linking with other messages.<br />
S BIN1 = bLoc1<br />
The Configuration operating mode is locked to prevent it being adjusted<br />
(e.g. by a wire jumper between terminals 9 and 10).<br />
S BIN1 = bLoc2<br />
If digital input 1 has been activated, <strong>manual</strong> operation is also locked<br />
in addition to the Configuration operating mode.<br />
S BIN1 or BIN2 = uP or doWn (contact closes) or --uP or --doWn (contact<br />
opens).<br />
The actuator drives the linear actuator to the upper or lower stop<br />
when the digital input is activated with continuous contact.<br />
S BIN1 or BIN2 (contact closes) = StoP or --StoP (contact opens).<br />
With activated digital input the piezo--<strong>valves</strong> are blocked and the<br />
actuator remains in the last position. Leakage messages can then<br />
be executed without initialization function.<br />
S BIN1 or BIN2 = oFF (factory setting)<br />
no function<br />
special function of DI1: If the digital input 1 is activated in P <strong>manual</strong><br />
operation by a jumper between terminals 9 and 10, , when the operating<br />
mode key is pressed the firmware version will be displayed.<br />
line of the display.<br />
If one of the above named functions is selected with the parameters<br />
“BIN1” and “BIN2” simultaneously, then “Blocking” has priority over<br />
“Up” and “Up” priority over “Down”.<br />
94<br />
SIPART PS2 Manual<br />
A5E00074631-03
Operation<br />
44.AFCT<br />
Alarm function<br />
The actuator can report the exceeding (max.) or dropping below (min)<br />
of a specified stroke or angle of rotation. The response of the alarms<br />
(limit contacts) is related to the MPOS-scaling (see figure 4-10, page<br />
93). The alarms are reported by the alarm module (order no.<br />
6DR4004-6A or -8A). In addition the alarms can be read out through<br />
the HART interface (optional).<br />
The direction of action of the digital outputs can be adapted from high<br />
active to low active sequence systems.<br />
Limit<br />
A2<br />
A1<br />
way<br />
A1 = 48<br />
A2 = 52<br />
Travel = 45<br />
Travel = 50<br />
Travel = 55<br />
Alarm module<br />
A1<br />
A2<br />
AFCT = MIN / MAX<br />
Activated<br />
Activated<br />
MIN<br />
MIN<br />
MAX<br />
--MIN<br />
MAX<br />
MIN<br />
MAX<br />
--MAX<br />
A1 = 48<br />
A2 = 52<br />
Travel = 45<br />
AFCT = --MIN / --MAX<br />
Activated<br />
Travel = 50 Activated Activated<br />
Travel = 55 Activated<br />
A1 = 52<br />
A2 = 48<br />
Travel = 45<br />
AFCT = MIN / MAX<br />
Activated<br />
Travel = 50 Activated Activated<br />
Travel = 55<br />
Activated<br />
--MIN<br />
--MAX<br />
--MIN<br />
--MAX<br />
A1 = 52<br />
A2 = 48<br />
Travel = 45<br />
Travel = 50<br />
Travel = 55<br />
AFCT = --MIN / --MAX<br />
Activated<br />
Activated<br />
45.A1<br />
46.A2<br />
47. FCT<br />
Response threshold alarm 1<br />
and<br />
Response threshold alarm 2<br />
The alarm thresholds are related to the mechanical path (MPOS-scale).<br />
Function of the fault message output<br />
The fault message output serves as a group message for following<br />
faults:<br />
S Control error (e.g. by actuator fault, valve fault, compressed air failure)<br />
with the parameters “48. TIM” and “49. LIM”<br />
S Positioner not in automatic mode<br />
S Digital input activated (see parameter “42.BIN1” and “43.BIN2”)<br />
S Exceeding of a limit value (e.g. way integral or valve seat, see parameter50to54)<br />
It also responds at:<br />
S Power failure<br />
S Processor fault<br />
The direction of action of the digital outputs can be adapted from high<br />
active to low active sequence systems.<br />
SIPART PS2 Manual<br />
A5E00074631-03<br />
95
Operation<br />
48. TIM<br />
49. LIM<br />
50. STRK<br />
51. DCHG<br />
52. ZERO<br />
Monitoring time for setting the fault messages<br />
The set value (s) serves as a specification for the time within which the<br />
positioner must have reached the <strong>control</strong>led state. The corresponding<br />
response threshold is specified with “49. LIM”.<br />
The fault message output is set on exceeding the set time.<br />
Response threshold of the fault message<br />
Here a value (%) can be set for the permissible variable of <strong>control</strong> error<br />
for releasing the fault message.<br />
If the parameters 48 and 49 are both set to ”Auto” (factory setting), the<br />
fault message is set if the short step zone is not reached within a<br />
certain time. This time is 5 times the initialization travel time within 5 to<br />
95% of the travel and 10 times this time outside 10 to 90% of the travel.<br />
Limit value for monitoring the way integral<br />
A limit value for the way integral can be set here. If the way integral<br />
exceeds the limit value, the fault message output (optional) is activated.<br />
This function enables a preventive maintenance of the fitting, see also<br />
chapter 4.5 “Diagnostics”, page 98.<br />
This monitoring function can be deactivated with the OFF setting<br />
(factory setting).<br />
Limit value for monitoring the changes of direction<br />
A limit value for the direction change counter can be set here. If this<br />
counter exceeds the limit value, the fault message output is activated.<br />
This function enables a preventive maintenance of the fitting, see also<br />
chapter 4.5 “Diagnostics”, page 98.<br />
This monitoring function can be deactivated with the OFF setting<br />
(factory setting).<br />
Tolerance value for monitoring the bottom hard stop<br />
With this value a limit value (in percent related to the total mechanical<br />
distance) can be preset for the monitoring of the bottom hard stop. If<br />
this tolerance value is exceeded or dropped below of, the fault<br />
message output (optional) is activated.<br />
This function detects when the bottom stop has changed by more then<br />
the specified tolerance related to its initialization value. Monitoring<br />
takes place when the valve is in tight closing bottom. Activation of the<br />
tight closing bottom function (parameter “39.YCLS”) is therefore a<br />
prerequisite.<br />
The fault message remains activated until either a subsequent<br />
monitoring remains within the tolerance or a new initialization is<br />
performed.<br />
This monitoring function can be deactivated with the OFF setting<br />
(factory setting). See also chapter 4.5 “Diagnostics”, page 98.<br />
96<br />
SIPART PS2 Manual<br />
A5E00074631-03
Operation<br />
53. OPEN<br />
Tolerance value for monitoring the top hard stop<br />
With this value a limit value (in percent related to the total mechanical<br />
distance) can be preset for the monitoring of the top hard stop. If this<br />
tolerance value is exceeded or dropped below of, the fault message<br />
output (optional) is activated.<br />
This function detects when the top stop has changed by more than the<br />
specified tolerance related to its initialization value. Monitoring takes<br />
place when the valve is in tight closing top. Activation of the tight<br />
closing top function (parameter “39.YCLS”) is therefore a prerequisite.<br />
The fault message remains activated until either a subsequent<br />
monitoring remains within the tolerance or a new initialization is<br />
performed.<br />
This monitoring function can be deactivated with the OFF setting<br />
(factory setting).<br />
. NOTE<br />
But the monitors of the bottom and top hard stop do not only react to<br />
valve errors. Adjustment of the position feedback is also detected as<br />
an error if the tolerance values are exceeded as a result.<br />
54. DEBA<br />
Limit value for monitoring the dead zone adaptation<br />
The automatic adaptation of the dead zone can be monitored with this<br />
value (%). If the dead zone exceeds the set value, the fault message<br />
output (optional) is activated.<br />
Prerequisite for this function is the setting of the parameter“34.DEBA” =<br />
Auto. This monitoring function can be deactivated with the OFF setting<br />
(factory setting).<br />
55.PRST<br />
Preset<br />
Establishing the factory setting and resetting the initialization.<br />
. NOTE<br />
The positioner must be re--initialized after ”Preset”. All previously determined<br />
maintenance parameters are cleared.<br />
SIPART PS2 Manual<br />
A5E00074631-03<br />
97
Operation<br />
4.5 Diagnosis<br />
4.5.1 Diagnostic display<br />
No.<br />
Abbreviation<br />
Meaning<br />
You go to the diagnostic display from automatic or <strong>manual</strong> operation by<br />
simultaneously pressing all three keys for at least two seconds.<br />
The following table shows an over<strong>view</strong> of the displayable values.<br />
The diagnostic display has a similar structure to in the ”Configuration”<br />
operating mode. the top line shows the value of the diagnostic variable,<br />
the bottom line the number and abbreviation of the displayed variable.<br />
The respective next diagnostic value can be selected with the operation<br />
mode key . By pressing and holding the operation mode key and<br />
additionally pressing the decrement key you can select the diagnostic<br />
values in reverse order.<br />
Certain values can be set to zero by pressing the increment key for<br />
at least 5 seconds. This is noted in the last column in the table.<br />
Some diagnostic values may be greater than 99999. In this case the<br />
display switches to exponential display. Example: the value 1234567 is<br />
displayed as 1.23E6.<br />
Displayable<br />
values<br />
1 STRKS Number of strokes 0to4.29E9 -- x<br />
2 CHDIR Changes of direction 0to4.29E9 -- x<br />
3 CNT Fault counter 0to4.29E9 -- x<br />
4 A1CNT Alarm counter 1 0to4.29E9 -- x<br />
5 A2CNT Alarm counter 2 0to4.29E9 -- x<br />
6 HOURS Operating hours 0to4.29E9 Hours<br />
7 WAY Determined travel 0to130 mm or _<br />
8 TUP Travel time up 0 to 1000 s<br />
9 TDOWN Travel time down 0 to 1000 s<br />
10 LEAK Leakage 0.0 to 100.0 %<br />
11 P0 Potentiometer value lower stop (0 %) 0.0 to 100.0 %<br />
12 P100 Potentiometer value upper stop (100 %) 0.0 to 100.0 %<br />
13 IMPUP Impulse length up 2to100 ms<br />
14 IMPDN Impulse length down 2to100 ms<br />
15 DBUP Dead Band Up 0.1 to 100.0 %<br />
16 DBDN Dead Band Down 0.1 to 100.0 %<br />
17 SSUP Short step zone up 0.1 to 100.0 %<br />
18 SSDN Short step zone down 0.1 to 100.0 %<br />
19 TEMP Current temperature --40 to 85 _C<br />
20 TMIN Minimum temperature (”drag pointer”) --40 to 85 _C<br />
21 TMAX Maximum temperature (”drag pointer”) --40 to 85 _C<br />
22 T1 Number of operating hours in temperature range 1 0to4.29E9 Hours<br />
23 T2 Number of operating hours in temperature range 2 0to4.29E9 Hours<br />
24 T3 Number of operating hours in temperature range 3 0to4.29E9 Hours<br />
25 T4 Number of operating hours in temperature range 4 0to4.29E9 Hours<br />
26 T5 Number of operating hours in temperature range 5 0to4.29E9 Hours<br />
27 T6 Number of operating hours in temperature range 6 0to4.29E9 Hours<br />
28 T7 Number of operating hours in temperature range 7 0to4.29E9 Hours<br />
29 T8 Number of operating hours in temperature range 8 0to4.29E9 Hours<br />
30 T9 Number of operating hours in temperature range 9 0to4.29E9 Hours<br />
Unit<br />
Rest<br />
poss.<br />
98<br />
SIPART PS2 Manual<br />
A5E00074631-03
Operation<br />
No.<br />
Abbreviation<br />
Meaning<br />
Displayable<br />
values<br />
Unit<br />
Rest<br />
poss.<br />
31 VENT1 Number of cycles pre--<strong>control</strong>valve 1 0to4.29E9 --<br />
32 VENT2 Number of cycles pre--<strong>control</strong>valve 2 0to4.29E9 --<br />
33 STORE Store current values as ”last maintenance”<br />
-- --<br />
(press increment key for 5 s)<br />
34 PRUP Prediction up 1to40 --<br />
35 PRDN Prediction down 1to40 --<br />
36 WT00 Number of operating hours in distance class WT00 0to4.29E9 Hours x<br />
37 WT05 Number of operating hours in distance class WT05 0to4.29E9 Hours x<br />
38 WT10 Number of operating hours in distance class WT10 0to4.29E9 Hours x<br />
39 WT30 Number of operating hours in distance class WT30 0to4.29E9 Hours x<br />
40 WT50 Number of operating hours in distance class WT50 0to4.29E9 Hours x<br />
41 WT70 Number of operating hours in distance class WT70 0to4.29E9 Hours x<br />
42 WT90 Number of operating hours in distance class WT90 0to4.29E9 Hours x<br />
43 WT95 Number of operating hours in distance class WT95 0to4.29E9 Hours x<br />
44 mA Current setpoint 0.0 to 20.0 mA<br />
Table 4-1<br />
Over<strong>view</strong> diagnostic values<br />
4.5.2 Meaning of the diagnostic values<br />
1 STRKS<br />
Number of strokes<br />
The actuator movements during operation are totaled and can be read<br />
here as number of strokes. Unit: 100% stokes The value is written every<br />
15 minutes in a non--volatile memory. It can be reset to zero with<br />
the increment key .<br />
2 CHDIR<br />
Number of direction changes<br />
Every change in direction leaving the dead zone is noted in the<br />
<strong>control</strong>ler and added to the number of changes of direction.<br />
The value is written every 15 minutes in a non--volatile memory. It can<br />
be reset to zero with the increment key .<br />
3 CNT<br />
Fault counter<br />
Every fault is noted in the <strong>control</strong>ler and added to the number of fault<br />
messages. The counter can be reset to zero with the increment key .<br />
SIPART PS2 Manual<br />
A5E00074631-03<br />
99
Operation<br />
4 A1CNT<br />
5 A2CNT<br />
Alarm counter 1<br />
and<br />
Alarm counter 2<br />
Responses of alarm 1 and alarm 2 are counted with these two<br />
counters. The prerequisite is the activation of the alarms with the<br />
parameter “44.AFCT”. The counters can be reset to zero with the<br />
increment key .<br />
6 HOURS<br />
Operating hours<br />
The operating hours counter is updated every hour as soon as the<br />
positioner has been supplied with electrical power.<br />
7WAY<br />
Determined actuating way<br />
This value indicates the actuating way determined during initialization<br />
according to the display at the end of an initialization. Prerequisite in<br />
linear actuator: Specification of the lever arm with the parameter<br />
“3.YWAY”.<br />
8TUP<br />
9TDOWN<br />
Travel time up<br />
and<br />
travel time down<br />
These values show the travel times which have been determined during<br />
initialization. The unit is seconds.<br />
10 LEAK<br />
Leakage<br />
If a leakage message has been output during initialization, the value of<br />
the leakage can be read here in %/min.<br />
11 P0<br />
12 P100<br />
Potentiometer value bottom stop<br />
and<br />
Potentiometer value top stop<br />
These two values indicate the measured values of displacement measurement<br />
(potentiometer) at the bottom and top hard stops as determined<br />
in automatic initialization. In <strong>manual</strong> initialization the values of<br />
the <strong>manual</strong>ly reached limit positions are indicated here.<br />
13 IMPUP<br />
14 IMPDN<br />
Impulse length up<br />
and<br />
Impulse length down<br />
During initialization the smallest impulse lengths are determined with<br />
which a movement of the actuator can be achieved. They are determined<br />
and displayed here for the “Up”-direction and the “Down”-direction.<br />
These two parameter can be used for special applications (see chapter<br />
4.7 page 110).<br />
100<br />
SIPART PS2 Manual<br />
A5E00074631-03
Operation<br />
15 DBUP<br />
16 DBDN<br />
Dead zone up<br />
and<br />
Dead zone down<br />
Here the dead zone of the <strong>control</strong>ler is displayed in “Up”-direction or in<br />
“Down”-direction. The values correspond either to the <strong>manual</strong>ly set<br />
value of the parameter“34.DEBA” or the value adapted automatically by<br />
the instrument when “DEBA” has been set to ”Auto”.<br />
17 SSUP<br />
18 SSDN<br />
Short step zone up<br />
and<br />
Short step zone down<br />
The short step zone is the range of the <strong>control</strong>ler in which pulse--<br />
shaped <strong>control</strong> signals are output. The impulse length here is proportional<br />
to the <strong>control</strong> error. If the <strong>control</strong> error is outside the short step<br />
zone, the <strong>valves</strong> are <strong>control</strong>led in continuous contact.<br />
These two parameter can be tuned for special applications (see chapter<br />
4.7 page 110).<br />
19 TEMP<br />
Current temperature<br />
Current temperature in the positioner housing The sensor is on the<br />
electronics board.<br />
The temperature display can be switched between _C and _F bypressing<br />
the decrement key.<br />
20 TMIN<br />
21 TMAX<br />
Minimum temperature (drag pointer)<br />
and<br />
Maximum temperature (drag pointer)<br />
The minimum and maximum temperature inside the housing is determined<br />
and stored continuously in a kind of drag pointer and can only be<br />
reset in the factory.<br />
22 T1 to<br />
30 T9<br />
Number of operating hours in temperature range T1 to T9<br />
Statistics how long operation takes place in which temperature ranges<br />
is kept in the instrument. To do this, the measured temperature over<br />
one hour respectively is averaged and incremented in the counter<br />
which is assigned to the corresponding temperature range every hour.<br />
This enables you to draw conclusions about the past operating conditions<br />
and thus the whole fitting.<br />
The temperature ranges are divided up as follows:<br />
Temperature<br />
range [_C]<br />
[_F]<br />
T1 T2 T3 T4 T5 T6 T7 T8 T9<br />
≥--30 ≥--15 ≥0 ≥15 ≥30 ≥45 ≥60 ≥75<br />
≥--30
Operation<br />
31 VENT1<br />
32 VENT2<br />
Number of cycles pre--<strong>control</strong> valve 1<br />
and<br />
Number of cycles pre--<strong>control</strong> valve 2<br />
These two counters add up the <strong>control</strong> processes of the pre--<strong>control</strong><br />
<strong>valves</strong>.<br />
33 STORE<br />
Store maintenance data<br />
A store function is triggered by pressing the increment key for at<br />
least 5 seconds. Here the diagnostic data 7 to 17 are stored in a non--<br />
volatile memory as ”Data of the last maintenance”. These diagnostic<br />
data are selected values, the changes of which can provide information<br />
on the mechanical wear of the valve.<br />
Normally this function is operated via PDF, menu item Instrument!Store<br />
maintenance info. It is possible to compare the data of the<br />
last maintenance with the current data via PDM.<br />
34 PRUP<br />
35 PRDN<br />
Prediction up<br />
Prediction down<br />
see chapter 4.7 page 110).<br />
36 WT00 to<br />
43 WT95<br />
Setting<br />
range<br />
section<br />
Number of operating hours in distance class WT00 to WT95<br />
If the positioner is in automatic mode, statistics are constantly kept for<br />
how long a valve or a flap has been operated in which section of the<br />
setting range. To do this, the total setting range (0 to 100%) is divided<br />
into 8 sections (distance classes). The positioner continuously registers<br />
the current position and increments the operating hours meter<br />
assigned to the corresponding section (distance class) every hour. This<br />
allows returns to previous operating conditions and is particularly used<br />
to evaluate the <strong>control</strong> properties of the <strong>control</strong> circuit or the entire fitting.<br />
The setting range is divided as follows:<br />
WT00 WT05 WT10 WT30 WT50 WT70 WT90 WT95<br />
≥5 % ≥10 % ≥30 % ≥50 % ≥30 % ≥90 % ≥95 %<br />
Operation<br />
44 MA<br />
Setpoint<br />
You can display the current setpoint in mA here.<br />
. NOTE<br />
All diagnostic values are updated every 15 minutes to a non--volatile<br />
memory, so that in the event of a loss of electrical power only the<br />
events of at most the last 15 minutes will be lost.<br />
4.5.3 Online-Diagnosis<br />
Some important variables and parameters are monitored continuously<br />
during operation. In the “Configuration” operating mode you can configure<br />
this monitoring so that the fault message output is activated when a<br />
certain event such as exceeding a limit value occurs.<br />
Table 4-2, page 104 shows which events can activate the fault message<br />
output, how the parameters must be set for this event to be monitored,<br />
when the fault message disappears again and where the possible<br />
causes of the fault lie.<br />
In automatic and <strong>manual</strong> operation response of the fault message<br />
output on the display shows which is the fault message trigger. The two<br />
digits at the bottom left indicate the corresponding error code. If several<br />
triggers occur at the same time, these are displayed cyclically. The<br />
instrument status which also contains all fault messages can be called<br />
via HART with the command #48.<br />
SIPART PS2 Manual<br />
A5E00074631-03<br />
103
Operation<br />
Error Event<br />
code<br />
1 Remaining <strong>control</strong><br />
error<br />
2 Instrument not<br />
in automatic<br />
mode<br />
3 Digital input DI1<br />
or DI2 active<br />
4 Limit value<br />
Number of strokes<br />
exceeded<br />
5 Limit value<br />
change of direction<br />
exceeded<br />
6 Limit value bottom<br />
hard stop<br />
exceeded<br />
7 Limit value<br />
top hard stop<br />
exceeded<br />
8 Limit value<br />
dead zone<br />
adaptation exceeded<br />
Table 4-2<br />
Parameter<br />
setting<br />
always active<br />
47. FCT= nA<br />
or = nAB<br />
47. FCT= nAB<br />
and digital function<br />
BIN1 or BIN2 to<br />
”on”<br />
Fault message disappears<br />
when ...<br />
... the <strong>control</strong> error has<br />
disappeared again<br />
... the instrument is<br />
brought into automatic<br />
mode<br />
... the digital input is no<br />
longer activated<br />
50. STRK¸OFF ... the stroke counter is<br />
reset or the limit value<br />
increased<br />
51. DCHG¸OFF ... the change of direction<br />
counter is reset or the limit<br />
value increased<br />
52. ZERO¸OFF<br />
39.YCLS = do or<br />
up do<br />
53. OPEN¸OFF<br />
39 YCLS = up or<br />
up do<br />
54. DEBA¸OFF<br />
34.DEBA = Auto<br />
... the deviation of the stop<br />
disappears or the<br />
instrument is re--initialized<br />
... the deviation of the stop<br />
disappears or the<br />
instrument is re--initialized<br />
... the limit value is<br />
dropped below again<br />
Events which can activate the fault message output<br />
Possible causes<br />
Compressed air missing,<br />
actuator fault, valve fault<br />
(e.g. blockade).<br />
The instrument is configured<br />
or is in <strong>manual</strong> operation.<br />
The contact connected to<br />
the binary input has become<br />
active (e.g. stuffing box<br />
monitoring, excess<br />
pressure, temperature<br />
switch).<br />
The total distance traveled<br />
by the actuator exceeded<br />
the set limit value.<br />
The number of changes of<br />
direction exceeded the set<br />
limit value.<br />
Wear of the valve seat, deposits<br />
or foreign bodies in<br />
the valve seat, mechanical<br />
maladjustment, slip clutch<br />
maladjusted.<br />
Wear of the valve seat, deposits<br />
or foreign bodies in<br />
the valve seat, mechanical<br />
maladjustment, slip clutch<br />
maladjusted.<br />
Increased stuffing box<br />
friction, mechanical lots of<br />
the position feedback<br />
Explanations of column “Error codes”:<br />
1 Monitoring of <strong>control</strong> error<br />
In automatic operation the error between setpoint and actual value is<br />
monitored continuously. The fault message is activated with unchanged<br />
<strong>control</strong> error according to the setting of the parameters 48. TIM, monitoring<br />
time for setting the fault messages and 49 LIM, response threshold<br />
of the fault message. As soon as the <strong>control</strong> error drops back below<br />
the response threshold, the fault message is reset.<br />
2 Monitoring automatic operation<br />
A fault message is generated when the instrument is not in the automatic<br />
mode at the appropriate parameter setting “47. FCT”. In this way<br />
the <strong>control</strong> system can be warned for example when the instrument has<br />
been switched to <strong>manual</strong> operation or Configuration on site.<br />
104<br />
SIPART PS2 Manual<br />
A5E00074631-03
Operation<br />
3 Digital input DI1 or DI2 active<br />
A fault message is generated when the digital input is activated at the<br />
the corresponding setting of the parameter “47. FCT”, function of the<br />
fault message output and the parameter “42.BIN1”, function digital input<br />
1. This may be a switch for stuffing box monitoring, a temperature<br />
switch or a limit value switch for example.<br />
Digital input 2 (on the alarm module option) can be configured in the<br />
same way.<br />
4 Monitoring of number of strokes<br />
5 Monitoring of number of changes of direction<br />
The two values number of strokes and number of changes of direction<br />
are compared continuously with the limit values which are specified<br />
with the parameters “50. STRK” and “51. DCHG”. The fault message<br />
output responds when exceeded. Both functions can be deactivated<br />
with the parameter setting ”OFF”.<br />
6 Monitoring of the bottom hard stop (valve seat)<br />
7 Monitoring of the top hard stop<br />
Monitoring of the bottom hard stop is activated when the parameter<br />
“52. ZERO” has a value¸OFF. Errors of the valve seat can be detected<br />
with this function for example. Exceeding of the limit value may hint at<br />
deposits or foreign bodies in the valve seat. Exceeding the limit value<br />
may be caused by wear of the valve seat. Mechanical maladjustment of<br />
the position feedback may also trigger this error message.<br />
Monitoring takes place every time the valve is in tight closing position.<br />
The current position is compared with the one determined during initialization<br />
as a bottom end stop. Activation of the tight closing bottom function<br />
(parameter “39.YCLS”) is therefore a prerequisite.<br />
Example: 3% is set as a value. Normally the setting 0% is adopted<br />
when closed. If a value >3% or
Operation<br />
8 Monitoring of the dead zone adaptation<br />
If the dead zone increases unproportionally in operation in automatic<br />
adaptation of the dead zone (parameter DEBA = Auto) this points to an<br />
error in the system (e.g. a marked increase in stuffing box friction, play<br />
in the displacement detection, leakage). Therefore a limit value can be<br />
specified for this value (”54. DEBA”, limit value for dead zone<br />
monitoring) which activates the fault message output when it is<br />
exceeded.<br />
4.6 Meanings of other display texts<br />
Notes on the tables:<br />
nn<br />
stands for variable numerical values<br />
Fault symbol<br />
/ (slash): the texts to the left and right of the slash<br />
flash alternately<br />
Reports before initializing (first commissioning):<br />
Upper<br />
line<br />
Lower<br />
line<br />
Meaning/Cause<br />
Actions<br />
CPU<br />
START<br />
x<br />
x<br />
Report after connecting the electrical<br />
auxiliary power<br />
P nnn.n x Potentiometer voltage for non-initialized<br />
positioner (P <strong>manual</strong> mode) (Setting<br />
actual value in % of measurement<br />
range)<br />
P------ x Measurement range exceeded, potentiometer<br />
is in the inactive zone,<br />
transmission ratio selector or effective<br />
lever arm are not matched to the<br />
travel<br />
S· Wait<br />
NOINI x Positioner not initialized S Start initialization<br />
S Check using the ”+” and ”--” keys<br />
whether the overall travel can be traversed<br />
without ever ”P------” being displayed<br />
S Perform initialization<br />
S Set transmission ratio selector to 90<br />
degrees, in particular for rotary actuators<br />
S Match effective arm length for linear<br />
actuators to measurement range<br />
Messages during initialization:<br />
Upper<br />
line<br />
Lower<br />
line<br />
Meaning/Cause<br />
Actions<br />
P---- x See above See above<br />
RUN 1 x Initialization started, part 1 active S Wait<br />
(direction of <strong>control</strong> action being determined)<br />
RUN 2 x Initialization part 2 active<br />
(travel check and determination of<br />
the end stops)<br />
S Wait<br />
106<br />
SIPART PS2 Manual<br />
A5E00074631-03
Operation<br />
Upper<br />
line<br />
Lower<br />
line<br />
Meaning/Cause<br />
RUN 3 x Initialization part 3 active<br />
(determination and display of positioning<br />
times)<br />
RUN 4 x Initialization part 4 active (determination<br />
the minimum positioning increment<br />
length)<br />
RUN 5 x Initialization part 5 active (optimization<br />
of the behavior on transients)<br />
YEND1 x only during <strong>manual</strong> initialization<br />
first end position can be moved to<br />
YEND2<br />
only during <strong>manual</strong> initialization<br />
second end position can be moved<br />
to<br />
RANGE x only during <strong>manual</strong> initialization<br />
End position or measurement span<br />
are outwith the permitted measurement<br />
range<br />
ok<br />
RUN 1/<br />
ERROR<br />
only during <strong>manual</strong> initialization<br />
permitted measurement range for<br />
end positions reached<br />
x Fault in RUN 1<br />
no movement e.g. no compressed air<br />
d___U x Bar display of the zero point<br />
Zero point is outwith the tolerance<br />
range<br />
SEt x Slip clutch misaligned; ”P 50.0” no<br />
MIDDL<br />
x<br />
displayed when arm horizontal<br />
UP > x ”UP” -- tolerance range exceeded or<br />
inactive zone of potentiometer entered<br />
90_95 x Only applies to rotary drives: travel is<br />
not within range 90 to 95%<br />
Actions<br />
S<br />
S<br />
S<br />
S<br />
S<br />
S<br />
S<br />
S<br />
S<br />
S<br />
S<br />
S<br />
S<br />
S<br />
S<br />
S<br />
S<br />
S<br />
S<br />
S<br />
S<br />
S<br />
S<br />
S<br />
Wait<br />
Wait<br />
Wait until ”FINSH” is displayed (initialization<br />
completed successfully)<br />
Press ”operating mode” key briefly to<br />
acknowledge or longer to quit configuration<br />
mode<br />
Move to first end position using the<br />
”+”or”--”key<br />
Press ”operating mode” key to acknowledge<br />
Move to second end position using<br />
the ”+” or ”--” key<br />
Press ”operating mode” key to acknowledge<br />
Using ”+” and ”--” keys move to the<br />
other end position and press ”operating<br />
mode” key to acknowledge,<br />
or<br />
Adjust slip clutch until ”ok” isdisplayed<br />
and press ”operating mode”<br />
key to acknowledge<br />
or<br />
Interrupt initialization by pressing the<br />
”operating mode” key, switch to P<br />
<strong>manual</strong> mode and correct the travel<br />
and position sensing<br />
Press ”operating mode” key to acknowledge,<br />
the remaining steps<br />
(”RUN1” to”FINSH”) will run through<br />
automatically<br />
Ensure compressed air is sufficient<br />
Open any choke(s)<br />
Re-start initialization<br />
With slip clutch set to ”P 4.0”to”P<br />
9.9” (>0
Operation<br />
Upper<br />
line<br />
Lower<br />
line<br />
Meaning/Cause<br />
U--d> x Measurement span ”Up--Down” is insufficient<br />
U nn.n<br />
D-->U<br />
x<br />
x<br />
Actions<br />
S<br />
Display the positioning time ”Up” S Wait, or<br />
S<br />
S<br />
S<br />
Reduce effective arm length for linear<br />
actuators or set transmission ratio<br />
selector to 33 degrees<br />
Press ”operating mode” key briefly to<br />
acknowledge<br />
Re-start initialization<br />
To change the travel time interrupt<br />
initialization with the ”--” key,<br />
or<br />
S Activate the leakage test with the ”+”<br />
key<br />
d nn.n x Display the positioning time ”Down” S Wait, or<br />
U-->d<br />
x<br />
S To change the travel time interrupt<br />
initialization with the ”--” key,<br />
or<br />
S Activate the leakage test with the ”+”<br />
key<br />
NOZZL x Actuator stationary (initialization interrupted<br />
with the ”--” key during actuation<br />
S Travel time can be adjusted by varying<br />
the choke(s)<br />
speed display)<br />
S Use the ”--” key to repeat the deter-<br />
mination of the positioning speed<br />
S Continue using the ”+” key<br />
TESt x Leakage test active initialization interrupted<br />
S Wait 1 minute<br />
with the ”+” key during travel-<br />
LEAKG<br />
x<br />
speed display)<br />
S Continue with the ”+” key<br />
nn.n x Value and units of results of the leakage<br />
S Remove leakage if value is too high.<br />
_oMIN<br />
x<br />
test<br />
S Continue with the ”+” key<br />
nn.n x Initialization completed successfully, S Press ”operating mode” key briefly to<br />
FINSH<br />
x<br />
with display of the travel or positioning<br />
angle as appropriate<br />
guration<br />
acknowledge or longer to quit confi-<br />
mode<br />
Reports on leaving ”configuration” operating mode:<br />
Upper<br />
line<br />
Lower<br />
line<br />
Automatic<br />
Manual<br />
mode<br />
P <strong>manual</strong><br />
mode<br />
Meaning/Cause<br />
Actions<br />
Cn<br />
VER<br />
Error<br />
SLnn<br />
x<br />
x<br />
x<br />
x<br />
Software version S Wait<br />
Monoticity transgression of<br />
the free characteristic line<br />
at support point ”n”<br />
S<br />
Correct value<br />
108<br />
SIPART PS2 Manual<br />
A5E00074631-03
Operation<br />
Reports on leaving ”configuration” operating mode:<br />
CPU<br />
START<br />
HW /<br />
ERROR<br />
Upper<br />
line<br />
x<br />
Lower<br />
line<br />
Automatic<br />
Manual<br />
mode<br />
P <strong>manual</strong><br />
mode<br />
Meaning/Cause<br />
Actions<br />
Message after applying S Wait<br />
x<br />
auxiliary electrical power<br />
x Fault in the hardware S Exchange electronics<br />
NOINI x x Positioner not initialized S Start initialization<br />
nnn.n x x x Setting actual value [in %]<br />
for initialized positioners.<br />
Flashing decimal point indicates<br />
communication<br />
withaclass2master<br />
AUTnn x x Automatic mode (nn = setpoint)<br />
MANnn x Manual mode (nn = setpoint)<br />
oFL / 127.9 x x x Display range exceeded.<br />
Possible causes:<br />
S Slip clutch or<br />
S Transmission ratio selector<br />
switch changed<br />
or<br />
S Positioner installed without<br />
reinitialization,<br />
having previously been<br />
fitted to another drive<br />
EXSTP x x Actuator stopped by binary<br />
input<br />
EX UP x x Actuator moved by binary<br />
input to upper stop<br />
EXDWN x x Actuator moved by binary<br />
input to lower stop<br />
HTCNF x x x x HART configuration is running<br />
S<br />
S<br />
S<br />
S<br />
Press operating mode<br />
key to change to automatic<br />
mode<br />
Adjust slip clutch so that<br />
when moving the drive<br />
the actual value display<br />
remains within 0.0 to<br />
100.0 or<br />
Change transmission<br />
selector switch or<br />
Carry out factory setting<br />
(preset) and initialization<br />
SIPART PS2 Manual<br />
A5E00074631-03<br />
109
Operation<br />
4.7 Optimization of the <strong>control</strong> data<br />
The data automatically determined during initialization for <strong>control</strong> quality<br />
are optimized for short duration commands with small overshoots.<br />
In special cases (e.g. extremely small and specially quick actuators or<br />
when operating with boosters) it can however occur that these data<br />
need to be revised to achieve quick responses or heavy damping. The<br />
following six parameters are available for this purpose:<br />
13 Pulse length up This determines for any sense of actuation the smallest drive move-<br />
pulse length. The optimum value is dependent particularly on the<br />
14 Pulse length downment<br />
volume of the drive.Small values will lead to small actuation increments<br />
and frequent <strong>control</strong> drive activations. Note that if the value is too small<br />
no movement will result. If drive volumes are large, then it is better to<br />
use larger actuation increments. Note also that large actuation increments<br />
will still lead to large movements for small drives.<br />
17 Short step zone up<br />
18 Short step zone down<br />
The short step zone is the range in which the <strong>control</strong> variation between<br />
the fast step zone and the dead band. In this zone the drive is activated<br />
in pulses.<br />
If the value is small, even small changes of setpoint will evoke relatively<br />
large positioning speeds and can thus lead to overshoots. If the value<br />
is large, the overshoots will be reduced, particularly on large changes<br />
of setpoint but will lead to slow positioning speeds, particularly as the<br />
target setpoint is approached closely.<br />
34 Prediction up<br />
35 Prediction down<br />
These parameters operate on the damping factor and have the effect of<br />
adjusting the <strong>control</strong> <strong>dyna</strong>mics.<br />
If the value is small, responses will be quick but with overshoots. If the<br />
value is large, response will be slow but without overshoots.<br />
It is recommended that the firstly an automatic initialization is performed and only thereafter that<br />
the positioner parameters are matched to any special requirements.<br />
TIP: So as to have a fixed reference value, it is advantageous for special <strong>control</strong> optimization<br />
to set a fixed value for the dead zone (parameter DEBA) instead of ”Auto”.<br />
The above parameters are usually selected from the diagnostics menu and activated for<br />
general adjustment by pressing the increment or decrement key. Any adjustment to a<br />
parameter will be immediately effective. This means the effect of the new values on the <strong>control</strong><br />
results can be immediately tested.<br />
On leaving the diagnostic menu the activation of the parameter for adjustment will be deactivated<br />
again.<br />
110<br />
SIPART PS2 Manual<br />
A5E00074631-03
Care and Maintenance<br />
Service and Maintenance<br />
5<br />
The positioner is largely maintenance--free. The positioners are fitted<br />
with filters in the pneumatic connections as protection against coarse<br />
particles of dirt. If the pneumatic energy supply contains particles of<br />
dirt, the filters may clog and impair the function of the positioner. In this<br />
case the filters can be cleaned as follows.<br />
Positioner in metal housing and explosion proof version<br />
1. Switch off the pneumatic power supply and remove the pipes.<br />
2. Remove the metal filters carefully from the holes and clean (e.g.<br />
with compressed air).<br />
3. Insert the filters.<br />
4. Re-connect the pipes and supply pneumatic energy.<br />
Positioner in plastic housing<br />
Removal<br />
1. Switch off the pneumatic power supply and remove the pipes.<br />
2. Unscrew the cover<br />
3. Remove the three screws from the pneumatic connector strip.<br />
4. Remove the filters and O-rings behind the connector strip.<br />
5. Clean the filters (e.g. with compressed air).<br />
Installation<br />
6. First insert the filters in the recesses in the plastic housing and then<br />
place the O-rings on the filters.<br />
7. Align the pneumatic connector strip on the two lugs and screw tight<br />
with the three self--tapping screws.<br />
Important:<br />
Make sure that the same thread is used. To do this turn the screws<br />
counterclockwise until they snap into the thread audibly. Only then<br />
should you tighten the screws.<br />
SIPART PS2 Manual<br />
A5E00074631-03<br />
111
Care and Maintenance<br />
8. Replace the cover and screw it tight.<br />
9. Re--connect the pipes and supply pneumatic energy.<br />
!<br />
DANGER<br />
Electrostatic charging must be prevented in hazardous areas. These<br />
could be caused by example when cleaning the positioner in plastic<br />
housing with a dry cloth.<br />
112<br />
SIPART PS2 Manual<br />
A5E00074631-03
Technical Data<br />
Technical Data<br />
6<br />
General data for basic device 6DR5<br />
(see following pages)<br />
SIPART PS2 Manual<br />
A5E00074631-03<br />
113
Technical Data<br />
■ Technical data<br />
SIPART PS2<br />
SIPART PS2 EEx d<br />
General data<br />
Travel range (linear actuators)<br />
Angle or rotation (part-turn<br />
actuators)<br />
Installation<br />
• On linear actuators<br />
• On part-turn actuators<br />
3 to 130 mm ( 0.12 to 5.12 inch)<br />
(angle of feedback shaft 16 to<br />
90°)<br />
30 to 100°<br />
Using mounting kit 6DR4004-8V<br />
and additional lever arm<br />
6DR4004-8L if required on actuators<br />
according to IEC 534-6<br />
(NAMUR) with ledge, columns or<br />
plane surface<br />
Using mounting kit 6DR4004-8D<br />
on actuators with fixing platform<br />
according to VDI/VDE 3845 and<br />
DIN 3337:<br />
the mounting plate must be provided<br />
on the actuator side;<br />
shaft with nut and M6 female<br />
thread (see Fig. 5/16)<br />
Controller<br />
• Five-point switch<br />
Self-adjusting<br />
• Dead zone<br />
dEbA = Auto<br />
Self-adjusting or<br />
dEbA = 0.1 to 10%<br />
fixed setting<br />
• Controllable response time ≥ 1.5 s,<br />
reduced resolution with smaller<br />
positioning times<br />
A/D converter<br />
• Scanning time<br />
10 ms<br />
• Resolution ≤ 0.05%<br />
• Transmission error ≤ 0.2%<br />
• Temperature influence<br />
≤ 0.1%/10 K (≤ 0.1%/18 °F)<br />
Binary input BI1 (terminals 9/10;<br />
electrically connected to basic<br />
device)<br />
Degree of protection<br />
Mounting position<br />
CE marking<br />
EMC requirements<br />
Can only be used for <strong>flo</strong>ating contact;<br />
max. contact rating < 5 µA at<br />
3 V<br />
IP 65 to EN 60 529/NEMA 4x<br />
Any; in wet environment, pneumatic<br />
connections and exhaust<br />
opening not upwards<br />
Conforms to EMC guideline<br />
89/336 EEC in compliance with<br />
the following standards<br />
EN 61 326/A1 Appendix A.1 and<br />
NAMUR NE21 August 1998<br />
1 ) When commissioning at ≤ 0 °C (≤ 32 °F) make sure that the <strong>valves</strong> are<br />
purged with the dry medium for a sufficiently long time.<br />
2 ) Limited refresh rate of LCD below -10 °C (+14 °F). Only T4 permissible<br />
when using with Iy module.<br />
3 ) With the EEx d version (6DR5 7 7 5-...), the values are reduced by<br />
approx. 20%.<br />
Technical data (continued)<br />
Material of:<br />
•Casing<br />
-6DR5 770-... (plastic)<br />
-6DR5 771-... (metal)<br />
-6DR5 775-... (metal)<br />
• Pressure gauge block<br />
Vibration resistance<br />
• Harmonic oscillations (sine-wave)<br />
according to DIN EN 60 062-2-6/<br />
05.96<br />
• Repetitive shocks (half sine-wave)<br />
according to DIN EN 60 068-2-29/<br />
03.95<br />
• Noise (digitally <strong>control</strong>led) according<br />
to DIN EN 60 068-2-64/08.95<br />
• Recommended continuous range<br />
of use for complete fitting<br />
Weight, basic device<br />
• Plastic casing<br />
• Metal casing<br />
• Metal casing, EEx d version<br />
Glass-fiber-reinforced Macrolon<br />
GK-AISi12<br />
GK-AISi12<br />
Aluminium AIMgSi, anodized<br />
3.5 mm (0.14 inch) (2 to 27 Hz)<br />
3 cycles/axis<br />
98.1 m/s 2 (321.84 ft/s 2 )<br />
(27 to 300 Hz) 3 cycles/axis<br />
150 m/s 2 (492 ft/s 2 ), 6 ms<br />
1000 shocks/axis<br />
10 to 200 Hz 1 (m/s 2 ) 2 /Hz<br />
(3.28 (ft/s 2 ) 2 /Hz)<br />
200 to 500 Hz 0.3 (m/s 2 ) 2 /Hz<br />
(0.98 (ft/s 2 ) 2 /Hz)<br />
4 hours/axis<br />
≤ 30 m/s 2 (≤ 98.4 ft/s 2 ) without<br />
magnification factor<br />
Approx. 0.9 kg (1.98 lb)<br />
Approx. 1.3 kg (2.87 lb)<br />
Approx. 5.2 kg (11.46 lb)<br />
Dimensions See Fig. 5/14 and Fig. 5/15<br />
Climatic class To IEC 721<br />
•Storage 1K5, but -40 to +80 °C 1 )<br />
(1K5, but -40 to +176 °F 1 ))<br />
• Transport 2K4, but -40 to +80 °C 1 )<br />
(2K4, but -40 to +176 °F 1 ))<br />
•Operation<br />
- Without purging air 3K3, but -30 to +80 °C 2 )<br />
(3K3, but -22 to +176 °F 2 ))<br />
- With purging air 3K4, but -30 to +80 °C 2 )<br />
(3K4, but -22 to +176 °F 2 ))<br />
Certificates and approvals<br />
Classification according to pressure<br />
equipment directive<br />
(DGRL 97/23/EC)<br />
Pneumatic data<br />
Supply (inlet air)<br />
• Pressure<br />
For gases of fluid group 1 and<br />
liquids of fluid group 1, complies<br />
with requirements of article 3,<br />
paragraph 3 (sound engineering<br />
practice SEP)<br />
1.4 to 7 bar (20.3 to 101.5 psi):<br />
sufficiently larger than max. actuator<br />
pressure (positioning pressure)<br />
Air quality according to ISO 8573-1<br />
• Size and density of particulates Class 2<br />
• Pressure dew point<br />
Class 2 (min. 20 K (36 °F) below<br />
ambient temperature)<br />
• Oil concentration Class 2<br />
Unrestricted <strong>flo</strong>w of: At 2 bar 4 bar 6 bar<br />
(29 psi) (58 psi) (87 psi)<br />
• Inlet air valve [Nm 3 /h] (USgpm) 3 ) 4.1 7.1 9.8<br />
(18.1) (31.3) (43.1)<br />
• Outlet air valve [Nm 3 /h] (USgpm) 3 ) 8.2 13.7 19.2<br />
(36.1) (60.3) (84.5)<br />
Valve leakage<br />
< 6 x 10 -4 Nm 3 /h (0.0026 USgpm)<br />
Throttle ratio Adjustable up to ∞ : 1<br />
Consumption of inlet air in<br />
stable state<br />
Types of actuators<br />
• In plastic casing<br />
• In metal casing<br />
• In flameproof casing<br />
< 3.6 x 10 -2 Nm 3 /h<br />
(0.158 USgpm)<br />
Single-action and double-action<br />
Single-action<br />
Single-action and double-action<br />
114<br />
SIPART PS2 Manual<br />
A5E00074631-03
Technical Data<br />
■ Technical data<br />
SIPART PS2<br />
Explosion protection to<br />
EN 50 014, EN 50 020 and EN 50 021<br />
Basic device<br />
without Ex protection<br />
Without<br />
Basic device<br />
with Ex protection<br />
EEx d (flameproof casing)<br />
EEx d<br />
II 2 G EEx ia/ib II C T6<br />
Basic device<br />
with Ex protection<br />
EEx ia/ib<br />
EEx ia/ib<br />
II 2 G EEx ia/ib II C T6<br />
Mounting location Zone 1 Zone 1 Zone 2<br />
Permissible ambient temperature for operation<br />
-30 to +80 °C<br />
(-22 to +176 °F)<br />
T4: -30 to +80 °C 1 )<br />
(T4: -22 to +176 °F 1 ))<br />
T5: -30 to +65 °C 1 )<br />
(T5: -22 to +149 °F 1 ))<br />
T6: -30 to +50 °C 1 )<br />
(T6: -22 to +122 °F 1 ))<br />
T4: -30 to +80 °C 1 )<br />
(T4: -22 to +176 °F 1 ))<br />
T5: -30 to +65 °C 1 )<br />
(T5: -22 to +149 °F 1 ))<br />
T6: -30 to +50 °C 1 )<br />
(T6: -22 to +122 °F 1 ))<br />
Basic device<br />
with Ex protection<br />
EEx n<br />
EEx n<br />
II 3 G EEx nA L [L] II C T6<br />
T4: -30 to +80 °C 1 )<br />
(T4: -22 to +176 °F 1 ))<br />
T5: -30 to +65 °C 1 )<br />
(T5: -22 to +149 °F 1 ))<br />
T6: -30 to +50 °C 1 )<br />
(T6: -22 to +122 °F 1 ))<br />
Electrical data<br />
Input<br />
Two-wire system (terminals 6/8)<br />
• Rated signal range<br />
4 to 20 mA<br />
• Current to maintain power supply<br />
≥ 3.6 mA<br />
• Required load voltage U B (r Ω at 20 mA)<br />
- without HART 6DR50.. typ.<br />
max.<br />
≤ 6.36 V (r 318 Ω)<br />
≤ 6.48 V (r 324 Ω)<br />
≤ 7.8 V (r 390 Ω)<br />
≤ 8.3 V (r 415 Ω)<br />
≤ 7.8 V (r 390 Ω)<br />
≤ 8.3 V (r 415 Ω)<br />
- without HART 6DR53.. typ.<br />
max.<br />
≤ 7.9 V (r 395 Ω)<br />
≤ 8.4 V (r 420 Ω)<br />
–<br />
–<br />
–<br />
–<br />
–<br />
–<br />
- with HART 6DR51.. typ.<br />
max.<br />
≤ 6.6 V (r 330 Ω)<br />
≤ 6.72 V (r 336 Ω)<br />
–<br />
–<br />
–<br />
–<br />
- with HART 6DR52.. typ.<br />
max.<br />
–<br />
–<br />
≤ 8.4 V (r 420 Ω)<br />
≤ 8.8 V (r 440 Ω)<br />
≤ 8.4 V (r 420 Ω)<br />
≤ 8.8 V (r 440 Ω)<br />
≤ 8.4 V (r 420 Ω)<br />
≤ 8.8 V (r 440 Ω)<br />
• Static destruction limit ± 40 mA – –<br />
• Internal capacitance C i<br />
- without HART<br />
- with HART<br />
–<br />
–<br />
≤ 22 nF<br />
≤ 7 nF<br />
–<br />
–<br />
• Internal inductance L i<br />
- without HART<br />
- with HART<br />
–<br />
–<br />
≤ 0.12 mH<br />
≤ 0.24 mH<br />
• For connection to circuits with – Intrinsically-safe<br />
U o ≤ 30 V DC<br />
I k ≤ 100 mA<br />
P ≤ 1 W<br />
Three-wire/four-wire system (terminals 2/4<br />
and 6/8)<br />
(only 6DR52.. and 6DR53..)<br />
–<br />
–<br />
U i ≤ 30 V DC<br />
I i ≤ 100 mA<br />
• Power supply U H 18 to 35 V DC 18 to 30 V DC 18 to 30 V DC<br />
• Current consumption I H<br />
(U H - 7.5 V)/2.4 kΩ [mA]<br />
• Internal capacitance C i – ≤ 22 nF –<br />
• Internal inductance L i – ≤ 0.12 mH –<br />
• For connection to circuits with – Intrinsically-safe<br />
U o ≤ 30 V DC<br />
I k ≤ 100 mA<br />
P ≤ 1 W<br />
Current input I W<br />
• Rated signal range<br />
4 to 20 mA<br />
U i ≤ 30 V DC<br />
I i ≤ 100 mA<br />
• Load voltage at 20 mA ≤ 0.2 V (r 10 Ω) ≤ 1 V (r 50 Ω) ≤ 1 V (r 50 Ω)<br />
• Internal capacitance C i – ≤ 22 nF –<br />
• Internal inductance L i – ≤ 0.12 mH –<br />
• For connection to circuits with –<br />
–<br />
–<br />
Intrinsically-safe<br />
U o ≤ 30 V DC<br />
I k ≤ 100 mA<br />
P ≤ 1 W<br />
U i ≤ 30 V DC<br />
I i ≤ 100 mA<br />
1 ) Limited refresh rate of LCD below -10 °C (+14 °F). Only T4 permissible when using with Iy module.<br />
SIPART PS2 Manual<br />
A5E00074631-03<br />
115
Technical Data<br />
■ Technical data (continued)<br />
SIPART PS2<br />
Basic device<br />
without Ex protection<br />
Basic device<br />
with Ex protection<br />
EEx d (flameproof casing)<br />
Basic device<br />
with Ex protection<br />
EEx ia/ib<br />
Basic device<br />
with Ex protection<br />
EEx n<br />
Electrical data<br />
Electrical isolation Between U H and I W Between U H and I W<br />
(2 intrinsically-safe circuits)<br />
Between U H and I W<br />
• Test voltage DC 840 V (1 s) or 700 V (50 Hz, 1 s)<br />
Connections<br />
• Electric Screw terminals 2.5<br />
AWG28-12<br />
Cable bushing M20 or<br />
1/2" NPT (see Ordering<br />
data)<br />
Screw terminals 2.5<br />
AWG28-12<br />
EEx d-certified cable<br />
bushing M20x1.5,<br />
1/2" NPT or M25x1.5<br />
(see Ordering data)<br />
Screw terminals 2.5<br />
AWG28-12<br />
Cable bushing M20 or<br />
1/2" NPT (see Ordering<br />
data)<br />
• Pneumatic<br />
Female thread G1/4 DIN 45 141 or 1/4" 18 NPT (see Ordering data)<br />
• External position sensor<br />
(potentiometer or NSC; option)<br />
-U o – < 5 V<br />
-I o – < 75 mA<br />
-I s – < 160 mA<br />
-P o – < 120 mW<br />
- Max. perm. external capacitance (C o ) – < 1 µF<br />
- Max. perm. external inductance (L o ) – < 1 mH<br />
Screw terminals 2.5<br />
AWG28-12<br />
Cable bushing M20 or<br />
1/2" NPT (see Ordering<br />
data)<br />
116<br />
SIPART PS2 Manual<br />
A5E00074631-03
Technical Data<br />
■ Technical data<br />
Option modules Without Ex protection With Ex protection<br />
Electrical data<br />
Ex protection to EN 50 014, EN 50 020 and 50 021 – II 2G EEx ia/ib II C T4/T5/T6 1 ) II 3G EEx nA L [L] II C T6<br />
Mounting location – Zone 1 Zone 2<br />
Permissible ambient temperature for operation -30 to +80 °C<br />
(-22 to +176 °F)<br />
Alarm module<br />
Binary alarm outputs A1, A2 and alarm output<br />
(terminals 41/42, 51/52 and 31/32)<br />
Signal status High (not triggered)<br />
Signal status Low 3 ) (triggered)<br />
Internal capacitance C i<br />
Internal inductance L i<br />
–<br />
–<br />
6DR4004-8A (without Ex protection)<br />
Conductive, R = 1 kΩ, +3/-1%<br />
Non-conductive, I R < 60 µA<br />
T4: -30 to +80 °C 1 )<br />
(T4: -22 to +176 °F 1 ))<br />
T5: -30 to +65 °C 1 )<br />
(T5: -22 to +149 °F 1 ))<br />
T6: -30 to +50 °C 1 )<br />
(T6: -22 to +122 °F 1 ))<br />
6DR4004-6A (with Ex protection)<br />
≥ 2.1 mA 2 )<br />
≤ 1.2 mA 2 )<br />
≤ 5.2 nF<br />
Negligible<br />
T4: -30 to +80 °C 1 )<br />
(T4: -22 to +176 °F 1 ))<br />
T5: -30 to +65 °C 1 )<br />
(T5: -22 to +149 °F 1 ))<br />
T6: -30 to +50 °C 1 )<br />
(T6: -22 to +122 °F 1 ))<br />
6DR4004-6A (with Ex protection)<br />
≥ 2.1 mA 2 )<br />
≤ 1.2 mA 2 )<br />
–<br />
–<br />
Power supply U H ≤ 35 V – –<br />
Connection to circuits with – Intrinsically-safe switching U i ≤ 15.5 V DC<br />
amplifier DIN 19 234<br />
U o ≤ 15.5 V DC<br />
I k ≤ 25 mA, P ≤ 64 mW<br />
Binary input BI2<br />
• Electrically connected to basic device<br />
(terminals 21/22)<br />
- Signal status 0 Floating contact, open<br />
- Signal status 1 Floating contact, closed<br />
- Contact rating 3 V, 5 µA<br />
• Electrically isolated from basic device<br />
(terminals 11/12)<br />
- Signal status 0 ≤ 4.5 V or open<br />
- Signal status 1 ≥ 13 V<br />
- Inherent resistance ≥ 25 kΩ<br />
Static destruction limit ± 35 V – –<br />
Internal inductance and capacitance – Negligible –<br />
Connection to circuits with – Intrinsically-safe U i ≤ 25.2 V U i ≤ 25.2 V DC<br />
Electrical isolation<br />
The 3 outputs, the input BI2 and the basic device are electrically isolated from each other<br />
Test voltage<br />
840 V DC, 1 s<br />
SIA module<br />
6DR4004-8G (without Ex protection)<br />
6DR4004-6G (with Ex protection)<br />
6DR4004-6G (with Ex protection)<br />
Limit monitor with slot-type initiators and alarm output<br />
Two-wire connection<br />
(terminals 41/42 and 51/52)<br />
Ex protection Without II 2 G EEx ia/ib IIC T6 II 2 G EEx nA L [L] IIC T6<br />
Connection<br />
Two-wire system to DIN 19 234 (NAMUR), for series-connected switching amplifiers<br />
2 slot-type initiators Type SJ2-SN<br />
Function<br />
Opener (NC, normally closed)<br />
Connection to circuits with<br />
Rated voltage 8 V<br />
Current consumption:<br />
≥ 3 mA (limit not triggered)<br />
≤ 1 mA (limit triggered)<br />
Intrinsically-safe switching<br />
amplifier DIN 19 234<br />
U i ≤ 15.5 V DC<br />
I i ≤ 25 mA, P i ≤ 64 mW<br />
U i ≤ 15.5 V DC<br />
P i ≤ 64 mW<br />
Internal capacitance – ≤ 41 nF –<br />
Internal inductance – ≤ 100 µH –<br />
Electrical isolation<br />
The 3 outputs are electrically isolated from the basic device<br />
Test voltage<br />
840 V DC, 1 s<br />
Alarm output (terminals 31/32)<br />
See alarm module<br />
1 ) Only in conjunction with the basic device 6DR5 777-7 E 777. Only T4 permissible when using with Iy module.<br />
2 ) Switching thresholds with supply to DIN 19 234: U H = 8.2 V, R i = 1 kΩ.<br />
3 ) Low is also the state if the basic device is faulty or without an electrical power supply.<br />
SIPART PS2 Manual<br />
A5E00074631-03<br />
117
Technical Data<br />
■ Technical data (continued)<br />
Option modules Without Ex protection With Ex protection<br />
Electrical data<br />
Ex protection to EN 50 014, EN 50 020 and 50 021 – II 2G EEx ia/ib II C T4/T5/T6 1 ) II 3G EEx nA L [L] II C T6<br />
Mounting location – Zone 1 Zone 2<br />
Permissible ambient temperature for operation -30 to +80 °C<br />
(-22 to +176 °F)<br />
T4: -30 to +80 °C 1 )<br />
(T4: -22 to +176 °F 1 ))<br />
T5: -30 to +65 °C 1 )<br />
(T5: -22 to +149 °F 1 ))<br />
T6: -30 to +50 °C 1 )<br />
(T6: -22 to +122 °F 1 ))<br />
T4: -30 to +80 °C 1 )<br />
(T4: -22 to +176 °F 1 ))<br />
T5: -30 to +65 °C 1 )<br />
(T5: -22 to +149 °F 1 ))<br />
T6: -30 to +50 °C 1 )<br />
(T6: -22 to +122 °F 1 ))<br />
I y module 6DR4004-8J (without Ex prot.) 6DR4004-6J (with Ex prot.) 6DR4004-6J (with Ex prot.)<br />
Direct current output for position feedback<br />
Two-wire system<br />
(terminals 61/62)<br />
Rated signal range i<br />
4 to 20 mA, short-circuit-proof<br />
Operating range<br />
3.6 to 20.5 mA<br />
Power supply U H +12 to 35 V + 12 to 30 V + 12 to 30 V<br />
External load R B [kΩ]<br />
≤ (U H [V] - 12 V) /i [mA]<br />
Transmission error ≤ 0.3%<br />
Temperature influence<br />
≤ 0.1%/10 K (≤ 0.1%/18 °F)<br />
Resolution ≤ 0.1%<br />
Residual ripple ≤ 1%<br />
Internal capacitance C i<br />
–<br />
Internal inductance L i –<br />
For connection to circuits with<br />
≤ 11 nF<br />
Negligible<br />
Intrinsically-safe: U i ≤ 30 V DC U i ≤ 30 V DC<br />
I i ≤ 100 mA; P i ≤ 1 W (only T4) I i ≤ 100 mA; P i ≤ 1 W (only T4)<br />
Electrically isolated from basic device<br />
840 V DC, 1 s<br />
Electrical isolation<br />
Test voltage<br />
NCS sensor<br />
Positioning range<br />
• Linear actuator<br />
max. 14 mm (max. 0.55 inch)<br />
• Rotary actuator max. 120°<br />
Linearity (after correction by SIPART PS2)<br />
• Linear actuator ± 1%<br />
• Rotary actuator ± 1%<br />
Hysteresis ± 0.2%<br />
Continuous operating temperature<br />
Degree of housing protection<br />
-40 °C to +90 °C (-40 °F to +194 °F)<br />
Only without Ex protection: -50 °C to +120 °C (-58 °F to +248 °F)with limited service life<br />
IP 68/NEMA 4x<br />
–<br />
–<br />
1 ) Only in conjunction with the basic device 6DR5 777-7 E 777. Only T4 permissible when using with Iy module.<br />
118<br />
SIPART PS2 Manual<br />
A5E00074631-03
Scope of deliver<br />
Scope of Delivery<br />
7<br />
The positioner and its options modules are delivered as separate units<br />
and in different versions. Positioners and options modules for operation<br />
in hazardous areas and non--hazardous areas are available. These versions<br />
are identified respectively by a special rating plate.<br />
!<br />
WARNING<br />
In the combination of components it must be ensured that only positioners<br />
and options modules are combined which are approved for the<br />
respective area of application. This applies especially for safe<br />
operation of the positioner in areas in which the atmosphere is potentially<br />
explosive (zone 1 and 2). The instrument categories (2 and 3) of<br />
the instrument itself and those of its options must be observed.<br />
SIPART PS2 Manual<br />
A5E00074631-03<br />
119
Scope of delivery<br />
7.1 Ordering data<br />
■ Ordering data<br />
Order No.<br />
SIPART PS2 (PA) electropneumatic<br />
6DR5 777-77777 - 77A7<br />
positioner<br />
Design<br />
• Two-wire<br />
see<br />
right<br />
- without HART, (4 to 20 mA) } 6DR5 0<br />
-with HART, without explosion } 6DR5 1<br />
protection (except EEx d)<br />
• Two-wire, three-wire, four-wire<br />
-with HART, with explosion pro-tection 6DR5 2<br />
- without HART, without explosion<br />
} 6DR5 3<br />
protection, only with plas-<br />
tic casing<br />
• PROFIBUS-PA connection } 6DR5 5<br />
For actuator<br />
Single-action } 6DR5 0 1<br />
Double-action } 6DR5 0 2<br />
Housing<br />
Plastic } 6DR5 0 0 0<br />
Aluminium; only single-action } 6DR5 0 0 1<br />
Stainless steel; only single-action 6DR5 0 0 2<br />
(on request); not for EEx d version;<br />
not FM/CSA<br />
Aluminium; EEx d casing (flameproof)<br />
6DR5 0 0 5<br />
Sliding clutch<br />
Standard } 6DR5 0 0 0 - 0<br />
Reinforced 6DR5 0 0 0 - 1<br />
Explosion protection<br />
Without } 6DR5 0 0 0 - 0 N<br />
With explosion protection Ex ia/ib }<br />
or EExd (CENELEC/FM/CSA) 6DR5 0 0 0 - 0 E<br />
With explosion protection EEx n 6DR5 0 0 0 - 0 G<br />
(CENELEC)<br />
Connection thread<br />
electric/pneumatic<br />
M20 x 1.5 / G1/4 } 6DR5 0 0 0 - N 0 G<br />
1/2" NPT / 1/4" NPT 6DR5 0 0 0 - N 0 N<br />
M20 x 1.5 / 1/4" NPT<br />
6DR5 0 0 0 - N 0 M<br />
1/2" NPT / G1/4 6DR5 0 0 0 - N 0 P<br />
Limit monitor, built-in;<br />
incl. 2nd cable gland<br />
Without } 6DR5000-N0G 0<br />
Alarm module; electronic<br />
6DR5000-N0G 1<br />
(6DR4004-7 A)<br />
SIA module; slot initiators<br />
6DR5000-N0G 2<br />
(6DR4004-7 G); not with EEx d<br />
version<br />
Option modules, built-in;<br />
incl. 2nd cable gland<br />
Without } 6DR5000-N0G0 0<br />
Iy module for position feedback 6DR5000-N0G0 1<br />
(4 to 20 mA) (6DR4004-7 J)<br />
EMC filter module for external 6DR5000-N0G0 2<br />
position sensor (C73451-A430-<br />
D23)<br />
Iy module and EMC filter module<br />
for external position sensor<br />
6DR5000-N0G0 3<br />
■ Ordering data<br />
Order No.<br />
SIPART PS2 (PA) electropneumatic<br />
6DR5 777-77777 - 77A7<br />
positioner<br />
Customer-specific design<br />
see left<br />
Without } 6DR5000-N0G00 - 0<br />
Operating Instructions<br />
German/English } 6DR5000-N0G00 - 0A<br />
French/Spanish/Italian<br />
6DR5000-N0G00 - 0B<br />
Attached manometer assembly<br />
Without } 6DR5000-N0G00 - 0A7 0<br />
Single G1/4 6DR5000-N0G00 - 0A7 1<br />
Double G1/4 6DR5000-N0G00 - 0A7 2<br />
Single NPT 6DR5000-N0G00 - 0A7 3<br />
Double NPT 6DR5000-N0G00 - 0A7 4<br />
} Available ex stock.<br />
120<br />
SIPART PS2 Manual<br />
A5E00074631-03
Scope of deliver<br />
7.2 Scope of delivery of standard <strong>control</strong>ler<br />
Versions Housing Valve Ex-protection Order numbers<br />
SIPART PS2<br />
Plastic housing single action non Ex 6DR5010-xNxxx-0AA0<br />
2L without Plastic housing double action non Ex 6DR5020-xNxxx-0AA0<br />
HART Metal housing single action non Ex 6DR5011-xNxxx-0AA0<br />
Plastic housing single action CENELEC/FM 6DR5010-xExxx-0AA0<br />
SIPART PS2<br />
Plastic housing double action CENELEC/FM 6DR5020-xExxx-0AA0<br />
2L without Metal housing single action CENELEC/FM 6DR5011-xExxx-0AA0<br />
HART Explosion proof housing single action CENELEC/FM 6DR5015-xExxx-0AA0<br />
Explosion proof housing double action CENELEC/FM 6DR5025-xExxx-0AA0<br />
Plastic housing single action non Ex 6DR5110-xNxxx-0AA0<br />
SIPART PS2<br />
Plastic housing double action non Ex 6DR5120-xNxxx-0AA0<br />
2L with HART<br />
Metal housing single action non Ex 6DR5111-xNxxx-0AA0<br />
Plastic housing single action CENELEC/FM 6DR5210-xExxx-0AA0<br />
Plastic housing double action CENELEC/FM 6DR5220-xExxx-0AA0<br />
SIPART PS2<br />
Metal housing single action CENELEC/FM 6DR5211-xExxx-0AA0<br />
4L with HART<br />
Explosion proof housing single action CENELEC/FM 6DR5215-xExxx-0AA0<br />
Explosion proof housing double action CENELEC/FM 6DR5225-xExxx-0AA0<br />
2L<br />
4L<br />
--x<br />
corresponds to two-wire operation<br />
corresponds to four--wire-operation<br />
stands for sub--variant<br />
7.3 Scope of delivery of options<br />
Option<br />
SIA module non Ex<br />
SIA module Ex (CENELEC / FM) 1)2)<br />
Alarm module non Ex<br />
Alarm module Ex (PTB) 1)<br />
Alarm module Ex (FM) 2)<br />
J y -module non Ex<br />
J y -module Ex (PTB) 1)<br />
J y -module Ex (FM) 2)<br />
1) EC-type examination certificates<br />
2) Approval Reports of Factory Mutual System<br />
Order number<br />
6DR4004-8G<br />
6DR4004-6G<br />
6DR4004-8A<br />
6DR4004-6A<br />
6DR4004-7A<br />
6DR4004-8J<br />
6DR4004-6J<br />
6DR4004-7J<br />
SIPART PS2 Manual<br />
A5E00074631-03<br />
121
Scope of delivery<br />
7.4 Scope of delivery of accessories<br />
Accessories<br />
Mounting kit set linear actuators IEC 534 -- 6<br />
including lever arm for 3 to 35 mm way<br />
Additional lever for > 35 to 130 mm way<br />
Mounting kit rotary actuators VDI/VDE 3845<br />
Solenoid valve block for SAMSON actuator (integrated mounting)<br />
Manometer block single acting<br />
Manometer block double acting<br />
Solenoid valve block single acting (NAMUR)<br />
Mounting set for SAMSON actuator (integrated mounting)<br />
NCS-Sensor<br />
not explosion protected<br />
explosion-protected<br />
cable length 6 m<br />
for rotary actuators<br />
for linear actuators up to 14 mm<br />
EMV filter module<br />
External position detection system<br />
Operating software SIMATIC PDM<br />
Order number<br />
6DR4004-8V<br />
6DR4004-8L<br />
6DR4004-8D<br />
6DR4004-1C<br />
6DR4004-1M<br />
6DR4004-2M<br />
6DR4004-1B<br />
6DR4004-8S<br />
6DR4004-_ N_ _ 0<br />
6DR4004-8N<br />
6DR4004-6N<br />
6DR4004-_NN<br />
6DR4004-_N_10<br />
6DR4004-_N_20<br />
C73451-A430-D23<br />
C73451-A430-D78<br />
on request<br />
122<br />
SIPART PS2 Manual<br />
A5E00074631-03
Index<br />
Index<br />
8<br />
A<br />
Accessories, 33<br />
Alarm function, 95<br />
Alarm module, 31, 54, 58, 61<br />
Application<br />
positioner in a wet environment, 38<br />
under great accelerations and vibrations, 40<br />
Assembly, 37<br />
Screw--type gland with plastic hose, 40<br />
Assembly procedure, 43, 46<br />
linear actuator, 44<br />
rotary actuator, 47, 48<br />
Automatic, Changing the operating mode, 84<br />
B<br />
Base plate, 51<br />
Block diagram, Mode of operation, 24<br />
C<br />
Catalogs, 125<br />
Certificate<br />
CSA, 146, 148<br />
EC Declaration of Conformity, 126, 127<br />
EC Type Examination, 128<br />
EC Type--Examination, 131<br />
FM Approval Report, 142, 144<br />
Statement of conformity, 139<br />
Certificates, 126<br />
Commissioning, 63<br />
Configuration, changing the operating mode,<br />
83<br />
CSA Certficate of Compliance, 146, 148<br />
Current output, Electrical Connection, 54, 58,<br />
61<br />
D<br />
Delivery, 10<br />
Diagnosis, 98<br />
Online, 103<br />
Diagnostic, Display, 98<br />
Diagnostic display, Changing the operating<br />
mode, 84<br />
Diagnostic values, Meaning of the ~, 99<br />
Digital input, electrical connection, 54, 58, 61<br />
Digital output, electrical connection, 54, 58, 61<br />
Dimensional drawings, 35<br />
Display, 79<br />
distance class, 102<br />
Documentation, 9<br />
double--acting, 13, 14<br />
E<br />
EC Declaration of Conformity, 127<br />
EEx d, 126<br />
EC Type Examination Certificate<br />
PTB 99 ATEX 1101, 128<br />
TÜV 00 ATEX 1654, 131<br />
TÜV 01 ATEX 1786 X, 139<br />
Electrical connection, 17, 50<br />
F<br />
Filters, Cleaning the ~, 111<br />
Firmware version, 81<br />
FM Approval Report, 144<br />
EEx d, 142<br />
Four--wire connection, 53, 56, 60<br />
G<br />
General information, 5<br />
H<br />
HART module, 31<br />
Housing, 11<br />
I<br />
Initialization, 89<br />
Automatic ~, Structogram, 74<br />
automatic ~, 63, 65, 71, 74<br />
changing the operating mode, 83<br />
copying ~, 63<br />
<strong>manual</strong> ~, 63, 67, 72<br />
Initialization data, Copying the ~, 78<br />
Input keys, 79<br />
SIPART PS2 Manual<br />
A5E00074631--03<br />
123
Index<br />
Installation positions, favorable and<br />
unfavorable, 39, 41<br />
Instrument identification, 35<br />
J<br />
Jy module, 32, 54, 58, 61<br />
L<br />
Lever arm transmission, 88<br />
Linear actuator, 13, 14<br />
automatic initialization, 65<br />
<strong>manual</strong> initialization, 67<br />
preparation, 64<br />
Literature, 125<br />
M<br />
Maintenance, 111<br />
Manometer block, 33<br />
Manual mode<br />
Changing the operating mode, 84<br />
P <strong>manual</strong> mode, 83<br />
Method of operation, 15, 22<br />
Mounting kit<br />
linear actuator, 42<br />
rotary actuator, 45<br />
O<br />
Operating mode<br />
AUT, 84<br />
MAN, 84<br />
Operating Modes, 82<br />
Operating modes, Change ~, 82<br />
Operation, 79<br />
Options, 12, 25<br />
P<br />
Parameter table, SIPART PS2, 85<br />
Parameters, 84<br />
PDM (Process Device Manager), 78, 102<br />
Personnel, Qualification, 7<br />
Pneumatic connection, 18, 62<br />
Positioner exchange, 63, 78<br />
Positioning, 20<br />
Preset, 97<br />
Purge air switching, 21<br />
Q<br />
Qualified Personnel, 7<br />
R<br />
Reset, 97<br />
Restrictors, 21<br />
Rotary actuator, 13, 14, 49, 50<br />
Automatic initialization, 71<br />
<strong>manual</strong> initialization, 72<br />
preparation, 70<br />
S<br />
Scope of Delivery, 119, 125<br />
Series circuit, of two positioners, 57<br />
Service, 111<br />
Setpoint, 103<br />
Setpoint characteristic, 91<br />
SIA module, 55, 59, 62<br />
Electrical Connection, 55, 59, 62<br />
single--acting, 13, 14<br />
Split range, 57, 89<br />
Electrical Connection, 57<br />
Standard <strong>control</strong>ler, 55, 59<br />
Standards, 10<br />
Structograms of automatic initialization, 74<br />
T<br />
Technical data, 113<br />
Three--wire connection, 53, 56, 60<br />
Two--wire connection, 52, 53, 55, 56, 59, 60<br />
Type key, 35<br />
U<br />
Use as intended, 9<br />
V<br />
Versions, 11<br />
Vibrations, 40<br />
View of the instrument, 16<br />
W<br />
Warranty, 10<br />
wet environment, 38<br />
124<br />
SIPART PS2 Manual<br />
A5E00074631--03
Appendix<br />
Appendix<br />
9<br />
9.1 Literature and catalogs<br />
Nr. Title Issue by Order no.<br />
/1/ Industrial Communication and Siemens AG E86060--K6710--A101--B2--7600<br />
Field Devices<br />
Catalog IK PI · 2002/2003<br />
/2/ Field Instruments for Process Siemens AG E86060--K6201--A101--A3--7600<br />
Automation<br />
Catalog FI 01 · 2003<br />
/3/ SIMATIC PCS 7 Process Control<br />
System<br />
Catalog ST PCS 7 · 2002<br />
Siemens AG E86060--K4678--A111--A5--7600<br />
SIPART PS2 Manual<br />
A5E00074631--03<br />
125
Appendix<br />
9.2 Certificates<br />
9.2.1 EC Declaration of Conformity (EEx d)<br />
126<br />
SIPART PS2 Manual<br />
A5E00074631--03
Appendix<br />
9.2.2 EC Declaration of Conformity<br />
SIPART PS2 Manual<br />
A5E00074631--03<br />
127
Appendix<br />
9.2.3 EC Type-Examination Certificate PTB 99 ATEX 1101 (EEx d)<br />
(type of protection “flameproof enclosure”)<br />
128<br />
SIPART PS2 Manual<br />
A5E00074631--03
Appendix<br />
SIPART PS2 Manual<br />
A5E00074631--03<br />
129
Appendix<br />
130<br />
SIPART PS2 Manual<br />
A5E00074631--03
Appendix<br />
9.2.4 EC Type-Examination Certificate TÜV 00 ATEX 1654<br />
SIPART PS2 Manual<br />
A5E00074631--03<br />
131
Appendix<br />
132<br />
SIPART PS2 Manual<br />
A5E00074631--03
Appendix<br />
SIPART PS2 Manual<br />
A5E00074631--03<br />
133
Appendix<br />
134<br />
SIPART PS2 Manual<br />
A5E00074631--03
Appendix<br />
SIPART PS2 Manual<br />
A5E00074631--03<br />
135
Appendix<br />
136<br />
SIPART PS2 Manual<br />
A5E00074631--03
Appendix<br />
SIPART PS2 Manual<br />
A5E00074631--03<br />
137
Appendix<br />
138<br />
SIPART PS2 Manual<br />
A5E00074631--03
Appendix<br />
9.2.5 Statement of conformity TÜV 01 ATEX 1786 X<br />
SIPART PS2 Manual<br />
A5E00074631--03<br />
139
Appendix<br />
140<br />
SIPART PS2 Manual<br />
A5E00074631--03
Appendix<br />
SIPART PS2 Manual<br />
A5E00074631--03<br />
141
Appendix<br />
9.2.6 FM Approval Report (EEx d)<br />
142<br />
SIPART PS2 Manual<br />
A5E00074631--03
Appendix<br />
SIPART PS2 Manual<br />
A5E00074631--03<br />
143
Appendix<br />
9.2.7 FM Approval Report<br />
144<br />
SIPART PS2 Manual<br />
A5E00074631--03
Appendix<br />
SIPART PS2 Manual<br />
A5E00074631--03<br />
145
Appendix<br />
9.2.8 CSA Certificate of Compliance<br />
146<br />
SIPART PS2 Manual<br />
A5E00074631--03
Appendix<br />
SIPART PS2 Manual<br />
A5E00074631--03<br />
147
Appendix<br />
9.2.9 Control Drawing A5E00065622D<br />
148<br />
SIPART PS2 Manual<br />
A5E00074631--03
Appendix<br />
SIPART PS2 Manual<br />
A5E00074631--03<br />
149
Appendix<br />
150<br />
SIPART PS2 Manual<br />
A5E00074631--03
Appendix<br />
SIPART PS2 Manual<br />
A5E00074631--03<br />
151
Appendix<br />
152<br />
SIPART PS2 Manual<br />
A5E00074631--03
Appendix<br />
SIPART PS2 Manual<br />
A5E00074631--03<br />
153
Appendix<br />
154<br />
SIPART PS2 Manual<br />
A5E00074631--03
Appendix<br />
SIPART PS2 Manual<br />
A5E00074631--03<br />
155
Appendix<br />
156<br />
SIPART PS2 Manual<br />
A5E00074631--03
Appendix<br />
SIPART PS2 Manual<br />
A5E00074631--03<br />
157
Appendix<br />
158<br />
SIPART PS2 Manual<br />
A5E00074631--03
@1PA5E00074631@<br />
1P<br />
A5E00074631<br />
Siemens AG<br />
Bereich Automation and Drives<br />
Geschaeftsgebiet Process Instrumentation and Analytics<br />
D-76181 Karlsruhe<br />
wwwsiemenscom/fielddevices<br />
A5E00074631-03