XDT Manual - Pioneer Air Systems Engineering
XDT Manual - Pioneer Air Systems Engineering
XDT Manual - Pioneer Air Systems Engineering
Create successful ePaper yourself
Turn your PDF publications into a flip-book with our unique Google optimized e-Paper software.
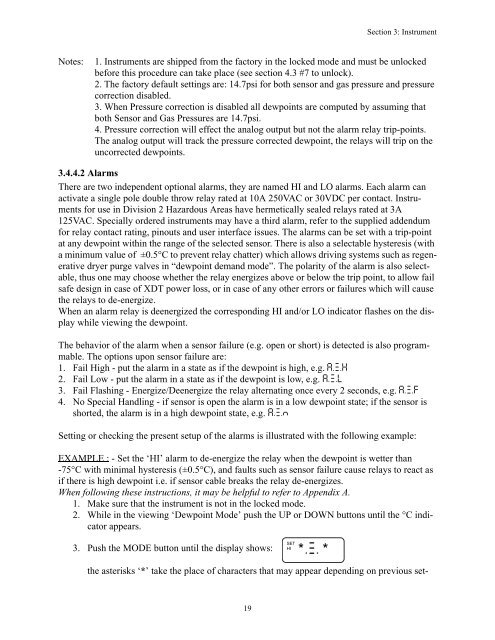
Section 3: InstrumentNotes:1. Instruments are shipped from the factory in the locked mode and must be unlockedbefore this procedure can take place (see section 4.3 #7 to unlock).2. The factory default settings are: 14.7psi for both sensor and gas pressure and pressurecorrection disabled.3. When Pressure correction is disabled all dewpoints are computed by assuming thatboth Sensor and Gas Pressures are 14.7psi.4. Pressure correction will effect the analog output but not the alarm relay trip-points.The analog output will track the pressure corrected dewpoint, the relays will trip on theuncorrected dewpoints.3.4.4.2 AlarmsThere are two independent optional alarms, they are named HI and LO alarms. Each alarm canactivate a single pole double throw relay rated at 10A 250VAC or 30VDC per contact. Instrumentsfor use in Division 2 Hazardous Areas have hermetically sealed relays rated at 3A125VAC. Specially ordered instruments may have a third alarm, refer to the supplied addendumfor relay contact rating, pinouts and user interface issues. The alarms can be set with a trip-pointat any dewpoint within the range of the selected sensor. There is also a selectable hysteresis (witha minimum value of ±0.5°C to prevent relay chatter) which allows driving systems such as regenerativedryer purge valves in “dewpoint demand mode”. The polarity of the alarm is also selectable,thus one may choose whether the relay energizes above or below the trip point, to allow failsafe design in case of <strong>XDT</strong> power loss, or in case of any other errors or failures which will causethe relays to de-energize.When an alarm relay is deenergized the corresponding HI and/or LO indicator flashes on the displaywhile viewing the dewpoint.The behavior of the alarm when a sensor failure (e.g. open or short) is detected is also programmable.The options upon sensor failure are:1. Fail High - put the alarm in a state as if the dewpoint is high, e.g. A.X.H2. Fail Low - put the alarm in a state as if the dewpoint is low, e.g. A.X.L3. Fail Flashing - Energize/Deenergize the relay alternating once every 2 seconds, e.g. A.X.F4. No Special Handling - if sensor is open the alarm is in a low dewpoint state; if the sensor isshorted, the alarm is in a high dewpoint state, e.g. A.X.NSetting or checking the present setup of the alarms is illustrated with the following example:EXAMPLE : - Set the ‘HI’ alarm to de-energize the relay when the dewpoint is wetter than-75°C with minimal hysteresis (±0.5°C), and faults such as sensor failure cause relays to react asif there is high dewpoint i.e. if sensor cable breaks the relay de-energizes.When following these instructions, it may be helpful to refer to Appendix A.1. Make sure that the instrument is not in the locked mode.2. While in the viewing ‘Dewpoint Mode’ push the UP or DOWN buttons until the °C indicatorappears.3. Push the MODE button until the display shows:SETHI* *the asterisks ‘*’ take the place of characters that may appear depending on previous set-19


