42XV560A 46XV560A 52XV560A - Blake Television & Video Rentals
42XV560A 46XV560A 52XV560A - Blake Television & Video Rentals
42XV560A 46XV560A 52XV560A - Blake Television & Video Rentals

Create successful ePaper yourself
Turn your PDF publications into a flip-book with our unique Google optimized e-Paper software.
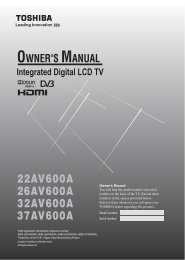
Getting startedPICTUREmenuPICTUREPicture SettingsActive Backlight ControlAuto Contrastx.v.Colour Selection3D Colour ManagementBase Colour AdjustmentMPEG NRDNRSOUNDmenuSOUNDMTSDualBassTrebleBalanceWOWStable SoundDynamic Range ControlSETUPmenuSETUPMenu LanguageAuto TuningATV Manual TuningDTV Manual TuningDTV SettingsAV ConnectionPicture PositionQuick SetupREGZA-LINKmenuREGZA-LINKEnable REGZA-LINKTV Auto Power OnAuto StandbyAmplifier ControlSpeaker PreferenceTIMERSmenu000OnOffAutoOffLowAutoAutoDual 1OffEnglishOnOnOnOnTV SpeakersTIMERSProgramme TimersSleep Timer 00:00PICTUREPicture SettingsActive Backlight ControlAuto Contrastx.v.Colour Selection3D Colour ManagementBase Colour AdjustmentMPEG NRDNRSOUNDMTSDualSOUNDBass BassTrebleTrebleBalanceBalanceWOWWOWStableStableSoundSoundDynamicDynamicRangeRangeControlControlBass BoostBass Boost LevelSETUPMenu LanguageAuto TuningSETUPATV Manual TuningATV Manual TuningDTV Manual TuningDTV Manual TuningDTV SettingsDTV SettingsAV ConnectionAV ConnectionPicture PositionPicture PositionQuick SetupQuick SetupSystem InformationReset TVREGZA-LINKEnable REGZA-LINKTV Auto Power OnAuto StandbyAmplifier ControlSpeaker Preference00000070OnOffAutoOffLowAutoAutoDual 1OffOffOnEnglishEnglishOnOnOnOnTV SpeakersTIMERSProgramme TimersSleep Timer 00:00• If you do not make a selection for a while, the menu displaydisappears automatically.• If you want to close the menu display instantly, press P.• To return to the previous menu, press M.• In PC input mode, PC Settings appears in the SETUP menu(- page 37).• In 480i, 576i or 1080i input signal mode, you can select theCinema Mode in the Picture Settings menu (- page 19).• When the 3D Colour Management function is set to on (-page 20), you can select Base Colour Adjustment in thePICTURE menu.Programming channels into theTV’s channel memoryAuto TuningAuto Tuning will completely re-tune the TV and can be usedto up-date the channel list.It is recommended that Auto Tuning is run periodically toensure that all new services are added. All current channels andsettings, i.e. favourites and locked channels, will be lost.Note:As new services are broadcast, it will be necessary to retunethe TV in order to view them.1 Press M, and then press or to display the SETUPmenu.2 Press to select Auto Tuning, and then press Q.SETUPMenu LanguageAuto TuningATV Manual TuningDTV Manual TuningDTV SettingsAV ConnectionPicture PositionQuick Setup3 A screen will appear warning that previous settings willbe deleted.Auto TuningEnglishPrevious settings will be lost! Press EXIT forno change.Tuning ModeDTV and ATVFUNCTIONmenuFUNCTIONTeletextPanel LockAuto Format4:3 StretchBlue ScreenSide PanelAutoOffOnOffOn1FUNCTIONTeletextPanel LockAuto Format4:3 StretchBlue ScreenSide PanelNotes for menu system:• In video input mode (o1 - o4), Auto Tuning, ATV ManualTuning, DTV Manual Tuning and DTV Settings are notavailable. Instead, Manual Settings appears in the SETUPmenu (- page 24).• If you connect external equipment via component videosource, Colour system selection in the Manual Settingsmenu is not available.AutoOffOnOffOn1Start ScanUse or to select DTV and ATV, DTV or ATV.Then, press to select Start Scan and press Q tocontinue with the Auto Tuning.The TV will start to search for all available DTV and/orATV services.You must allow the TV to complete the search.When the search is complete, the Auto Tuning screenwill display the services found.4 Use or to move through the list to select a channel,and then press Q to view.13