

Assembly Instructions - Swing-N-Slide
Assembly Instructions - Swing-N-Slide
Assembly Instructions - Swing-N-Slide

Create successful ePaper yourself
Turn your PDF publications into a flip-book with our unique Google optimized e-Paper software.
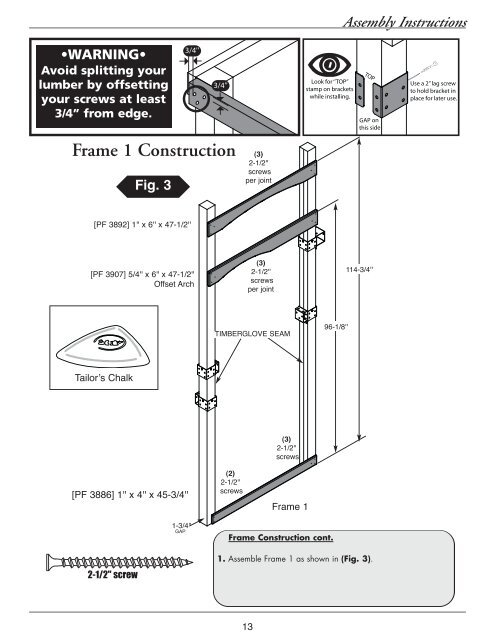
<strong>Assembly</strong> <strong>Instructions</strong>•WARNING•Avoid splitting yourlumber by offsettingyour screws at least3/4’’ from edge.Frame 1 ConstructionFig. 3(3)2-1/2''screwsper jointLook for ‘’TOP’’stamp on bracketswhile installing.TOPGAP onthis sideUse a 2’’ lag screwto hold bracket inplace for later use.[PF 3892] 1'' x 6'' x 47-1/2''[PF 3907] 5/4'' x 6'' x 47-1/2''Offset Arch(3)2-1/2''screwsper joint114-3/4''TIMBERGLOVE SEAM96-1/8''Tailor’s Chalk[PF 3886] 1'' x 4'' x 45-3/4''(2)2-1/2''screws(3)2-1/2''screwsFrame 11-3/4''GAPFrame Construction cont.2-1/2'' screw1. Assemble Frame 1 as shown in (Fig. 3).13


