

Assembly Instructions - Swing-N-Slide
Assembly Instructions - Swing-N-Slide
Assembly Instructions - Swing-N-Slide

Create successful ePaper yourself
Turn your PDF publications into a flip-book with our unique Google optimized e-Paper software.
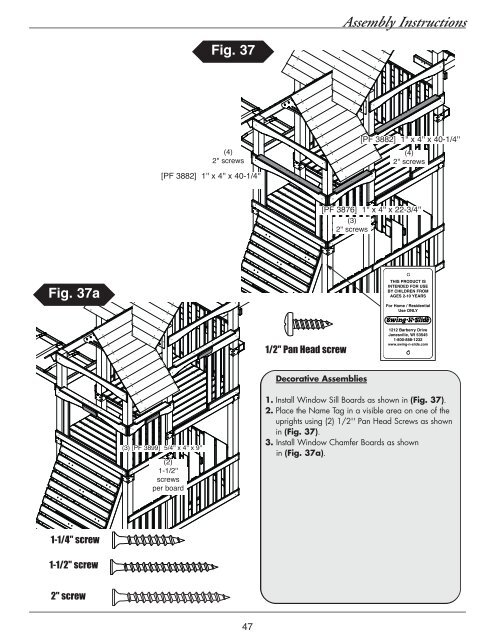
R<strong>Assembly</strong> <strong>Instructions</strong>Fig. 37[PF 3882] 1'' x 4'' x 40-1/4''(4)2'' screws(4)2'' screws[PF 3882] 1'' x 4'' x 40-1/4''[PF 3876] 1'' x 4'' x 22-3/4''(3)2'' screwsFig. 37aTHIS PRODUCT ISINTENDED FOR USEBY CHILDREN FROMAGES 2-10 YEARSFor Home / ResidentialUse ONLY1/2'' Pan Head screw1212 Barberry DriveJanesville, WI 535451-800-888-1232www.swing-n-slide.comDecorative Assemblies(3) [PF 3899] 5/4'' x 4'' x 9''(2)1-1/2''screwsper board1. Install Window Sill Boards as shown in (Fig. 37).2. Place the Name Tag in a visible area on one of theuprights using (2) 1/2'' Pan Head Screws as shownin (Fig. 37).3. Install Window Chamfer Boards as shownin (Fig. 37a).1-1/4'' screw1-1/2'' screw2'' screw47


