PDF - Source : www.pcsoft-windev-webdev.com
PDF - Source : www.pcsoft-windev-webdev.com
PDF - Source : www.pcsoft-windev-webdev.com
- No tags were found...
Create successful ePaper yourself
Turn your PDF publications into a flip-book with our unique Google optimized e-Paper software.
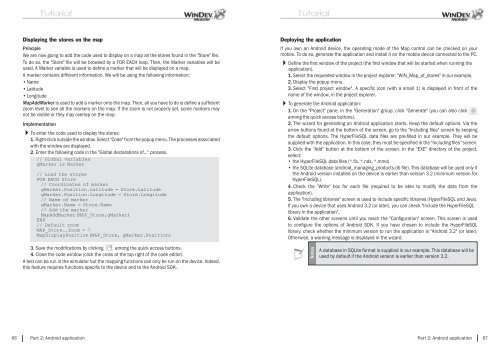
Displaying the stores on the mapPrincipleWe are now going to add the code used to display on a map all the stores found in the "Store" fi le.To do so, the "Store" fi le will be browsed by a FOR EACH loop. Then, the Marker variables will beused. A Marker variable is used to defi ne a marker that will be displayed on a map.A marker contains different information. We will be using the following information:• Name• Latitude• LongitudeMapAddMarker is used to add a marker onto the map. Then, all you have to do is defi ne a suffi cientzoom level to see all the markers on the map. If the zoom is not properly set, some markers maynot be visible or they may overlap on the map.ImplementationTo enter the code used to display the stores:1. Right-click outside the window. Select "Code" from the popup menu. The processes associatedwith the window are displayed.2. Enter the following code in the "Global declarations of..." process. Deploying the applicationIf you own an Android device, the operating mode of the Map control can be checked on yourmobile. To do so, generate the application and install it on the mobile device connected to the PC.Defi ne the fi rst window of the project (the fi rst window that will be started when running theapplication).1. Select the requested window in the project explorer: "WIN_Map_of_stores" in our example.2. Display the popup menu.3. Select "First project window". A specifi c icon (with a small 1) is displayed in front of thename of the window, in the project explorer.To generate the Android application:1. On the "Project" pane, in the "Generation" group, click "Generate" (you can also clickamong the quick access buttons).2. The wizard for generating an Android application starts. Keep the default options. Via thearrow buttons found at the bottom of the screen, go to the "Including fi les" screen by keepingthe default options. The HyperFileSQL data fi les are pre-fi lled in our example. They will besupplied with the application. In this case, they must be specifi ed in the "Including fi les" screen.3. Click the "Add" button at the bottom of the screen. In the "EXE" directory of the project,select:• the HyperFileSQL data fi les (*.fi c, *.ndx, *.mmo)• the SQLite database (android_managing_products.db fi le). This database will be used only ifthe Android version installed on the device is earlier than version 3.2 (minimum version forHyperFileSQL).4. Check the "Write" box for each fi le (required to be able to modify the data from theapplication).5. The "Including libraries" screen is used to include specifi c libraries (HyperFileSQL and Java).If you own a device that uses Android 3.2 (or later), you can check "Include the HyperFileSQLlibrary in the application".6. Validate the other screens until you reach the "Confi guration" screen. This screen is usedto confi gure the options of Android SDK. If you have chosen to include the HyperFileSQLlibrary, check whether the minimum version to run the application is "Android 3.2" (or later).Otherwise, a warning message is displayed in the wizard.3. Save the modifi cations by clicking among the quick access buttons.4. Close the code window (click the cross at the top right of the code editor).A test can be run in the simulator but the mapping functions can only be run on the device. Indeed,this feature requires functions specifi c to the device and to the Android SDK.NotesA database in SQLite format is supplied in our example. This database will beused by default if the Android version is earlier than version 3.2.66 Part 2: Android applicationPart 2: Android application 67


