Pro 200 Series Furnace - Whip Mix
Pro 200 Series Furnace - Whip Mix
Pro 200 Series Furnace - Whip Mix
Create successful ePaper yourself
Turn your PDF publications into a flip-book with our unique Google optimized e-Paper software.
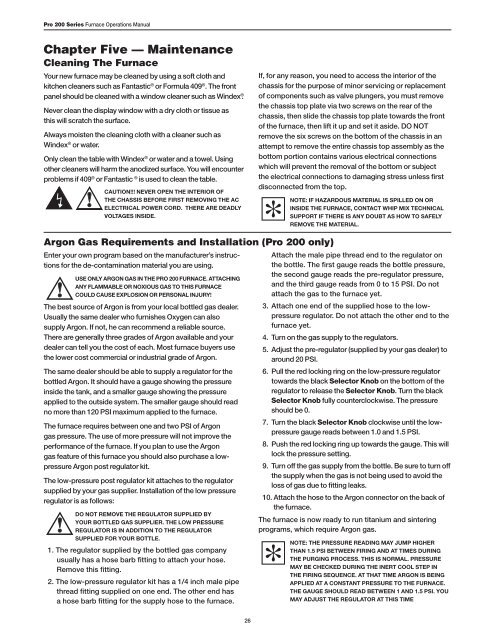
<strong>Pro</strong> <strong>200</strong> <strong>Series</strong> <strong>Furnace</strong> Operations ManualChapter Five — MaintenanceCleaning The <strong>Furnace</strong>Your new furnace may be cleaned by using a soft cloth andkitchen cleaners such as Fantastic ® or Formula 409 ® . The frontpanel should be cleaned with a window cleaner such as Windex ® .Never clean the display window with a dry cloth or tissue asthis will scratch the surface.Always moisten the cleaning cloth with a cleaner such asWindex ® or water.Only clean the table with Windex ® or water and a towel. Usingother cleaners will harm the anodized surface. You will encounterproblems if 409 ® or Fantastic ® is used to clean the table.CAUTION!!! NEVER OPEN THE INTERIOR OFTHE CHASSIS BEFORE FIRST REMOVING THE ACELECTRICAL POWER CORD. THERE ARE DEADLYVOLTAGES INSIDE.If, for any reason, you need to access the interior of thechassis for the purpose of minor servicing or replacementof components such as valve plungers, you must removethe chassis top plate via two screws on the rear of thechassis, then slide the chassis top plate towards the frontof the furnace, then lift it up and set it aside. DO NOTremove the six screws on the bottom of the chassis in anattempt to remove the entire chassis top assembly as thebottom portion contains various electrical connectionswhich will prevent the removal of the bottom or subjectthe electrical connections to damaging stress unless firstdisconnected from the top.NOTE: IF HAZARDOUS MATERIAL IS SPILLED ON ORINSIDE THE FURNACE, CONTACT WHIP MIX TECHNICALSUPPORT IF THERE IS ANY DOUBT AS HOW TO SAFELYREMOVE THE MATERIAL.Argon Gas Requirements and Installation (<strong>Pro</strong> <strong>200</strong> only)Enter your own program based on the manufacturer’s instructionsfor the de-contamination material you are using.USE ONLY ARGON GAS IN THE <strong>Pro</strong> <strong>200</strong> FURNACE. ATTACHINGANY FLAMMABLE OR NOXIOUS GAS TO THIS FURNACECOULD CAUSE EXPLOSION OR PERSONAL INJURY!The best source of Argon is from your local bottled gas dealer.Usually the same dealer who furnishes Oxygen can alsosupply Argon. If not, he can recommend a reliable source.There are generally three grades of Argon available and yourdealer can tell you the cost of each. Most furnace buyers usethe lower cost commercial or industrial grade of Argon.The same dealer should be able to supply a regulator for thebottled Argon. It should have a gauge showing the pressureinside the tank, and a smaller gauge showing the pressureapplied to the outside system. The smaller gauge should readno more than 120 PSI maximum applied to the furnace.The furnace requires between one and two PSI of Argongas pressure. The use of more pressure will not improve theperformance of the furnace. If you plan to use the Argongas feature of this furnace you should also purchase a lowpressureArgon post regulator kit.The low-pressure post regulator kit attaches to the regulatorsupplied by your gas supplier. Installation of the low pressureregulator is as follows:DO NOT REMOVE THE REGULATOR SUPPLIED BYYOUR BOTTLED GAS SUPPLIER. THE LOW PRESSUREREGULATOR IS IN ADDITION TO THE REGULATORSUPPLIED FOR YOUR BOTTLE.1. The regulator supplied by the bottled gas companyusually has a hose barb fitting to attach your hose.Remove this fitting.2. The low-pressure regulator kit has a 1/4 inch male pipethread fitting supplied on one end. The other end hasa hose barb fitting for the supply hose to the furnace.Attach the male pipe thread end to the regulator onthe bottle. The first gauge reads the bottle pressure,the second gauge reads the pre-regulator pressure,and the third gauge reads from 0 to 15 PSI. Do notattach the gas to the furnace yet.3. Attach one end of the supplied hose to the lowpressureregulator. Do not attach the other end to thefurnace yet.4. Turn on the gas supply to the regulators.5. Adjust the pre-regulator (supplied by your gas dealer) toaround 20 PSI.6. Pull the red locking ring on the low-pressure regulatortowards the black Selector Knob on the bottom of theregulator to release the Selector Knob. Turn the blackSelector Knob fully counterclockwise. The pressureshould be 0.7. Turn the black Selector Knob clockwise until the lowpressuregauge reads between 1.0 and 1.5 PSI.8. Push the red locking ring up towards the gauge. This willlock the pressure setting.9. Turn off the gas supply from the bottle. Be sure to turn offthe supply when the gas is not being used to avoid theloss of gas due to fitting leaks.10. Attach the hose to the Argon connector on the back ofthe furnace.The furnace is now ready to run titanium and sinteringprograms, which require Argon gas.Note: The pressure reading may jump higherthan 1.5 PSI between firing and at times duringthe purging process. This is normal. PressureMAY be checked during the inert cool step inthe firing sequence. At that time Argon is beingapplied at a constant pressure to the furnace.The gauge should read between 1 and 1.5 PSI. YouMAY adjust the regulator at this time2617280 <strong>Pro</strong> <strong>Series</strong> <strong>200</strong> Manual_ENG.indd 26 8/12/11 1:54 PM


