Customer Setup of the NCR PC-8. - THE CORE MEMORY
Customer Setup of the NCR PC-8. - THE CORE MEMORY
Customer Setup of the NCR PC-8. - THE CORE MEMORY
- No tags were found...

Create successful ePaper yourself
Turn your PDF publications into a flip-book with our unique Google optimized e-Paper software.
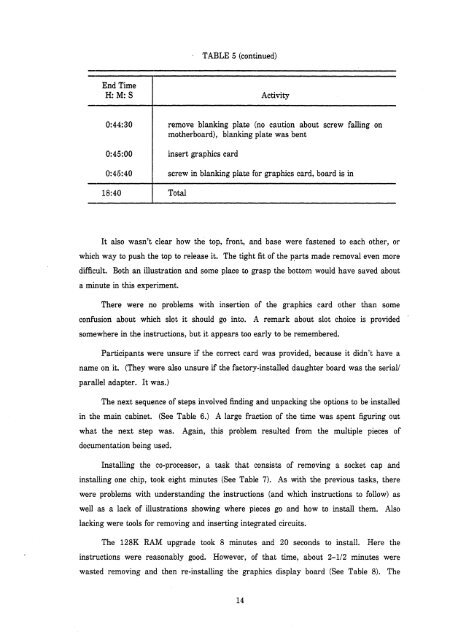
TABLE 5 (continued)Activity0:44:300:45:00remove blanking plate (no caution about screw falling onmo<strong>the</strong>rboard), blanking plate was bentinsert graphics card0:45:40 screw in blanking plate for graphics card, board is in-18: 40TotalIt also wasn't clear how <strong>the</strong> top, front, and base were fastened to each o<strong>the</strong>r, orwhich way to push <strong>the</strong> top to release it. The tight fit <strong>of</strong> <strong>the</strong> p.arts made removal even moredifficult. Both an illustration and some place to grasp <strong>the</strong> bottom would have saved abouta minute in this experiment.There were no problems with insertion <strong>of</strong> <strong>the</strong> graphics card o<strong>the</strong>r than someconfusion about which slot it should go into. A remark about slot choice is providedsome,where in <strong>the</strong> insl;ructions, but it appears too early to be remembered.Participants were unsure if <strong>the</strong> correct card was provided, because it didn't have aname on it. (They were also unsure if <strong>the</strong> factory-installed daughter board was <strong>the</strong> serial/parallel adapter. It wtas.)The next sequence <strong>of</strong> steps involved finding and unpacking <strong>the</strong> options to be installedin <strong>the</strong> main cabinet. (See Table 6.) A large fraction <strong>of</strong> <strong>the</strong> time was spent figuring outwhat <strong>the</strong> next step was. Again, this problem resulted from <strong>the</strong> multiple pieces <strong>of</strong>docunnentation being used.Installing <strong>the</strong> co-processor, a task that consists <strong>of</strong> removing a socket cap andinstalling one chip, took eight minutes (See Table 7). As with <strong>the</strong> previous tasks, <strong>the</strong>rewere problems with understanding <strong>the</strong> instructions (and which instructions to follow) aswell iks a lack <strong>of</strong> illustrations showing where pieces go and how to install <strong>the</strong>m. Alsolacking were tools for removing and inserting integrated circuits.The 128K RAlM upgrade took 8 minutes and 20 seconds to install. Here <strong>the</strong>instru.ctions were reasonably good. However, <strong>of</strong> that time, about 2-112 minutes werewasted removing and <strong>the</strong>n re-installing <strong>the</strong> graphics display board (See Table 8). The