HD-X2 - IRO AB
HD-X2 - IRO AB
HD-X2 - IRO AB
- No tags were found...

You also want an ePaper? Increase the reach of your titles
YUMPU automatically turns print PDFs into web optimized ePapers that Google loves.
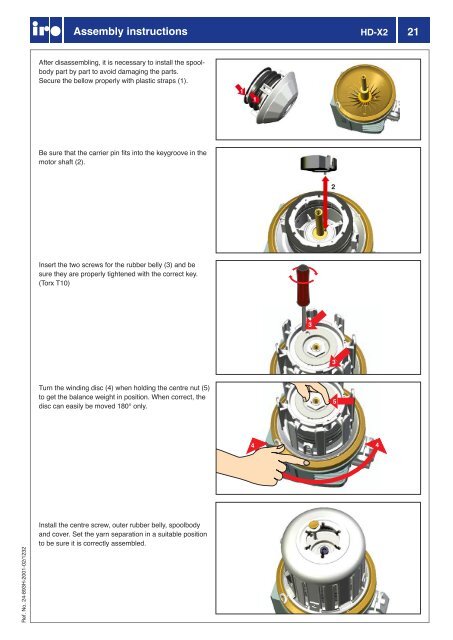
Assembly instructions<strong>HD</strong>-<strong>X2</strong> 21After disassembling, it is necessary to install the spoolbodypart by part to avoid damaging the parts.Secure the bellow properly with plastic straps (1).11Be sure that the carrier pin fits into the keygroove in themotor shaft (2).2Insert the two screws for the rubber belly (3) and besure they are properly tightened with the correct key.(Torx T10)333Turn the winding disc (4) when holding the centre nut (5)to get the balance weight in position. When correct, thedisc can easily be moved 180° only.544Ref. No. 24-893H-2001-02/1232Install the centre screw, outer rubber belly, spoolbodyand cover. Set the yarn separation in a suitable positionto be sure it is correctly assembled.