Asas Autocad 2D

Create successful ePaper yourself
Turn your PDF publications into a flip-book with our unique Google optimized e-Paper software.
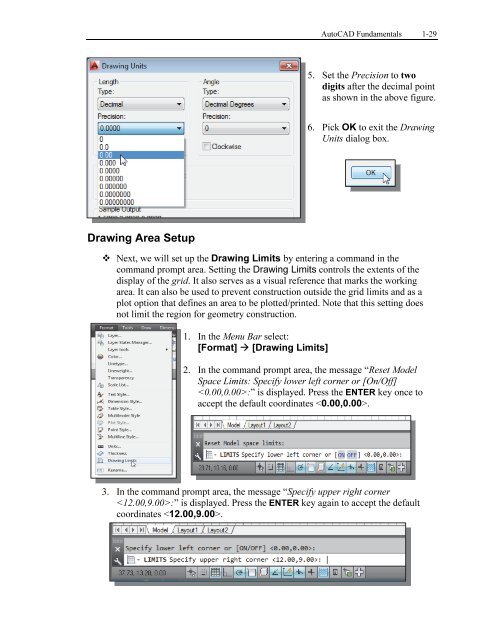
AutoCAD Fundamentals 1-29<br />
5. Set the Precision to two<br />
digits after the decimal point<br />
as shown in the above figure.<br />
6. Pick OK to exit the Drawing<br />
Units dialog box.<br />
Drawing Area Setup<br />
Next, we will set up the Drawing Limits by entering a command in the<br />
command prompt area. Setting the Drawing Limits controls the extents of the<br />
display of the grid. It also serves as a visual reference that marks the working<br />
area. It can also be used to prevent construction outside the grid limits and as a<br />
plot option that defines an area to be plotted/printed. Note that this setting does<br />
not limit the region for geometry construction.<br />
1. In the Menu Bar select:<br />
[Format] [Drawing Limits]<br />
2. In the command prompt area, the message “Reset Model<br />
Space Limits: Specify lower left corner or [On/Off]<br />
:” is displayed. Press the ENTER key once to<br />
accept the default coordinates .<br />
3. In the command prompt area, the message “Specify upper right corner<br />
:” is displayed. Press the ENTER key again to accept the default<br />
coordinates .