


Create successful ePaper yourself
Turn your PDF publications into a flip-book with our unique Google optimized e-Paper software.
Tutorial<br />
WALKTHROUGH<br />
This project requires quite a lot of software setup<br />
before you can go ahead and use it.<br />
The radio module uses the Raspberry Pi’s S<strong>PI</strong><br />
interface, which needs to be enabled, so run raspiconfig<br />
using the command:<br />
sudo raspi-config<br />
Scroll down to the Advanced option, select it, and<br />
then select S<strong>PI</strong>. Enable it, and when asked if you want<br />
This code is all in C++ but can be<br />
called from our Python program<br />
the S<strong>PI</strong> module to load automatically, say Yes.<br />
Next, you need to install and build the NRF24 library<br />
for the RF module by issuing the following commands:<br />
git clone https://github.com/TMRh20/RF24<br />
cd RF24<br />
make all<br />
sudo make install<br />
After that, you need to download a messaging<br />
library that provides a higher-level interface to the<br />
basic RF module using the following commands:<br />
cd ..<br />
wget http://torsten-traenkner.de/wissen/<br />
smarthome/openmilight_raspberry_pi.tgz<br />
tar xzvf openmilight_raspberry_pi.tgz<br />
This code is all in C++ and so that we can make use<br />
of it in Python, your expert has written a C++ program<br />
called send_cmd, which is designed to be called from<br />
Python with a command message to be sent to the<br />
Mi‐Light. Download this program and the Python code<br />
for the project from your Pi’s command line, using:<br />
git clone https://github.com/simonmonk/<br />
pi_magazine.git<br />
Copy all the files in the project folder 11_mi_light<br />
into the openmilight folder, and then compile two of<br />
the programs by using the commands:<br />
cp pi_magazine/11_mi_light/* openmilight<br />
cd openmilight<br />
sh ./comp.sh<br />
You also need to install the Python Bottle library that<br />
will be used for the web server, using the command:<br />
sudo apt-get install python-bottle<br />
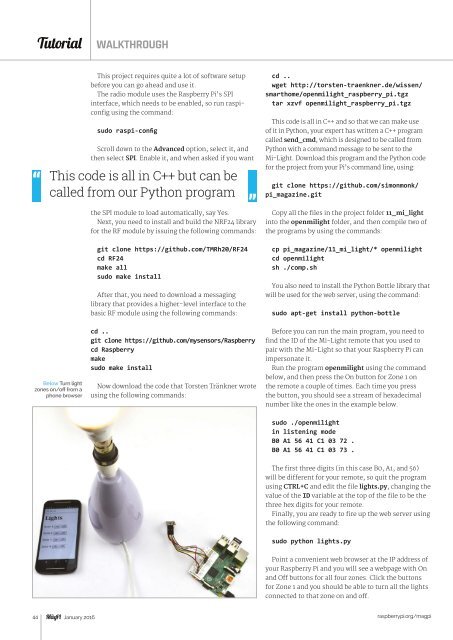
Below Turn light<br />
zones on/off from a<br />
phone browser<br />
cd ..<br />
git clone https://github.com/mysensors/Raspberry<br />
cd Raspberry<br />
make<br />
sudo make install<br />
Now download the code that Torsten Tränkner wrote<br />
using the following commands:<br />
Before you can run the main program, you need to<br />
find the ID of the Mi-Light remote that you used to<br />
pair with the Mi-Light so that your Raspberry Pi can<br />
impersonate it.<br />
Run the program openmilight using the command<br />
below, and then press the On button for Zone 1 on<br />
the remote a couple of times. Each time you press<br />
the button, you should see a stream of hexadecimal<br />
number like the ones in the example below.<br />
sudo ./openmilight<br />
in listening mode<br />
B0 A1 56 41 C1 03 72 .<br />
B0 A1 56 41 C1 03 73 .<br />
The first three digits (in this case B0, A1, and 56)<br />
will be different for your remote, so quit the program<br />
using CTRL+C and edit the file lights.py, changing the<br />
value of the ID variable at the top of the file to be the<br />
three hex digits for your remote.<br />
Finally, you are ready to fire up the web server using<br />
the following command:<br />
sudo python lights.py<br />
Point a convenient web browser at the IP address of<br />
your Raspberry Pi and you will see a webpage with On<br />
and Off buttons for all four zones. Click the buttons<br />
for Zone 1 and you should be able to turn all the lights<br />
connected to that zone on and off.<br />
44 January 2016<br />
raspberrypi.org/magpi