


Create successful ePaper yourself
Turn your PDF publications into a flip-book with our unique Google optimized e-Paper software.
Tutorial<br />
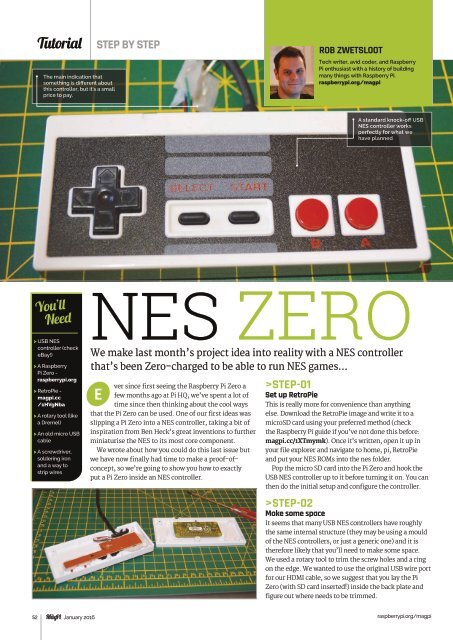
The main indication that<br />
something is different about<br />
this controller, but it's a small<br />
price to pay.<br />
STEP BY STEP<br />
ROB ZWETSLOOT<br />
Tech writer, avid coder, and Raspberry<br />
Pi enthusiast with a history of building<br />
many things with Raspberry Pi.<br />
raspberrypi.org/magpi<br />
A standard knock-off USB<br />
NES controller works<br />
perfectly for what we<br />
have planned<br />
You’ll<br />
Need<br />
> USB NES<br />
controller (check<br />
eBay!)<br />
> A Raspberry<br />
Pi Zero -<br />
raspberrypi.org<br />
> RetroPie -<br />
magpi.cc<br />
/1HVgNba<br />
> A rotary tool (like<br />
a Dremel)<br />
> An old micro USB<br />
cable<br />
> A screwdriver,<br />
soldering iron<br />
and a way to<br />
strip wires<br />
NES ZERO<br />
We make last month’s project idea into reality with a NES controller<br />
that’s been Zero-charged to be able to run NES games...<br />
E<br />
ver since first seeing the Raspberry Pi Zero a<br />
few months ago at Pi HQ, we’ve spent a lot of<br />
time since then thinking about the cool ways<br />
that the Pi Zero can be used. One of our first ideas was<br />
slipping a Pi Zero into a NES controller, taking a bit of<br />
inspiration from Ben Heck’s great inventions to further<br />
miniaturise the NES to its most core component.<br />
We wrote about how you could do this last issue but<br />
we have now finally had time to make a proof-ofconcept,<br />
so we’re going to show you how to exactly<br />
put a Pi Zero inside an NES controller.<br />
>STEP-01<br />
Set up RetroPie<br />
This is really more for convenience than anything<br />
else. Download the RetroPie image and write it to a<br />
microSD card using your preferred method (check<br />
the Raspberry Pi guide if you’ve not done this before:<br />
magpi.cc/1XTmymk). Once it’s written, open it up in<br />
your file explorer and navigate to home, pi, RetroPie<br />
and put your NES ROMs into the nes folder.<br />
Pop the micro SD card into the Pi Zero and hook the<br />
USB NES controller up to it before turning it on. You can<br />
then do the initial setup and configure the controller.<br />
>STEP-02<br />
Make some space<br />
It seems that many USB NES controllers have roughly<br />
the same internal structure (they may be using a mould<br />
of the NES controllers, or just a generic one) and it is<br />
therefore likely that you’ll need to make some space.<br />
We used a rotary tool to trim the screw holes and a ring<br />
on the edge. We wanted to use the original USB wire port<br />
for our HDMI cable, so we suggest that you lay the Pi<br />
Zero (with SD card inserted!) inside the back plate and<br />
figure out where needs to be trimmed.<br />
52 January 2016<br />
raspberrypi.org/magpi