SUMMER 2023
Distributor's Link Magazine Summer 2023 / Vol 46 No 3
Distributor's Link Magazine Summer 2023 / Vol 46 No 3

Create successful ePaper yourself
Turn your PDF publications into a flip-book with our unique Google optimized e-Paper software.
142<br />
THE DISTRIBUTOR’S LINK<br />
LARRY BOROWSKI SETTING ADJUSTABLE THREAD RINGS PART 2 - HOW IT IS DONE from page 108<br />
Making the Adjustment (with the ring engaged<br />
on the set plug if possible):<br />
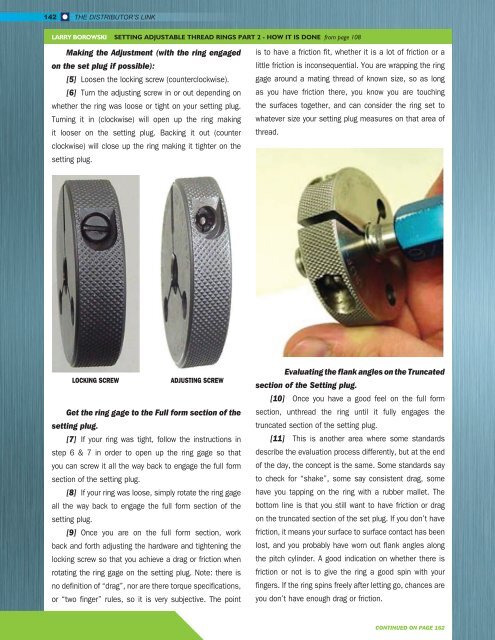
[5] Loosen the locking screw (counterclockwise).<br />
[6] Turn the adjusting screw in or out depending on<br />
whether the ring was loose or tight on your setting plug.<br />
Turning it in (clockwise) will open up the ring making<br />
it looser on the setting plug. Backing it out (counter<br />
clockwise) will close up the ring making it tighter on the<br />
setting plug.<br />
is to have a friction fit, whether it is a lot of friction or a<br />
little friction is inconsequential. You are wrapping the ring<br />
gage around a mating thread of known size, so as long<br />
as you have friction there, you know you are touching<br />
the surfaces together, and can consider the ring set to<br />
whatever size your setting plug measures on that area of<br />
thread.<br />
LOCKING SCREW<br />
ADJUSTING SCREW<br />
Get the ring gage to the Full form section of the<br />
setting plug.<br />
[7] If your ring was tight, follow the instructions in<br />
step 6 & 7 in order to open up the ring gage so that<br />
you can screw it all the way back to engage the full form<br />
section of the setting plug.<br />
[8] If your ring was loose, simply rotate the ring gage<br />
all the way back to engage the full form section of the<br />
setting plug.<br />
[9] Once you are on the full form section, work<br />
back and forth adjusting the hardware and tightening the<br />
locking screw so that you achieve a drag or friction when<br />
rotating the ring gage on the setting plug. Note: there is<br />
no definition of “drag”, nor are there torque specifications,<br />
or “two finger” rules, so it is very subjective. The point<br />
Evaluating the flank angles on the Truncated<br />
section of the Setting plug.<br />
[10] Once you have a good feel on the full form<br />
section, unthread the ring until it fully engages the<br />
truncated section of the setting plug.<br />
[11] This is another area where some standards<br />
describe the evaluation process differently, but at the end<br />
of the day, the concept is the same. Some standards say<br />
to check for “shake”, some say consistent drag, some<br />
have you tapping on the ring with a rubber mallet. The<br />
bottom line is that you still want to have friction or drag<br />
on the truncated section of the set plug. If you don’t have<br />
friction, it means your surface to surface contact has been<br />
lost, and you probably have worn out flank angles along<br />
the pitch cylinder. A good indication on whether there is<br />
friction or not is to give the ring a good spin with your<br />
fingers. If the ring spins freely after letting go, chances are<br />
you don’t have enough drag or friction.<br />
CONTINUED ON PAGE 162