SERVICE MANUAL - SONYRUS
SERVICE MANUAL - SONYRUS
SERVICE MANUAL - SONYRUS

You also want an ePaper? Increase the reach of your titles
YUMPU automatically turns print PDFs into web optimized ePapers that Google loves.
DSC-W1/W12<br />
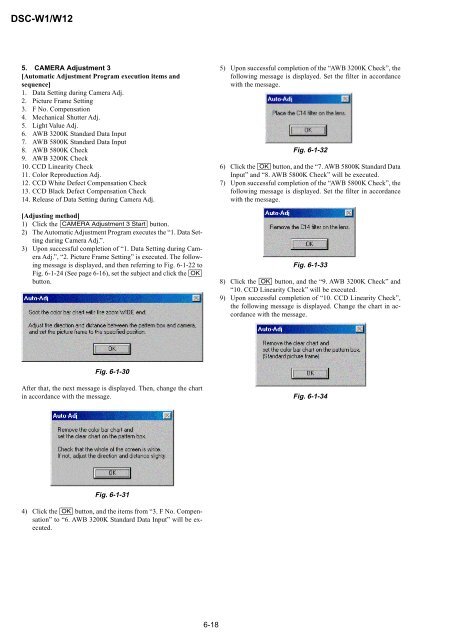
5. CAMERA Adjustment 3<br />
[Automatic Adjustment Program execution items and<br />
sequence]<br />
1. Data Setting during Camera Adj.<br />
2. Picture Frame Setting<br />
3. F No. Compensation<br />
4. Mechanical Shutter Adj.<br />
5. Light Value Adj.<br />
6. AWB 3200K Standard Data Input<br />
7. AWB 5800K Standard Data Input<br />
8. AWB 5800K Check<br />
9. AWB 3200K Check<br />
10. CCD Linearity Check<br />
11. Color Reproduction Adj.<br />
12. CCD White Defect Compensation Check<br />
13. CCD Black Defect Compensation Check<br />
14. Release of Data Setting during Camera Adj.<br />
[Adjusting method]<br />
1) Click the [CAMERA Adjustment 3 Start] button.<br />
2) The Automatic Adjustment Program executes the “1. Data Setting<br />
during Camera Adj.”.<br />
3) Upon successful completion of “1. Data Setting during Camera<br />
Adj.”, “2. Picture Frame Setting” is executed. The following<br />
message is displayed, and then referring to Fig. 6-1-22 to<br />
Fig. 6-1-24 (See page 6-16), set the subject and click the [OK]<br />
button.<br />
Fig. 6-1-30<br />
After that, the next message is displayed. Then, change the chart<br />
in accordance with the message.<br />
Fig. 6-1-31<br />
4) Click the [OK] button, and the items from “3. F No. Compensation”<br />
to “6. AWB 3200K Standard Data Input” will be executed.<br />
6-18<br />
5) Upon successful completion of the “AWB 3200K Check”, the<br />
following message is displayed. Set the filter in accordance<br />
with the message.<br />
Fig. 6-1-32<br />
6) Click the [OK] button, and the “7. AWB 5800K Standard Data<br />
Input” and “8. AWB 5800K Check” will be executed.<br />
7) Upon successful completion of the “AWB 5800K Check”, the<br />
following message is displayed. Set the filter in accordance<br />
with the message.<br />
Fig. 6-1-33<br />
8) Click the [OK] button, and the “9. AWB 3200K Check” and<br />
“10. CCD Linearity Check” will be executed.<br />
9) Upon successful completion of “10. CCD Linearity Check”,<br />
the following message is displayed. Change the chart in accordance<br />
with the message.<br />
Fig. 6-1-34