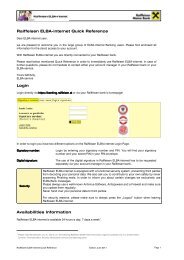
Info - Raiffeisen
Info - Raiffeisen
Info - Raiffeisen

Create successful ePaper yourself
Turn your PDF publications into a flip-book with our unique Google optimized e-Paper software.
ELBA-business<br />
Electronic banking for your office<br />
Installation Guideline<br />
ELBA-business 5.4.1<br />
Network / Multiuser Installation<br />
Installation Guideline Network / Multiuser 5.4.1<br />
December 2009<br />
Page 1
ELBA-business<br />
Electronic banking for your office<br />
Table of contents<br />
1. Preface ...................................................................................3<br />
1.1 Before Installation............................................................................................3<br />
1.2 What you need before the installation of ELBA ...............................................3<br />
1.3 Definitions........................................................................................................4<br />
2. Installation guideline ..............................................................5<br />
2.1 Installation ...................................................................................................... 5<br />
2.2 What are bank data?.....................................................................................11<br />
2.3 Assistant for the set up of bank data.............................................................11<br />
2.4 Connection of ELBA to workstation/client......................................................20<br />
2.5 Access to ELBA.............................................................................................20<br />
3. Database backup .................................................................21<br />
3.1 General..........................................................................................................21<br />
3.2 Possibility 1 (Back-up on the server via automated magnetic tape backup) .................21<br />
3.3 Possibility 2 (Backup on the server without tape backup) ........................................22<br />
4. Multiuser configuration ........................................................23<br />
5. Technical Annex ...................................................................24<br />
5.1 dial-up Network under Windows 2000 ..........................................................24<br />
5.2 dial-up Network under Windows XP ..............................................................25<br />
5.3 dial-up Network under Windows Vista ..........................................................26<br />
5.4 Integration of foreign banks...........................................................................28<br />
5.5 Additional technical information about installation ........................................29<br />
5.6 ELBA-Installation on the terminal-server or citrix-server ...............................29<br />
Installation Guideline Network / Multiuser 5.4.1<br />
December 2009<br />
Page 2
ELBA-business<br />
Electronic banking for your office<br />
1. Preface<br />
1.1 Before Installation<br />
You You have have to to install install your your ELBA ELBA program program directly directly on on on the the server server<br />
server<br />
(standard: (standard: server server server under under C: C:\Program<br />
C: rogram Files Files\ELBA5)<br />
Files<br />
ELBA5)<br />
Please notice that all “ELBA-workstations” that schould access ELBA from the networkdrive have to<br />
have the same access permission to the network drive e.g. K:\ELBA<br />
For the network installation two possibilities are available and described as follows:<br />
Network Network installation installation:<br />
installation<br />
ELBA 5 can be installed in the network for shared access from several work stations. Thereby<br />
is only one concurrent access to your ELBA by one user at a time possible.<br />
Please note that the installation has to be executed directly on the server and only from an IT<br />
expert who has required administrator rights on this server.<br />
In the course of the network installation a data base service called “SQL Anywhere - Elba-5”<br />
has to be installed additionally.<br />
Multiuser Multiuser-compatible Multiuser compatible network network installation:<br />
installation:<br />
It is the enhancement of the network installation.<br />
The multiuser-function has to be separately requested from your account manager at your<br />
<strong>Raiffeisen</strong> bank. The installation is the same like the network installation but consequently a<br />
defined number of users have access to your ELBA data AT THE SAME TIME – concurrent<br />
users.<br />
Please note that beside the successful installation of ELBA-business the implementation of<br />
the data base base backup (described on page 21/chapter 3) is an essential part for your daily<br />
operations.<br />
1.2 What you need before the installation of ELBA<br />
ELBA CD-Rom<br />
Envelope with password<br />
Envelope with PIN (from each of your ELBA-disposers)<br />
User name and password of your Internet-Provider (in case of dial-up communication)<br />
Installation Guideline Network / Multiuser 5.4.1<br />
December 2009<br />
Page 3
ELBA-business<br />
Electronic banking for your office<br />
1.3 Definitions<br />
LICENCENUMBER (to be found in the envelope with the password):<br />
This is the number under which your ELBA-version is licensed. It is needed during the<br />
installation process.<br />
COMMUNICATION AUTHORIZATION (to be found in the envelope with the<br />
password)<br />
This authorization is a synonym for your (business-) name e.g. ELVIE3xKBV00001.<br />
It is also needed during the installation process.<br />
PASSWORD (to be found in the envelope with the password)<br />
The password refers to the communication authorization and and is also needed during the<br />
installation process.<br />
AUTHORISED SIGNATORY (to be found in the envelope with the PIN)<br />
Each authorised signatory receives a TAN list.<br />
PIN (to be found in the envelope with the PIN)<br />
This is a five-digit numerical code which refers to the authorised signatory.<br />
TAN (list)<br />
TAN = Transaction number or “electronic signature”. Each TAN is valid only once and is<br />
used to “sign“ orders (e.g. monetary transfers).<br />
USER<br />
Access to the program is only possible for user (max. 8-digits) with an appropriate password.<br />
You can define the user by yourself in the program and you also can determine what this<br />
user will be authorized to do and which accounts he will be authorized to edit.<br />
In ELBA-business 5.4.1 there is a predefined system administrator<br />
(User: SYSADMIN – Password elbaw). This user is available automatically after the<br />
installation and is used for miscellaneous settings. For safety reasons you will be requested<br />
to change your password at first-login.<br />
PASSWORD<br />
You have access to the program with your self defined password. It is always referring to a<br />
single user and has a maximum of 8 digits.<br />
1.4 Instruction manual<br />
A detailed instruction manual of the program can be found in the so-called online help help! help<br />
How does the online help work?<br />
If you have questions to an opened mask in ELBA simply click on the button. Thereby the<br />
online online-help online help to the accordingly opened mask appears.<br />
Installation Guideline Network / Multiuser 5.4.1<br />
December 2009<br />
Page 4
ELBA-business<br />
Electronic banking for your office<br />
2. Installation guideline<br />
Important<br />
2.1 Installation<br />
Installation Guideline Network / Multiuser 5.4.1<br />
The network setup has to be executed from your responsible IT system<br />
administrator<br />
administrator!<br />
administrator<br />
administrator<br />
For the installation a linked network drive cannot be selected! The setup has<br />
to be done directly on the server to the servers local hard hard disk disk. disk<br />
Insert your ELBA CD-Rom into your CD drive of your server.<br />
Through the autostart function of the CD-Rom mask 1 1 is opened.<br />
<strong>Info</strong><br />
If the autostart function is deactivated please proceed as follows:<br />
Open the windows-explorer<br />
Select your CD-Rom drive<br />
Double click on file “ELBA5_Netzwerk_Setup.exe”<br />
Continue the installation as described under point 2/page 6.<br />
Select in the installation menu of the ELBA CD the link “Welcome Welcome Welcome”. Welcome Continue the installation as<br />
described in mask mask 11.<br />
1<br />
Select the button<br />
‚to the network<br />
installation’<br />
December 2009<br />
1<br />
Page 5
ELBA-business<br />
Electronic banking for your office<br />
Installation Guideline Network / Multiuser 5.4.1<br />
2<br />
3<br />
4<br />
5<br />
December 2009<br />
Choose the language for your ELBA<br />
installation.<br />
“DEUTSCH” (German) is predefined as<br />
a standard.<br />
Use the pull-down menu to switch to<br />
English.<br />
Click “OK” to get to screen screen 3<br />
To print the installation guideline for ELBA<br />
which includes information to all steps of<br />
the set up, please press “Instruction”.<br />
Note: Note: Only the system administrator is<br />
allowed to make installations on the server.<br />
Click “Next” to get to screen 4<br />
Select “New installation”<br />
Click “Next” to get to screen 5<br />
This screen provides you with more<br />
information concerning the installation of<br />
ELBA-business<br />
Click “Next” to get to screen 6<br />
Page 6
ELBA-business<br />
Electronic banking for your office<br />
<strong>Info</strong><br />
Installation Guideline Network / Multiuser 5.4.1<br />
6<br />
7<br />
8<br />
We recommend to keep the standard selection of the directories! As a<br />
consequence all ELBA data will be directly saved in the ELBA5-program<br />
directory.<br />
December 2009<br />
Enter the following data:<br />
Your Bank<br />
(from the Pull-down menu)<br />
Your License number<br />
(to be found in the envelope with the<br />
password)<br />
Registered for<br />
(Your company name)<br />
Click “Next” to get to screen screen 7<br />
Choose the directory where you want to install<br />
ELBA.<br />
The directory C:\Program Files\ELBA5<br />
is recommended as a standard.<br />
Here all local hard disks of the server are<br />
available.<br />
Click “Next” to get to mask mask 8<br />
This mask offers the possibility to select the<br />
desired directories where you would like to<br />
save the variable ELBA-data (e.g. elba.db,<br />
export data, logfiles, in_out files, properties<br />
files).<br />
The directories also have to be available<br />
locally on the server hard disk.<br />
Click “Next Next Next” Next to get to mask 9.<br />
Page 7
ELBA-business<br />
Electronic banking for your office<br />
Installation Guideline Network / Multiuser 5.4.1<br />
9<br />
10<br />
11<br />
December 2009<br />
Data Data base base name: name: ELBA5SRV<br />
Port: Port: 2640<br />
Service Service name: name: Elba-5<br />
We recommend not to make any changes in<br />
this mask. These data are necessary for the<br />
setting of the ELBA-service.<br />
Click “Next” Next” to get to screen 10<br />
This screen is crucial for how you will have to<br />
start ELBA in the future.<br />
We suggest:<br />
Choose “Don`t create icons” as you<br />
connect the single work stations manually to<br />
elba5.exe after successful installation on the<br />
server.<br />
Moreover please deactivate the option “Create<br />
icons for All Users”<br />
Click “Next” to get to screen 11<br />
This screen gives you a summary of your<br />
selections throughout the installation<br />
process.<br />
If you want to make any changes to your<br />
selections click the button “Previous”<br />
and repeat the respective steps as<br />
described above.<br />
Click “Install” to get to screen screen 12<br />
12<br />
Page 8
ELBA-business<br />
Electronic banking for your office<br />
14/1<br />
14/2<br />
Installation Guideline Network / Multiuser 5.4.1<br />
12<br />
13<br />
December 2009<br />
This screen informs you about the progress of<br />
the installation. There is no input essential!<br />
Screen 13 opens up automatically<br />
After installation the ELBA data base is<br />
automatically started (see mask 14/1)<br />
If this does not work please have a look at<br />
your firewall settings.<br />
Mask Mask Mask 14 14/1 14 14 /1 is opened and closed<br />
automatically.<br />
Click on “next next next” next to get to mask 15<br />
You will be informed about the successful<br />
start of the data base service through the<br />
SQL symbol in the Notification Area (see<br />
mask 14/2).<br />
Page 9
ELBA-business<br />
Electronic banking for your office<br />
<strong>Info</strong><br />
Installation Guideline Network / Multiuser 5.4.1<br />
15<br />
In the course of the installation the feature “SQL Anywhere - Elba-5” was<br />
automatically set up on the server.<br />
December 2009<br />
The installation is completed.<br />
Subsequently you have to set up your<br />
bank data as described on the following<br />
pages.<br />
Click “Done” to get to bank data setup.<br />
(see page 11 and the following)<br />
Page 10
ELBA-business<br />
Electronic banking for your office<br />
2.2 What are bank data?<br />
Bank data are your individual data which are necessary to run ELBA properly.<br />
(bank code, account number, disposer,….)<br />
ELBA has an integrated assistant which guides you through the registration process:<br />
1. Authorise Communication is a synonym for your (business-) name<br />
2. Transfer settings configures the connection to the bank server<br />
3. Request bank data calls up your bank data (disposer, accounts etc.) from the bank server<br />
4. Account administration checks the called accounts<br />
5. Authorized disposer/accounts checks your authorized signatories<br />
6. User administration creates users (persons who are allowed to work with ELBA)<br />
7. Individual settings enable to configure user-related settings<br />
8. System settings define guidelines to run the program<br />
2.3 Assistant for the set up of bank data<br />
Installation Guideline Network / Multiuser 5.4.1<br />
1<br />
2<br />
1<br />
2<br />
3<br />
December 2009<br />
Choose “Authorise communication” in<br />
order to start the set up!<br />
Click “Authorise communication”<br />
to advance to screen 2<br />
Point 1:<br />
Choose your licensor bank from the pulldown<br />
menu.<br />
Point 2:<br />
Enter your communication account (to be<br />
found in the envelope with the password)<br />
Password and Repetition:<br />
Enter your password<br />
(to be found in the envelope with the<br />
password)<br />
Name:<br />
Enter your business name.<br />
Click “OK” to advance to screen 3<br />
Select “Transfer settings” to continue with<br />
the assistant.<br />
In this section you can decide how to<br />
establish the connection to the bank<br />
server.<br />
Click “Transfer settings” to get to<br />
screen 4<br />
Page 11
ELBA-business<br />
Electronic banking for your office<br />
In screen 4 you can undertake settings to establish the connection from<br />
your computer to the bank server.<br />
Depending on your system there are two possibilities described as option A or B:<br />
Option A:<br />
You have ADSL, Cable, or Router?<br />
Activate the option „existing existing connection connection“!<br />
connection<br />
This means that the internet connection is permanently ONLINE and that ELBA-business uses this<br />
connection to log on to the bank server.<br />
No further settings have to be undertaken!<br />
Click “OK OK OK” OK to continue the set up<br />
Option B: (is divided into two options)<br />
1. You have an Internet connection which has to be activated<br />
“manually“.<br />
That means that you have to click “dial” or “connect” after opening the Internet Browser (e.g.<br />
Internet Explorer/Netscape).<br />
Select the entry for your internet connection in the field “Dial-up connection to the<br />
bank server with network entry“.<br />
In the field USER fill in the user name/log in of your internet provider and in the<br />
field “Password” fill in the password.<br />
If you do not know these data please contact your Internet provider.<br />
Click “OK” to continue.<br />
2. You do not have access to the Internet.<br />
Click the symbol under “Dial-up connection to the bank server with<br />
network entry“.<br />
Subsequently your operating software will open an assistant to guide you through the<br />
configuration process. From page 24 onward you will be provided with a set up<br />
guideline concerning such a network – depending on your operating<br />
software.<br />
Confirm by clicking “OK OK OK” OK and start your data transmission.<br />
Installation Guideline Network / Multiuser 5.4.1<br />
4<br />
December 2009<br />
The field „Communication account“<br />
is already filled in.<br />
Undertake your settings for the<br />
Communication authorization (see<br />
definition on page 3) now.<br />
Page 12
ELBA-business<br />
Electronic banking for your office<br />
Installation Guideline Network / Multiuser 5.4.1<br />
5<br />
6<br />
7<br />
December 2009<br />
Continue with “Request bank data”<br />
Click “Request bank data” to get to<br />
screen 6<br />
Please choose your ELBA-institute<br />
(<strong>Raiffeisen</strong>.....).<br />
Click “OK” to get to screen 7<br />
The software will create the connection to<br />
the bank server.<br />
In this screen all the single steps of the<br />
login are recorded.<br />
The index card “Analysis” provides you<br />
with further details concerning the request<br />
of bank data.<br />
If the connection to the bank server does<br />
not work please try to start another login!<br />
In case of another failure please contact<br />
the ELBA-hotline!<br />
Click “Close” to get to screen 8<br />
Page 13
ELBA-business<br />
Electronic banking for your office<br />
Installation Guideline Network / Multiuser 5.4.1<br />
8<br />
9<br />
10<br />
December 2009<br />
During the request of bank data process you<br />
already have been provided with your<br />
accounts from the bank server automatically.<br />
Please check it with the button “Account<br />
administration“.<br />
Click “Account administration” to<br />
get to screen 9<br />
This screen displays the accounts which<br />
are available for ELECTRONIC BANKING.<br />
Should you require a change/an<br />
enhancement of these authorizations<br />
please contact your account manager at<br />
your <strong>Raiffeisen</strong> bank.<br />
In the field “Account Holder” you can<br />
add your (business-) address in the<br />
second line (optional).<br />
In the field “Short name” you can<br />
assign a brief description for each account<br />
(optional).<br />
Click “OK” to get to screen 10<br />
The button<br />
“Authorise disposer/accounts”<br />
allows you to check whether the authorised<br />
signatories are attached to the accurate<br />
accounts or not.<br />
The authorised signatories are taken from the<br />
bank server automatically.<br />
Changes can only be requested from your<br />
account manager at your <strong>Raiffeisen</strong> bank.<br />
Click “Authorise disposer/accounts”<br />
to get to screen 11<br />
Page 14
ELBA-business<br />
Electronic banking for your office<br />
Installation Guideline Network / Multiuser 5.4.1<br />
11<br />
12<br />
13<br />
14<br />
December 2009<br />
Here you can see your ELBA authorised<br />
disposers.<br />
Mark every authorised disposer separately<br />
and enter the respective PIN in the field<br />
“PIN” (PIN is to be found in the envelope<br />
with the PIN).<br />
In the field “Repetition” enter the<br />
respective PIN again.<br />
Click “OK” to get to screen 12<br />
Now you can collect your account<br />
statements from the bank server.<br />
Click “Request transactions” to<br />
get to screen13<br />
In this window all the single steps which<br />
occurred during the account statement<br />
collection process are registered.<br />
Click “Close” to get to screen 14<br />
When starting the program you have to enter<br />
a certain user.<br />
The assistant will help you in creating the<br />
users.<br />
Click “User administration” to get to<br />
screen 15<br />
Page 15
ELBA-business<br />
Electronic banking for your office<br />
Installation Guideline Network / Multiuser 5.4.1<br />
15<br />
16<br />
17<br />
December 2009<br />
MUSTER1 und SYSADMIN are users who<br />
are existing in the program automatically.<br />
Click the button “New” to create a new<br />
user.<br />
The password for the user<br />
SYSADMIN is ELBAW. This<br />
password has to be changed at<br />
the initial login.<br />
Special actions within the program<br />
are feasible for this user only (e.g.<br />
deletion of accounts)!<br />
Click “New” ” to get to screen 16<br />
In the field “USER” please enter the preselected<br />
User to start ELBA in the future<br />
(max. 8 digits).<br />
In the field “Name of the user” enter<br />
the name of the user.<br />
It is not mandatory to fill in the field<br />
“Division” but it is advised to be done.<br />
Click “OK” ” to advance to screen 17<br />
You will receive a note that the password<br />
for the first entry of the new created user is<br />
ELBA.<br />
Click “OK” to advance to screen 18<br />
Page 16
ELBA-business<br />
Electronic banking for your office<br />
Installation Guideline Network / Multiuser 5.4.1<br />
18<br />
19<br />
20<br />
December 2009<br />
Here you can see the user created before<br />
(he is marked in blue).<br />
Choose the index card “Accounts“<br />
Now you can decide which accounts the<br />
user shall be allowed to see resp. which<br />
accounts he will be allowed to work with!<br />
The accounts allowed to be seen must be<br />
marked with<br />
Click “Menu authorisations” to get<br />
to screen 19<br />
Here you can decide which activities the<br />
user will be allowed to execute in ELBA.<br />
When clicking the button “Authorise<br />
menus” several authorisation profiles<br />
can be selected.<br />
Click “OK” ” to get to mask 20<br />
In a next step you are able to make user-<br />
related “Individual settings” and “System<br />
settings”.<br />
Click “Individual settings” to get to<br />
screen 21!<br />
Page 17
ELBA-business<br />
Electronic banking for your office<br />
Installation Guideline Network / Multiuser 5.4.1<br />
21<br />
22<br />
23<br />
December 2009<br />
Under “individual individual individual settings settings” settings settings you are able to<br />
configure ELBA for each user according to<br />
his individual requirements.<br />
Click “OK” to get to screen 22<br />
Finally you are now able to make<br />
miscellaneous system settings.<br />
Click “System System settings settings” settings to get to screen<br />
23.<br />
Under “system system settings settings” settings<br />
you are able to<br />
define different guidelines for the program<br />
execution.<br />
We recommend making NO changes for<br />
the time being here.<br />
Click “OK OK OK” OK to get to screen 24.<br />
Page 18
ELBA-business<br />
Electronic banking for your office<br />
Finish ELBA by clicking<br />
Installation Guideline Network / Multiuser 5.4.1<br />
24<br />
December 2009<br />
You have now set up your bank data<br />
successfully!<br />
Click “Exit Exit Exit” Exit to close the assistant.<br />
Page 19
ELBA-business<br />
Electronic banking for your office<br />
2.4 Connection of ELBA to workstation/client<br />
After successful installation of ELBA on your server, you have to set links to to the file ELBA5.exe on<br />
each each workstation workstation from which ELBA will be started.<br />
Please note that the network drive from which ELBA is started via workstation has to be authorized on<br />
all all “ELBA “ELBA workstations” workstations” with the same drive letter letter. letter<br />
2.5 Access to ELBA<br />
Via the respective program linkage of ”ELBA5.EXE” you get to the ELBA user login.<br />
As already mentioned on page 17/screen 15, please note that at the initial login with the standard<br />
system administrator SYSADMIN the standard password ELBAW has to be changed immediately for<br />
security reasons! For this purpose you will automatically receive a respective request when logging in<br />
with the user SYSADMIN (see mask 2). The change of the standard password is necessary and<br />
cannot be avoided!<br />
The installation and the setup of your bank data are finished!<br />
Installation Guideline Network / Multiuser 5.4.1<br />
1<br />
2<br />
December 2009<br />
Enter the USER which you have defined in<br />
step 15 in the field “User“! ! (see page<br />
17/screen 15)<br />
“Password“: enter ELBA.<br />
Confirm by clicking “Login“.<br />
Now the program asks you to change the<br />
password.<br />
Old password:<br />
ELBA<br />
New password:<br />
Create your own Password.<br />
Repetition:<br />
Repeat the new password<br />
Confirm with “OK“<br />
Page 20
ELBA-business<br />
Electronic banking for your office<br />
3. Database backup<br />
3.1 General<br />
In this chapter we would like to describe three possibilities how to backup your ELBA database in the<br />
future.<br />
Depending on your requirements and the security concept of your company please choose one of<br />
these possibilities.<br />
3.2 Possibility 1 (Back-up on the server via automated magnetic tape backup)<br />
In the course of the ELBA installation a service for the ELBA data base was set up on the server in the<br />
Windows services (see mask 9 in chapter 2.1.Installation).<br />
In order to save the ELBA data base in the course of a possible automated tape backup of your<br />
system this service has to be closed.<br />
In order to automate this, you will find on the ELBA CD in the directory CD Rom:\Tools\Sicherung two<br />
BAT-files dbstop.bat dbstop.bat and dbstart.bat dbstart.bat.<br />
dbstart.bat<br />
In “dbstop.bat dbstop.bat dbstop.bat” dbstop.bat the stop and in “dbstart.bat dbstart.bat dbstart.bat” dbstart.bat the start of the ELBA data base is defined.<br />
Copy these two files into your ELBA5 program directory.<br />
Control the entries in the files and change them if necessary to your installation specifications!<br />
<strong>Info</strong><br />
Contents of<br />
the files:<br />
Should you have defined at the installation in mask 9 in chapter 2.1.Installation another<br />
ser servicename<br />
ser servicename<br />
vicename, vicename you now have to adapt it in the BAT files.<br />
In order that these BAT files are executed automatically in the future you subsequently have to set up<br />
Scheduled Tasks for them on the server.<br />
Therefore select on the server “Control Panel”>>”Scheduled Tasks” the option “Add Scheduled<br />
Task” and follow the instructions of the assistant.<br />
<strong>Info</strong><br />
dbstop.bat<br />
dbstart.bat<br />
To stop the service it is necessary to enter a time before starting your tape backup and<br />
to start it you have to choose a point of time after the tape backup is finished.<br />
1 Translation of the comment line of the batch-file – please adapt if required: „Stops the database/ the service of ELBA5”<br />
2 Translation of the comment line of the batch-file – please adapt if required: “Starts the database/ the service of ELBA5”<br />
Installation Guideline Network / Multiuser 5.4.1<br />
REM Stoppen der Datenbank/des Dienstes von ELBA51<br />
net stop " SQL Anywhere - Elba-5"<br />
exit<br />
REM Starten der Datenbank/des Dienstes von ELBA52<br />
net start " SQL Anywhere - Elba-5"<br />
exit<br />
December 2009<br />
Page 21
ELBA-business<br />
Electronic banking for your office<br />
3.3 Possibility 2 (Backup on the server without tape backup)<br />
Copy the BAT file “dbbackup.bat<br />
dbbackup.bat<br />
dbbackup.bat” dbbackup.bat from the ELBA CD-Rom (CD Rom:\Tools\Sicherung) into your<br />
ELBA5 program directory.<br />
Control the pathnames in the BAT file and change them according to your requirements<br />
Contents of the file:<br />
In the example of the above quoted dbbackup.bat the data backup would be saved in the directory<br />
“C:\programs\elba5\Sicherung”<br />
The backup file has the name “elbn.ebk elbn.ebk elbn.ebk”. elbn.ebk<br />
Additionally a LOG file named “batch.log batch.log batch.log” batch.log is saved in the backup directory.<br />
After the configuration of the dbbackup.bat you have to set up a Scheduled Task ask for this BAT file on<br />
the server.<br />
For this select on the server under “Control Control Panel>> Panel>>Scheduled<br />
Panel>> Panel>> Scheduled Scheduled Tasks asks asks” asks the option “Add Scheduled<br />
Task” and follow the instructions of the assistant.<br />
<strong>Info</strong><br />
Select for the execution of the Scheduled TTask<br />
T<br />
ask a time when no user works with ELBA<br />
(proposal: during the night)<br />
Installation Guideline Network / Multiuser 5.4.1<br />
REM Onlinedatensicherung für ELBA5 erstellen<br />
REM Bitte geben Sie den Pfad zur Datei DASIBATCH.EXE an. Nach dem Parameter 3<br />
outputpath= geben Sie bitte das<br />
REM Ziel der Sicherung an.<br />
"C:\Programme\elba5\dasibatch.exe" “outputpath=C:\Programme\elba5\Sicherung\”<br />
Exit<br />
3 Translation of the comment line of the batch-file – please adapt if required: “Create Online-backup for ELBA5” “Please enter<br />
the pathname of the file DASIBATCH.EXE. Set the required backup output pathname with the parameter “outputpath=”.<br />
December 2009<br />
Page 22
ELBA-business<br />
Electronic banking for your office<br />
4. Multiuser configuration<br />
The following settings only have to be done if you use a multi-user network installation!<br />
Open ELBA with the system administrator<br />
Under System>> ystem>> ystem>>System ystem>> ystem settings on the tab General General: General<br />
In the chapter “Multi-user” the option “Change Change messages in in the the multiuser multiuser mode mode“ mode can be found. If you<br />
activate this item a message for each registered user is displayed if changes of the saved data are<br />
made.<br />
We recommend not activating this option.<br />
Under System>> ystem>> ystem>>System<br />
ystem>> ystem settings on the tab Archiving Archiving: Archiving<br />
In the chapter “Data ata backup” backup” you are able to determine if and when ELBA should remind you of a<br />
data backup.<br />
This depends on the possibility of the ELBA data backup you have selected – see page 21 in this<br />
guideline.<br />
Using backup method 1 and 2 please activate “never” – as the backup happens automatically.<br />
Using backup method 3 we suggest “every every every 7 7 day days” day<br />
– please note that the data backup has to be<br />
effected manually then. ELBA will ask you every seven days to start the data backup.<br />
Under System ystem ystem>> ystem>><br />
>>User >> User User administration<br />
dministration<br />
dministration:<br />
dministration<br />
Please highlight a user, if available and select the button “Open Open settings settings”. settings<br />
On the tab “Payments Payments Payments” Payments in the chapter “Record order” please deactivate the item “Mark Mark new orders as<br />
‘Due’ ‘Due’ ‘Due’ when when saving saving”. saving saving<br />
Reason: To avoid the unintended sending of orders, which have been recorded by another user.<br />
Repeat this for each user created in the program!<br />
Installation Guideline Network / Multiuser 5.4.1<br />
December 2009<br />
Page 23
ELBA-business<br />
Electronic banking for your office<br />
5. Technical Annex<br />
5.1 dial-up Network under Windows 2000<br />
<strong>Info</strong><br />
After clicking on the computer symbol in the assistant the screen “dial-up-Network”<br />
opens.<br />
To set up a new dial-up-connection for ELBA press the button “New” and select the<br />
option “Dial into a private Network” and confirm your entry with “Continue”<br />
In the following window, please insert the telephone number of the ELBA computer (which<br />
you will find in your envelope) and confirm by clicking “Continue“!<br />
The window “Availability of connection” opens. Select the option “For all<br />
users” and confirm by clicking “Continue“.<br />
In the following window, please insert the name of the connection: elba.<br />
Confirm with the push button “Complete“. “.<br />
You are once again in the window “Network connections“. “.<br />
Your created entry “elba” is now selected.<br />
In the following window, with the option “Create connection through…” you can<br />
select the modem to create the connection to the bank server.<br />
Continue by selecting “Network”.<br />
In the field “This connection uses the following items“, please deactivate all<br />
options apart from:<br />
Internetprotocoll (TCP/IP)<br />
Client for Microsoft-Networks<br />
Confirm your entry with “OK“<br />
You are once again in the window “Network Connections“. .<br />
Your created entry “elba” is now selected.<br />
Click button “Dial“<br />
In the following window please enter Username: elba and Password: mbsip.<br />
Activate the checkbox “Save password“!<br />
Continue by selecting “Dial“<br />
The DFU-Network now creates the connection!<br />
In case of connection problems, please contact the ELBA-hotline!<br />
If the connection is successful, the symbol “dial-up-Monitor” appears.<br />
Continue with a double click on that symbol.<br />
In the following window, by clicking “Disconnect” you can interrupt the connection.<br />
Please return to the ELBA 5 assistant (page 12).<br />
Installation Guideline Network / Multiuser 5.4.1<br />
December 2009<br />
Page 24
ELBA-business<br />
Electronic banking for your office<br />
5.2 dial-up Network under Windows XP<br />
<strong>Info</strong><br />
After clicking on the computer symbol in the assistant the screen “dial-up-Network”<br />
opens.<br />
To set up a new dial-up connection for ELBA click “New“<br />
Select the Option “Dial into a private Network” and confirm with “Continue“<br />
In the following mask you select the modem to create the connection and confirm by clicking<br />
“Continue“.<br />
In the following window please insert the phone number of the ELBA-server (which you can<br />
find in the enclosed envelope) and confirm by clicking “Continue“<br />
In the following window please insert the name of the connection: elba. .<br />
Confirm your set-up with the button “Complete“<br />
You are once again in the window “Network connections“. .<br />
Your created entry “elba” is now selected.<br />
Confirm by clicking the field “Characteristics“<br />
Select the option “Network” in the window “ “ELBA “<br />
Characteristics”<br />
Deactivate all options apart from<br />
Network Monitor Driver (if available)<br />
Internetprotocoll (TCP/IP)<br />
QoS-Packet Scheduler<br />
Confirm with “OK“<br />
You are once again in the window “Network Connections“.<br />
Your created entry “elba” is now selected.<br />
Continue by clicking “Connect...“<br />
In the following window please enter Username: elba and Password: mbsip.<br />
Please activate the checkbox “Save password“!<br />
And confirm by clicking “Dial“<br />
The DFU-Network now creates the connection!<br />
In case of connection problems, please contact the ELBA-hotline!<br />
If the connection is successful, a symbol with 2 connected computers appears.<br />
Continue with a double click on that symbol.<br />
In the following window, by clicking “Disconnect” you can interrupt the connection.<br />
Please return to the ELBA 5 assistant (page 12).<br />
Installation Guideline Network / Multiuser 5.4.1<br />
December 2009<br />
Page 25
ELBA-business<br />
Electronic banking for your office<br />
5.3 dial-up Network under Windows Vista<br />
<strong>Info</strong><br />
After clicking on the computer symbol in the assistant, the template “Network<br />
Connections” opens.<br />
To set up a dial-up connection for ELBA click „new“<br />
Please choose from the specified connection types the option „Dial-up – Connect<br />
through a dial-up modem or ISDN“.<br />
You can select the modem to establish a connection by the mask „Which modem do<br />
you want to use?“.<br />
Please enter the phone number of the ELBA-server (which you can find in the enclosed<br />
password letter) in the following window „Type the telephone number to connect<br />
to“. It is also possible for you to chance the field „Destination name“ (name of the<br />
dialup connection). Please enter the name „elba“. Please choose the option „Allow<br />
other people to use this connection“. Confirm your entry by selecting the button<br />
„Next“.<br />
Please enter the following data at the window „Type your user name and<br />
password“:<br />
User name: elba and Password: mbsip<br />
Activate the Checkbox „Remember this password“.<br />
Confirm your entry with the button „Create“.<br />
You return to the window „ Network Connections “ where your currently created entry<br />
is already selected.<br />
Please click „Properties“.<br />
Please choose the tag „Networking“ in the window „elba Properties“.<br />
Deactivate all options in the range of „This connection uses the following items“<br />
except of:<br />
Internet Protocol Version 6 (TCP/IPv6)<br />
Internet Protocol Version 4 (TCP/IPv4)<br />
QoS Packet Scheduler (if selectable)<br />
Confirm by clicking the button „OK“.<br />
You once again return to the window „Network Connections“, and your entry is<br />
automatically selected.<br />
Please click on the button „Connect...“.<br />
You are now in the window „Connect elba“. “. Confirm by clicking the button „Dial“.<br />
The currently established DFU-Network will now create the connection.<br />
In case of connection problems, please contact the ELBA-service !!!!<br />
If the connection is successfully established, the window „Select a location for the<br />
‚elba’ network“ will appear. From the available options „Home“, „Work“ and<br />
„Public location“ please select either the option „Home“ or „Work“, to set the<br />
optimal network settings for your connection automatically.<br />
A Symbol with two connected computers will appear in the menu bar (in the area of the<br />
System time).<br />
Installation Guideline Network / Multiuser 5.4.1<br />
December 2009<br />
Page 26
ELBA-business<br />
Electronic banking for your office<br />
Continue with a double click on that symbol.<br />
In the following window you can interrupt the connection by clicking ”disconnect".<br />
Please return to the ELBA 5 assistant (page 12).<br />
Installation Guideline Network / Multiuser 5.4.1<br />
December 2009<br />
Page 27
ELBA-business<br />
Electronic banking for your office<br />
5.4 Integration of foreign banks<br />
ELBA-business is multi bank compliant. It means that you can involve all banks using the same<br />
standard. The following data are necessary:<br />
Communication Authorisation including password from the foreign bank<br />
User incl. PIN code<br />
Bank code and account number from the foreign bank<br />
Access data for the bank server from the foreign bank<br />
Start ELBA by a user who has system administrator rights.<br />
Select from the menu bar the option System and choose the Assistant… Subsequently, the<br />
assistant for the configuration of your ELBA program opens.<br />
Select the option “Authorise Communication”.<br />
Under “create a new entry” select the bank, from which you would like to include your<br />
accounts, fill in the authorization of communication including password and confirm your entries with<br />
“OK”.<br />
Press the button “Transfer settings” and fill in the correspondent data.<br />
Select the option “Account administration” and open your accounts. Confirm your entries<br />
with “OK”.<br />
Select the option “Authorise disposer/accounts”.<br />
With the button “New” you can enter the disposer, which one you have received from the account<br />
holding bank, and confirm with “OK“.<br />
Select the register “Accounts” and select the authorization to sign for the respective accounts.<br />
Confirm your entries with “OK”.<br />
Choose the option “User administration“.<br />
Mark the user who can manage the currently added accounts.<br />
On the register “Accounts” you can select the required accounts. Confirm with “OK”.<br />
Installation Guideline Network / Multiuser 5.4.1<br />
December 2009<br />
Page 28
ELBA-business<br />
Electronic banking for your office<br />
5.5 Additional technical information about installation<br />
If you secure your system by a firewall please note that ELBA use the Port 3048 for the<br />
communication.<br />
If you use additionally a proxy server you also have to make the configurations (depending on the<br />
proxy-software)<br />
Examples:<br />
CSM or Wingate Proxy<br />
On the proxy-software a TCP-mapping has to be set up on the IP address of elvie3x.elba.at.<br />
Microsoft-Proxy<br />
The ProxyClient-Software has to be installed on the “ELBA-Workstations”.<br />
5.6 ELBA-Installation on the terminal-server or citrix-server<br />
You have to activate the installation modus on the server before executing the ELBA-installation on<br />
the server.<br />
For this please open the DOS-box by pressing and enter “cmd”. In order to<br />
activate the installation modus please enter the following order: “change user / install”<br />
After that you are able to execute via the ELBA CD the installation or the bank data set up of ELBAbusiness<br />
(see page 5 and the following in this guideline).<br />
After the installation you have to finish the installation modus on the server. For this please call up the<br />
DOS-box again and enter the following order:<br />
“change user / execute”<br />
Installation Guideline Network / Multiuser 5.4.1<br />
December 2009<br />
Page 29