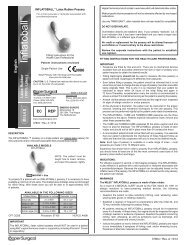
MilexTM Pessary Fitting Kit - CooperSurgical
MilexTM Pessary Fitting Kit - CooperSurgical
MilexTM Pessary Fitting Kit - CooperSurgical

Create successful ePaper yourself
Turn your PDF publications into a flip-book with our unique Google optimized e-Paper software.
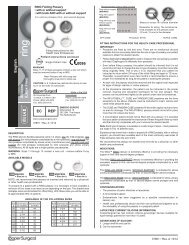
1. Wear dry gloves. The pessary is<br />
compressed between the thumb<br />
and forefingers (see Figure 1). If<br />
necessary, the entering edge can<br />
be coated with TRIMO-SAN TM .<br />
2. Use the fingers of the other hand<br />
to spread the labia and guide the<br />
pessary into the vagina. Check the<br />
fit (see Figure 2).<br />
Figure 1<br />
Figure 2<br />
3. Have the patient sit, stand and bear down. Examine the patient<br />
while she is in the standing position to ensure pessary has not<br />
shifted position. The patient should not feel the pessary once it<br />
is in position.<br />
4. Have the patient (or caregiver) insert and remove the CUBE<br />
pessary several times before the patient leaves your office.<br />
Note: It is important that the pessary be removed on a daily<br />
basis so they must be comfortable with removing and placing<br />
the Cube pessary.<br />
TO REMOVE:<br />
DO NOT PULL ON CORD TO REMOVE PESSARY!<br />
The cord is to help locate the CUBE pessary. Pulling on the cord to<br />
remove the CUBE can damage vaginal mucosa. To remove the<br />
pessary, the suction with the vaginal walls must be broken. Work the<br />
fingertips between the vaginal mucosa and the pessary, compress<br />
the CUBE between the thumb and forefinger, and remove (see<br />
Figure 1).<br />
Note: If necessary, irrigate the vagina after removal of the pessary<br />
(and before reinsertion) to cleanse the vagina of excess discharge<br />
and secretions. HCPCS Supply Number A4320 (Irrigation Tray<br />
with Syringe, any purpose).<br />
During each visit the vagina should be carefully inspected for<br />
evidence of pressure or allergic reaction. The patient should be<br />
ques tioned concerning discharge, and disturbance of bow el func tion<br />
or urination. It may be necessary to fit another size or an entirely<br />
different type of pessary.<br />
DO NOT assume that a replacement will be the same size as the<br />
previous one. Check the fitting to ensure patient comfort and relief<br />
of symptoms.<br />
At each checkup, the pessary should be removed and cleaned. If no<br />
contraindications are present, the pessary may be reinserted.<br />
5. It is sometimes necessary to refit the patient with a different size<br />
or type of pessary after a period of time. Do not assume that a<br />
replacement will always be the same size as the previous one.<br />
Check the fitting to ensure continued patient comfort and relief<br />
of symptoms. The use life of a pessary is limited. Examine<br />
frequently for signs of deterioration. The pessary should not be<br />
too loose as it may turn or be expelled, and it should not be too<br />
tight as it may cause discomfort.<br />
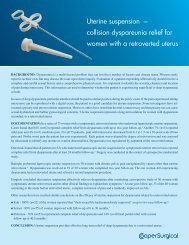
Properly positioned<br />
CUBE pessary<br />
PATIENT FOLLOW-UP:<br />
Have the patient:<br />
• Report immediately any difficulty in urinating<br />
• Report immediately any dis com fort<br />
• Return within 24 hours for first examination<br />
• Return for second examination within 3 days<br />
• Return for examination every 4 to 6 weeks<br />
Note: Above schedule of follow-up examinations may be al tered to<br />
fit the needs of the individual patient.<br />
12