Sch./ Ref./ Réf./ Typ/ Ref. 1092/600 Mod. 1092
Sch./ Ref./ Réf./ Typ/ Ref. 1092/600 Mod. 1092
Sch./ Ref./ Réf./ Typ/ Ref. 1092/600 Mod. 1092
- No tags were found...

Create successful ePaper yourself
Turn your PDF publications into a flip-book with our unique Google optimized e-Paper software.
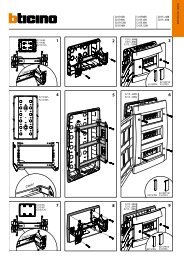
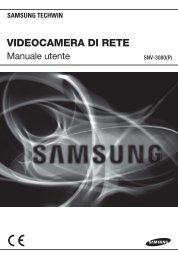
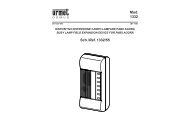
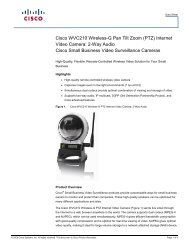
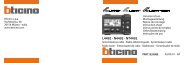
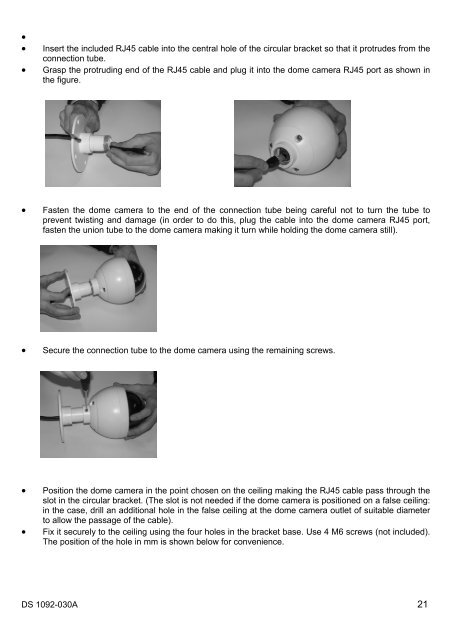
•• Insert the included RJ45 cable into the central hole of the circular bracket so that it protrudes from theconnection tube.• Grasp the protruding end of the RJ45 cable and plug it into the dome camera RJ45 port as shown inthe figure.• Fasten the dome camera to the end of the connection tube being careful not to turn the tube toprevent twisting and damage (in order to do this, plug the cable into the dome camera RJ45 port,fasten the union tube to the dome camera making it turn while holding the dome camera still).• Secure the connection tube to the dome camera using the remaining screws.• Position the dome camera in the point chosen on the ceiling making the RJ45 cable pass through theslot in the circular bracket. (The slot is not needed if the dome camera is positioned on a false ceiling:in the case, drill an additional hole in the false ceiling at the dome camera outlet of suitable diameterto allow the passage of the cable).• Fix it securely to the ceiling using the four holes in the bracket base. Use 4 M6 screws (not included).The position of the hole in mm is shown below for convenience.DS <strong>1092</strong>-030A 21