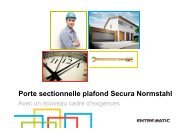

Create successful ePaper yourself
Turn your PDF publications into a flip-book with our unique Google optimized e-Paper software.
Translation from the original<br />
instruction manual<br />
Contents<br />
Introduction<br />
EN English<br />
EC-Declaration of Conformity. . . . . . . . . . 9<br />
Introduction . . . . . . . . . . . . . . . . . . . . . . 10<br />
Product description . . . . . . . . . . . . . . . . 10<br />
About this instruction and assembly<br />
manual . . . . . . . . . . . . . . . . . . . . . . . . . . 10<br />
Symbols . . . . . . . . . . . . . . . . . . . . . . . . . 10<br />
Correct use of equipment, warranty . . . 10<br />
Informal safety measures . . . . . . . . . . . . 10<br />
Safety instructions . . . . . . . . . . . . . . . . . 10<br />
Safety instructions for installation . . . . . 10<br />
Door safety equipment. . . . . . . . . . . . . . 10<br />
Storage . . . . . . . . . . . . . . . . . . . . . . . . . . 11<br />
Preparation for installation . . . . . . . . . . . 11<br />
Surface protection . . . . . . . . . . . . . . . . . 11<br />
Installation . . . . . . . . . . . . . . . . . . . . . 11-14<br />
Start-up procedure. . . . . . . . . . . . . . . . . 14<br />
Operation . . . . . . . . . . . . . . . . . . . . . . . . 14<br />
Care & maintenance. . . . . . . . . . . . . . . . 14<br />
Troubleshooting . . . . . . . . . . . . . . . . . . . 14<br />
Routine maintenance . . . . . . . . . . . . . . . 14<br />
Additional notes . . . . . . . . . . . . . . . . . . . 14<br />
Technical data . . . . . . . . . . . . . . . . . . . . 14<br />
Dismantling, disposal . . . . . . . . . . . . . . . 14<br />
Spare parts list . . . . . . . . . . . . . . . . . . . 15<br />
Read through this instruction manual and<br />
assembly plan carefully before installing<br />
and operating the equipment. Pay close<br />
attention to figures and notes.<br />
Keep the assembly plan and the instruction<br />
manual safely for later use.<br />
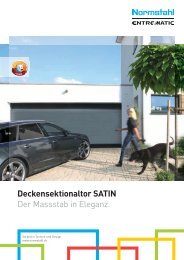
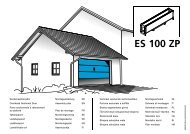
Product description<br />
The overhead sectional door comprises<br />
horizontal sections cut to the correct<br />
opening width.<br />
The door is fitted into the side architrave<br />
tracks with the tandem pulleys and the top<br />
and bottom guide pulleys. The door opens<br />
upwards via the track cams and is guided<br />
up and back along the ceiling tracks. The<br />
door is sealed all-round with rubber profile<br />
seals.<br />
For WK2 the lock must be fitted with a<br />
profile cylinder with drilling and pulling<br />
protection (class P2 BZ - DIN 18252 or<br />
class 4 - EN 1303).<br />
All WK2-relevant parts are<br />
identified by the following<br />
symbol:<br />
All overhead sectional door models are<br />
only suitable for fitting with <strong>Normstahl</strong> door<br />
operators Magic 600 and Magic <strong>100</strong>0.<br />
Steel skins are polyester powder-coated<br />
and need no extra protection.<br />
Wood skins are pre-impregnated before<br />
dispatch but need to be treated for longterm<br />
protection.<br />
Packaging: All packaging materials are<br />
reusable. Packaging corresponds to legal<br />
requirements and local environmentally<br />
friendly disposal options.<br />
About this instruction and<br />
assembly manual<br />
The assembly plan and the instruction<br />
manual belong together. The assembly<br />
plan contains pictograms that refer to<br />
text explanations. We reserve the right to<br />
change the technology and figures.<br />
Door variants<br />
The standard overhead sectional door<br />
design can be converted to the low-lintel<br />
variant.<br />
If you are building a standard<br />
door, proceed according to the<br />
symbols as follows: All assembly<br />
steps marked "s”, no letters.<br />
If you are building an low-lintel<br />
door, proceed according to the<br />
symbols as follows: All assembly<br />
steps marked "n”, no letters.<br />
Doors with a lock are identified<br />
by a “v”.<br />
Symbols<br />
This instruction manual uses the following<br />
symbols:<br />
CAUTION! Warns of danger to<br />
persons and property. Ignoring<br />
instructions marked with this<br />
symbol can lead to serious injury<br />
and damage to property.<br />
WARNING! Warns of damage to<br />
property. Ignoring instructions<br />
marked with this symbol can<br />
lead to damage to property.<br />
NOTE: Technical notes that<br />
require particular attention.<br />
Correct use of equipment,<br />
warranty<br />
This garage door is suitable for use on<br />
single garages for single households.<br />
Any of the following, unless expressly<br />
authorised by the manufacturer in writing:<br />
• conversions or attachments<br />
• use of non-original spare parts<br />
• carrying out of repairs by operations<br />
or persons not authorised by the<br />
manufacturer<br />
may be considered as breaching the terms<br />
of the warranty and guarantee.<br />
Ten year warranty from date of invoice<br />
on all door parts and surfaces (surface<br />
warranty does not apply in coastal installations).<br />
Changes of colour that can occur<br />
over time are excluded from the warranty.<br />
We accept no liability for damage resulting<br />
from non-observance of the instruction<br />
manual.<br />
Please quote reference and serial number<br />
with all enquiries along with the model<br />
description according to the specification<br />
plate on the door leaf.<br />
Informal safety measures<br />
Ensure that there are instructions for<br />
assistance kept near the door in case<br />
of failure of the door and/or associated<br />
equipment. Tip: Keep the assembly plan<br />
and the instruction manual in a protective<br />
sleeve indoors next to or near the door,<br />
where it can be seen.<br />
Safety instructions<br />
General safety<br />
instructions<br />
The door must only be operated<br />
if the operating area is entirely<br />
free from obstacles. There must<br />
be no one within range of the<br />
door when it is operating.<br />
Inadmissible behaviour when using the<br />
door:<br />
• Walking or driving through a moving<br />
door.<br />
• Using the door to lift or push objects<br />
and/or people.<br />
• Wind power may prevent the door leaf<br />
from operating reliably.<br />
A closed door can be unlocked and<br />
opened from inside by pressing the lock<br />
release lever and lifting the lock handle.<br />
Safety instructions for<br />
installation<br />
CAUTION! Installation must be<br />
carried out by at least 2 trained<br />
specialists<br />
The safe working load and suitability of<br />
the support structure of the building in<br />
which the door is to be installed must be<br />
checked and verified by an expert.<br />
The anti-theft protection must be attached<br />
securely and completely at all securing<br />
points. The ceiling suspension units must<br />
be attached with 2 screws at each fixing<br />
point. Depending on the quality of the supporting<br />
structure the fixtures used must<br />
enable the securing points to withstand a<br />
traction of 800 N.<br />
If these requirements are not met people<br />
may be injured or property damaged by<br />
the door falling or moving uncontrollably.<br />
When drilling the securing holes, take<br />
care not to damage either the structural<br />
engineering of the building or plumbing,<br />
electrical or any other lines.<br />
Support unattached door safely.<br />
Follow relevant occupational safety<br />
directives, keep children away from the<br />
installation.<br />
Avoid injuries caused by sharp edges!<br />
Wear gloves.<br />
Door safety equipment<br />
CAUTION! The garage door is<br />
fitted with the following safety<br />
equipment. This must not be<br />
removed or tampered with.<br />
• Hinge covers protect against trapping.<br />
• Locking handle (handle for releasing<br />
and opening door from the inside).<br />
10 (102) N000711-01-00/04 <strong>ES</strong> <strong>100</strong> V