VideoMate DVB-T300/T200 PCI Tuner Card Start Up Guide
VideoMate DVB-T300/T200 PCI Tuner Card Start Up Guide
VideoMate DVB-T300/T200 PCI Tuner Card Start Up Guide

You also want an ePaper? Increase the reach of your titles
YUMPU automatically turns print PDFs into web optimized ePapers that Google loves.
Software Installation<br />
After installing the <strong>PCI</strong> card and cables in your computer, you should restart it<br />
and follow these steps to install the software.<br />
Step 1. After restarting, Windows will detect your <strong>VideoMate</strong> <strong>DVB</strong>-<strong>T300</strong>/<strong>T200</strong><br />
and start the Add/Remove Hardware Wizard, prompting you to install<br />
the <strong>VideoMate</strong> <strong>DVB</strong>-<strong>T300</strong>/<strong>T200</strong> drivers. Please press Cancel and go<br />
to the next step.<br />
Step 2. Insert the installation CD into your CD drive. If you have Autorun<br />
enabled, the installer will start automatically. (If Autorun is diabled,<br />
double-click on “setup.exe” on the installation CD.) You can choose<br />
Complete to install all necessary software (<strong>VideoMate</strong><br />
<strong>DVB</strong>-<strong>T300</strong>/<strong>T200</strong> drivers, ComproDTV, Ulead PhotoExplore 8 SE and<br />
ComproDVD) or choose Custom to select item by item. Compro<br />
recommends you choose Complete.<br />
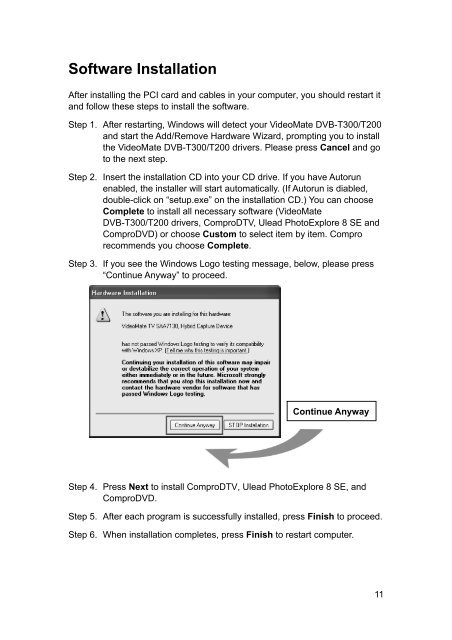
Step 3. If you see the Windows Logo testing message, below, please press<br />
“Continue Anyway” to proceed.<br />
Continue Anyway<br />
Step 4. Press Next to install ComproDTV, Ulead PhotoExplore 8 SE, and<br />
ComproDVD.<br />
Step 5. After each program is successfully installed, press Finish to proceed.<br />
Step 6. When installation completes, press Finish to restart computer.<br />
11