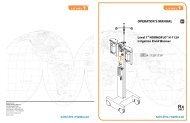
H-1100 - Smiths Medical
H-1100 - Smiths Medical
H-1100 - Smiths Medical
You also want an ePaper? Increase the reach of your titles
YUMPU automatically turns print PDFs into web optimized ePapers that Google loves.
A–Install the Irrigation Warming Set<br />
The installation sequence for the Disposable Set corresponds to the<br />
numbered Blocks marked 1-2-3 on the Fluid Warmer.<br />
Remove the Disposable Set from its packaging and review the<br />
Instructions for Use provided. Do not remove spike caps at this time.<br />
1 Push the bottom end of the Heat Exchanger (a) [the end near the<br />
Gas Vent] into #1 Block (b). Press the Heat Exchanger down<br />
firmly to properly seat in the block.<br />
a<br />
2 Slide #2 Block up (c). Snap Heat Exchanger into guide (d). Press<br />
firmly into place to ensure it is properly seated. Slide #2 Block<br />
down (e), push down firmly to secure.<br />
c<br />
S E C T I O N 9 • O p e r a t i n g I n s t r u c t i o n s<br />
26 Level 1 ® NORMOFLO ® H-<strong>1100</strong> Irrigation Fluid Warmer | Operator’s Manual<br />
a<br />
b<br />
d<br />
e<br />
LEVEL<br />
SYSTEM 1000<br />
MAX<br />
R


