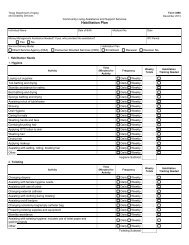
(spw) sas help file
(spw) sas help file
(spw) sas help file

You also want an ePaper? Increase the reach of your titles
YUMPU automatically turns print PDFs into web optimized ePapers that Google loves.
3. Move to the MN field and select Y-Yes from the drop down list.<br />
4. Move to the Permanent field and select N-No.<br />
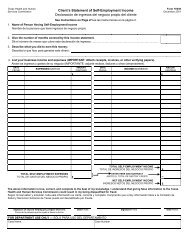
SAS Help File<br />
5. Move to the Begin Date field and enter the first day of the ISP period.<br />
6. Move to the End Date field and enter the last day of the ISP period<br />
7. Click on Force and enter the reason for the Force under Force<br />
Comments.<br />
8. Save the record.<br />
Diagnosis – SPW<br />
There will be an existing Service Group 1 Diagnosis record. The SPSU must<br />
create a new Diagnosis record for Service Group 19 SPW.<br />
To add a Service Group 19 Diagnosis record in SAS, complete the<br />
following steps:<br />
1. Select Diagnosis in the Medical directory.<br />
2. Select Add and a blank Diagnosis record will appear.<br />
3. Move to the Service Group field and select 19-STAR+PLUS from the<br />
drop down list.<br />
4. Move to the Begin Date field and enter the first day of the ISP period.<br />
5. Move to the End Date field and enter the last day of the ISP period<br />
6. Enter up to five diagnoses.<br />
7. Leave Version at the default.<br />
8. Save the record.<br />
Money Follows the Person Demonstration for an SPW Applicant<br />
Follow the instructions for an MFP Applicant above, with the Service<br />
Authorization record completed as follows:<br />
1. Select Service Authorization in the Program and Service directory.<br />
2. Select Add and a blank Service Authorization record will appear.<br />
3. Move to the Service Group field and select 19-STAR+PLUS from the<br />
drop down list.<br />
Revised: 4/23/2012 37