1 DENTON DISCOVERY 550 REACTED SPUTTERED ...
1 DENTON DISCOVERY 550 REACTED SPUTTERED ...
1 DENTON DISCOVERY 550 REACTED SPUTTERED ...

You also want an ePaper? Increase the reach of your titles
YUMPU automatically turns print PDFs into web optimized ePapers that Google loves.
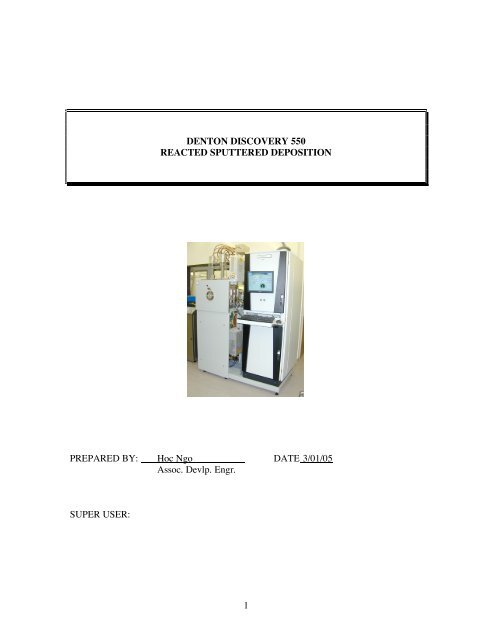
<strong>DENTON</strong> <strong>DISCOVERY</strong> <strong>550</strong><br />
<strong>REACTED</strong> <strong>SPUTTERED</strong> DEPOSITION<br />
PREPARED BY: Hoc Ngo DATE 3/01/05<br />
Assoc. Devlp. Engr.<br />
SUPER USER:<br />
1
1.0 SCOPE<br />
<strong>REACTED</strong> <strong>SPUTTERED</strong> DEPOSITION<br />
This document establishes the procedures for reacted sputtered deposition of thin metal or<br />
dielectric films on silicon, GaAs, and other substrates in the Nanoelectronics Laboratory.<br />
2.0 APPLICABLE DOCUMENTS<br />
Sputterer logbook and maintenance log<br />
System Component Operation Manuals<br />
3.0 MATERIALS AND EQUIPMENT<br />
Denton Discovery <strong>550</strong> sputtering System<br />
Tweezers<br />
Isopropyl Alcohol<br />
Cleanroom wiper<br />
Various sputtering targets<br />
4.0 GENERAL<br />
4.1 Denton Discovery <strong>550</strong> Sputterer is configured for thin film deposition of<br />
up to 4 materials sequentially without breaking the vacuum. The system is<br />
equipped with two 3" DC target positions and two 3” RF target one. The<br />
target number 3 is the dual power one that can run either DC or RF power.<br />
The machine can run reactive deposition utilizing a high temperature heater<br />
in plasma environment. It can also create alloy films by co-deposition of<br />
the RF and DC targets.<br />
4.2 Vacuum Integrity Maintenance Maintaining a low background pressure is<br />
necessary to deposit quality thin films. To avoid contamination these<br />
practices need to be followed:<br />
4.2.1. Never touch any part(s) inside the chamber or part(s) going into the<br />
chamber with bare hands or contaminated gloves.<br />
4.2.2 Handle substrate table and parts going into the chamber with<br />
gloves and/or vacuum system tools.<br />
4.2.3 Avoid unnecessary touching/handling of chamber parts and vacuum<br />
system tools, even with gloves on.<br />
4.2.4 Clean any area or tool which will contact vacuum chamber parts by<br />
wiping with lint-free wipes and isopropyl alcohol.<br />
2
4.2.5 The vacuum chamber should not be subjected to excessive<br />
atmospheric exposure; pre-deposition preparation should be done in<br />
a timely manner to avoid such exposure.<br />
4.2.6 A cleanroom mask must be worn while the chamber is open.<br />
4.2.7 Load only clean substrates and clean substrate holder/fixtures into<br />
the vacuum chamber.<br />
4.2.8 The system is designed to process semiconductor wafers with no<br />
films that outgas. Any nonstandard substrate such as glass, plastics,<br />
unbaked photoresist must not be put in the system without area<br />
engineers approval.<br />
4.3 Emergency Shut Off The red emergency switch is on the front of control<br />
cabinet. Hit this switch immediately in case of emergency. This will shut<br />
down the whole system except the cryo-pump.<br />
4.4 Power Shut Off<br />
4.4.1 Turn off the main circuit breaker that is located behind the control<br />
cabinet. This cuts off all power to the system.<br />
4.4.2 Turn off the circuit breaker on the wall behind the system.<br />
5.0 PROCESS PREPARATION<br />
5.1 Sputterer Standby Check List This checklist must be done before venting<br />
the chamber.<br />
Cooling Water:<br />
Netlab Cooling Water is on.<br />
Water pressure: > 60 Psi<br />
Water temperature: < 20 oC<br />
<strong>DENTON</strong>2 Overview Control Screen:<br />
Chamber Idle Pressure FRI shows less than 10E-7<br />
System Controller is in AUTO (green high light)<br />
5.2 System Base Pressure Record on the log sheet, the base pressure of the<br />
system as displayed on the chamber ion gauge icon. Verify that previous<br />
user had no problem.<br />
5.3 Sample Holder Two 4” wafers can be put face up onto the 8” substrate<br />
table.<br />
The high temperature reaction requests silicon carbide insert. This one has<br />
black appearance.<br />
3
5.4 Sputterer Venting<br />
5.4.0 Click the RECIPE icon on the OVERVIEW screen.<br />
5.4.1 Click the EDIT/CREATE under MASTER RECIPE box<br />
5.4.2 Open SEQUENCE TYPE by clicking on the Auto Pump line<br />
5.4.3 Choose the AUTOVENT by clicking on it<br />
5.4.4 Click ADD to add the Main Vent sequence to Master Sequence<br />
List.<br />
5.4.5 Save the recipe as A_Vent by clicking on the DOWNLOAD icon<br />
then save it by the name A_VENT in MASTER_RECIPE file.<br />
5.4.6 Close the Master Recipe Builder window.<br />
5.4.7 Click OVERVIEW icon to access the <strong>DENTON</strong>2 Main Control<br />
Screen.<br />
5.4.8 Verify the A_Vent.dat appears in Recipe Name box<br />
5.4.9 Click Start to activate the vent recipe. The high vacuum valve<br />
would close then the chamber vent valve opens. The vented<br />
chamber would be notified by a string of beeps sound and the “<br />
Auto Process End OK” flashing alarm<br />
NOTE: At this point you must be wearing clean gloves and a face<br />
mask.<br />
5.5 Substrate Loading<br />
5.5.1 Load sample onto the substrate table, the deposition side face up<br />
5.5.2 Remove the substrate table from the heater carrier if needed then<br />
replace it back into the chamber after sample loading.<br />
5.6 Closing Chamber Door<br />
6.0 PROCEDURE<br />
5.6.1 Check the chamber o-ring for debris/particles. If needed, wipe the<br />
circumference of the o-ring with isopropyl alcohol and cleanroom<br />
wipers<br />
5.6.2 Close the chamber door with the lock<br />
6.1 Create the recipe<br />
4
6.1.1 Create the recipe by clicking on RECIPE icon to open RECIPE<br />
SCREEN<br />
6.1.2 Click the EDIT/CREATE in AUTOMATIC SEQUENCE<br />
CONFIGURATION box<br />
6.1.3 Click OPEN to access the recipe list in Deposition file<br />
6.1.4 Pick the designated recipe by double clicking on its name<br />
6.1.5 Change the parameters such as time/substrate temperature in<br />
deposition step then save the change by clicking SAVE.<br />
6.1.6 Click Close to close the Recipe<br />
6.2 Create the sequence. The sequence should contain three steps: AUTO<br />
PUMP, AUTO DEPOSITIION, and AUTO VENT. Each step will be<br />
added to the sequence one by one.<br />
6.2.1 Click the EDIT/CREAT under MASTER RECIPE box.<br />
6.2.2 Click on AUTO PUMP under SEQUENCE TYPE to pull down the<br />
list of action<br />
6.2.3 High light Auto Pump under Sequence Type.<br />
6.2.4 Add APump.dat to the Master Sequence List by clicking on ADD<br />
icon<br />
6.2.5 Pull down the Sequence Type then high light Auto Deposition<br />
6.2.6 Pull down the list of deposition recipe by click on any recipe name<br />
under USER DEFINE SEQUENCE<br />
6.2.7 Add the designed recipe to the Master Sequence List by click on<br />
ADD icon after high lighting recipe name.<br />
6.2.8 Add Auto Vent sequence to the recipe by open Sequence Type,<br />
choose Auto Vent then add it to Master Sequence List as MainVent.<br />
6.2.9 Click DOWNLOAD to load the created recipe<br />
6.2.10 Save the recipe by an appropriate name to the Master Recipe.<br />
6.2.11 Exit the recipe by click on close.<br />
6.2.12 Verify the Sequence Appearance in the Active Recipe box on<br />
Recipe Screen<br />
5
6.2.13 Go to Over view<br />
6.2.14 Click Start to start the process.<br />
The system is going to pump down the chamber, deposit the requested film than vent the<br />
chamber automatically<br />
Warning: Do not use Auto Regen in any case<br />
6.3 Deposition Completion<br />
The process completion will be notified by a string of beeping sound and<br />
the “Auto Process End OK” flashing alarm. It is safe to open the chamber<br />
door and remove the sample.<br />
6.4 Chamber Pump down<br />
6.4.1 Close and lock the chamber door with the hook<br />
6.4.2 Click the RECIPE icon to open RECIPE SCREEN<br />
6.4.3 Click EDIT/ CREATE under MASTER RECIPE to open Master<br />
Recipe Builder window<br />
6.4.4 Click Auto Pump under Sequence Type to pull down the list of<br />
sequence<br />
6.4.5 Click the Auto Pump to high light it<br />
6.4.6 Add APump.dat to the Master Sequence List by click on ADD icon<br />
6.4.7 Load the Auto Pump sequence to Master Recipe by clicking on<br />
DOWNLOAD then save the recipe by the name A_Pump1<br />
6.4.8 Close the Master Recipe Builder window by clicking CLOSE<br />
6.4.9 Click the OVERVIEW icon to enter the main controller window.<br />
6.4.10 Start to pumping down the chamber by clicking the START<br />
6.4.11 Complete filling in the log book. Enter any thickness data if<br />
available. Note any problems under comments.<br />
6