Create successful ePaper yourself
Turn your PDF publications into a flip-book with our unique Google optimized e-Paper software.
NO<br />
(Part 18). Tighten Large Lock Nut clockwise until <strong>wheel</strong>s are secure.<br />
BED ASSEMBLY:<br />
Bunn<br />
2 Vognbunn<br />
Parts 13 Håndtakskobling<br />
needed:<br />
14 Håndtak<br />
#1<br />
19<br />
Bed<br />
M8 x 15 styrebolt<br />
#13 20 Handle M8 x 60 Coupler bolt<br />
#14 22 Pull Skive Handle<br />
#19 23 M8 Låsemutter x 15 Steering Bolts<br />
#20 Ferdigmonterte M8 x 60 Pull forhjul Handle Bolt<br />
Ferdigmonterte bakhjul<br />
#22 Washers<br />
#23 Lock Nuts<br />
Front Wheel Assembly Back Wheel Assembly<br />
23<br />
23<br />
19<br />
19<br />
22<br />
22<br />
5<br />
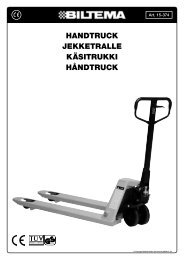
Art. 14-087<br />
1. With the Bed(Part 1) turned upside down, attach the Back <strong>wheel</strong> <strong>assembly</strong><br />
1. Plasser 1. vognbunnen With opp ned.<br />
to the the Bed Bed(Part by inserting 1) turned six upside M8 x 15 down, Steering attach Bolts(Part the Back 19) <strong>wheel</strong> from <strong>assembly</strong><br />
Feste bakhjulene: to Stikk inn 2 stk. M8 x 15 styrebolter (19) nedenfra gjennom et bunnstag og bakakselstøtten.<br />
under the Bed the by bar inserting first through six M8 the x 15 holes Steering located Bolts(Part on the metal 19) from support bars on<br />
Stikk inn under 4 stk. M8 x 15 styrebolter (19) nedenfra gjennom bunnstag og venstre og høyre bakakselstag. Lås<br />
med skive (22)<br />
the under the bar<br />
og låsemutter<br />
side first of through the<br />
(23).<br />
Bed the<br />
Trekk<br />
then holes into located<br />
til med<br />
the on the metal support bars on<br />
the klokka.<br />
holes under located side of on the both Bed the then Left into and the<br />
23<br />
holes Right located Rear Axle on both Brace( the Parts Left and<br />
23<br />
7<br />
Right and Rear 8) and Axle also Brace( the Rear Parts Axle 7 Support<br />
and (Part 8) and 6). Next also insert the Rear Washers Axle Support<br />
22<br />
(Part (Parts 6). 22) Next onto insert the Washers Bolts then<br />
22<br />
(Parts secure 22) with onto Lock the Bolts Nuts(Parts then 23).<br />
secure Tighten with Lock Lock Nuts Nuts(Parts clockwise 23). until secure.<br />
22<br />
Tighten Lock Nuts clockwise until secure.<br />
2223<br />
23<br />
19<br />
19<br />
20<br />
20<br />
19<br />
19<br />
14<br />
14<br />
11 © 2009 <strong>Biltema</strong> Nordic Services AB


