Printer DA70S, DA75S Operator Guide - Pitney Bowes Canada
Printer DA70S, DA75S Operator Guide - Pitney Bowes Canada
Printer DA70S, DA75S Operator Guide - Pitney Bowes Canada
Create successful ePaper yourself
Turn your PDF publications into a flip-book with our unique Google optimized e-Paper software.
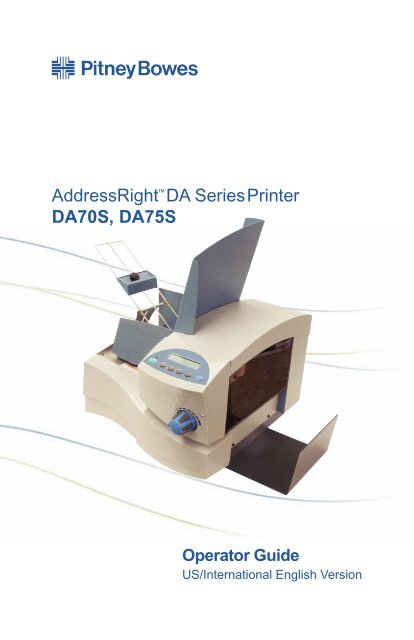
AddressRight DA Series <strong>Printer</strong><br />
<strong>DA70S</strong>, <strong>DA75S</strong><br />
<strong>Operator</strong> <strong>Guide</strong><br />
US/International English Version
NOTICE<br />
The use of this information by the recipient or others for purposes<br />
other than the repair, adjustment or operation of <strong>Pitney</strong> <strong>Bowes</strong><br />
equipment may constitute an infringement of patent and/or other<br />
intellectual property rights of <strong>Pitney</strong> <strong>Bowes</strong> or others. <strong>Pitney</strong> <strong>Bowes</strong><br />
assumes no responsibility for any such use of the information.<br />
Except as provided in writing, duly signed by an officer of <strong>Pitney</strong><br />
<strong>Bowes</strong>, no license, either express or implied, under any <strong>Pitney</strong><br />
<strong>Bowes</strong> or any third party’s patent, copyright, or other intellectual<br />
property rights is granted by providing this information.<br />
SV61665 Rev. D<br />
Fourth Edition, December, 2006.<br />
©2006 <strong>Pitney</strong> <strong>Bowes</strong> Inc. All rights reserved.<br />
This book may not be reproduced in whole or in part in any fashion<br />
or stored in a retrieval system of any type or transmitted by any<br />
means, electronically or mechanically, without the express written<br />
permission of <strong>Pitney</strong> <strong>Bowes</strong>.<br />
We have made every reasonable effort to assure the accuracy and<br />
usefulness of this manual, however we can not assume responsibility<br />
for errors or omissions or liability for the misuse or misapplication of<br />
our products.<br />
Envelope Designer and SmartMailer are registered trademarks<br />
of <strong>Pitney</strong> <strong>Bowes</strong>, Inc. Microsoft and Windows are trademarks or<br />
registered trademarks of Microsoft Corporation.<br />
NOTE: <strong>DA70S</strong>/<strong>DA75S</strong><br />
The similarity of the <strong>DA70S</strong> and <strong>DA75S</strong> printers allows their features<br />
and operation to be documented together. The principle difference<br />
in these printers is that the <strong>DA75S</strong> is a color printer that uses both<br />
a black and color ink cartridge. The <strong>DA70S</strong> only uses a black ink<br />
cartridge.<br />
The photos and illustrations in this document are of the <strong>DA75S</strong><br />
printer, but representative of each printer.<br />
IMPORTANT: Model and feature availability varies by country.<br />
Contact your machine supplier for more information. This guide<br />
covers all models and features. Inclusion within this guide does not<br />
guarantee availability of a particular model or feature within your<br />
country.
Conforms to the Following:<br />
FCC Rules<br />
NOTE: This equipment has been tested and found to comply with<br />
the limits for a Class A digital device, pursuant to part 15 of the FCC<br />
Rules. These limits are designed to provide reasonable protection<br />
against interference when the equipment is operated in a commercial<br />
environment. This equipment generates, uses, and can radiate<br />
radio frequency energy and, if not installed and used in accordance<br />
with the instruction manual, may cause interference to radio<br />
communications. Operation of this equipment in a residential area is<br />
likely to cause interference in which case the user will be required to<br />
correct the interference at his own expense.<br />
CAUTION: Changes or modifications to this equipment not<br />
expressly approved by the party responsible for compliance could<br />
void the user’s authority to operate the equipment.<br />
Shielded USB cables must be used with this equipment to ensure<br />
compliance with the limits. Use of unshielded USB cables is<br />
prohibited.<br />
WARNING! This is a Class A product. In a domestic environment<br />
this product may cause radio interference in which case the user<br />
may be required to take adequate measures.<br />
EMC Directive 89/336/EEC<br />
Low Voltage Directive 73/23/EEC<br />
Tested for compliance by TUV Rheinland Product Safety<br />
to meet regulatory requirements in USA, <strong>Canada</strong>, and Europe.<br />
Also Conforms to:<br />
Directive 2002/96/EC (OJ:L37/24/2003) on waste electrical and<br />
electronic equipment (The WEEE Directive)<br />
Directive 2002/95/EC of the European Parliament and of the Council<br />
of 27 January 2003 on the restriction of the use of certain hazardous<br />
substances in electrical and electronic equipment.
Contact Information List<br />
SV61665 Rev. D<br />
Table of Contents<br />
USA Contacts .......................................................................iii<br />
<strong>Canada</strong> Contacts ..................................................................iii<br />
Other Country Contacts ....................................................... iv<br />
Chapter 1 - Introduction<br />
Welcome to the <strong>DA70S</strong>/<strong>DA75S</strong> Ink Jet <strong>Printer</strong> ..................1-2<br />
Using This <strong>Guide</strong> ...............................................................1-2<br />
System Requirements .......................................................1-2<br />
Getting Help .......................................................................1-3<br />
Online Help ................................................................ 1-3<br />
<strong>Printer</strong> Options ...................................................................1-3<br />
Important Safety Notes ......................................................1-4<br />
Other Informational Cautions ..................................... 1-5<br />
Important Safety Notes for the EU Only ..................... 1-6<br />
<strong>Printer</strong> Parts and Locations ...............................................1-7<br />
Chapter 2 - <strong>Printer</strong> Basics<br />
<strong>Printer</strong> Features Overview .................................................2-2<br />
Setting Up a Job ................................................................2-3<br />
1. Setting the Separator Gap ................................... 2-3<br />
2. Centering the Input <strong>Guide</strong> under the Material ..... 2-5<br />
3. Setting the Feed Angle ........................................ 2-6<br />
4. Setting the Feed Ramp ........................................ 2-8<br />
5. Position the Side <strong>Guide</strong> ....................................... 2-9<br />
6. Loading Material ................................................ 2-10<br />
7. Adjusting the Media Thickness Knob .................2-11<br />
8. Adjusting the Exit Rollers ................................... 2-12<br />
9. Printing a Test Piece .......................................... 2-13<br />
<strong>Printer</strong> Driver Software ....................................................2-13<br />
Selecting <strong>Printer</strong> Properties ..................................... 2-13<br />
Using the Control Panel ...................................................2-14<br />
Using the Menus ..............................................................2-15<br />
Using the Main Menu ............................................... 2-16<br />
Using the Setup Menu ............................................. 2-17<br />
i
Table of Contents<br />
Chapter 3 - <strong>Printer</strong> Maintenance<br />
Preventive Maintenance ....................................................3-2<br />
Print Quality Problems .......................................................3-2<br />
Cleaning the Exit Rollers ...................................................3-3<br />
Cleaning the Sensor ..........................................................3-3<br />
Cleaning the Printhead Shaft .............................................3-3<br />
Cleaning the Floor Assembly and Top Cover ....................3-4<br />
Purging the Printhead ........................................................3-4<br />
Installing and Removing the Ink Jet Cartridges .................3-5<br />
Installing the Ink Jet Cartridges (Color & Black) ........ 3-5<br />
Removing the Ink Jet Cartridges ................................ 3-6<br />
CMYK Printing Alignment (<strong>DA75S</strong> ONLY) .........................3-8<br />
Chapter 4 - Troubleshooting<br />
Problems and Solutions .....................................................4-2<br />
Feed Problems ..................................................................4-2<br />
Print Quality Problems .......................................................4-3<br />
Interface Problems ............................................................4-4<br />
Motor Problems .................................................................4-4<br />
Barcode Problems .............................................................4-5<br />
Other Problems .................................................................4-6<br />
Appendix A - Specifications<br />
Equipment Specifications ................................................. A-2<br />
Material Specifications ...................................................... A-9<br />
Appendix B - Glossary<br />
Index<br />
Glossary ........................................................................... B-1<br />
Index ...................................................................................I-1<br />
ii SV61665 Rev. D
Contact Information List<br />
USA Contacts<br />
Product Name - <strong>DA70S</strong> or <strong>DA75S</strong><br />
▪ For frequently asked questions, go to: www.pb.com and click on<br />
Customer Support.<br />
▪ To place requests for service or training, go to: www.pb.com and<br />
click on My Account.<br />
▪ To order supplies and accessories, call the Supply Line at:<br />
1.800.243.7824 or go to: www.pb.com and click on Online<br />
Store.<br />
▪ To view and pay invoices online, go to: www.pb.com and click<br />
on My Account.<br />
▪ To view inventory, go to: www.pb.com and click on My Account.<br />
▪ For direct questions, call: 1.800.522.0020. Customer Service<br />
Representatives are available Monday through Friday, 8:00 AM<br />
- 8:00 PM ET.<br />
<strong>Canada</strong> Contacts<br />
Product Name - <strong>DA70S</strong> or <strong>DA75S</strong><br />
▪ For frequently asked questions or to order supplies, go to:<br />
www.pitneybowes.ca<br />
▪ For direct questions, call: 1.800.672.6937. Customer Service<br />
Representatives are available Monday through Friday, 8:30 AM<br />
- 4:00 PM ET.<br />
SV61665 Rev. D<br />
iii
Contact Information List<br />
Other Country Contacts<br />
Contact information is given in a separate publication supplied with<br />
the product.<br />
iv SV61665 Rev. D
SV61665 Rev. D<br />
1 • Introduction<br />
The <strong>DA70S</strong>/<strong>DA75S</strong> printer is a versatile, easy-to-use desktop<br />
printer designed for addressing applications. This chapter<br />
explains what's in this guide, and tells you how to order<br />
supplies and where to get more information about using your<br />
printer.<br />
Welcome to the <strong>DA70S</strong>/<strong>DA75S</strong> Ink Jet <strong>Printer</strong> ...................1-2<br />
Using This <strong>Guide</strong> ................................................................1-2<br />
System Requirements ........................................................1-3<br />
Getting Help........................................................................1-3<br />
Online Help ..................................................................1-3<br />
<strong>Printer</strong> Options....................................................................1-4<br />
Ordering Supplies ...............................................................1-4<br />
Important Safety Notes .......................................................1-5<br />
<strong>Printer</strong> Parts and Locations ................................................1-6<br />
1-1
1 • Introduction<br />
Welcome to the <strong>DA70S</strong>/<strong>DA75S</strong> Ink Jet <strong>Printer</strong><br />
The <strong>DA70S</strong>/<strong>DA75S</strong> ink jet printer is a desktop printer used to print<br />
addresses, graphics and other information, in color (<strong>DA75S</strong> only),<br />
on a wide range of material of various sizes, construction and<br />
composition. You can define the font, placement, print quality and<br />
barcode characteristics for your addresses.<br />
Using This <strong>Guide</strong><br />
Refer to this guide for information about printer setup, operation and<br />
troubleshooting. It is divided into the following chapters:<br />
Chapter 1, Introduction - Contains an overview of the <strong>Operator</strong><br />
<strong>Guide</strong>, Help resources, safety information, as well as printer parts<br />
and locations.<br />
Chapter 2, <strong>Printer</strong> Basics - Explains how to set up your printer to<br />
run a job.<br />
Chapter 3, <strong>Printer</strong> Maintenance - Describes how to keep the printer<br />
clean and functioning properly.<br />
Chapter 4, Troubleshooting - Contains a list of possible problems<br />
and their solutions.<br />
Appendix A, Specifications - Provides hardware and material<br />
specifications. Your printer will run at its best when your material<br />
conforms to our specifications.<br />
Appendix B, Glossary - Explains the meanings of common terms<br />
used with address printing equipment.<br />
System Requirements<br />
In order to operate the printer with your computer, your system must<br />
meet the following requirements:<br />
CPU: Pentium III 500MHz. or greater, 500MB RAM or more<br />
preferred<br />
Operating System: Windows 2000/2003 Server/XP<br />
USB Cable or Ethernet Cable: A USB cable is supplied with your<br />
printer. If you choose to use another cable, make sure it isn't any<br />
longer than 16 feet (5m).<br />
1-2 SV61665 Rev. D
Getting Help<br />
SV61665 Rev. D<br />
Introduction • 1<br />
As you use your printer, there may be times when you need help<br />
to solve a specific application problem, or you may want additional<br />
information about printer operation.<br />
Refer to the Contact Information List at the front of this guide for<br />
more information or in the separate contact sheet supplied with your<br />
machine.<br />
Online Help<br />
The Print Driver for your printer has a built-in help system. To get to<br />
the driver, click on Properties from Windows print dialog box. Rightclick<br />
on items in question for the "What's This" Help button.<br />
If you're using programs such as Envelope Designer or<br />
SmartMailer , press the F1 key while you're using the program<br />
to display information about the open screen. Select the Help<br />
menu to display a list of topics or search for a term. Refer to the<br />
documentation supplied with these programs for more information.<br />
NOTE: The availability of software varies by country. Refer to your<br />
machine supplier for details of software available to you.<br />
<strong>Printer</strong> Options<br />
There are several options available for your addressing printer, such<br />
as ink drying equipment which may reduce smudging on glossy<br />
stock, stackers, and envelope designing software.<br />
NOTE: The availability of software and product varies by country.<br />
Refer to your machine supplier for availability details in your<br />
country.<br />
1-3
1 • Introduction<br />
Important Safety Notes<br />
Follow the normal safety precautions for all office equipment:<br />
• It is recommended that you use only <strong>Pitney</strong> <strong>Bowes</strong> approved<br />
supplies, in particular aerosol dusters. Improper storage and<br />
use of aerosol dusters or flammable aerosol dusters, can cause<br />
an explosive-like condition that could result in a personal injury<br />
and/or property damage. Never use aerosol dusters labeled<br />
flammable and always read instructions and safety precautions<br />
on the duster container label.<br />
• To obtain supplies, please contact our Supply Line to place<br />
orders. Material Safety Data Sheets can be obtained on the web<br />
or from our Supply Line. Refer to the Contact Information List<br />
for more information.<br />
• Use the power cord supplied with the machine and plug it into<br />
a properly grounded wall outlet located near the machine and<br />
easily accessible. Failure to properly ground the machine can<br />
result in severe personal injury and/or fire.<br />
• Avoid touching moving parts or materials while the machine is in<br />
use. Keep hands, loose clothing, jewelry and long hair away from<br />
all moving parts.<br />
• Do not remove covers or defeat safety interlock switches. Covers<br />
enclose hazardous parts that should only be accessed by<br />
properly trained service personnel. Immediately report to service<br />
any damaged or non-functioning components that renders the<br />
unit unsafe.<br />
• Place the unit in an accessible location to allow for proper<br />
venting of the equipment and to facilitate servicing.<br />
• The power cord wall plug is the primary means of disconnecting<br />
the machine from the AC supply.<br />
• Do not use an adapter plug on the line cord or wall outlet.<br />
• Do not remove the ground pin from the line cord.<br />
• Avoid using wall outlets that are controlled by wall switches, or<br />
shared with other equipment.<br />
• Do not route the power cord over sharp edges or trap between<br />
furniture.<br />
1-4 SV61665 Rev. D
SV61665 Rev. D<br />
Introduction • 1<br />
• Ensure there is no strain on the power cord and that it does not<br />
become jammed between the equipment, walls or furniture.<br />
• Be certain the area in front of the wall receptacle into which the<br />
machine is plugged is free from obstruction.<br />
• Before clearing a jam, be sure machine mechanisms come to a<br />
stop.<br />
• When removing jammed material, avoid using too much force to<br />
protect against minor personal injury and damaging equipment.<br />
• To prevent overheating, do not cover the vent openings.<br />
• Operation of this equipment without periodic maintenance will<br />
inhibit optimum operating performance and could cause the<br />
equipment to malfunction. Contact your machine supplier for<br />
required service schedule.<br />
• Read all instructions before attempting to operate the equipment.<br />
• Use this equipment only for its intended purpose.<br />
Other Informational Cautions<br />
NOTES:<br />
• In case of an ink spill, leaking ink, or excessive ink<br />
accumulation, immediately disconnect the power cord plug<br />
from the wall outlet and call your machine supplier for a<br />
cleaning.<br />
• Always follow the specific occupational safety and health<br />
standards for your workplace.<br />
• Avoid using wall outlets that are controlled by wall switches,<br />
or shared with other equipment. If a wall outlet controlled by<br />
a wall switch is used, mail could be interrupted if the printer is<br />
plugged in when the wall switch is used to turn power off.<br />
1-5
1 • Introduction<br />
Important Safety Notes for the EU Only<br />
In some countries the equipment is supplied with a moulded mains<br />
lead and plug. In other countries, or if the supplied lead is not used,<br />
the following information applies:<br />
1. An approved mains lead for the country concerned must be<br />
used.<br />
2. As the colours of the wires in the mains lead of this equipment<br />
may not correspond with the coloured markings identifying the<br />
terminals in your plug, proceed as follows:<br />
- The wire which is coloured green and yellow must be<br />
connected to the terminal in the plug which is marked with<br />
the letter “E” or by the earth symbol ( ) or coloured green<br />
or green and yellow.<br />
- The wire which is coloured blue must be connected to the<br />
terminal which is marked with the letter “N” or coloured<br />
black.<br />
- The wire which is coloured brown must be connected to the<br />
terminal which is marked with the letter “L” or coloured red.<br />
3. The wires in the supplied mains lead are coloured in accordance<br />
with the following code:<br />
Green and Yellow - Earth<br />
Blue - Neutral<br />
Brown - Live<br />
WARNING! THIS EQUIPMENT MUST BE<br />
EARTHED. The socket outlet should be near to the<br />
equipment and should be easily accessible.<br />
1-6 SV61665 Rev. D
<strong>Printer</strong> Parts and Locations<br />
SV61665 Rev. D<br />
Introduction • 1<br />
The figure below calls out key machine components, each of which<br />
is briefly described in the text that follows. Refer to the figure below<br />
for component location.<br />
1<br />
3<br />
4<br />
8<br />
2<br />
7<br />
H-Block Separators - Adjust to the thickness of your<br />
material. The gap between the H-Block separator fingers<br />
and the feed rollers should be just enough to allow a single<br />
piece to feed through the printer.<br />
1<br />
11<br />
10<br />
9<br />
6<br />
5<br />
1-7
1 • Introduction<br />
2<br />
Feed Ramp and Lock Knob - The feed ramp adds a gentle<br />
slope to the stack to help feeding. Lower the ramp until the<br />
top of the bottom piece in the stack reaches the middle of<br />
the ramp. Secure the ramp with the lock knob.<br />
3 Input <strong>Guide</strong> - Supports the material stack.<br />
4<br />
5<br />
6<br />
7<br />
8<br />
9<br />
10<br />
11<br />
Input <strong>Guide</strong> Slide and Lock Knob - Move the slide up and<br />
down to adjust the feed angle to accommodate the weight<br />
of the material you're running. Move the slide forward and<br />
back to adjust its side-to-side position of the input guide so<br />
it's centered under the stack Secure the slide with the lock<br />
knob.<br />
Media Thickness Knob - The media thickness knob sets<br />
the distance between the printhead and the material.<br />
Control Panel - Use the control panel buttons to access<br />
printer menus, define print options, run the print job, position<br />
the print carriage and turn the printer on and off line.<br />
Interface Panel (Not Shown) - Located on the lower part of<br />
the rear cover, the panel has the ON/OFF switch, USB and<br />
Ethernet cable connectors and power cord receptacle. See<br />
figure on page 1-9.<br />
Side <strong>Guide</strong> - Helps confine the stack. Adjust to the width of<br />
your material plus 1/16" (2mm) clearance.<br />
Output Stacker Tray - Printed material is deposited in the<br />
stacker (catch) tray. The tray holds about 5" (130mm) of<br />
material.<br />
<strong>Printer</strong> Area Door Assembly (Not Shown) - Open to gain<br />
access to the printer cartridges and exit rollers. See figure<br />
on page 1-9.<br />
Exit Rollers (Not Shown) - <strong>Guide</strong>s the printed material as it<br />
exits the printer. Adjust so that each roller overlaps the edge<br />
of the material by 1/4" (6mm). See figure on page 1-9.<br />
1-8 SV61665 Rev. D
SV61665 Rev. D<br />
USB Connector<br />
Power Receptacle<br />
<strong>Printer</strong> Interface Panel<br />
<strong>Printer</strong> Area Door<br />
Ethernet Connector<br />
ON/OFF Switch<br />
Exit Rollers<br />
Exit Rollers and <strong>Printer</strong> Area Door (Open)<br />
Introduction • 1<br />
1-9
1 • Introduction<br />
This page is intentionally blank.<br />
1-10 SV61665 Rev. D
SV61665 Rev. D<br />
2 • <strong>Printer</strong> Basics<br />
In this chapter you'll learn about key printer features and how<br />
to adjust it to meet the requirements of your print jobs.<br />
<strong>Printer</strong> Features Overview ..................................................2-2<br />
Setting Up a Job .................................................................2-3<br />
1. Setting the Separator Gap .....................................2-3<br />
2. Centering the Input <strong>Guide</strong> under the Material .......2-5<br />
3. Setting the Feed Angle ..........................................2-6<br />
4. Setting the Feed Ramp ..........................................2-8<br />
5. Position the Side <strong>Guide</strong> .........................................2-9<br />
6. Loading Material ..................................................2-10<br />
7. Adjusting the Media Thickness Knob ..................2-11<br />
8. Adjusting the Exit Rollers .....................................2-12<br />
9. Printing a Test Piece ............................................2-13<br />
<strong>Printer</strong> Driver Software .....................................................2-13<br />
Selecting <strong>Printer</strong> Properties .......................................2-13<br />
Using the Control Panel....................................................2-14<br />
Using the Menus...............................................................2-15<br />
Using the Main Menu .................................................2-16<br />
Using the Setup Menu ...............................................2-17<br />
2-1
2 • <strong>Printer</strong> Basics<br />
<strong>Printer</strong> Features Overview<br />
This section provides a brief overview of the printer features. Refer to<br />
Appendix A, Specifications, for detailed specifications for the printer,<br />
including specific requirements for using each type of material.<br />
Speed (pieces per hour)<br />
<strong>Printer</strong> speed refers to the number of pieces of mail that can be<br />
processed in an hour. The printer can process up to 14,000 #10<br />
or DL envelopes per hour, depending on the address content and<br />
configuration. <strong>Printer</strong> speed depends on the number of characters<br />
per line, the number of lines, character size, font, interface, barcode,<br />
material size and graphics.<br />
Print Qualities<br />
Draft, Letter, Executive with optional Light Mode<br />
Internal Fonts<br />
13 (14 including Code 3 of 9 Barcode).<br />
Font Size<br />
Font size refers to the size of each typeface. The printer uses from 4<br />
to 144 point size for internal or downloaded fonts.<br />
Media Size<br />
The printer can print on the following range of material sizes.<br />
Width Height Thickness<br />
Minimum 3.5" (89 mm) 3.5" (89 mm) .003" (.08 mm)<br />
Maximum 15.5" (394 mm) 15" (381 mm) .25" (6.35 mm)<br />
Approved Media Types<br />
The printer can be used with envelopes, booklets, catalog envelopes,<br />
postcards, self mailers, and paper. All envelopes must be without<br />
windows. Any folded material needs to be tabbed.<br />
2-2 SV61665 Rev. D
Setting Up a Job<br />
SV61665 Rev. D<br />
<strong>Printer</strong> Basics • 2<br />
Setting up a print job means adjusting the printer to accommodate<br />
the width, height, thickness and weight of your material.<br />
There are two things that determine how reliably your printer feeds:<br />
the setup adjustments and the quality of your material. A good setup<br />
minimizes misfeeds and jams. And your printer will perform at its best<br />
when you run material that falls within our published specifications.<br />
Please see Appendix A, Specifications for complete material<br />
specifications.<br />
1. Setting the Separator Gap<br />
Whenever you switch from one material type to another, you<br />
need to set the gap between the separators and the feed roller<br />
before printing begins.<br />
NOTE: There are three positions of the "H" Blocks.<br />
• Lever fully down - adjusted to media thickness (ready to<br />
operate).<br />
• Lever midpoint - not adjusted to any media (free floating on<br />
media, not set up to operate).<br />
• Lever fully up - locked in the up position, not adjusted to any<br />
media thickness.<br />
H-Blocks<br />
2-3
2 • <strong>Printer</strong> Basics<br />
Setting the Proper Feed Gap<br />
A. Loosen the lock knobs to unlock all three H-Blocks.<br />
B. Lift the H-Blocks to their highest position and lock in place.<br />
C. Place a sample piece of material between the separator<br />
fingers (the lower section of the H-Blocks) and the feed<br />
roller.<br />
D. Lower only the H-Blocks that come in direct contact with the<br />
material and let them touch the material.<br />
E. Lock each separator in place. When lowering the H-Blocks,<br />
check that the material is between the separator tabs and<br />
the feed roller.<br />
Setup Example Using #10 or DL Envelopes:<br />
A. When you set the feed gap for a #10 or DL envelope, note<br />
that the width of the envelope will fall completely under the<br />
inside and middle H-Blocks, but only half way under the<br />
outer H-Block. Follow steps B through D to fix this.<br />
B. Remove the side guide.<br />
C. Place a second envelope next to the first, under the outer<br />
H-Block. Place the second envelope flap down with the short<br />
edge under the outer H-Block.<br />
D. Lock the separator in place.<br />
NOTE: If the separator gap is not set properly, the printer will<br />
misfeed.<br />
• If the gap is too big, the printer will feed doubles (two or<br />
more pieces at the same time).<br />
• If the gap is too small, material will jam at the feed roller<br />
entrance.<br />
2-4 SV61665 Rev. D
<strong>Printer</strong> Basics • 2<br />
2. Centering the Input <strong>Guide</strong> under the Material<br />
This adjustment helps eliminate skewing.<br />
A. Place a sample piece of material in the feed area, up against<br />
the support plate.<br />
B. Unlock the knob on the input guide slide by turning<br />
counterclockwise.<br />
C. Slide the input guide forward or back as required to center it<br />
under the sample piece of mail.<br />
D. Turn the lock knob clockwise to secure the input guide.<br />
SV61665 Rev. D<br />
Knob Slide input guide forward or<br />
back to center under mail.<br />
2-5
2 • <strong>Printer</strong> Basics<br />
3. Setting the Feed Angle<br />
The height of the input guide depends on the type of material<br />
you're running:<br />
• Heavy material—adjust to a low angle<br />
• Standard material—adjust to the center (45 degree angle)<br />
• Light material—adjust to a high angle<br />
To make the adjustment:<br />
A. Unlock the knob on the input guide slide by turning<br />
counterclockwise.<br />
B. Move the input guide up or down as required by sliding the<br />
retaining knob.<br />
Knob<br />
Scale<br />
C. Turn the lock knob clockwise to secure the input guide.<br />
NOTE: Center line of the knob aligns with relative number of<br />
the scale. Refer to the scale on following page.<br />
2-6 SV61665 Rev. D
1<br />
2<br />
3<br />
4<br />
5<br />
6<br />
7<br />
8<br />
9<br />
10<br />
11<br />
12<br />
13<br />
14<br />
15<br />
SV61665 Rev. D<br />
<strong>Printer</strong> Basics • 2<br />
The center of the knob aligns in the 6 to 7<br />
range for a typical 8 1/2" x 11" or A4 sheet of<br />
copy paper.<br />
The center of the knob aligns in the 10 to 12<br />
range for a typical # 10 or DL envelope.<br />
The center of the knob aligns in the 14 to 15<br />
range for a typical 90 to 100 lb. (340 to 380<br />
g/m 2 ) stock post card.<br />
NOTE: The settings shown above are suggested settings. You can<br />
adjust the input guide accordingly (up or down) until the desired<br />
feed throughput is achieved.<br />
2-7
2 • <strong>Printer</strong> Basics<br />
4. Setting the Feed Ramp<br />
A. Slide the ramp to the top of the input guide.<br />
B. With the Feed Gap properly set for one piece of media, slide<br />
the ramp down.<br />
C. Add a stack of media and adjust the ramp downward until<br />
the first piece of media is resting half way down the angle of<br />
the ramp surface as pictured below.<br />
NOTE: This picture is shown without the side guide, for ease<br />
of illustration.<br />
2-8 SV61665 Rev. D
5. Position the Side <strong>Guide</strong><br />
SV61665 Rev. D<br />
<strong>Printer</strong> Basics • 2<br />
Your printer comes with two side guides—a long one and a short<br />
one. Use the long side guide for #10 or DL envelopes and larger<br />
materials. Use the short side guide for materials smaller than a<br />
#10 or DL envelope.<br />
It is important that the side guide not be adjusted tight against<br />
the media.<br />
To position the side guide:<br />
A. Place a sample piece or trial stack of material in the input<br />
area.<br />
B. Slide the side guide until it almost touches the stack of<br />
material.<br />
C. Check that there's about 1/16" (2mm) clearance (the<br />
thickness of a dime) between the side guide and the stack.<br />
NOTE: Proper clearance is important. If you push the side<br />
guide tight up against the stack, it could impede feeding and<br />
cause jams. If the clearance is too great, pieces could skew as<br />
they feed into the printer.<br />
Adjust Side<br />
<strong>Guide</strong> to media<br />
width.<br />
2-9
2 • <strong>Printer</strong> Basics<br />
6. Loading Material<br />
Once your printer is set up, you can load material and make a<br />
test print. Avoid misfeeds by following these precautions:<br />
A. Make sure the input area is free of dust and other matter.<br />
B. Take a manageable amount of material and while holding<br />
it as shown, fan all sides of the material to separate each<br />
piece. This step helps keep misfeeds to a minimum.<br />
C. Tamp the material on a flat surface, making sure that the<br />
stack is square.<br />
D. Shingle the stack as you load it into the input area. Load<br />
envelopes so the side to be printed faces up. Flaps should<br />
be down and oriented away from the feed roller (flaps<br />
trailing).<br />
E. Position the right edge of the envelopes flush against the<br />
support plate. Begin with just a few envelopes to start the<br />
stack and get the proper contour, then add several more<br />
pieces. Then, add the remainder of the stack.<br />
NOTE: Envelope feeding is generally more reliable if there<br />
are more than just a couple of envelopes in the input bin.<br />
F. Adjust the position of the feed ramp as described in this<br />
chapter.<br />
2-10 SV61665 Rev. D
7. Adjusting the Media Thickness Knob<br />
SV61665 Rev. D<br />
<strong>Printer</strong> Basics • 2<br />
The media thickness knob sets the distance between the<br />
printhead and the material. Use it to compensate for different<br />
material thicknesses and to increase clarity of the printing.<br />
A. Estimate the thickness of the material to be run.<br />
NOTE: All material in a run must be the same thickness.<br />
For envelopes with 0 - 2 inserts, start with the media<br />
thickness knob set as shown below. For 1/4" (6mm) thick<br />
material, start with setting all the way at the Thick side. For<br />
1/8" (3mm), start 1/2 way.<br />
B. While running<br />
test samples,<br />
turn the knob<br />
counterclockwise<br />
to<br />
close the gap<br />
until the desired<br />
quality of printing<br />
is obtained.<br />
NOTE: Adjusting the media thickness knob too far counter<br />
clockwise may cause smearing or jamming.<br />
A NOTE ABOUT PRINT QUALITY: This printer is designed to<br />
feed and print on a range of materials with various finishes and<br />
coatings. However, the sharpness of the print may vary with<br />
different materials, depending on how absorbent the surface is,<br />
as well as other qualities.<br />
You'll get best results using white wove bonded stock. Printing<br />
is less sharp on Tyvek, recycled and glossy material. It is also<br />
possible that ink may not dry thoroughly on certain very glossy<br />
materials. Always test high gloss materials for their drying<br />
qualities before you buy them in quantity and attempt to run a<br />
print job.<br />
2-11
2 • <strong>Printer</strong> Basics<br />
8. Adjusting the Exit Rollers<br />
Adjust the exit rollers so they overlap the left and right edges of<br />
the material by 1/4" (6mm). Rotate the release lever to vertical<br />
then slide the rollers from side to side to make the adjustment<br />
and press the lever down to lock. Must be down and latched to<br />
operate.<br />
Exit Roller<br />
Release Lever<br />
Exit Slide Rollers (in<br />
jam-clearing position)<br />
IMPORTANT: Make sure the rollers do not touch any printed<br />
area of the material. If this happens, the rollers will act like a<br />
printing press and imprint a faint impression at incremental<br />
distances on the material. If this happens, move the roller or<br />
rollers toward the nearest clear zone, that is, an area free of<br />
printing.<br />
Output Stack Height<br />
The output stacker holds up to five inches of material before<br />
it becomes necessary to remove the stack from the bin. The<br />
optional power stacker increases capacity to 300 #10 or DL<br />
envelopes.<br />
NOTE: As the stack approaches the 5" (130mm) limit, there is<br />
a potential for stacking misfeed (pieces not neatly stacked one<br />
on top of the other). This can cause envelopes to stack out of<br />
printed sequence.<br />
2-12 SV61665 Rev. D
<strong>Printer</strong> Driver Software<br />
SV61665 Rev. D<br />
<strong>Printer</strong> Basics • 2<br />
9. Printing a Test Piece<br />
Print a test piece to ensure the material is loaded properly.<br />
(Or you can use a single test piece if you'd like to check your<br />
setup adjustments.) Use the Control Panel keys to print a test<br />
piece. Refer to Using the Control Panel in this chapter for more<br />
information.<br />
Check the print quality. If it's not what you want, adjust the media<br />
thickness lever as required and run another test piece. When<br />
you're satisfied with the setup adjustments, you're ready to run<br />
the job.<br />
Before you can use your printer with your computer, you must install<br />
a printer driver. The driver gives your computer information about the<br />
printer you're using, and tells the printer about the settings you want<br />
to use in your print job.<br />
If you have not previously installed the printer driver on your<br />
computer, refer to the installation instructions furnished with it.<br />
The printer drivers are contained on a CD that comes with your<br />
printer. To set up, follow the instructions as shown in the installer.<br />
Selecting <strong>Printer</strong> Properties<br />
This section describes printer properties and use of the windows<br />
for selecting the available options. To access the main properties<br />
window, follow these steps:<br />
1. Click the Start button in the task bar, then select Settings.<br />
2. Click <strong>Printer</strong>s. The <strong>Printer</strong> window displays.<br />
3. Right click the <strong>Pitney</strong> <strong>Bowes</strong> printer icon, then left click the<br />
Properties option.<br />
The Properties window opens and displays seven tabs, each of<br />
which allows access to different printer options. An explanation of the<br />
items on each tab is available by doing the following:<br />
• Right click an item to display the "What's This" button.<br />
• Right or left click this button to display the information about the<br />
selected item.<br />
Options may differ depending on which software drivers are used.<br />
2-13
2 • <strong>Printer</strong> Basics<br />
Using the Control Panel<br />
Use the buttons on the control panel to get to the printer menus,<br />
define the print options, run a print job, position the print carriage<br />
and turn the printer ON LINE and OFF LINE. You’ll normally perform<br />
these actions from within the application you’re using to set up your<br />
envelope layout.<br />
NOTE: You also have a PC Control Panel which allows you similar<br />
functionality to the LCD menus. The Control Panel also has online<br />
help.<br />
On Line Eject/- Menu Enter Cartridge/+ Test Env.<br />
The buttons on the control panel perform the following functions:<br />
This Button... Does This...<br />
ON LINE<br />
Toggles (switches) between ON LINE<br />
(communicates with host) and OFF LINE<br />
(no communications with host). Note that<br />
the functions of two buttons, Eject/- and<br />
Cartridge/+, vary, depending on whether<br />
the printer is ON LINE or OFF LINE .<br />
Eject/- (minus) When printer is OFF LINE, press to eject<br />
the last printed piece from the printer.<br />
When printer is OFF LINE, press to scroll<br />
through menu items from bottom to top<br />
printer.<br />
Menu<br />
Displays the options on the Main Menu and<br />
the Setup Menu. The printer must be OFF<br />
LINE to access the menus.<br />
2-14 SV61665 Rev. D
SV61665 Rev. D<br />
<strong>Printer</strong> Basics • 2<br />
This Button... Does This...<br />
Enter Press to select the currently displayed<br />
menu option.<br />
Cartridge/+(plus) With the printer OFF LINE, press to move<br />
the ink cartridge holder to the center of the<br />
printer. This makes it easy to remove the<br />
cartridge. With the printer OFF LINE, press<br />
to scroll forward through the menu options.<br />
Test Env. With the printer OFF LINE, press to print a<br />
test envelope.<br />
Using the Menus<br />
The printer has two menus, both displayed on the LCD:<br />
• Use the Main Menu to control how your printed material looks.<br />
• Use the Setup Menu to configure your printer so it will function<br />
correctly with your computer.<br />
NOTE: The printer must be OFF LINE to access the menu<br />
options.<br />
To select an option:<br />
1. Press the ON LINE button until the LCD message displays OFF<br />
LINE.<br />
2. To access the MAIN MENU, press the Menu button.<br />
3. To access the SETUP MENU, press and hold the Menu button<br />
for four (4) seconds.<br />
4. Press the plus (+) or minus (-) buttons to move through the list<br />
of menu options.<br />
5. When the appropriate menu option appears, press the Enter<br />
button to display the choices associated with that option.<br />
6. Press + or - to scroll through the choices. When an option has an<br />
asterisk (*) in front of it, means that option is presently selected.<br />
(Upon receipt from the factory, the asterisk is typically the default<br />
setting.) When you press the Enter button to define a new<br />
option, an asterisk will appear before the selected option.<br />
7. Press the Menu button several times to back out of the Menu<br />
until the printer displays OFF LINE. Then press the ON LINE<br />
button to print<br />
2-15
2 • <strong>Printer</strong> Basics<br />
Using the Main Menu<br />
The Main Menu options are:<br />
MAIN MENU MENU OPTIONS<br />
1. ADDRESS LAYOUT A. DISTANCE TO RIGHT<br />
B. DISTANCE TO BOTTOM<br />
C. LINE SPACING<br />
D. INVERTED PRINTING<br />
E. ORIENTATION<br />
F. ORIENTATION CONTROL<br />
2. PRINT QUALITY A. QUALITY<br />
B. LIGHT MODE<br />
3. FONT A. NAME<br />
B. SIZE<br />
C. BOLD<br />
D. ITALIC<br />
4. BARCODE (U.S. Only) A. LOCATION<br />
B. 9 DIGIT ON/OFF<br />
C. BAR WIDTH<br />
5. ADDRESS RECOVERY A. GET ADDRESS (BATCH)<br />
B. GET ADDRESS (INTER)<br />
C. CLEAR MEMORY<br />
6. CLEAR COUNTER<br />
7. IMAGE OVERLAY A. CAPTURE OVERLAY<br />
B. CLEAR OVERLAY<br />
C. PRINT OVERLAY<br />
NOTE: The settings you define in a software application such<br />
as SmartMailer override any settings you choose in the printer<br />
menus.<br />
2-16 SV61665 Rev. D
Using the Setup Menu<br />
The Setup Menu Options are:<br />
SV61665 Rev. D<br />
<strong>Printer</strong> Basics • 2<br />
SETUP MENU MENU OPTIONS<br />
1. HEAVY MEDIA MODE<br />
2. TEST PRINT HEAD<br />
3. PURGE PRINT HEAD<br />
4. LINES PER ADDRESS<br />
5. COMMUNICATIONS A. TCP/IP<br />
B. LINE TERMINATION<br />
6. HEX DUMP MODE<br />
7. LANGUAGE A. SYMBOL SET<br />
B. INCH/MILLIMETER<br />
C. MENU LANGUAGE<br />
8. ENVELOPE FEED DELAY<br />
9. ENVELOPE AUTO EJECT A. AUTO EJECT MODE<br />
B. DELAY<br />
10. ROM REVISION #<br />
11. PRINT HEAD MAINT A. HEAD MAINTENANCE<br />
B. MAINT. CYCLE TIME<br />
12. BUNDLE BREAK<br />
A. ENABLE/DISABLE<br />
13. TRAY BREAK<br />
B. BREAK CHARACTER<br />
C. BREAK CHARACTER COUNT<br />
D. CHAR. ORIENTATION<br />
E. BREAK LOCATION<br />
F. PRINT BRK CHARS<br />
14. LOW INK WARNING<br />
G. BRK PAUSE TIME<br />
A. DISPLAY WARNING<br />
B. WARNING THRESHOLD<br />
15. LOGGING SETTINGS<br />
C. STOP WHEN EMPTY<br />
A. ENABLE LOGGING<br />
B. LOGGING LEVEL<br />
C. PRINT LOG<br />
NOTE: To print a list of the Main Menu and Setup Menu settings,<br />
press the Test button when ROM REV is displayed.<br />
2-17
2 • <strong>Printer</strong> Basics<br />
This page is intentionally blank.<br />
2-18 SV61665 Rev. D
SV61665 Rev. D<br />
3 • <strong>Printer</strong> Maintenance<br />
This chapter describes the maintenance procedures you<br />
should perform on a regular basis to keep your printer running<br />
trouble-free.<br />
Preventive Maintenance .....................................................3-2<br />
Print Quality Problems ........................................................3-2<br />
Cleaning the Exit Rollers ....................................................3-3<br />
Cleaning the Sensor ...........................................................3-3<br />
Cleaning the Printhead Shaft..............................................3-3<br />
Cleaning the Floor Assembly and Top Cover .....................3-4<br />
Purging the Printhead .........................................................3-4<br />
Installing and Removing the Ink Jet Cartridges ..................3-5<br />
Installing the Ink Jet Cartridges (Color & Black) ..........3-5<br />
Removing the Ink Jet Cartridges ..................................3-6<br />
CMYK Printing Alignment (<strong>DA75S</strong> ONLY) ..........................3-8<br />
3-1
3 • <strong>Printer</strong> Maintenance<br />
Preventive Maintenance<br />
The Ink Jet <strong>Printer</strong> is designed for trouble-free service with a minimal<br />
amount of care. You should schedule regular cleaning of the Feed<br />
Rollers, Exit Rollers and Lower <strong>Guide</strong>.<br />
CAUTION:<br />
• Clean print head, cartridge, ink surfaces and<br />
covers with plain water only. (Water works best!)<br />
• Clean all rubber rollers with isopropyl, denatured<br />
and rubbing alcohol only.<br />
• Use of any other cleaning solvents will void all<br />
warranties.<br />
• Keep petroleum based cleaning solvents away<br />
from rubber or plastic parts. Anything but alcohol<br />
will cause premature breakdown of the rubber<br />
compound.<br />
Print Quality Problems<br />
The print head performs a self cleaning cycle periodically. If print<br />
quality is unacceptable, try the following:<br />
• Adjust the media thickness lever to see if print quality improves.<br />
• Clean the print head cartridge: dampen a soft cotton cloth with<br />
water and wipe the nozzles clean.<br />
Correct Incorrect<br />
• From the Setup Menu, select 3. Purge Printhead. The purging<br />
process clears any clogged ink on the print nozzle. Often this<br />
returns the print quality to a normal level. See Purging the<br />
Printhead in this chapter for more information.<br />
• Install a new ink cartridge. See Installing and Removing Ink Jet<br />
Cartridges in this chapter.<br />
3-2 SV61665 Rev. D
Cleaning the Exit Rollers<br />
SV61665 Rev. D<br />
<strong>Printer</strong> Maintenance • 3<br />
If the right and left exit rollers are misaligned, that is, contact printed<br />
surfaces, they can become contaminated with ink. Use water to<br />
dampen a soft cloth and remove the ink from the rollers.<br />
Cleaning the Sensor<br />
A film and/or dust can build up on the sensors and cause misfeeds of<br />
the material. Lift the transport door and use compressed air to blow<br />
dust from the sensors. Cans of compressed air are available from<br />
many computer supply houses.<br />
Cleaning the Printhead Shaft<br />
Periodically wipe the printhead shaft clean with a dry, soft, lint free,<br />
cotton cloth. DO NOT OIL!<br />
Printhead Shaft<br />
Sensor<br />
3-3
3 • <strong>Printer</strong> Maintenance<br />
Cleaning the Floor Assembly and Top Cover<br />
Periodically wipe the cover and floor assembly (feed deck) with a soft<br />
cotton cloth, dampened with water only.<br />
Purging the Printhead<br />
1. To access the SETUP MENU, press and hold the Menu button<br />
for four (4) seconds.<br />
2. Press the + or - buttons to scroll through the SETUP MENU<br />
options until 3. PURGE PRINT HEAD appears on the LCD<br />
panel.<br />
3. Press the Enter button to select this option.<br />
4. To select Purge Printhead cycle, press Enter when the "Purge<br />
Printhead?" message displays.<br />
5. Press the + button (YES) to enable this option. The printer will<br />
display "Please wait...print head being purged".<br />
6. Press the Menu button to back out of the menu until printer<br />
displays "OFF LINE". Then press the ON LINE button to enable<br />
the printer.<br />
3-4 SV61665 Rev. D
SV61665 Rev. D<br />
<strong>Printer</strong> Maintenance • 3<br />
Installing and Removing the Ink Jet Cartridges<br />
Installing the Ink Jet Cartridges (Color & Black)<br />
The printer uses Ink Jet Cartridges for printing. You must install<br />
a black only cartridge (<strong>DA70S</strong>), or a black and a color cartridge<br />
(<strong>DA75S</strong>), before you can print. To begin:<br />
1. With the printer on, press the ON LINE key until the display<br />
reads OFF LINE.<br />
2. Open the back cover of the printer.<br />
3. Press the Cartridge/+ key on the control panel to move the<br />
carriage to the middle of the printer. Do not attempt to move the<br />
carriage by hand. Doing so can result in damage to the carriage<br />
assembly.<br />
4. Remove the cartridge from its shipping container by peeling the<br />
top cover off. Be careful not to touch the gold contacts.<br />
WARNING! The ink in the cartridge may be<br />
harmful if swallowed. Keep new and used<br />
cartridges out of reach of children. Discard empty<br />
cartridges immediately.<br />
5. Gently remove the tape covering the ink nozzles on the print<br />
cartridge, being careful not to touch the copper nozzles.<br />
6. Gently insert the cartridge (color to the right, black to the left-<br />
DA750 only) into the carriage at approximately a 20 degree<br />
angle with copper strip to the bottom and in first. Press down on<br />
the cartridge until it is seated.<br />
NOTE: The<br />
print cartridge<br />
photos in this<br />
section are<br />
of the <strong>DA75S</strong><br />
printer. The<br />
<strong>DA70S</strong> has<br />
only one<br />
cartridge.<br />
3-5
3 • <strong>Printer</strong> Maintenance<br />
7. Push the cartridge forward (away from you) until it snaps in<br />
place.<br />
IMPORTANT: When installing cartridges on the <strong>DA75S</strong>,<br />
please immediately perform the CMYK Printing Alignment<br />
procedure in this chapter.<br />
Removing the Ink Jet Cartridges<br />
To remove or replace the ink jet cartridges, follow these steps:<br />
1. With the printer on, press the ON LINE button until the printer<br />
displays "OFF LINE".<br />
2. Open the printhead cover.<br />
3. Press the Cartridge/+ key on the control panel. This moves the<br />
carriage to the middle of the printer. Do not move the cartridge<br />
by hand.<br />
3-6 SV61665 Rev. D
<strong>Printer</strong> Maintenance • 3<br />
4. To remove the ink jet cartridge, place your thumb on the grooved<br />
surface and press down slightly then tilt towards you until it pops<br />
loose.<br />
5. Lift the print cartridge out of the cradle.<br />
SV61665 Rev. D<br />
3-7
3 • <strong>Printer</strong> Maintenance<br />
CMYK Printing Alignment (<strong>DA75S</strong> ONLY)<br />
Your <strong>DA75S</strong> printer allows black (K) to print with color (CMY) at the<br />
same time (known as CMYK printing). To ensure proper printing, the<br />
black (K) and color cartridges (CMY) need to be correctly aligned.<br />
The alignment procedure should be done whenever you replace any<br />
of your cartridges. Follow this procedure to align the cartridges:<br />
1. Turn ON the <strong>DA75S</strong>. When the startup completes, the "ON<br />
LINE" screen displays.<br />
2. Press the Cartridge/+ button.<br />
3. Replace the ink print cartridge (if you haven't done so already).<br />
The "Press a key when print heads replaced" prompt displays.<br />
Press any key to continue.<br />
4. When the "Reset color (or black) Ink..." prompts displays, press<br />
Cartridge/+ to reset the ink if you have just installed a new<br />
cartridge; otherwise, press Eject/- if all you need to do is the<br />
alignment procedure.<br />
5. When the "ALIGN INK CARTRIDGES" prompt displays, press<br />
(+).<br />
6. When the "--COLOR ALIGNMENT--" prompt displays, insert an<br />
envelope into the printer and press Enter.<br />
7. The "Horiz adjust" prompt displays and the sample shown below<br />
prints on the envelope.<br />
Color<br />
Cartridge<br />
Line on<br />
Top<br />
Select number with best matched lines<br />
1 2 3 4 5 6 7 8 9 10 11 12 13 14 15<br />
Not Aligned Aligned Not Aligned<br />
Black<br />
Cartridge<br />
Line on<br />
Bottom<br />
3-8 SV61665 Rev. D
SV61665 Rev. D<br />
<strong>Printer</strong> Maintenance • 3<br />
8. Press the (+) or (-) buttons to scroll through the selections and<br />
choose the number that represents the best horizontal alignment<br />
of the upper and lower lines (for the color and black cartridges,<br />
respectively).<br />
9. Insert an envelope into the printer and press Enter. The<br />
horizontal adjustment prompt displays and the sample shown<br />
below prints on the envelope.<br />
NOTE: The number you selected is highlighted (underlined)<br />
and all lines on the envelope should now be aligned.<br />
When correct pattern is selected<br />
all lines should be str traight<br />
1 2 3 4 5 6 7 8 9 10 11 12 13 14 15<br />
Both Black and Color<br />
Cartridge Lines Together<br />
Aligned Aligned<br />
Number<br />
Selected<br />
Highlighted<br />
10. Press MENU to return to the alignment choice window<br />
11. Press (+) or (-) to move to the vertical alignment screen.<br />
12. Insert an envelope into the printer and press Enter. The vertical<br />
adjustment prompt displays and the sample shown on the next<br />
page prints on the envelope.<br />
3-9
3 • <strong>Printer</strong> Maintenance<br />
1 2 3 4 5 6 7 8 9 10 11 12 13 14 15<br />
Color Cartridge<br />
Line on Top<br />
Black Cartridge<br />
Line on Bottom<br />
Black Cartridge<br />
Line on Top<br />
Color Cartridge<br />
Line on Bottom<br />
Not Aligned Aligned<br />
Not Aligned<br />
13. Press (+) or (-) to scroll through the selections and choose the<br />
number that represents the best vertical alignment of the upper<br />
and lower lines (for the color and black cartridges, respectively).<br />
14. Insert an envelope into the printer and press Enter. The vertical<br />
adjustment prompt displays and the sample shown on the next<br />
page prints on the envelope.<br />
NOTE: The number you selected will be highlighted and all<br />
lines on the envelope should now be aligned.<br />
3-10 SV61665 Rev. D
SV61665 Rev. D<br />
When correct pattern is selected<br />
all lines should be str traight<br />
1 2 3 4 5 6 7 8 9 10 11 12 13 14 15<br />
Both Black and Color<br />
Cartridge Lines Together<br />
Aligned Aligned<br />
<strong>Printer</strong> Maintenance • 3<br />
15. Press Menu twice to return to the normal ON LINE screen.<br />
Number<br />
Selected<br />
Highlighted<br />
3-11
3 • <strong>Printer</strong> Maintenance<br />
This page is intentionally blank.<br />
3-12 SV61665 Rev. D
SV61665 Rev. D<br />
4 • Troubleshooting<br />
This chapter lists some common printer problems and offers<br />
suggestions on how to fix them.<br />
Problems and Solutions......................................................4-2<br />
Feed Problems ...................................................................4-2<br />
Print Quality Problems ........................................................4-3<br />
Interface Problems .............................................................4-4<br />
Motor Problems ..................................................................4-4<br />
Barcode Problems ..............................................................4-5<br />
Other Problems ..................................................................4-6<br />
4-1
4 • Troubleshooting<br />
Problems and Solutions<br />
Before calling for service, look for your problem below. If you can<br />
solve the problem yourself, you will be able to resume printing<br />
sooner.<br />
Feed Problems<br />
Problem Reason Solution<br />
Intermittent<br />
Feed<br />
Multifeeds<br />
(Feeds<br />
Doubles) or<br />
Skewing<br />
Feed Ramp not used. The feed ramp adds a gentle<br />
slope to the stack and helps<br />
feeding. If you're using the<br />
ramp, check the H-Block gap for<br />
proper separation. Also make<br />
sure the wire frame is centered<br />
under the ma te ri al.<br />
See Chapter 2, <strong>Printer</strong> Basics<br />
for more information.<br />
Dirty feed rollers. Clean the feed roller with<br />
alcohol. DO NOT use any other<br />
solvents or detergents. They<br />
could damage the feed rollers.<br />
Paper dust present<br />
(yellow or white<br />
residue), blocking<br />
feed sensor.<br />
Too much material in<br />
feeder (too heavy).<br />
Weight of stack must<br />
be 20 lbs. (9kg) or<br />
less.<br />
Separators (H-blocks)<br />
not set correctly.<br />
Side guide set<br />
incorrectly.<br />
Media thickness knob<br />
set too thick.<br />
Clean sensor with compressed<br />
air.<br />
See Chapter 3, <strong>Printer</strong><br />
Maintenance for more<br />
information.<br />
Remove some material from<br />
stack.<br />
Adjust H-Blocks to thickness of<br />
material.<br />
Check side guide position.<br />
See Chapter 2, <strong>Printer</strong> Basics<br />
for more information.<br />
Reduce setting.<br />
4-2 SV61665 Rev. D
Print Quality Problems<br />
Problem Reason Solution<br />
No Print Ink cartridge<br />
problem.<br />
Grey or Light<br />
Print–Black Ink<br />
Off Color<br />
or Low Ink<br />
Intensity<br />
- Color Ink<br />
<strong>DA75S</strong> Only<br />
Address<br />
Smudging<br />
Address<br />
Printing is not<br />
Sharp<br />
Unwanted<br />
Bolding<br />
Addresses<br />
"Walking"<br />
SV61665 Rev. D<br />
Troubleshooting • 4<br />
Purge ink cartridge. See<br />
Chapter 5, <strong>Printer</strong> Maintenance<br />
for more information.<br />
Clean cartridge jets with soft<br />
cotton cloth and water.<br />
Change to a new cartridge(s)<br />
Ink supply is low. Check adjustment of the media<br />
thick ness knob.<br />
If this fails to correct the<br />
prob lem, replace ink<br />
car tridge. See Chapter 3,<br />
<strong>Printer</strong> Maintenance for more<br />
information.<br />
Incorrect media<br />
thickness knob<br />
setting.<br />
Ink may not dry<br />
on very high gloss<br />
ma te ri al.<br />
Incorrect media<br />
thickness knob<br />
setting. Also,<br />
un suit able material<br />
Escape sequence<br />
turning on bold<br />
or bold se lec tion<br />
in printer's menu<br />
options is set to bold.<br />
Incorrect address<br />
setup.<br />
Check whether media thickness<br />
knob is adjusted too low.<br />
Try using less glossy material.<br />
Check exit idler rollers.<br />
Check whether media thickness<br />
knob is adjusted too high. Print<br />
quality is less sharp when using<br />
Tyvek®, recycled or glossy<br />
media.<br />
Turn off bolding in software<br />
and/or turn bold selection in<br />
printer menu OFF. Refer to help<br />
system provided with printer for<br />
more information. If prob lem still<br />
exists, call for service.<br />
Count carriage returns and<br />
line feeds and adjust Lines Per<br />
Address to the same number.<br />
Also check line termination:<br />
Typical, CR=CR; LF=LF.<br />
Other choices, (CR=CR+LF;<br />
LF=LF), CR=CR; LF=CR+LF),<br />
(CR=CR+LF; LF=CR+LF),<br />
double spacing.<br />
4-3
4 • Troubleshooting<br />
Interface Problems<br />
Problem Reason Solution<br />
<strong>Printer</strong> Not<br />
Responding<br />
Motor Problems<br />
Incorrect printer<br />
driver, bad USB or<br />
Ethernet connection,<br />
bad printer controller<br />
board.<br />
Use appropriate printer driver;<br />
replace USB or Ethernet cable.<br />
Make sure cable connections<br />
are tight. If the problem still<br />
persists, call for service.<br />
Clear memory.<br />
Cycle power (turn printer off,<br />
then on).<br />
Problem Reason Solution<br />
Motor Turning<br />
but No<br />
Feed Roller<br />
Movement<br />
Mechanical problem. Call for service.<br />
4-4 SV61665 Rev. D
Barcode Problems<br />
Problem Reason Solution<br />
Barcode (Lower<br />
Right) is not<br />
Printing (U.S.<br />
Only)<br />
Address too<br />
High<br />
Barcode<br />
Fails MERLIN<br />
Standards at<br />
USPS (U.S.<br />
Only)<br />
SV61665 Rev. D<br />
Troubleshooting • 4<br />
Barcode not enabled. Turn barcode ON using<br />
Envelope Designer Plus, the<br />
appropriate print driver or the<br />
printer’s control panel menus.<br />
Missing ZIP Code. Insert ZIP Code.<br />
Invalid ZIP Code<br />
format.<br />
Check ZIP Code for invalid<br />
character. Example: Zero (0)<br />
can only be the number, not<br />
the letter (O). Verify that there<br />
is a dash inserted between the<br />
5 + 4 ZIP Code per local postal<br />
specifications.<br />
Address too low. Verify the bottom of the last line<br />
of the address field is not less<br />
than 5/8” (16mm) from bottom<br />
edge of the media.<br />
Address field is<br />
within 1/10” (2.5mm)<br />
of the top edge of the<br />
media.<br />
Mail does not meet<br />
barcode, address<br />
placement, or<br />
other acceptance<br />
tests of MERLIN<br />
(Mail Evaluation<br />
Readability Look-up<br />
Instrument) at USPS.<br />
Move address field down<br />
to within local postal<br />
specifications.<br />
Visit our web site for more<br />
information about MERLIN.<br />
Click on Customer Support,<br />
then search the database for<br />
MERLIN.<br />
4-5
4 • Troubleshooting<br />
Other Problems<br />
Problem Reason Solution<br />
Paper Out or<br />
Paper Jam<br />
Input area is empty. Refill the input area.<br />
H-Block separators<br />
not adjusted<br />
correctly.<br />
Paper jam<br />
obstructing paper<br />
path.<br />
Dirty paper feed<br />
sensor.<br />
Shuttle Jam Media thickness<br />
knob is set too low<br />
for material.<br />
Adjust the H-Blocks to the<br />
thickness of the material you’re<br />
running.<br />
See page Chapter 2, <strong>Printer</strong><br />
Basics for more information.<br />
Clear obstructed paper path.<br />
Clean sensor with compressed<br />
air.<br />
See page Chapter 2, <strong>Printer</strong><br />
Basics for more information.<br />
Open the transport door and<br />
adjust the media thickness<br />
knob.<br />
See page Chapter 2, <strong>Printer</strong><br />
Basics for more information.<br />
Lower rail shaft dirty Wipe lower rail shaft clean.<br />
Out of Memory The printer can run<br />
out of memory when<br />
downloading fonts or<br />
graphics.<br />
This generally means you’re<br />
trying to use a graphic (artwork)<br />
that’s too big or you have too<br />
many fonts or too large a font<br />
size. If the out-of-memory<br />
message appears, try reducing<br />
the size of your art and limiting<br />
the number and size of your<br />
fonts. Then shut the printer<br />
OFF, then ON and retry.<br />
4-6 SV61665 Rev. D
SV61665 Rev. D<br />
Appendix A •<br />
Specifications<br />
This Appendix contains detailed hardware and material<br />
specifications for the printer.<br />
Equipment Specifications .................................................. A-2<br />
Material Specifications....................................................... A-9<br />
A-1
Appendix A • Specifications<br />
Equipment Specifications<br />
Physical Dimensions<br />
13” (33 cm) high; 19” (48 cm) wide; 17” (43 cm) deep (without input<br />
guide).<br />
Weight<br />
50 lbs. (23 kg), including high-capacity print cartridges and catch bin.<br />
Electrical<br />
100-240 Vac, 50/60 Hz., 5.0A<br />
Agency Approvals<br />
cTUVus/TUV Rheinland-GS - Refer to the FCC and CE statements<br />
at the front of this guide for more information.<br />
Interface<br />
USB and Ethernet<br />
Control Language<br />
PCL5, modified<br />
Address Recovery<br />
Memory buffer holds a maximum of 99 addresses<br />
A-2 SV61665 Rev. D
SV61665 Rev. D<br />
Specifications • Appendix A<br />
Print Modes (Print Resolution)<br />
The printer has three print resolutions. These resolutions are<br />
Executive (600), Letter (300), and Draft (150), which represent the<br />
horizontal density. Additionally, there are two Light Mode settings (ON<br />
and OFF), which represent the vertical density. When Light Mode<br />
is "ON", the vertical density setting is 300 DPI; when Light Mode is<br />
"OFF" the vertical density setting is 600 DPI. Refer to the table below<br />
for the print mode options.<br />
Print Quality: With Light Mode<br />
set to "ON":<br />
With Light Mode<br />
set to "OFF":<br />
Executive 600 x 300 DPI 600 x 600 DPI<br />
Letter 300 x 300 DPI 300 x 600 DPI<br />
Draft 150 x 300 DPI 150 x 600 DPI<br />
Fonts<br />
Resident Fonts<br />
Arial, Comic Sans MS, Courier New, Georgia, Impact, Kino, MSLogo,<br />
Symbol, Tahoma, Times New Roman, Trebuchet MS, Verdana,<br />
Webdings, Wingding, an OCR-A font and a Code 39 font. All fonts<br />
are scalable from 4 to 144 point size.<br />
Resident Font Enhancements<br />
Bold, Italic<br />
Downloadable Fonts<br />
Supports bitmapped, downloadable fonts.<br />
Cartridge Fonts<br />
Not Required. Fonts are downloaded with addresses.<br />
User-Definable Parameters<br />
• Font Characteristics<br />
• Address Placement<br />
• Barcode Characteristics<br />
• Print Quality<br />
A-3
Appendix A • Specifications<br />
Barcode Printing Position<br />
The printer can print a barcode in one of three positions:<br />
• lower right of the envelope<br />
• above the address block<br />
• below the address block.<br />
Barcode Printing Types<br />
The printer can print the following barcodes:<br />
1-Dimensional<br />
• The printer is capable of printing a USPS Certified POSTNET<br />
barcode. All types of barcodes can be printable including FIM, 3<br />
of 9, 4 state bar code (UK, Canadian, Euro, Asutralia, etc.) and<br />
others.<br />
• The printer is capable of printing 5-, 9-, or 11- digit POSTNET<br />
barcodes. 5-digit barcode printing may be disabled through<br />
menu selection.<br />
• Delivery point barcode is generated by transmitting the three<br />
digits.<br />
• The printer is capable of printing planet barcode used for delivery<br />
confirmation services. The printer is also capable of printing any<br />
barcode rendered by a Windows ® true type font.<br />
2-Dimensional<br />
The printer is capable of printing an USPS Certified IBIP barcode<br />
as well as all types of 2-D barcodes defined for the countries<br />
(UK, Canadian, Euro, Australia etc.) and others to the defined<br />
standards. Reference applicable Postal Standards.<br />
A-4 SV61665 Rev. D
SV61665 Rev. D<br />
Specifications • Appendix A<br />
Special Note on FIM Barcode (U.S. Only)<br />
FIM (Face Identifi cation Marking) barcode was developed by the<br />
USPS as part of their POSTNET barcoding system. It is normally<br />
used by high-volume mailers to put on return envelopes for their<br />
customers’ invoices.<br />
When the invoices are mailed back in their return envelope, the<br />
USPS sorts and processes this mail according to what version of<br />
FIM barcode is used on the envelope: FIM A (Postage required,<br />
POSTNET bar code included), FIM C (Postage prepaid, POSTNET<br />
bar code included), and FIM D (Postage required, POSTNET bar<br />
code not included).<br />
One of the requirements of the FIM barcode is that it needs to be<br />
printed on the edge of the envelope (typically printed in the top right<br />
corner). This is diffi cult to support by our printers, especially on on<br />
the trail edge. Inverted mode may supply a better print for the FIM,<br />
but any attempt to print to the exact edge of the envelope is liable to<br />
"miss" the edge occasionally. Because of these issues, we cannot<br />
guarantee full USPS compliance.<br />
Throughput<br />
14,000 letters per hour (lph)<br />
Based on:<br />
• Print quality - Draft mode<br />
• 3-line destination address<br />
• 18 characters per line<br />
• 12-point character size<br />
• Time New Roman font<br />
• Bidirectional printing of text<br />
NOTE: Adding graphics and/or printing at a higher resolution (e.g.,<br />
Letter or Executive mode) will decrease throughput.<br />
Stacker Capacity<br />
• Input Stacker: 600 #10 or DL Envelopes with Bin extension, or<br />
250 without extension installed.<br />
• Output Stacker: 150 #10 or DL Envelopes<br />
A-5
Appendix A • Specifications<br />
Effective Print Area<br />
The printable width is 9.4" (24cm) measured from the right side of<br />
the piece of mail. The printable height is 15" (38cm) measured from<br />
the bottom edge of the piece of mail. See the figure below.<br />
Trailing Edge (Top)<br />
Feed Direction<br />
Left Right<br />
Leading Edge (Bottom)<br />
Flap on<br />
Opposite<br />
Side<br />
NOTES:<br />
• All edges are viewed from the front surface of the material.<br />
• Two clear zones, each 0.3" (7.6mm) wide, are required on the<br />
piece of mail to allow clearance for the exit rollers.<br />
• Printing is allowed to the top edge of the media, however print<br />
quality will be degraded.<br />
• The lower 5/8" (16mm) of the material is reserved for the lower<br />
right barcode when it is used.<br />
A-6 SV61665 Rev. D
SV61665 Rev. D<br />
Specifications • Appendix A<br />
Printhead/InkJet Cartridges - U.S. Only<br />
Cartridges: User-replaceable ink jet<br />
Single Black Ink Cartridge: Order Number 660-1<br />
Single Color Ink Cartridge: Order Number 660-5 (<strong>DA75S</strong> only)<br />
4 Pack-Black Ink Cartridge: Order Number 660-9<br />
Print Position Accuracy<br />
For a #10 or DL envelope (Acclaim #10 WW Commercial,Regular):<br />
• Horizontal: within +/- 1.5 mm<br />
• Vertical: within +/- 1.5 mm<br />
• Skew: within +/- 1 degree<br />
For other media:<br />
• Horizontal: within +/- 3.0 mm<br />
• Vertical: within +/- 3.0 mm<br />
• Skew: within +/- 2-1/2 degrees<br />
Environmental Limits<br />
Operating Conditions<br />
• Temperature: 55 to 95°F (12 to 35°C)<br />
• Humidity: 8 to 80%<br />
• Maximum Wet Bulb Temperature: 80°F (27°C)<br />
Storage Conditions<br />
• Temperature (<strong>Printer</strong>): 15 to 120°F (-23.6 to 35.2°C)<br />
• Humidity (Supplies): 5 to 95%<br />
• Maximum Wet Bulb Temperature: 85°F (29°C)<br />
Shipment Conditions<br />
• Temperature (<strong>Printer</strong>): -40 to 140°F<br />
• Humidity (Supplies): 5 to 100%<br />
• Maximum Wet Bulb Temperature: 85°F (29°C)<br />
A-7
Appendix A • Specifications<br />
Noise Level<br />
The sound pressure level at the operator's position for this<br />
equipment as measured in any mode using ANSI and ISO Standards<br />
is less than 72 dB(A).<br />
Recommended Usage<br />
This machine has been tested under many different conditions. We<br />
recommend that you do not exceed the usage levels specified below:<br />
• Monthly usage is 250,000 pieces (86,000 pieces per month<br />
typical)<br />
NOTE: Usage beyond these recommended cycles is not<br />
covered under your Equipment Maintenance Agreement.<br />
• Product life is 5 years or 15,000,000 cycles<br />
A-8 SV61665 Rev. D
Material Specifications<br />
SV61665 Rev. D<br />
Specifications • Appendix A<br />
Approved Media<br />
The paper types listed below are approved for use with the printer.<br />
Please note that the dimensional limits above apply in all cases, and<br />
that all media (flats, envelopes, postcards, catalog envelopes, etc.)<br />
must be without windows, unstuffed and unsealed.<br />
• White Wove<br />
• Bond paper<br />
• Recycled paper<br />
• Coated paper<br />
• Card stock<br />
• Brown kraft<br />
• Manila<br />
Material Notes<br />
• Envelopes have a flap along the long edge and are processed<br />
by the printer non-flap edge first. Envelopes may have either a<br />
diagonal or straight edge along the envelope flap.<br />
• Booklets are defined as media having physical dimensions 6 x 9”<br />
(15.25 x 23cm) or larger. Booklets have an opening along their<br />
long edge which is covered by a flap with an adhesive seal.<br />
• Catalog envelopes have an opening along their short edge which<br />
is closed by a flap with an adhesive seal.<br />
• Postcards have no folds or bends. The printable side may have a<br />
higher surface roughness than the non-printable side.<br />
• Self-mailers may be of “C,” “Z,” or half-folded construction. They<br />
may not exceed the maximum allowable thickness as specified<br />
on the previous page and must be tabbed per postal regulations.<br />
• A catalog may consist of multiple pages bound by adhesive or<br />
tabs on the feed edge or at 90 degrees with respect to the feed<br />
edge.<br />
• Sheet stock may consist of 16 to 28 lb. (60 to 105g/m2 ) bond as<br />
well as 60 to 80 lb. (220 to 300g/m2 ) coated stock. The size and<br />
thickness constraints specified above apply.<br />
A-9
Appendix A • Specifications<br />
Envelope Sizes<br />
Paper Name Displayed in List Size<br />
(Width)<br />
US/<strong>Canada</strong> Envelope/Paper Sizes<br />
Size<br />
(Height)<br />
ENV_9 Envelope #9 8⅞" 3⅞"<br />
ENV_10 Envelope #10 9½" 4⅛"<br />
ENV_11 Envelope #11 10⅜" 4½"<br />
ENV_12 Envelope #12 11" 4¾"<br />
PPR_Booklet_9_12 Booklet 9 x 12 12" 9"<br />
ENV_MONARCH Envelope Monarch 7½" 3⅞"<br />
PPR_Card_4_6 Card 6 x 4 6" 4"<br />
PPR_Card_5_7 Card 7 x 5 7" 5"<br />
LETTER Letter 8½" 11"<br />
LEGAL Legal 8½" 14"<br />
EXECUTIVE Executive 7¼" 10½ in<br />
European Envelope/Paper Sizes<br />
ENV_B4 Envelope B4 353mm 250mm<br />
ENV_B5 Envelope B5 250mm 176mm<br />
ENV_B6 Envelope B6 176mm 125mm<br />
ENV_C4 Envelope C4 324mm 229mm<br />
ENV_C5 Envelope C5 229mm 162mm<br />
ENV_C6 Envelope C6 162mm 114mm<br />
ENV_C65 Envelope C65 229mm 114mm<br />
PG_ENV_C76 Envelope C76 162mm 81mm<br />
PG_ENV_C7 Envelope C7 114mm 81mm<br />
ENV_DL Envelope DL 220mm 110mm<br />
ENV_DLX Envelope DLX 235mm 120mm<br />
ENV_DLE Envelope DLE 225mm 114mm<br />
A4 A4 210mm 297mm<br />
A5 A5 148mm 210mm<br />
A-10 SV61665 Rev. D
SV61665 Rev. D<br />
Specifications • Appendix A<br />
Paper Name Displayed in List Size<br />
(Width)<br />
Asian Envelope/Paper Sizes<br />
Size<br />
(Height)<br />
Envelope 12JE 140mm 265mm<br />
Envelope 9JE 190mm 265mm<br />
Envelope 6JE 215mm 305mm<br />
Envelope ZL<br />
[China]<br />
230mm 120mm<br />
Chou #3 Yoko 120mm 235mm<br />
Chou #4 Tate 90mm 205mm<br />
Hagaki 100mm 148mm<br />
Postcard #3 165mm 102mm<br />
Postcard #4 183mm 100mm<br />
Maximum Paper Size 9.4" 15"<br />
A-11
Appendix A • Specifications<br />
This page is intentionally blank.<br />
A-12 SV61665 Rev. D
SV61665 Rev. D<br />
Appendix B • Glossary<br />
This Appendix contains a glossary of terms related to your<br />
Address <strong>Printer</strong> and Computer.<br />
B-1
Appendix B • Glossary<br />
Cable<br />
Wires that carry the information between the computer and the<br />
printer.<br />
Character<br />
A printable letter or symbol.<br />
Character height<br />
The height of a uppercase letter. A character height is measured<br />
in points.<br />
Characters per inch<br />
The number of characters printed in a horizontal inch. Also called<br />
pitch.<br />
Character set<br />
The set of characters or symbols that make up a language.<br />
Clean print cartridge<br />
Describes the process of removing dried ink from the nozzles of<br />
the ink jet cartridge.<br />
Configuration<br />
The settings used by the printer to communicate with the<br />
computer. Also the internal settings in the printer that control the<br />
print job.<br />
Control code<br />
The instructions sent to the printer to describe how to perform<br />
the print job.<br />
Control panel<br />
The buttons and display that are used to manually change the<br />
printer’s settings.<br />
CPI<br />
See characters per inch.<br />
Data communications<br />
The sending of data from the computer to a peripheral device,<br />
i.e., the printer.<br />
Dots per inch<br />
The number of ink dots printed in one horizontal inch. The larger<br />
the number the better the resolution of print.<br />
B-2 SV61665 Rev. D
Glossary • Appendix B<br />
Double feeding<br />
A condition in which two or more pieces of media feed at the<br />
same time or without separation.<br />
DPI<br />
See dots per inch.<br />
Draft quality<br />
A lower print resolution which saves ink and allows faster printing<br />
of a document.<br />
Drivers<br />
A file used by the computer’s software to communicate<br />
commands and information that the printer needs to layout and<br />
print a document.<br />
Embedded printer commands<br />
Commands sent in a record or document to instruct the printer to<br />
change printing options.<br />
Escape character<br />
A special non-printable character used to instruct the printer to<br />
change printing options.<br />
Escape sequence<br />
Commands sent beginning with the escape character that<br />
instruct the printer to change printing options: fonts, page<br />
orientation, etc.<br />
Feed gap<br />
Adjustable opening between the ends of the H-Block Assembly<br />
fingers and the Feed Rollers so the media is fed one at a time.<br />
Font<br />
A set of printable characters with consistent style and<br />
characteristics.<br />
Grounded<br />
A electrical circuit that has a voltage of zero.<br />
Handshaking<br />
A method for the computer to communicate with peripheral<br />
devices to ensure complete transfer of information.<br />
SV61665 Rev. D<br />
B-3
Appendix B • Glossary<br />
Hex dump<br />
A printer option that allows all the information and commands<br />
sent to the printer as base 16 digits.<br />
Internal test address message<br />
The preprogrammed Address that is printed when the Test button<br />
is pressed.<br />
Interface cable<br />
The cable that connects the printer or other device to the<br />
computer.<br />
Interface connector<br />
The connectors on both ends of the interface cable that insert<br />
into the interface ports.<br />
Internal fonts<br />
Resident or built-in fonts supplied with a printer.<br />
Jam<br />
See Paper Jam.<br />
Letter quality<br />
Print resolution which saves ink and still provides a high quality<br />
document.<br />
Lines per inch<br />
The number of lines printed in one vertical inch.<br />
Menu directories<br />
The list of available printer controls that appear on the bottom of<br />
the LCD display. A directory can contain other directories called<br />
"sub-directories."<br />
Off Line<br />
A condition in which the printer will not respond to information<br />
sent from the computer.<br />
On line<br />
A condition in which the printer will accept and respond to<br />
information sent from the computer.<br />
Outline fonts<br />
Scaleable printer fonts.<br />
Paper jam<br />
A condition in which media is stuck in the printer.<br />
B-4 SV61665 Rev. D
Glossary • Appendix B<br />
Parity<br />
An error checking method used when communicating between<br />
the computer and a peripheral device.<br />
PCL commands<br />
A standard printer language of commands to access printer<br />
features or options.<br />
Point size<br />
A measurement standard for the height of a printed character.<br />
One point equals one seventy-second of an inch.<br />
Postal regulations<br />
Rules and guidelines set up by the Postal Authority for mail.<br />
Power socket<br />
The socket on the back of the printer where the line cord is<br />
connected.<br />
Print cartridge<br />
A removable container that holds ink for printing.<br />
Print quality<br />
Refers to the resolution or level of sharpness of the printed<br />
image.<br />
<strong>Printer</strong> driver<br />
See Drivers.<br />
Record<br />
A collection of related fields that make up the name and address<br />
of an individual in a mailing list file.<br />
Sans serif<br />
A font typeface that contains no serifs or finishing strokes on the<br />
top or bottom of the characters. Helvetica and Arial are examples<br />
of sans serif typefaces.<br />
Scaleable fonts<br />
Outline printer fonts that are stored in a mathematical form and<br />
can be enlarged or reduced.<br />
Spacing<br />
The relative spacing between characters.<br />
SV61665 Rev. D<br />
B-5
Appendix B • Glossary<br />
Stuffed media<br />
Media that is already filled and sealed for delivery.<br />
Subdirectory<br />
A directory within a directory (or a folder within a folder).<br />
Troubleshooting<br />
The process of isolating and correcting a problem.<br />
Universal Serial Bus (USB)<br />
A communications protocol for connecting printers and other<br />
peripheral devices to a computer. This protocol supports<br />
automatic device detection for "plug and play" installation. It<br />
also it supports daisy chaining and branching for hot plug-andplay<br />
capability without disturbing running applications. USB<br />
also supports the SBP (serial bus protocol) which allows data<br />
transfers to PC peripherals. SBP allows bigger files to be sent<br />
asynchronously across the bus.<br />
There are several USB standards, the latest of which, 2.0,<br />
supports communications up to 480 mb/sec.<br />
The maximum recommended distance of a peripheral to a PC is<br />
16 feet or 5 meters.<br />
B-6 SV61665 Rev. D
SV61665 Rev. D<br />
Index<br />
I-1
Index<br />
A<br />
Addresses "Walking" 4-3<br />
Address High 4-5<br />
Address Recovery<br />
Specifi cation A-2<br />
Address Smudging 4-3<br />
Agency Approvals A-2<br />
Approved Media A-9<br />
Approved Media Types 2-2<br />
B<br />
Barcode (Lower Right) is not<br />
Printing 4-5<br />
Bold Type<br />
Unwanted 4-3<br />
C<br />
Cartridge Fonts A-3<br />
Cleaning<br />
Rubber Rollers 3-2<br />
Cleaning Printhead<br />
Cartridge 3-2<br />
Contact Information iii<br />
Control Language A-2<br />
Control Panel 1-7<br />
D<br />
Downloadable Fonts A-3<br />
E<br />
Effective Print Area A-5<br />
Electrical<br />
Specifi cations A-2<br />
Envelope Sizes A-10<br />
Environmental Limits A-8<br />
Ethernet Cable 1-2<br />
Exit Rollers 2-12<br />
I-2 SV61665 Rev. D<br />
F<br />
Side <strong>Guide</strong> 2-9<br />
Feed Gap, setting<br />
2-4<br />
Feed Ramp 1-7,2-8<br />
Font Size 2-2<br />
Fuzzy Printing 4-3<br />
G<br />
Getting Help 1-3<br />
Glossary B-2,B-3,B-4,B-<br />
5,B-6<br />
Glossy Material<br />
Print Quality 2-11<br />
H<br />
Heavy Material 2-6<br />
I<br />
Ink Jet Cartridge<br />
Installing 3-5<br />
Removing 3-6<br />
Input <strong>Guide</strong> 1-7<br />
Input <strong>Guide</strong> Slide 1-7<br />
Installing<br />
Ink Jet Cartridge 3-5<br />
Interface<br />
USB, Ethernet A-2<br />
Internal Fonts 2-2<br />
J<br />
Jam<br />
Paper 4-6<br />
Shuttle 4-6
L<br />
Light Print 4-3<br />
M<br />
Material Notes A-9<br />
Material Safety Data Sheets<br />
iii<br />
Media Size 2-2<br />
Media Thickness Knob 1-7,2-<br />
11,3-2<br />
Memory Card Error 4-6<br />
N<br />
Noise Level A-8<br />
No Print 4-3<br />
O<br />
Operating System<br />
Recommended 1-2<br />
Ordering Supplies iii<br />
Out of Memory 4-6<br />
P<br />
Paper Jam 4-6<br />
Petroleum Based Cleaning<br />
Solvents 3-2<br />
Print<br />
No printing 4-3<br />
Printhead<br />
Purging 3-2<br />
Printing<br />
Light 4-3<br />
Not Sharp 4-3<br />
Test Piece 2-13<br />
Print Modes (Print Resolution)<br />
Available A-3<br />
SV61665 Rev. D<br />
Index<br />
Print Position Accuracy A-7<br />
Print Qualities 2-2<br />
Purging Printhead 3-2,3-4<br />
R<br />
Recommended Usage A-8<br />
Recycled Material<br />
Print Quality 2-11<br />
Resident Font<br />
Enhancements A-3<br />
Resident Fonts<br />
Listing A-3<br />
S<br />
Separator Gap 2-3<br />
Setup Adjustments<br />
Exit Rollers 2-12<br />
Feed Fence 2-9<br />
Media Thickness Lever<br />
2-11<br />
Output Stack Height 2-12<br />
Separator Gap 2-3<br />
Shingling<br />
Stack 2-10<br />
Shuttle Jam 4-6<br />
Side <strong>Guide</strong> 1-7<br />
Skew<br />
Avoiding 2-9<br />
Smudging<br />
Address 4-3<br />
Specifications<br />
Address Recovery A-2<br />
Agency Approvals A-2<br />
Approved Media A-9<br />
Cartridge Fonts A-3<br />
Control Language A-2<br />
Downloadable Fonts A-3<br />
Effective Print Area A-5<br />
Electrical A-2<br />
Environmental Limits A-8<br />
I-3
Index<br />
Fonts A-3<br />
Interface A-2<br />
Material Notes A-9<br />
Noise Level A-8<br />
Printhead/InkJet Cartridge<br />
A-8<br />
Print Modes (Print<br />
Resolution) A-3<br />
Print Position Accuracy<br />
A-7<br />
Recommended Usage<br />
A-8<br />
Resident Font<br />
Enhancements A-3<br />
Resident Fonts A-3<br />
Stacker Capacity A-5<br />
Weight A-2<br />
Speed<br />
<strong>Printer</strong> 2-2<br />
Stacker Capacity A-5<br />
T<br />
Technical Support iii<br />
Test Piece 2-13<br />
Troubleshooting<br />
Address Printing is not<br />
Sharp 4-3<br />
Address Smudging 4-3<br />
Address too High 4-5<br />
Barcode (Lower Right) is<br />
not Printing 4-5<br />
Intermittent Feed 4-2<br />
Memory Card Error 4-6<br />
No Print 4-3<br />
Out of Memory 4-6<br />
Shuttle Jam 4-6<br />
Unwanted Bolding 4-3<br />
Tyvek<br />
Print Quality 2-11<br />
I-4 SV61665 Rev. D<br />
U<br />
Unwanted Bolding 4-3<br />
USB Port<br />
Cable Length 1-2<br />
W<br />
Weight A-2
1 Elmcroft Road<br />
Stamford, Connecticut 06926-0700<br />
www.pb.com<br />
Elizabeth Way<br />
Harlow, Essex CM19 5BD<br />
United Kingdom<br />
For Service or Supplies<br />
PB Form SV61665 Rev. D 12/06<br />
© 2006 <strong>Pitney</strong> <strong>Bowes</strong> Inc.<br />
All Rights Reserved<br />
Printed in the USA or <strong>Canada</strong><br />
Printed on recyclable paper<br />
*SV61665ReVD*<br />
5500 Explorer Drive<br />
Mississauga, Ontario L4W 5C7<br />
www.pitneybowes.ca


