

Printer DA70S, DA75S Operator Guide - Pitney Bowes Canada
Printer DA70S, DA75S Operator Guide - Pitney Bowes Canada
Printer DA70S, DA75S Operator Guide - Pitney Bowes Canada

You also want an ePaper? Increase the reach of your titles
YUMPU automatically turns print PDFs into web optimized ePapers that Google loves.
SV61665 Rev. D<br />
<strong>Printer</strong> Maintenance • 3<br />
Installing and Removing the Ink Jet Cartridges<br />
Installing the Ink Jet Cartridges (Color & Black)<br />
The printer uses Ink Jet Cartridges for printing. You must install<br />
a black only cartridge (<strong>DA70S</strong>), or a black and a color cartridge<br />
(<strong>DA75S</strong>), before you can print. To begin:<br />
1. With the printer on, press the ON LINE key until the display<br />
reads OFF LINE.<br />
2. Open the back cover of the printer.<br />
3. Press the Cartridge/+ key on the control panel to move the<br />
carriage to the middle of the printer. Do not attempt to move the<br />
carriage by hand. Doing so can result in damage to the carriage<br />
assembly.<br />
4. Remove the cartridge from its shipping container by peeling the<br />
top cover off. Be careful not to touch the gold contacts.<br />
WARNING! The ink in the cartridge may be<br />
harmful if swallowed. Keep new and used<br />
cartridges out of reach of children. Discard empty<br />
cartridges immediately.<br />
5. Gently remove the tape covering the ink nozzles on the print<br />
cartridge, being careful not to touch the copper nozzles.<br />
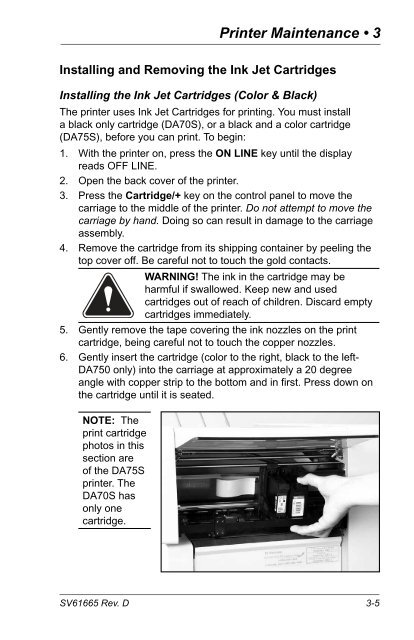
6. Gently insert the cartridge (color to the right, black to the left-<br />
DA750 only) into the carriage at approximately a 20 degree<br />
angle with copper strip to the bottom and in first. Press down on<br />
the cartridge until it is seated.<br />
NOTE: The<br />
print cartridge<br />
photos in this<br />
section are<br />
of the <strong>DA75S</strong><br />
printer. The<br />
<strong>DA70S</strong> has<br />
only one<br />
cartridge.<br />
3-5


