GigaStudio 3 Installation and Use: QuickStart Guide - 4.37 - Tascam
GigaStudio 3 Installation and Use: QuickStart Guide - 4.37 - Tascam
GigaStudio 3 Installation and Use: QuickStart Guide - 4.37 - Tascam

Create successful ePaper yourself
Turn your PDF publications into a flip-book with our unique Google optimized e-Paper software.
ÿ page 1<br />
Contents<br />
Initial Setup 2<br />
Getting To Know Giga 6<br />
Searching <strong>and</strong> Loading 9<br />
Loading Instruments 12<br />
Editing Instruments 14<br />
Meet QuickEdit 16<br />
Stacking Instruments 18<br />
The DSP Station<br />
Overview 20<br />
DSP – Adjusting EQ <strong>and</strong> Dynamics 21<br />
DSP – Inserting Effects 23<br />
DSP – Aux Buses <strong>and</strong> Aux Effects 24<br />
Creating a Distributed Wave<br />
Instrument 27<br />
Creating <strong>and</strong> Editing an Instrument<br />
in the Instrument Editor 32<br />
Meet The Wizard 37<br />
Index 44<br />
©2004 All rights reserved. TASCAM, a division of Teac America. <strong>GigaStudio</strong>, GigaPiano <strong>and</strong><br />
GigaPulse are trademarks of TASCAM. All other trademarks <strong>and</strong> registered trademarks are<br />
the property of their respective holders. QS3QSG V1 • Printed in USA<br />
1
LOADING INSTRUMENTS<br />
2<br />
!<br />
<strong>GigaStudio</strong> <strong>QuickStart</strong><br />
page 2 ÿ <strong>GigaStudio</strong> 3 Quick Start <strong>Guide</strong><br />
<strong>GigaStudio</strong> is an amazingly advanced sampler that you don’t<br />
master in a day. But paradoxically, it’s also very easy to get up<br />
<strong>and</strong> running…as this <strong>QuickStart</strong> will prove.<br />
We know you’re impatient to check out what this new kind<br />
of musical instrument can do, so let’s jump in. We’ll gloss over<br />
some of the many outst<strong>and</strong>ing features in favor of getting a<br />
broad overview — so when you get a chance, do make sure you<br />
go through the entire manual. You know the old saying:<br />
Q. What’s the defi nition of a “power user”?<br />
A. Someone who reads the manual!<br />
Before proceeding, refer to the main manual on how to install<br />
the application, <strong>and</strong> make sure you read the ReadMe in the root<br />
directory of CD1/DVD1. Return here after installation is complete.<br />
INITIAL SETUP<br />
Welcome back! First, we’ll make sure <strong>GigaStudio</strong> can converse<br />
with your computer.<br />
1 Start <strong>GigaStudio</strong>’s Confi guration Manager by going Start ><br />
Programs > TASCAM > <strong>GigaStudio</strong> Confi guration Manager.<br />
Manager<br />
2 You’ll now see the Hardware Confi guration screen (top of next<br />
page). There are several tabs; click on Hardware (outlined<br />
for clarity). For now, we just want to verify that <strong>GigaStudio</strong><br />
recognizes your audio interface <strong>and</strong> MIDI input.<br />
3 Under the Hardware Adapter portion of the screen (toward
Inital Setup ÿ page 3<br />
the left), check that the name of your audio interface appears,<br />
<strong>and</strong> says “GSIF” GSIF” GSIF to the right of the name. This means that<br />
the interface has <strong>GigaStudio</strong>-compatible drivers. Below the<br />
@<br />
#<br />
LOADING INSTRUMENTS<br />
3
LOADING INSTRUMENTS<br />
4<br />
$<br />
page 4 ÿ <strong>GigaStudio</strong> 3 Quick Start <strong>Guide</strong><br />
name, you can choose a sample rate <strong>and</strong> bit depth supported<br />
by your interface; click on the small triangle toward the right<br />
of these fi elds, <strong>and</strong> a drop-down menu will list your options.<br />
Also check that at least one output is enabled under Output<br />
Channels. You can enable or disable your audio interface<br />
outputs by clicking in the Output fi eld for a particular output<br />
channel.<br />
2 If you don’t see that a GSIF driver is available, you have two<br />
options: Either contact your interface manufacturer to check if a<br />
newer driver package is available that includes GSIF drivers, or run<br />
<strong>GigaStudio</strong> in ReWire mode. For this <strong>QuickStart</strong>, we’ll assume you<br />
have GSIF drivers available. Otherwise, look in the main manual<br />
for information on ReWiring <strong>GigaStudio</strong> in host applications like<br />
Nuendo®, Sonar®, Cubase SX, Pro Tools®, Live, etc.<br />
4 Let’s ensure that MIDI is up <strong>and</strong> running. <strong>GigaStudio</strong><br />
Orchestra can h<strong>and</strong>le up to 8 physical MIDI ports, but we’ll<br />
keep it simple for now. Click on the small triangle to the right<br />
of the top MIDI In Ports fi eld, <strong>and</strong> choose the name of the<br />
MIDI port you want to use.
Inital Setup ÿ page 5<br />
2 If you don’t see a MIDI port, or don’t have a MIDI interface,<br />
don’t panic — you can use <strong>GigaStudio</strong>’s virtual keyboard to trigger<br />
notes for now. Still, hook up a MIDI interface to your computer as<br />
soon as possible so you can play with a real keyboard <strong>and</strong> feed in<br />
MIDI data from sustain pedals, controllers, etc.<br />
5 Click on “ “Apply “ Apply Apply” then on “<br />
OK.” OK We’re done with confi guration.<br />
Be patient; it might take a few seconds before this window<br />
disappears.<br />
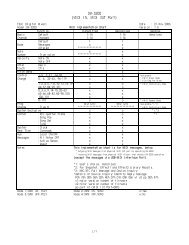
2 Note: This Quick Start <strong>Guide</strong> shows screenshots<br />
taken from GS3 Orchestra. However, GS3 Ensemble <strong>and</strong><br />
GS3 Solo are primarily the same. For example, in these<br />
screenshots, Ensemble <strong>and</strong> Solo have fewer MIDI ports<br />
available than you see here in Orchestra.<br />
Also, all screenshots in this guide are subject to change.<br />
%<br />
LOADING INSTRUMENTS<br />
5
LOADING INSTRUMENTS<br />
6<br />
!<br />
@<br />
page 6 ÿ <strong>GigaStudio</strong> 3 Quick Start <strong>Guide</strong><br />
GETTING TO KNOW GIGA<br />
After booting <strong>and</strong> the desktop appears, wait for any signifi cant<br />
hard drive activity to cease before starting <strong>GigaStudio</strong>.<br />
1 Start <strong>GigaStudio</strong> by going<br />
Start > Programs > TASCAM ><br />
<strong>GigaStudio</strong>3 > <strong>GigaStudio</strong> Workstation [name of your edition<br />
— Orchestra, Ensemble, or Solo]<br />
2 The default opening screen is shown at the top of the next<br />
page. This is where you’ll spend most of your time when<br />
loading <strong>and</strong> playing instruments, although there are several<br />
other screens for advanced editing <strong>and</strong> other aspects of<br />
managing <strong>GigaStudio</strong>. Let’s look at each section of this screen:<br />
The MIDI Mixer, QuickSound Loader, <strong>and</strong> Virtual<br />
Keyboard.<br />
2 If you don’t see all three views, one or more<br />
may be hidden. You can show/hide them with the<br />
toolbar buttons at the top of the main screen.<br />
3 A fi le menu (File, View, Capture, Help) is at<br />
the very top. Other elements are:<br />
˘ A Toolbar that provides quick access to common <strong>GigaStudio</strong><br />
functions<br />
˘ A MIDI Mixer with 16 instrument slots (per port). Loading an<br />
instrument into a slot associates it with a particular MIDI<br />
channel.<br />
˘ A Resize Bar along the bottom of the MIDI Mixer. Click on
Getting To Know Giga ÿ page 7<br />
this <strong>and</strong> drag up <strong>and</strong> down to reveal more or fewer of the<br />
instrument slots.<br />
˘ Eight tabs, each of which selects one of the eight individual<br />
MIDI ports for viewing. (With <strong>GigaStudio</strong> Ensemble there are<br />
four tabs <strong>and</strong> for<br />
the Solo version,<br />
two tabs.) For<br />
the <strong>QuickStart</strong>,<br />
we’ll stick with<br />
G3Port 1, so<br />
make sure that<br />
tab is selected<br />
before moving<br />
on.<br />
2 If you do the<br />
math for the Orchestral version, eight output ports times 16<br />
instruments means you can load up to 128 instruments! Of course,<br />
#<br />
LOADING INSTRUMENTS<br />
7
LOADING INSTRUMENTS<br />
8<br />
$<br />
%<br />
page 8 ÿ <strong>GigaStudio</strong> 3 Quick Start <strong>Guide</strong><br />
your computer may run<br />
out of horsepower<br />
before that happens,<br />
but it’s nice to know the<br />
potential is there.<br />
4 The<br />
QuickSound loader is a fast way to locate Instruments<br />
(thanks to a search function), as well as load <strong>and</strong> audition<br />
them. There are three main views:<br />
˘ The Folder Tree acts like Windows’ explorer. It shows the<br />
various drives available on your computer. You can search for<br />
<strong>GigaStudio</strong> fi les throughout the computer, or limit searching<br />
to particular drives or folders.<br />
˘ The Instrument List view shows which instruments were<br />
found with <strong>GigaStudio</strong>’s search function. For example, if you<br />
decide to look for fi les with the name “Piano” <strong>and</strong> do a search,<br />
all instruments containing “Piano” are listed here. Or, you<br />
could search for all <strong>GigaStudio</strong> Instrument fi les with a .gig<br />
suffi x.<br />
˘ The Loaded Instrument view shows information on<br />
instruments that are currently loaded into <strong>GigaStudio</strong>.<br />
Toward the top, a Toolbar accesses various QuickSound<br />
functions. For example, note the lines above going from the<br />
Folder Tree, Instrument List view, <strong>and</strong> Loaded Instrument.<br />
These indicate show/hide icons for each of these views.<br />
There’s also a resize bar so you can change the size of the<br />
QuickSound window.<br />
5 The Virtual Keyboard lets you trigger notes for the various<br />
instruments, without the need for an external MIDI keyboard.<br />
The four buttons at the left <strong>and</strong> right sides are (from top to<br />
bottom) zoom in, zoom out, scroll keyboard right, <strong>and</strong> scroll<br />
keyboard left. The slider toward the left sets a default velocity<br />
value for when you click on a key. Various status indicators<br />
run along the bottom.
Searching <strong>and</strong> Loading ÿ page 9<br />
SEARCHING AND LOADING<br />
Next we’ll locate sounds, then load them. If you know where<br />
all your sounds are, you can of course just select them manually.<br />
But for now, pretend you don’t have a clue where they are, <strong>and</strong><br />
let’s use the Search function. First, we’ll set up some search<br />
criteria.<br />
1 Click on the right-most icon in the<br />
QuickSound Toolbar. This<br />
brings up the QuickSound settings window.<br />
2 “ Recursive” should already be checked under Search mode so<br />
that <strong>GigaStudio</strong> will search in folders within folders. If you<br />
select “Local,” the search will take place only in the folder<br />
(directory) you specifi ed in the Folder Tree. Under Results<br />
Properties, check “Show Only Instruments that Match<br />
Search” to keep things simple for now.<br />
3 Click on the “ “Advanced “ Advanced Settings<br />
” button to open another<br />
window where you can select particular drives to include or<br />
exclude, as well as what File Types you want to include in the<br />
!<br />
LOADING INSTRUMENTS<br />
9
LOADING INSTRUMENTS<br />
10<br />
%<br />
^<br />
&<br />
*<br />
page 10 ÿ <strong>GigaStudio</strong> 3 Quick Start <strong>Guide</strong><br />
QuickSound database. Check them all for now,<br />
then click on “Save Settings.”<br />
4 Click on “<br />
Rebuild Entire QuickSound<br />
Database Now.” Now<br />
5 When the<br />
Update QuickSound Database<br />
window appears, click on the “Update<br />
QuickSound Database” button. <strong>GigaStudio</strong> fl ies<br />
through your hard drives, looking for fi les with<br />
the extensions you specifi ed. This can take a few<br />
seconds to several minutes, depending on how many fi les you<br />
have stored on your drives, the<br />
size of your drives, <strong>and</strong> how<br />
many drives you’re searching.<br />
When this fl urry of activity is<br />
done, click “OK” OK” OK on the Settings<br />
window.<br />
6 To select the drive or folder<br />
where you want to search, click on it in the Folder Tree view.<br />
7 Type the search string<br />
in the Search fi eld. Here<br />
we’ve typed *.gig to fi nd all<br />
<strong>GigaStudio</strong> instruments. Note<br />
that the * symbol is Windows<br />
shorth<strong>and</strong> for “any text string,”<br />
so this would fi nd anything<br />
with a .gig suffi x. You can also type “fi lters” for other fi le types<br />
like <strong>GigaStudio</strong> Performance (.gsp), WAV fi les (.wav), names<br />
of particular instruments, etc., or use the pull-down menu to<br />
choose a particular fi lter.<br />
8 Almost instantly, fi les that<br />
meet the your search criteria<br />
show up in the Instrument List<br />
view. You may also see a small<br />
label appear above the Folder<br />
Tree that says how many fi les<br />
were found.
Searching <strong>and</strong> Loading ÿ page 11<br />
2 Note that the Instrument List View shows the complete fi le<br />
path for the fi les, as well as their sizes. If you can’t see all of this,<br />
you can move the vertical splitter bar between the Instrument List<br />
display <strong>and</strong> Loaded Instrument view to show more of one window<br />
or the other, as well as move the vertical splitter bars between the<br />
various headings in the Instrument List view. All moveable splitter<br />
bars are shown circled in the above shot.<br />
LOADING INSTRUMENTS<br />
11
LOADING INSTRUMENTS<br />
12<br />
!<br />
@<br />
#<br />
page 12 ÿ <strong>GigaStudio</strong> 3 Quick Start <strong>Guide</strong><br />
LOADING INSTRUMENTS<br />
The Instrument List View now shows what instruments are<br />
available for loading. But perhaps you want to refresh your<br />
memory as to what a particular instrument sounds like before<br />
you load it...no problem.<br />
1 Click on one of the<br />
Instruments in the Instrument<br />
List View, View then click on<br />
the Play Audition Sample<br />
button. Click again to stop the<br />
audition. Repeat until you’ve<br />
listened to all the Instruments<br />
you want to audition.<br />
2 Let’s see if the Instrument<br />
contains different patches.<br />
Click on the small + symbol<br />
to the left of the Instrument<br />
name to exp<strong>and</strong> it. Underneath<br />
the name, you’ll see anywhere<br />
from one to many patches. In<br />
this example, the GigaPiano II<br />
has one patch, whereas the DX7 Classic Instrument has three<br />
variations: DX7 Classic E.P. Lite, Soft DX7 Classic, <strong>and</strong> (just<br />
barely visible) Rock DX7 Classic.<br />
3 Now decide which slot<br />
should hold the instrument.<br />
Click on the slot number to the<br />
left of the slot. This outlines<br />
the slot in blue to show it<br />
has the focus; therefore, any<br />
instrument you load will go<br />
into that slot. (Actually you<br />
can click anywhere in the slot<br />
to select it, but clicking on the<br />
number is safer because you don’t want to click on a control<br />
or button accidentally.) For now, click on Slot 1.<br />
4 Double-click on the patch for the instrument you want<br />
to load. (You can choose a piano to be in sync with the<br />
<strong>QuickStart</strong>, but that’s not crucial. Just avoid an instrument
Loading Instruments ÿ page 13<br />
like organ that<br />
has a continuous<br />
tone, as the effects<br />
of the GigaPulse,<br />
which we’ll<br />
cover later, won’t<br />
be as dramatic<br />
or obvious.)<br />
<strong>GigaStudio</strong> starts<br />
pulling data off<br />
your hard drive<br />
as fast as it can,<br />
<strong>and</strong> stuffs it into<br />
the selected slot. A<br />
bar shows loading<br />
progress; loading<br />
may take a few<br />
seconds with<br />
large fi les. Note that you can also drag <strong>and</strong> drop <strong>GigaStudio</strong><br />
Instruments <strong>and</strong> Performances into a slot.<br />
5 Now select slot 2 <strong>and</strong> load another instrument. When loading<br />
is done, each slot shows the name of the loaded instrument.<br />
6 If you’re using<br />
an external MIDI<br />
keyboard, Slot 1<br />
responds to channel<br />
1, Slot 2 responds to<br />
channel 2, <strong>and</strong> so<br />
on. Set the channel<br />
of your master<br />
keyboard to drive<br />
the appropriate slot.<br />
The virtual keyboard<br />
will play whichever<br />
slot is selected<br />
— no channel setting<br />
required.<br />
$ %<br />
^<br />
LOADING INSTRUMENTS<br />
13
LOADING INSTRUMENTS<br />
14<br />
page 14 ÿ <strong>GigaStudio</strong> 3 Quick Start <strong>Guide</strong><br />
EDITING INSTRUMENTS<br />
Select the Instrument in Slot 1. Let’s look at some of the<br />
available MIDI mixing parameters (note that due to the width of<br />
the MIDI mixer, it’s shown here split in half to avoid reducing the<br />
size too much).<br />
Each slot has a strip of editable parameters. Going from left to<br />
right, these are:<br />
A The name of the Instrument loaded in the slot.<br />
B A meter that shows velocity. Hit a few keys on your keyboard,<br />
<strong>and</strong> you’ll see the corresponding amount of velocity.<br />
C Four buttons — (M)ute, (S)olo, (Q)uickEdit editor, <strong>and</strong> FX. Mute<br />
turns off the slot’s audio, Solo turns off all slots that aren’t<br />
soloed, QuickEdit brings up massive numbers of ways to<br />
tweak the slot’s sound (as we’ll discover soon), <strong>and</strong> FX allows<br />
editing effects for Instruments using convolution.<br />
D Controls MIDI volume, from 0 to 127 (default is 90). Drag the<br />
slider left to lower volume, right to raise volume. Note that<br />
you can also adjust volume using the DSP-based mixer, as<br />
described later.<br />
E Tune changes the<br />
tuning from -100 cents to +100 cents.<br />
F Pan places the position of the Instrument in the stereo fi eld<br />
(anywhere between left <strong>and</strong> right).<br />
G The drop-down menu here chooses from one of the available<br />
outputs.
Editing Instruments ÿ page 15<br />
2 Note that you can return<br />
most <strong>GigaStudio</strong> controls<br />
(including volume, tune, <strong>and</strong><br />
pan) to their default position by<br />
Ctrl-clicking on the control.<br />
The volume, tune, <strong>and</strong><br />
pan parameters can also be<br />
assigned to MIDI controllers.<br />
Click on the small triangle<br />
to the right of the parameter<br />
name to see a list of controllers<br />
like the one above (this<br />
shows that Controller #7, the<br />
st<strong>and</strong>ard MIDI control for<br />
volume, is assigned to the<br />
selected parameter — in this<br />
case, volume). Also note that<br />
Fine Tune <strong>and</strong> Coarse Tune are<br />
at the end of the list.<br />
Select an Instrument slot<br />
<strong>and</strong> click on some virtual<br />
keys to hear it. Adjust the<br />
volume, pan, <strong>and</strong> tune controls<br />
to hear their effect on the<br />
sound. Then audition any<br />
other Instruments that are in<br />
other slots. When you’re done,<br />
return all parameters to their<br />
default positions.<br />
LOADING INSTRUMENTS<br />
15
LOADING INSTRUMENTS<br />
16<br />
MEET QUICKEDIT<br />
page 16 ÿ <strong>GigaStudio</strong> 3 Quick Start <strong>Guide</strong><br />
Hit a slot’s Q button, <strong>and</strong> the QuickEdit window appears. There<br />
are four main modules: Articulation, Dimensions, Wave, <strong>and</strong><br />
Keyboard.<br />
Articulation contains the type of modules you’d fi nd in<br />
synthesizers to process the sampled wave: Envelopes, fi lters, LFOs,<br />
etc. <strong>GigaStudio</strong>’s unique “dimensions” capability allows (among<br />
other things) MIDI controllers to switch or crossfade among<br />
various samples. Because this window takes up a lot of space,<br />
the circled show/hide buttons let you display only those areas of<br />
interest.<br />
2 Clicking anywhere along the line pointed to by the show/hide<br />
button does the same thing as clicking on the show/hide button.
Meet QuickEdit ÿ page 17<br />
Although this is a <strong>QuickStart</strong> <strong>and</strong> not a course on synthesis, if<br />
you’re into synthesizers <strong>and</strong> are familiar with typical synthesizer<br />
modules, feel free to play around. Envelope 1 controls the<br />
amplitude, Envelope 2 controls the fi lter. If you’re clueless about<br />
synthesizers, select Lowpass as the Filter Type, <strong>and</strong> vary the<br />
fi lter’s Cut(off) Freq(uency) <strong>and</strong> Res(onance) parameters as you<br />
play. You’ll hear the timbre change. Now add some Attack time<br />
with Envelope 1; the piano note swell up to volume rather than<br />
have a percussive attack, <strong>and</strong> you’ll probably see the attack curve<br />
superimposed on the waveform. Similarly, Envelope 2’s Attack<br />
control changes the fi lter’s cutoff frequency.<br />
And how about a piano with vibrato? Sure, why not — go to<br />
the LFO section <strong>and</strong> increase the Pitch Int Depth parameter value<br />
to about 40.<br />
This gives you only the slightest idea of the power of<br />
QuickEdit. While it defaults to editing all samples used in an<br />
instrument, it’s also possible to edit each sample that makes up<br />
the instrument individually. For example, if your instrument is a<br />
drum hit, each drum can have its own fi ltering, envelopes, etc.<br />
LOADING INSTRUMENTS<br />
17
LOADING INSTRUMENTS<br />
18<br />
!<br />
@<br />
#<br />
page 18 ÿ <strong>GigaStudio</strong> 3 Quick Start <strong>Guide</strong><br />
STACKING INSTRUMENTS<br />
If you want to drive two or more instruments from the same<br />
MIDI channel, you can do so by using Stack Mode. Let’s try it.<br />
1 We’ll start by<br />
“detaching” both of<br />
the Instruments we’ve<br />
loaded so far. Click<br />
on the triangle to the<br />
right of the name fi eld,<br />
<strong>and</strong> select “Detach<br />
Instrument.” Detaching<br />
still keeps the Instrument loaded in memory,<br />
which is useful if you’re going back <strong>and</strong> forth<br />
between different Instruments <strong>and</strong> don’t want to<br />
have to load them each time. In other cases, you<br />
might want not only to detach the Instrument<br />
from its slot, but also remove it from memory to<br />
free up space for other instruments. Here’s how to<br />
do this.<br />
2 Right-click on an Instrument in the<br />
Loaded<br />
Instrument View <strong>and</strong> choose to unload all loaded<br />
instruments, just the selected ones, or just the ones<br />
that are unmapped. To start off with a clean slate,<br />
select “Unload All.”<br />
3 Click on Slot 1, <strong>and</strong> assign an instrument to it as we did
Stacking Instruments ÿ page 19<br />
before — by double-clicking on a patch in the Instrument List<br />
view. But before assigning another patch, click on the “Stack<br />
Instruments on Active MIDI Channel” button.<br />
4 With Slot 1 still selected,<br />
double-click on the patch in<br />
the Instrument List view that<br />
you want to stack with the<br />
fi rst Instrument you selected.<br />
The Slot is now called a<br />
Stacked Instrument, <strong>and</strong> you<br />
can see the instruments that<br />
are stacked underneath. Play a note on the virtual keyboard,<br />
<strong>and</strong> you’ll hear them both play at the same time.<br />
5 The stacked Instruments retain their individual identities.<br />
For example, you can pan them to opposite sides of the<br />
stereo fi eld, change the fi ne tuning a bit to add somewhat<br />
of a chorusing effect, assign them to different outputs, <strong>and</strong><br />
change their relative balance using the volume parameter.<br />
Experiment with these various parameters.<br />
Leave the two stacked instruments in place for now. Next we’ll<br />
explore the DSP Station, where we can do sophisticated mixing<br />
<strong>and</strong> add effects.<br />
2 If you’re loading a lot of instruments, it’s worth checking the<br />
memory meter in the lower right to make sure you’re not running<br />
short on available memory.<br />
$<br />
%<br />
LOADING INSTRUMENTS<br />
19
DSP STATION – OVERVIEW<br />
20<br />
page 20 ÿ <strong>GigaStudio</strong> 3 Quick Start <strong>Guide</strong><br />
THE DSP STATION – OVERVIEW<br />
Click on the DSP Station show/hide icon to reveal <strong>GigaStudio</strong>’s<br />
comprehensive virtual mixing console.<br />
2 You may want to hide the Virtual Keyboard <strong>and</strong> QuickSound<br />
windows so you can see the entire DSP Station.<br />
Each channel strip in the DSP Station represents an output<br />
to which an Instrument was assigned on the MIDI Mixer page.<br />
For example, if an Instrument was assigned to outs 1+2, it would<br />
appear on the fi rst (leftmost) channel strip. If it was assigned to<br />
outs 3+4, it would appear on the second channel strip (the next<br />
one to the right).<br />
But the real action unfolds when you exp<strong>and</strong> a channel strip<br />
by clicking on the triangle to the right of the output number. This<br />
presents modules for EQ (four b<strong>and</strong>s with six possible fi lter types
DSP ÿ page 21<br />
per b<strong>and</strong>), Dynamics control, Inserts for adding<br />
effects included with <strong>GigaStudio</strong> or VST plugin,<br />
<strong>and</strong> a set of 8 stereo aux sends.<br />
The shot at right shows two inserted effects:<br />
The <strong>GigaStudio</strong> Tap Delay, followed by the<br />
<strong>GigaStudio</strong> Chorus. Dynamics, EQ, <strong>and</strong> the aux<br />
sends aren’t doing anything — yet.<br />
That’s the overview, now let’s see how each<br />
of these elements works.<br />
DSP – ADJUSTING EQ<br />
AND DYNAMICS<br />
Let’s adjust the EQ <strong>and</strong> create some tonal<br />
changes. We’ll assume you still have a stacked instrument loaded<br />
from our previous examples, but if not, load something like a<br />
piano into one of the instrument slots.<br />
1 There are four stages of EQ; each one is identical. The BL fi eld<br />
has a drop-down menu where you can choose the fi lter type:<br />
Parametric, Notch, Low pass, High pass, Low shelf, <strong>and</strong> High<br />
shelf. For now, choose Parametric in<br />
Stage 1 (the top fi lter).<br />
2 Refer to the main manual for a complete<br />
description of the various fi lter response types<br />
<strong>and</strong> how they affect the sound.<br />
2 Click the Stage 1 “On” button (next<br />
page). Experiment with the Gain, Freq,<br />
<strong>and</strong> Q controls. Note how Q changes<br />
the width of the area being boosted<br />
!<br />
DSP – ADJUSTING EQ AND DYNAMICS<br />
21
DSP – ADJUSTING EQ AND DYNAMICS<br />
22<br />
@<br />
$ %<br />
#<br />
page 22 ÿ <strong>GigaStudio</strong> 3 Quick Start <strong>Guide</strong><br />
or cut using the<br />
Gain control, while<br />
Freq determines<br />
where this cutting<br />
or boosting takes<br />
place.<br />
3 The reason<br />
each stage has an<br />
on-off button is<br />
because EQ requires<br />
computer DSP, so<br />
you don’t want to<br />
enable any more stages of EQ than necessary. Note that<br />
there’s also a Master EQ on/off button in the main channel<br />
strip itself that turns off all b<strong>and</strong>s of channel EQ. Before<br />
proceeding, turn the Master EQ button off.<br />
2 Note that there are also master on/off switches in the<br />
same area for turning the Dynamics <strong>and</strong> Insert sections on <strong>and</strong> off.<br />
4 For a punchier sound, let’s add some compression using the<br />
Dynamics module. Click on the module’s DYN (Dynamics)<br />
button to enable dynamics.<br />
5 Set THR dB to –12. Signals above this level will be compressed.<br />
Ratio, ATT, ATT <strong>and</strong><br />
REL should be left at their defaults (4.3:1,<br />
10, <strong>and</strong> 150 respectively). Also click on the Auto switch to<br />
automatically adjust the overall level <strong>and</strong> make up for some<br />
of the signal loss created during the compression process. Play<br />
a note; it will have a higher average level, <strong>and</strong> sustain longer<br />
if it has a decay. Compare to the uncompressed sound by<br />
clicking on DYN to turn off the sound temporarily.<br />
2 The meter in the Dynamics module indicates the extent to which<br />
peaks are being reduced at any given moment. This is the basis of<br />
compression: by reducing the level of peaks, the overall volume can<br />
be increased, thus producing a louder overall sound.<br />
6 Now turn off Dynamics; let’s insert one of the effects included<br />
with GigaSampler.
DSP ÿ page 23<br />
DSP – INSERTING EFFECTS<br />
1 Click on the downward<br />
pointing triangle toward the<br />
right of the fi rst effects Insert<br />
fi eld, then go Native Plugins<br />
(NFX) > NFX3 Tap/Delay<br />
(Stereo).<br />
2 The Tap Delay effect appears.<br />
Play a note, <strong>and</strong> you should<br />
hear an echo. Toward the top,<br />
under the Effect name,<br />
Default<br />
Patch should be selected.<br />
3 Click on Tap 4, <strong>and</strong> increase<br />
both Feedback <strong>and</strong><br />
Damping<br />
to 110. The echoes now<br />
continue for much longer<br />
because of the feedback.<br />
Turn Damping down to 50;<br />
successive echoes sound duller,<br />
as if they were occurring in a<br />
room with a lot of absorbent<br />
material.<br />
2 Note that there are four<br />
individually adjustable taps, as<br />
well as a Contour section that lets<br />
you tailor the overall frequency<br />
response. This is a versatile effect,<br />
so be sure to check out the manual<br />
for what the various NFX can<br />
do. <strong>GigaStudio</strong> can also load VST<br />
format effects if you have any<br />
installed on your system.<br />
4 Remove the effect by clicking<br />
in the Insert fi eld as if you<br />
were going to insert an effect,<br />
<strong>and</strong> select Remove. We now<br />
!<br />
@<br />
#<br />
DSP – INSERTING EFFECTS<br />
23
DSP – INSERTING EFFECTS AUX BUSES AND AUX EFFECTS<br />
24<br />
$<br />
!<br />
page 24 ÿ <strong>GigaStudio</strong> 3 Quick Start <strong>Guide</strong><br />
know how to add <strong>and</strong> remove effects from a<br />
channel, so let’s investigate how to add an effect<br />
to multiple instruments simultaneously using<br />
an Aux bus.<br />
DSP – AUX BUSES AND AUX EFFECTS<br />
An aux bus contains one or more effects.<br />
Each channel has a send control that can send<br />
some audio into this bus, <strong>and</strong> this audio will<br />
pass through the aux bus effect before returning<br />
into the mixer. Aux bus effects are ideal for<br />
adding overall sounds that should affect multiple<br />
channels, such as room ambience. Sending more<br />
signal from a channel into the aux bus increases<br />
the apparent amount of ambience, allowing you to<br />
control a sound’s “depth” within a mix.<br />
1 Click on the Aux Returns tab to reveal the 8 aux<br />
buses.<br />
2 These bus modules are called “returns” because<br />
here is where the signal returns into the mixer,<br />
with a master level set by the faders. Each Aux<br />
bus has four effects slots, just like the channels,<br />
<strong>and</strong> you insert effects similarly. Insert the<br />
GigaPulse processor into the top insert slot.<br />
3 The extremely cool-looking GigaPulse screen<br />
appears (see top of next page). Under Bank,<br />
select Preset 0018 – Larry Seyer – Thunderous<br />
(5ch-15v).fxb. Play a few notes; you won’t<br />
hear any difference yet (the sound is still<br />
unprocessed) because we haven’t yet sent any<br />
signal to the bus containing the GigaPulse.<br />
@
DSP ÿ page 25<br />
4 While GigaPulse still has the focus, drag the<br />
Wet/Dry<br />
control (Under “Mic Masters”) all the way to the right<br />
so that all Wet/Dry mix parameters read 100%.<br />
5 Click on the Inputs tab so you can see the exp<strong>and</strong>ed<br />
channel strip for the left-most channel. We’re now<br />
going to adjust the amount of signal going to the<br />
GigaPulse.<br />
%<br />
#<br />
DSP – AUX BUSES AND AUX EFFECTS<br />
25
DSP – AUX BUSES AND AUX EFFECTS<br />
26<br />
^<br />
&<br />
page 26 ÿ <strong>GigaStudio</strong> 3 Quick Start <strong>Guide</strong><br />
6 In the Aux Sends section, note the 8 controls that correspond<br />
to the 8 aux buses. As the GigaPulse is in aux bus 1, enable<br />
Aux Send 1 by clicking on its On button (it glows green), then<br />
turn up the Send control to around –10 or so. Play a note;<br />
you should now hear some room ambience added to the<br />
instrument you have loaded.<br />
7 Try out different banks, <strong>and</strong> prepare to be amazed. With the<br />
Larry Seyer 5ch presets, place them on Aux Returns <strong>and</strong> use<br />
the Wet/Dry master slider set to 100%. Also check out some<br />
of the variations included with the Seyer 5ch presets. Other<br />
presets should be used as Insert effects; play with the master<br />
Perspective control to change the amount of room sound, <strong>and</strong><br />
leave the Wet/Dry mix controls at 100%.<br />
This is just a hint of what GigaPulse can do, but you’ve<br />
probably already fi gured out that one of the advantages of<br />
TASCAM’s Convolution Reverb approach is stunningly realistic<br />
sound quality.
Creating a Distributed Wave Instrument ÿ page 27<br />
CREATING A DISTRIBUTED WAVE INSTRUMENT<br />
A Distributed Wave instrument<br />
provides a way to assemble <strong>and</strong><br />
audition samples quickly, then save<br />
them as a .GIG or .DW (Distributed<br />
Wave) instrument. You can play this<br />
instrument directly, reload it as a .DW<br />
fi le if you want to do more work on it,<br />
or bring it into the Instrument Editor<br />
(described next section) for further<br />
refi nement.<br />
Although you can drag existing<br />
WAV fi les into the Distributed Wave<br />
instrument, we’ll try recording some<br />
sounds signal into <strong>GigaStudio</strong> <strong>and</strong> using them. Note that this<br />
requires an audio interface with a GSIF 2 driver, <strong>and</strong> an audio<br />
source plugged into your audio interface’s hardware input. If<br />
both aren’t available, skip to step 6.<br />
1 In the DSP Station screen, assign a mixer channel input to<br />
your hardware input.<br />
2 Route the mixer’s output to a set of master<br />
outputs, then click on the Outputs tab.<br />
3 Record enable the master output that’s being fed<br />
from the mixer channel.<br />
4 To capture audio, start playback from your audio<br />
source <strong>and</strong> click on the Start Audio Capture<br />
button. You’ll be asked where you want to save the<br />
fi le.<br />
5 When you’re fi nished recording, click on the Stop<br />
Audio Capture button.<br />
6 Click on the MIDI Mixer icon.<br />
7 Click on the<br />
&<br />
downward-<br />
pointing arrow<br />
toward the<br />
right side of an<br />
instrument slot<br />
(we’ll choose Slot<br />
!<br />
$<br />
@<br />
#<br />
^<br />
%<br />
CREATING A DISTRIBUTED WAVE INSTRUMENT<br />
27
CREATING A DISTRIBUTED WAVE INSTRUMENT<br />
28<br />
*<br />
page 28 ÿ <strong>GigaStudio</strong> 3 Quick Start <strong>Guide</strong><br />
#1), <strong>and</strong> select Create/Edit Distributed Wave Instrument.<br />
8 The Distributed Wave Instrument window appears. Note the<br />
three panes (two if you didn’t capture any audio): The lowest<br />
one shows the most recent audio captures (you may need to<br />
“unfold” this by clicking on the triangle that points to Recent<br />
Wave Captures), the middle is for auditioning samples, <strong>and</strong><br />
the upper, for arranging them into an instrument.
Creating a Distributed Wave Instrument ÿ page 29<br />
9 Drag WAV fi les in to the Audition pane from either the<br />
Recent Wave Captures window or any other place containing<br />
WAV fi les, <strong>and</strong> drop them on the keys where you want<br />
them to play. If you don’t know where you want them to<br />
play, no worries: Drop them anywhere, audition them, <strong>and</strong><br />
once you’ve decided where they need to go, create a more<br />
permanent placement in the upper pane. If you drag them all<br />
simultaneously to a key, they’ll be arranged chromatically.<br />
(<br />
CREATING A DISTRIBUTED WAVE INSTRUMENT<br />
29
CREATING A DISTRIBUTED WAVE INSTRUMENT<br />
30<br />
BL<br />
page 30 ÿ <strong>GigaStudio</strong> 3 Quick Start <strong>Guide</strong><br />
bl Click on the keys to audition them. After deciding where the<br />
keys should be mapped, drag them to the appropriate keys on<br />
the upper pane.
Creating a Distributed Wave Instrument ÿ page 31<br />
bm You can now click on the<br />
Export button to export the<br />
Distributed Instrument as a .GIG fi le, or the Save button<br />
(four buttons to the left of Export) to save it as a Distributed<br />
Instrument.<br />
BM<br />
CREATING A DISTRIBUTED WAVE INSTRUMENT<br />
31
CREATING AND EDITING AN INSTRUMENT<br />
32<br />
!<br />
@<br />
CREATING AND EDITING AN INSTRUMENT<br />
IN THE INSTRUMENT EDITOR<br />
page 32 ÿ <strong>GigaStudio</strong> 3 Quick Start <strong>Guide</strong><br />
<strong>GigaStudio</strong> enjoys the support of a huge number of sample<br />
libraries, but there will likely be times where you’ll want to<br />
make your own instruments. Although the process can of<br />
creating an instrument can be diffi cult <strong>and</strong> time-consuming,<br />
<strong>GigaStudio</strong> offers a “wizard” function for creating certain types<br />
of instruments that can slash creation time to a fraction of what<br />
you’d experience with other samplers.<br />
For this example, we’ll create an octave of multi-sampled<br />
guitar sounds using a VG8 guitar synthesizer. This was sampled<br />
at four different notes (D2, F2, G#2, <strong>and</strong> B2) <strong>and</strong> furthermore, each<br />
note was sampled at four different velocities (soft, medium, loud,<br />
<strong>and</strong> loudest), giving a total of 16 samples. The Wizard will map<br />
these samples across the keyboard, as well as create splits for the<br />
four different velocities, then demonstrate ways to warp these<br />
basic sounds...all with a minimum of time <strong>and</strong> effort.<br />
1 Although you can access the Instrument Editor from<br />
<strong>GigaStudio</strong>, it’s also possible (<strong>and</strong> usually preferable) to run it<br />
as a st<strong>and</strong>-alone application. Double-click on the GsEdit.exe<br />
icon or its shortcut icon to open it.<br />
2 You’ll be presented with a blank screen. Before proceeding,
Creating <strong>and</strong> Editing an Instrument ÿ page 33<br />
let’s make sure everything is set up properly, so go File ><br />
System Settings.<br />
3 As with Gigastudio, verify that your audio interface <strong>and</strong> MIDI<br />
input ports are recognized, that GSIF drivers are being used,<br />
<strong>and</strong> that at least one output pair of channels is enabled.<br />
4 We also need to verify some<br />
Preferences, so go Edit ><br />
Preferences.<br />
5 <strong>GigaStudio</strong> uses a Wizard, not a Psychic, so it needs you to<br />
supply some information about the samples you want to<br />
load in order to map them properly across the keyboard. For<br />
example, if one sample is at “C2” <strong>and</strong> another is at “F#2,” then<br />
<strong>GigaStudio</strong> knows to place the fi rst sample on the C2 key <strong>and</strong><br />
the other sample on the F#2 key (screen shot on next page).<br />
That leaves a gap between them of four notes (C#2, D2, D#2,<br />
E2) so <strong>GigaStudio</strong> stretches the fi rst sample up to cover C#2<br />
<strong>and</strong> D2, <strong>and</strong> the second sample down to cover E2 <strong>and</strong> F2.<br />
<strong>GigaStudio</strong> can recognize either a MIDI Note Number or Note<br />
Name embedded in the fi lename; in this case, make sure<br />
“Guess from fi lename (e.g., C#4)” is checked because that’s<br />
#<br />
$<br />
CREATING AND EDITING AN INSTRUMENT<br />
33
CREATING AND EDITING AN INSTRUMENT<br />
34<br />
%<br />
&<br />
page 34 ÿ <strong>GigaStudio</strong> 3 Quick Start <strong>Guide</strong><br />
how the samples are named<br />
in this format. The other<br />
parameters aren’t important<br />
for now.<br />
6 Now let’s start creating<br />
our instrument by going File ><br />
New.<br />
7 An impressive-looking<br />
screen appears, which is<br />
where the samples will be mapped <strong>and</strong> edited.<br />
^
Creating <strong>and</strong> Editing an Instrument ÿ page 35<br />
8 Locate the folder “VG8_POWER_CHORDS” provided on the<br />
distribution CD-ROM (if necessary, use the Windows Search<br />
function by going Start > Search > Files <strong>and</strong> Folders), copy it to<br />
your Desktop, then open it. You should see four folders named<br />
02_SOFT, 03_MEDIUM, 04_LOUD, 05_LOUDEST.<br />
9 Draw a marquee around the four folders, then drag them into<br />
the Samples Window.<br />
*<br />
(<br />
CREATING AND EDITING AN INSTRUMENT<br />
35
CREATING AND EDITING AN INSTRUMENT<br />
36<br />
page 36 ÿ <strong>GigaStudio</strong> 3 Quick Start <strong>Guide</strong><br />
2 Although drag <strong>and</strong> drop is convenient, you can also<br />
right-click in the Samples Window to bring up a sample<br />
management menu: Import, export, copy, delete, <strong>and</strong><br />
sort samples, as well as many other functions.<br />
bl All four folders are now in the Samples Window.<br />
At this point, the Default Sample Group<br />
folder isn’t necessary, so click on it <strong>and</strong> hit the<br />
computer’s Delete key. If you’re asked whether<br />
you’re sure you want to delete it, click on “Yes.”<br />
BL
Meet The Wizard ÿ page 37<br />
MEET THE WIZARD<br />
The Wizard is the quickest way to build up many types of<br />
instruments. What you’re about to do for the next couple of<br />
minutes would take much longer if done manually, without<br />
the Wizard.<br />
1 Click on the Instrument Wizard icon.<br />
2 Using the Wizard involves following steps in order. In<br />
this fi rst one, give the<br />
Instrument a name. Then<br />
set the Dimension Key Start<br />
to C-1 (type it in, use the up<br />
<strong>and</strong> down arrows, or click<br />
<strong>and</strong> drag on the “spinner”<br />
control between the two<br />
arrows) <strong>and</strong> the Dimension<br />
Key End to G9. Actually<br />
these values aren’t critical,<br />
but we might as well cover<br />
the maximum possible<br />
range for now. Click on Next when you’re ready for the next<br />
step.<br />
3 Click on “ Make a Region<br />
per Sample.” This tells the<br />
Instrument Editor that you<br />
want to assign each sample<br />
to the keyboard <strong>and</strong> create<br />
a region for it. The other<br />
option, “Create Region Every<br />
___ Half Steps” creates<br />
regions, each of which<br />
contains a uniform number<br />
of half steps. This would be a<br />
better choice if, for example, you had an instrument that was<br />
sampled every half step, as each region could be exactly one<br />
half step. For “Start at Note” <strong>and</strong> “End at Note,” enter C-1 <strong>and</strong><br />
G9 respectively (same values as in Step 1). When you’re done,<br />
click “Next.”<br />
!<br />
@<br />
#<br />
MEET THE WIZARD<br />
37
MEET THE WIZARD<br />
38<br />
$<br />
%<br />
page 38 ÿ <strong>GigaStudio</strong> 3 Quick Start <strong>Guide</strong><br />
4 Dimensions are an element that, well, take <strong>GigaStudio</strong> to<br />
another dimension. They provide exceptional control over<br />
expressiveness; it’s worth spending some quality time with<br />
the manual, <strong>and</strong> analyzing well-programmed Instruments,<br />
to learn fully how these work. For this Quick Start we’ll set up<br />
a very simple dimension, where each note’s velocity range<br />
is split into four regions. The<br />
lowest velocity range will<br />
trigger the softest sample, the<br />
next higher velocity range will<br />
trigger the medium sample,<br />
the next higher the loud<br />
sample, <strong>and</strong> the highest range,<br />
the loudest sample.<br />
For “Controller Source,” click<br />
on the downward pointing<br />
arrow in this fi eld <strong>and</strong> select<br />
Velocity. Velocity For<br />
Splits, type in 4.<br />
For description, type in Timbre.<br />
Also, because these are stereo samples, it’s vital to click on<br />
“Reserve Space for Stereo” or the Wizard will not produce the<br />
desired results.<br />
5 Click on “ State Names” <strong>and</strong><br />
enter names for the four<br />
dimension states (in this<br />
case Soft, Medium, Loud,<br />
Loudest). This gives humanfriendly<br />
names to the Splits<br />
in the Instrument Editor,<br />
making navigation much<br />
easier. When you’re done,<br />
click on “OK.” OK.” OK The program<br />
will revert to the main Step<br />
3 screen; click on “Next” to<br />
proceed.<br />
6 Now assign each of the Sample Groups to a Dimension. To do<br />
this, click on a Sample Group in the left window, then click on<br />
the corresponding Dimension name in the right window. In<br />
this example three of the Sample Groups have been assigned,<br />
but the Loudest one has not been assigned to its Dimension
Meet The Wizard ÿ page 39<br />
yet. After assigning all<br />
four, the Instrument Editor<br />
now knows what samples<br />
you’re using, where they<br />
are to be mapped across<br />
the keyboard, <strong>and</strong> which<br />
samples to associate with<br />
which Dimension. We’re<br />
almost there, so click on<br />
“Finish.”<br />
7 The Instrument has now<br />
been populated with Samples <strong>and</strong> Splits. Note that most<br />
of the action is happening two octave below Middle C; the<br />
highest <strong>and</strong> lowest samples have been stretched to cover the<br />
entire keyboard. But note you won’t hear anything yet if you<br />
start playing, because you need to click on the Load File icon<br />
— so do it now.<br />
^<br />
&<br />
MEET THE WIZARD<br />
39
MEET THE WIZARD<br />
40<br />
*<br />
(<br />
page 40 ÿ <strong>GigaStudio</strong> 3 Quick Start <strong>Guide</strong><br />
8 A dialog box will now alert you that the fi le needs to be saved<br />
before it can be loaded. Click on “Save As.”<br />
9 Another dialog box appears. Navigate to where you want to<br />
save the Instrument, name it, <strong>and</strong> click on “Save.”<br />
bl The Instrument is now saved, loaded <strong>and</strong> ready to play. The<br />
Load light glows green to confi rm that the Instrument is<br />
loaded.<br />
bm Let’s check out this screen in more detail (screen shot at top of<br />
next page).<br />
˘ Play on your keyboard, <strong>and</strong> you should see notes on the small,<br />
virtual keyboard at the top illuminate in blue (1). If not, make<br />
sure that the MIDI Channel <strong>and</strong> Port numbers (6) to the right<br />
of the Load indicator match what your keyboard is sending.<br />
˘ Sample mappings appear in (2). As there are only four<br />
samples, the highest <strong>and</strong> lowest are stretched over a huge<br />
range. An Orange sample has the focus, a Yellow sample<br />
is selected <strong>and</strong> will be affected by editing operations, <strong>and</strong><br />
a White sample is not selected <strong>and</strong> will not be affected by<br />
editing operations. Ctrl-click on multiple samples to select<br />
them.<br />
˘ There are many resize bars (indicated by triangles) on this<br />
screen. In (3), the Samples Window has been exp<strong>and</strong>ed <strong>and</strong><br />
the Sample folders opened to show all the samples being<br />
used.<br />
BL
Meet The Wizard ÿ page 41<br />
˘ (4) shows a<br />
Velocity meter. As you play a key, the little<br />
velocity indicator moves up <strong>and</strong> down. The sample at which<br />
it is pointing indicates which sample is being triggred. In this<br />
case, the lowest velocity sample is being triggered.<br />
˘ The listing of editable parameters in (5) hints at just how easy<br />
it is to modify the sound, which we’ll do in a bit. Also note the<br />
waveform display above this list, which shows the sample<br />
that has the focus.<br />
bn Let’s add a mod wheel-controlled wah effect (scrren shot at<br />
top of next page). To do this, fi rst select all sample ranges by<br />
Ctrl-clicking on any sample range that’s white. All samples<br />
should be either yellow or orange. Then move the scroll<br />
bar to the right of the parameter list until you see the Filter<br />
parameters.<br />
BM<br />
MEET THE WIZARD<br />
41
MEET THE WIZARD<br />
42<br />
BO<br />
BN<br />
page 42 ÿ <strong>GigaStudio</strong> 3 Quick Start <strong>Guide</strong><br />
bo Click on “<br />
Filter Type,” <strong>and</strong> a triangle for a drop-down<br />
menu appears at the right of the fi eld. Select Lowpass<br />
fi lter. Similarly, click on Cutoff Controller <strong>and</strong> choose<br />
Mod Wheel. Move the mod wheel as you play the keys,<br />
<strong>and</strong> you should hear a fi lter/wa effect.<br />
bp We’ll now go for a sharper sound (screen shot at top of<br />
next page. Click in the resonance fi eld; there are three<br />
ways to edit this value.<br />
˘ Click in the resonance fi eld then drag up to increase the<br />
value, down to decrease.<br />
˘ Enter a number directly in the fi eld.<br />
˘ Click on one of the “edit knobs” in the line that traverses<br />
the samples, <strong>and</strong> drag up or down to change the value. This<br />
affects all selected samples only. You can use this knob to<br />
change parameters of individual samples as well.<br />
bq Set a high value, like 110, then move the mod wheel as you<br />
play. The sound will be much sharper <strong>and</strong> more resonant.<br />
br Now let’s have the sound fade in. Scroll to the top of the<br />
Parameter List until you see<br />
Amplitude 1 (envelope). Click on
Meet The Wizard ÿ page 43<br />
“Attack “ (sec)<br />
” <strong>and</strong><br />
adjust the value<br />
using one of the<br />
three methods<br />
described above<br />
to around 5.00.<br />
As you play notes,<br />
they’ll fade in.<br />
Note the graphic<br />
feedback: Not<br />
only can you see<br />
the value in the<br />
Parameter List, but<br />
the waveform now<br />
shows an envelope<br />
(you may need to<br />
zoom out to see it;<br />
use the + <strong>and</strong> –<br />
buttons just above<br />
the upper right<br />
of the Parameter<br />
List). Furthermore,<br />
the Dimensions<br />
display in the<br />
lower left also<br />
shows an envelope.<br />
The last 43 pages just gives you the merest hint of what’s<br />
possible with <strong>GigaStudio</strong>, but that’s enough for a Quick Start.<br />
Enjoy your new musical instrument, <strong>and</strong> go through the Big<br />
Manual when you get a chance — we’ve only scratched the<br />
surface.<br />
Also, please visit www.tascamgiga.com for news about<br />
updates, recent sample libraries <strong>and</strong> other information. ó<br />
BP - BR<br />
MEET THE WIZARD<br />
43
INDEX<br />
44<br />
Index<br />
Symbols<br />
(M)ute 14<br />
(Q)uickEdit 14<br />
(S)olo 14<br />
A<br />
Adjusting EQ <strong>and</strong><br />
Dynamics 21<br />
Advanced Settings 9<br />
Articulation 16<br />
ATT 22<br />
Attack (sec) 43<br />
Auto 22<br />
Aux Buses <strong>and</strong><br />
Aux Effects 24<br />
Aux Returns 24<br />
Aux Sends 26<br />
C<br />
Chorus 21<br />
Chorusing 19<br />
Confi guration Manager 2<br />
Contour 23<br />
Controller Source 38<br />
Create/Edit Distributed<br />
Wave 28<br />
Create Region Every ___<br />
Half Steps 37<br />
Cut(off) Freq(uency) 17<br />
Cutoff Controller 42<br />
D<br />
Damping 23<br />
Default Patch 23<br />
Description 38<br />
Detach Instrument 18<br />
Dimensions 16, 38<br />
Dimension Key End 37<br />
Dimension Key Start 37<br />
Distributed Wave<br />
instrument 27<br />
DSP Station 20<br />
DYN 22<br />
Dynamics 21<br />
Dynamics module 22<br />
E<br />
Editing an Instrument 32<br />
Editing Instruments 14<br />
Edit knobs 42<br />
Effect 23<br />
End at Note 37<br />
Envelope 17<br />
EQ 21<br />
Adjusting 21<br />
Freq 22<br />
High pass 21<br />
High shelf 21<br />
Lowpass 17, 42<br />
Low shelf 21<br />
Master EQ 22<br />
Parametric 21<br />
“Q” 21<br />
Stages of EQ 21<br />
Export 31<br />
page 44 ÿ <strong>GigaStudio</strong> 3 Quick Start <strong>Guide</strong><br />
F<br />
Feedback 23<br />
File Types 9<br />
Filter Type 17, 42<br />
Folder Tree 8, 10<br />
Freq 22<br />
G<br />
Gain 22<br />
GigaPulse 24<br />
GSIF 3<br />
H<br />
Hardware Adapter 2<br />
Hardware Confi guration 2<br />
High pass 21<br />
High shelf 21<br />
I<br />
Inputs 25<br />
Inserting Effects 23<br />
Instrument Editor 27, 32<br />
Instrument List 8, 10, 11<br />
Instrument List View 12<br />
Instrument Wizard 37<br />
K<br />
Keyboard 16<br />
L<br />
Loaded Instrumen 8<br />
Loaded Instrument View 18<br />
Loading Instruments 12<br />
Local 9<br />
Low pass 17, , 21, 42<br />
Low shelf 21
M<br />
Index ÿ page 45<br />
Make a Region<br />
per Sample 37<br />
Master EQ 22<br />
MIDI In Ports 4<br />
MIDI Mixer 6, 20, 27<br />
MIDI Note Name 33<br />
MIDI Note Number 33<br />
MIDI port 5<br />
MIDI volume 14<br />
Mod Wheel 42<br />
(M)ute 14<br />
N<br />
Notch 21<br />
O<br />
On 26<br />
Output 4<br />
Outputs 27<br />
Output Channels 4<br />
P<br />
Pan 14<br />
Parameter List 42<br />
Parametric 21<br />
Pitch Int Depth 17<br />
Play Audition Sample 12<br />
Preferences 33<br />
Q<br />
“Q” 21<br />
(Q)uickEdit 14<br />
QuickEdit 16<br />
QuickSound database 10<br />
QuickSound Loader 6<br />
QuickSound Toolbar 9<br />
R<br />
Ratio 22<br />
Recent Wave Captures 28<br />
Recursive 9<br />
REL 22<br />
Res(onance) 17<br />
Reserve Space for Stereo 38<br />
Resize Bar 6<br />
Resonance fi eld 42<br />
Results Properties 9<br />
S<br />
Samples Window 36, 40<br />
Sample Groups 38<br />
Sample mappings 40<br />
Save 31<br />
Save Settings 10<br />
Search 9, 10<br />
Searching <strong>and</strong> Loading 9<br />
Send 26<br />
(S)olo 14<br />
Splits 38<br />
Stacked Instrument 19<br />
Stacking Instruments 18<br />
Stack Instruments onActive<br />
MIDI Channel 19<br />
Stack Mode 18<br />
Stages of EQ 21<br />
Start at Note 37<br />
Start Audio Capture 27<br />
State Names 38<br />
Stop Audio Capture 27<br />
T<br />
Tap Delay 21, 23<br />
Timbre 17<br />
Tonal changes 21<br />
Toolbar 6<br />
Tune 14<br />
Tuning 14<br />
U<br />
Unload All 18<br />
V<br />
Velocity 38, 41<br />
Vibrato 17<br />
Virtual Keyboard 6<br />
Volume 15<br />
Volume parameter 19<br />
W<br />
Wave 16<br />
WAV fi les 27<br />
Wet/Dry 25<br />
Wizard 32<br />
INDEX<br />
45
46<br />
NOTES
NOTES<br />
<br />
<br />
<br />
<br />
<br />
<br />
<br />
<br />
<br />
<br />
<br />
<br />
<br />
<br />
<br />
<br />
<br />
<br />
<br />
<br />
<br />
47
48<br />
TEAC CORPORATION<br />
3-7-3 Nakacho • Musashino-shi • Tokyo<br />
180-8550 JAPAN • +81-422-52-5082<br />
www.tascam.com<br />
TEAC AMERICA, INC.<br />
7733 Telegraph Road• Montebello CA<br />
90640 USA • +1-323-726-0303<br />
www.tascam.com<br />
TEAC CANADA LTD.<br />
5939 Wallace Street • Mississauga<br />
Ontario L4Z 1Z8 • CANADA<br />
+1-905-890-8008 • www.tascam.com<br />
TEAC MEXICO, S.A de C.V<br />
Campesinos Nº184 • Colonia Granjas<br />
Esmeralda Delegacion Iztapalapa<br />
CP 09810 Mexico DF MEXICO<br />
+52-5-581-5500 • www.tascam.com<br />
TEAC UK LIMITED<br />
5 Marlin House, Croxley Business Park<br />
Watford Hertfordshire • WD1 8YA<br />
UNITED KINGDOM • +52-5-5815500<br />
www.tascam.co.uk<br />
TEAC EUROPE<br />
Bahnstrasse 12 • 65205 Wiesbaden-<br />
Erbenheim GERMANY • +49-611-71580<br />
www.tascam.de<br />
TEAC FRANCE SA<br />
17 Rue Alexis-de-Tocqueville • CE 005<br />
92182 • Antony Cedex FRANCE<br />
+33-1-42-37-01-02<br />
www.tascam-europe.com<br />
TEAC ITALIANA S.p.A.<br />
Via C Cantu 11 • 20092 Cinisello<br />
Balsamo [ Milano ] ITALY<br />
+39-02-66010500 • www.teac.it