
Create successful ePaper yourself
Turn your PDF publications into a flip-book with our unique Google optimized e-Paper software.
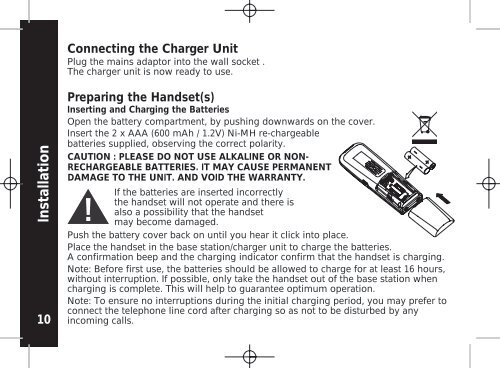
Connecting the Charger Unit<br />
Plug the mains adaptor into the wall socket .<br />
The charger unit is now ready to use.<br />
Installation<br />
10<br />
Preparing the Handset(s)<br />
Inserting and Charging the Batteries<br />
Open the battery compartment, by pushing downwards on the cover.<br />
Insert the 2 x AAA (600 mAh / 1.2V) Ni-MH re-chargeable<br />
batteries supplied, observing the correct polarity.<br />
CAUTION : PLEASE DO NOT USE ALKALINE OR NON-<br />
RECHARGEABLE BATTERIES. IT MAY CAUSE PERMANENT<br />
DAMAGE TO THE UNIT. AND VOID THE WARRANTY.<br />
If the batteries are inserted incorrectly<br />
the handset will not operate and there is<br />
also a possibility that the handset<br />
may become damaged.<br />
Push the battery cover back on until you hear it click into place.<br />
Place the handset in the base station/charger unit to charge the batteries.<br />
A confirmation beep and the charging indicator confirm that the handset is charging.<br />
Note: Before first use, the batteries should be allowed to charge for at least 16 hours,<br />
without interruption. If possible, only take the handset out of the base station when<br />
charging is complete. This will help to guarantee optimum operation.<br />
Note: To ensure no interruptions during the initial charging period, you may prefer to<br />
connect the telephone line cord after charging so as not to be disturbed by any<br />
incoming calls.