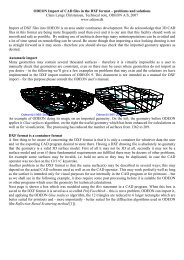
Download - Odeon
Download - Odeon
Download - Odeon

Create successful ePaper yourself
Turn your PDF publications into a flip-book with our unique Google optimized e-Paper software.
Define a receiver grid and calculate grid response<br />
Enter the Define Grid menu and select the two floor surfaces (surface 1001 and surface 1002).<br />
Specify the Distance between receivers to 2 (metres) then click the Show grid button. Close the Define Grid<br />
dialog to save the grid definition. The auto grid detection will automatically find the surfaced<br />
from which a elevated grid can be reached with direct sound from the defined source.<br />
Note! If the Define Grid button is disabled this is because some process is open, which<br />
requires data to be saved. In this case, it is probably the Estimate Reverberation display that<br />
needs to be closed. To find this open window, use the Windows menu item on the menu bar.<br />
Other displays containing calculation processes may cause the same kind of disabling of<br />
miscellaneous options.<br />
Hint! The grid may also be used for easy positioning the point sources and discrete<br />
receivers, which are usually defined in the Source-receiver list. To learn how to operate the<br />
3DGrid display, select the display (and the 3DGrid tab in that window) - then select the 3DGrid|<br />
Parameters dropdown menu.<br />
Calculate grids<br />
Click the Job list button again. Activate the Grid option from the Joblist, by checking the Grid option<br />
for job 1; then click the Run all or Run Selected Job button. ODEON will now start calculating the Grid<br />
response for this job; this may take a while. When the calculations is finished, select job number<br />
1 in the Job list and click the View grid button to view the grid results. To learn more about the<br />
results and options available from this display; press F1.<br />
Calculate Reflector Coverage<br />
Enter the Define reflector surfaces menu and select the podium-ceiling surface (surface 3001). Then<br />
click the Calculate reflector coverage button on the main toolbar to calculate the reflector coverage for<br />
the selected surface(s).<br />
Reflector coverage calculates the coverage provided by chosen reflecting surfaces, at the first order<br />
reflections (or up to fifth order if so desired – using the dropdown menu or shortcut-keys 1<br />
through 5). This is an efficient tool for investigating whether the receiver area is covered by<br />
the reflectors or not and if the reflectors are positioned correctly. The 3DBilliard display may also<br />
be useful for this purpose.<br />
3D Investigate Rays<br />
The 3D Investigate Rays display visualises the ray tracing as it is carried out during any point<br />
response calculation. By default its calculation parameters are also set up as the parameters<br />
used for the point response calculations (Single Point, Multi and Grid). This display is a very valuable<br />
tool for testing new room models, e.g. to detect missing or misplaced surfaces. It may also<br />
give an impression of what is happening in the calculations, e.g. the effect of the scattering<br />
assigned to the surfaces. Click the Ok button, then click the Single forward button a few times and<br />
note the behaviour of the ray tracing.<br />
3D Billard<br />
The 3Dbillard display is a tool that can be used for investigating or demonstrating effects such as<br />
scattering flutter echoes or coupling effects. A number of billard balls are emitted from the<br />
source and reflected by the surfaces in the room. To speed up the process, set the Dist. per update<br />
to a higher value. To visualize a flutter echo, a large Number of billard balls should be used, e.g. 10000<br />
balls. It’s easier to visualize a flutter echo if rays are only emitted in the relevant plane (XZ, YZ<br />
or XY). If the geometry is complicated it may be hard to see the billard balls. In that case<br />
toggle parts of the geometry off using the T shortcut.<br />
Auralisation - Listening to the rooms!<br />
At this point you have tried calculation of room acoustical parameters, operating visual display<br />
like decay curves, 3D reflection paths, reflectograms etc. It is time to move on, trying the<br />
auralisation options in ODEON. Two ways of auralisation are available in ODEON, a real-time<br />
2-20