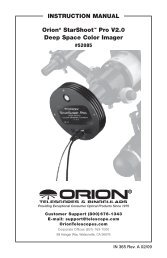
INSTRUCTION MANUAL
INSTRUCTION MANUAL
INSTRUCTION MANUAL

You also want an ePaper? Increase the reach of your titles
YUMPU automatically turns print PDFs into web optimized ePapers that Google loves.
the drive control keys can be changed. To reverse the button logic of the hand control, press the MENU button<br />
and select Direction Buttons from the Utilities menu. Use the Up/Down arrow keys (10) to select either the<br />
azimuth (left and right) or altitude (up and down) button direction and press ENTER. Pressing ENTER again will<br />
reverse the direction of the hand control buttons from their current state. Direction Buttons will only change the<br />
eyepiece rates (rate 1-6) and will not affect the slew rates (rate 7-9).<br />
Goto Approach - Lets the user define the direction that the telescope will approach when slewing to an<br />
object. This allows the user the ability to minimize the effects of backlash For example, if your telescope is<br />
back heavy from using heavy optical or photographic accessories attached to the back, you would want to set<br />
your altitude approach to the negative direction. This would ensure that the telescope always approaches an<br />
object from the opposite direction as the load pulling on the scope. Similarly, if using the NexStar polar aligned<br />
on a wedge, you would want to set the azimuth approach to the direction that allows the scope to compensate for<br />
different load level on the motors and gears when pointing in different parts of the sky.<br />
To change the goto approach direction, simply choose Goto Approach from the Scope Setup menu, select either<br />
Altitude or Azimuth approach, choose positive or negative and press Enter.<br />
Autoguide Rate – Allows the user to set an autoguide rate as a percentage of sidereal rate. This is helpful<br />
when calibrating your telescope to a CCD autoguider for long exposure photography.<br />
Cordwrap - Cord wrap safeguards against the telescope slewing more than 360º in azimuth and wrapping<br />
the power cord or accessory cables around the base of the telescope. This is useful when powering the<br />
telescope with an optional AC adapter or any time that cables are plugged into the base of the telescope. When<br />
you select “Cordwrap On” from the Scope Setup menu, you will be asked to move your telescope opposite to<br />
the no-cross line. The no-cross line is a user definable line that the NexStar will not pass in order to slew to an<br />
object; rather it will slew the long way around in order to get to the object. For example, if you want the no-cross<br />
line to be towards due north, then you would need to slew the telescope in azimuth until the front of the tube is<br />
pointing towards due south. Once in position, press Enter to set the no-cross line. By default, the cord wrap<br />
feature is turned on once the telescope is aligned.<br />
Utility Features<br />
Scrolling through the MENU (9) options will also provide access to several advanced utility functions within the<br />
NexStar such as; Wedge Align, Hibernate and all the optional GPS accessory functions as well.<br />
GPS On/Off (with optional CN16 GPS Accessory)- Allows you to turn off the optional CN16 GPS<br />
module. When aligning the telescope using AutoAlign, the NexStar still receives information, such as current<br />
time, from the GPS. If you want to use the NexStar database to find the coordinates of a celestial object for a<br />
future date you would need to turn the GPS module off in order to manually enter a date and time other than the<br />
present.<br />
Compass (with optional CN16 GPS Accessory)- – These compass features that allows you to<br />
automatically move your telescope to the north position and calibrate north for increased accuracy of future<br />
alignments.<br />
• Find Celestial North – Automatically finds and moves the telescope to its true north position.<br />
• Calibrate Compass - After completing a successful GPS Alignment, use the Calibrate Compass<br />
feature to compensate for magnetic declination errors and local anomalies. This will greatly improve the<br />
accuracy of your initial star alignments the next time you align your telescope.<br />
Alt Sensor (with optional CN16 GPS Accessory)- Here you have leveling features that allows you to<br />
automatically move your telescope to its level position and calibrate level for increased accuracy.<br />
• Find Alt Sensor - Automatically finds and moves the telescope to its level position.<br />
• Calibrate Sensor– After completing a successful Altazimuth alignment this utility function calibrates the<br />
level inside the GPS accessory with the actual position of the optical tube. This level position is then<br />
stored and used to improve the accuracy of future Altazimuth alignments.<br />
28