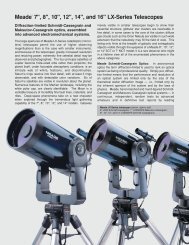
INSTRUCTION MANUAL
INSTRUCTION MANUAL
INSTRUCTION MANUAL

Create successful ePaper yourself
Turn your PDF publications into a flip-book with our unique Google optimized e-Paper software.
1 2<br />
APPENDIX C LONGITUDE LATITUDE<br />
degrees min degrees min<br />
Torrance 118 19.8 33 48<br />
Travis AFB 121 55.8 38 16.2<br />
Tahoe 120 7.8 39 19.2<br />
Direction<br />
Buttons<br />
Up and Down<br />
Scroll Buttons<br />
a) Use the Up and Down scroll buttons to get to the<br />
AutoAlign menu and press ENTER. b) Input the<br />
necessary date and time information as instructed by the<br />
hand control. (See Hand Control section for complete<br />
instruction on entering data). c) The first time the NexStar<br />
is used from a new location, the longitude and latitude<br />
must be entered into the hand control. When asked for<br />
your coordinates , use Appendix C to look up the<br />
longitude and latitude of your nearest city and enter it<br />
into the hand control.<br />
With the computerized hand control installed,<br />
power on the NexStar. Press ENTER to begin<br />
an alignment.<br />
4<br />
3<br />
Altitude index for<br />
NexStar 5i<br />
Altitude index for NexStar 8i<br />
Once all the necessary information has been entered,<br />
use the direction arrow keys to align the altitude index<br />
marks (see above) and rotate the telescope tube<br />
towards North. (See Astronomy Basics for help on<br />
finding North).<br />
Based on the inputted information, the NexStar will<br />
automatically pick an alignment star and slew the<br />
telescope close to that star. Once there, the display<br />
will ask you to use the arrow buttons to aim the Star<br />
Pointer at the star. If the star is not visible (perhaps<br />
behind a tree), press UNDO to select a new star.<br />
Next, center the star in the eyepiece and press<br />
ALIGN. Repeat these steps for the second alignment<br />
star. When complete, display will read "Alignment<br />
Successful".<br />
31