Non Invasive Blood Pressure - Living on the EDge
Non Invasive Blood Pressure - Living on the EDge
Non Invasive Blood Pressure - Living on the EDge

Create successful ePaper yourself
Turn your PDF publications into a flip-book with our unique Google optimized e-Paper software.
4. Taking an Axillary Temperature:<br />
a. Ensure that <strong>the</strong> probe with <strong>the</strong> BLUE ejecti<strong>on</strong> butt<strong>on</strong> and <strong>the</strong> BLUE probe well are c<strong>on</strong>nected to <strong>the</strong><br />
Spot LXi.<br />
b. Hold <strong>the</strong> probe handle with your thumb and two fingers <strong>on</strong> <strong>the</strong> indentati<strong>on</strong>s of <strong>the</strong> probe handle,<br />
<strong>the</strong>n withdraw <strong>the</strong> probe from <strong>the</strong> probe well.<br />
c. Ensure <strong>the</strong> appropriate mode, Adult Axillary (A.AXI) or Pediatric Axillary (P.AXI), appears in <strong>the</strong><br />
display window and <strong>the</strong> associated ic<strong>on</strong> is flashing. Adult Axillary will display a flashing shirt;<br />
Pediatric Axillary will display a small child crawling. To change <strong>the</strong> mode, press <strong>the</strong> Navigati<strong>on</strong><br />
butt<strong>on</strong>s until desired setting is displayed; <strong>the</strong>n press <strong>the</strong> Select butt<strong>on</strong> .<br />
d. Insert <strong>the</strong> probe into a new probe cover and press down firmly until a new probe cover engages<br />
<strong>on</strong>to <strong>the</strong> probe.<br />
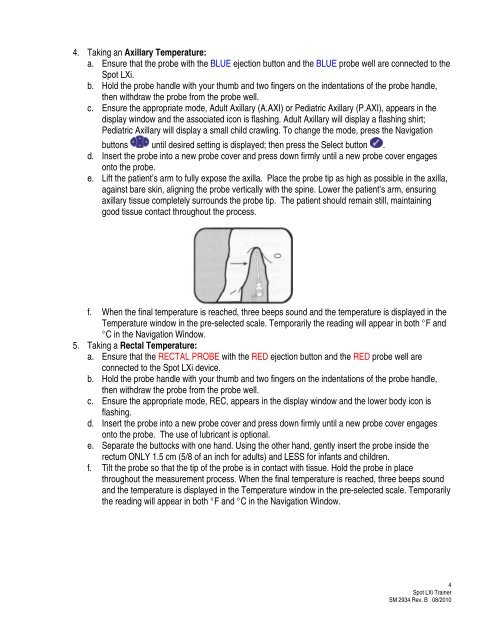
e. Lift <strong>the</strong> patient’s arm to fully expose <strong>the</strong> axilla. Place <strong>the</strong> probe tip as high as possible in <strong>the</strong> axilla,<br />
against bare skin, aligning <strong>the</strong> probe vertically with <strong>the</strong> spine. Lower <strong>the</strong> patient’s arm, ensuring<br />
axillary tissue completely surrounds <strong>the</strong> probe tip. The patient should remain still, maintaining<br />
good tissue c<strong>on</strong>tact throughout <strong>the</strong> process.<br />
f. When <strong>the</strong> final temperature is reached, three beeps sound and <strong>the</strong> temperature is displayed in <strong>the</strong><br />
Temperature window in <strong>the</strong> pre-selected scale. Temporarily <strong>the</strong> reading will appear in both °F and<br />
°C in <strong>the</strong> Navigati<strong>on</strong> Window.<br />
5. Taking a Rectal Temperature:<br />
a. Ensure that <strong>the</strong> RECTAL PROBE with <strong>the</strong> RED ejecti<strong>on</strong> butt<strong>on</strong> and <strong>the</strong> RED probe well are<br />
c<strong>on</strong>nected to <strong>the</strong> Spot LXi device.<br />
b. Hold <strong>the</strong> probe handle with your thumb and two fingers <strong>on</strong> <strong>the</strong> indentati<strong>on</strong>s of <strong>the</strong> probe handle,<br />
<strong>the</strong>n withdraw <strong>the</strong> probe from <strong>the</strong> probe well.<br />
c. Ensure <strong>the</strong> appropriate mode, REC, appears in <strong>the</strong> display window and <strong>the</strong> lower body ic<strong>on</strong> is<br />
flashing.<br />
d. Insert <strong>the</strong> probe into a new probe cover and press down firmly until a new probe cover engages<br />
<strong>on</strong>to <strong>the</strong> probe. The use of lubricant is opti<strong>on</strong>al.<br />
e. Separate <strong>the</strong> buttocks with <strong>on</strong>e hand. Using <strong>the</strong> o<strong>the</strong>r hand, gently insert <strong>the</strong> probe inside <strong>the</strong><br />
rectum ONLY 1.5 cm (5/8 of an inch for adults) and LESS for infants and children.<br />
f. Tilt <strong>the</strong> probe so that <strong>the</strong> tip of <strong>the</strong> probe is in c<strong>on</strong>tact with tissue. Hold <strong>the</strong> probe in place<br />
throughout <strong>the</strong> measurement process. When <strong>the</strong> final temperature is reached, three beeps sound<br />
and <strong>the</strong> temperature is displayed in <strong>the</strong> Temperature window in <strong>the</strong> pre-selected scale. Temporarily<br />
<strong>the</strong> reading will appear in both °F and °C in <strong>the</strong> Navigati<strong>on</strong> Window.<br />
4<br />
Spot LXi Trainer<br />
SM 2934 Rev. B 08/2010