CEREC MC XL - MEDIPRO
CEREC MC XL - MEDIPRO
CEREC MC XL - MEDIPRO

Create successful ePaper yourself
Turn your PDF publications into a flip-book with our unique Google optimized e-Paper software.
Sirona Dental Systems GmbH<br />
Operating Instructions <strong>CEREC</strong> <strong>MC</strong> <strong>XL</strong><br />
7 Maintenance<br />
Milling instruments<br />
If you frequently process materials from both groups, equip the bur sets as<br />
follows:<br />
Milling instrument<br />
"Left"<br />
Milling instrument<br />
"Right"<br />
Bur set<br />
"Step Bur 20" "Cyl. Pointed Bur 20" Bur set 1<br />
"Step Bur 12 S" "Cyl. Pointed Bur 12 S" Bur set 2<br />
7.2.2 Changing milling instruments (burs)<br />
NOTICE<br />
Regular replacement of milling instruments<br />
Change the milling instruments as soon as the system prompts you to do<br />
this.<br />
Change the milling instruments after using them to mill 25 restorations at<br />
the latest.<br />
✔<br />
The torque wrench from the draw of the milling unit is ready-to-hand.<br />
1. In the menu line, select the command "Settings" / "Instruments".<br />
2. If several milling units are connected, a dialog box will appear. Select the<br />
milling unit you prefer and confirm your choice with "OK".<br />
A dialog box then opens where you can select the burr set.<br />
3. Select the desired bur set and confirm with "Start".<br />
You can also select the desired bur set on the milling unit (up/down<br />
arrow) and then confirm your selection with "Start".<br />
The motors travel to the change position for the milling instruments.<br />
The "Change instruments" dialog box opens.<br />
4. Press the catch of the milling chamber door and open the door.<br />
båÖäáëÜ<br />
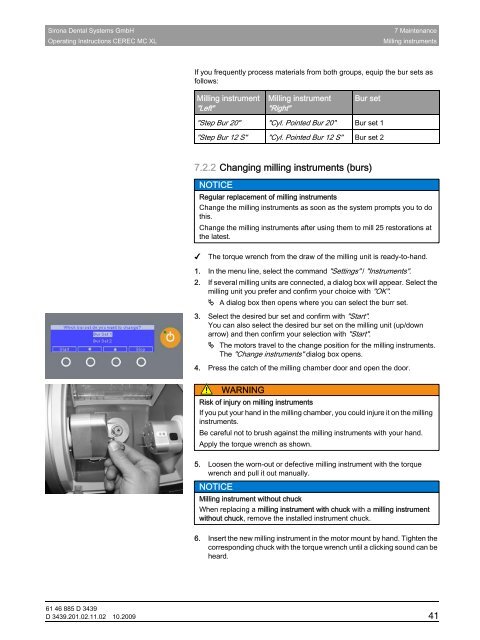
WARNING<br />
Risk of injury on milling instruments<br />
If you put your hand in the milling chamber, you could injure it on the milling<br />
instruments.<br />
Be careful not to brush against the milling instruments with your hand.<br />
Apply the torque wrench as shown.<br />
5. Loosen the worn-out or defective milling instrument with the torque<br />
wrench and pull it out manually.<br />
NOTICE<br />
Milling instrument without chuck<br />
When replacing a milling instrument with chuck with a milling instrument<br />
without chuck, remove the installed instrument chuck.<br />
6. Insert the new milling instrument in the motor mount by hand. Tighten the<br />
corresponding chuck with the torque wrench until a clicking sound can be<br />
heard.<br />
61 46 885 D 3439<br />
D 3439.201.02.11.02 10.2009 41