

Chapter 1. Getting Started - Kodak
Chapter 1. Getting Started - Kodak
Chapter 1. Getting Started - Kodak

You also want an ePaper? Increase the reach of your titles
YUMPU automatically turns print PDFs into web optimized ePapers that Google loves.
<strong>Chapter</strong> 2. Proofing Job Files<br />
Defining the RIP Setup<br />
Defining the RIP<br />
Setup<br />
You can manually define the RIP setup, you can use the default RIP setup<br />
(see “Defining Default Settings” in <strong>Chapter</strong> 1), or you can use the RIP<br />
setup from an existing IJQ file.<br />
Defining Your Own RIP Setup<br />
If you do not have the IJQ file for the job, you must manually define the<br />
RIP setup using information provided by the job creator. Use the following<br />
steps to manually define the RIPs for the job you are proofing:<br />
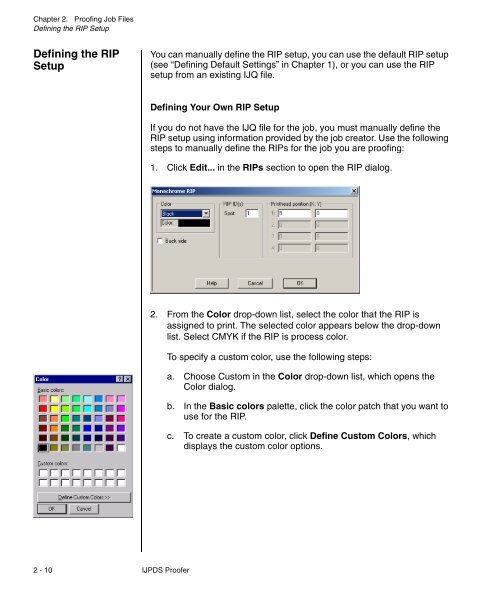
<strong>1.</strong> Click Edit... in the RIPs section to open the RIP dialog.<br />
2. From the Color drop-down list, select the color that the RIP is<br />
assigned to print. The selected color appears below the drop-down<br />
list. Select CMYK if the RIP is process color.<br />
To specify a custom color, use the following steps:<br />
a. Choose Custom in the Color drop-down list, which opens the<br />
Color dialog.<br />
b. In the Basic colors palette, click the color patch that you want to<br />
use for the RIP.<br />
c. To create a custom color, click Define Custom Colors, which<br />
displays the custom color options.<br />
2 - 10 IJPDS Proofer


