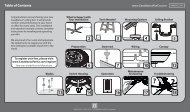
Installation and Operation Manual For Hunter Ceiling ... - Hunter Fan
Installation and Operation Manual For Hunter Ceiling ... - Hunter Fan
Installation and Operation Manual For Hunter Ceiling ... - Hunter Fan

You also want an ePaper? Increase the reach of your titles
YUMPU automatically turns print PDFs into web optimized ePapers that Google loves.
®<br />
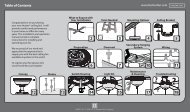
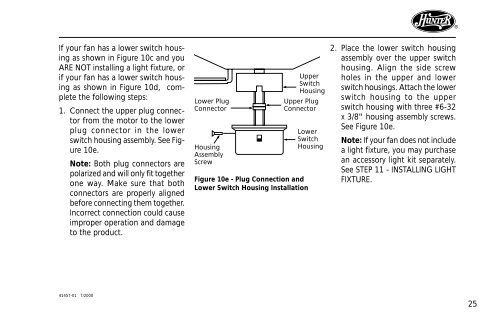
If your fan has a lower switch housing<br />
as shown in Figure 10c <strong>and</strong> you<br />
ARE NOT installing a light fixture, or<br />
if your fan has a lower switch housing<br />
as shown in Figure 10d, complete<br />
the following steps:<br />
1. Connect the upper plug connector<br />
from the motor to the lower<br />
plug connector in the lower<br />
switch housing assembly. See Figure<br />
10e.<br />
Note: Both plug connectors are<br />
polarized <strong>and</strong> will only fit together<br />
one way. Make sure that both<br />
connectors are properly aligned<br />
before connecting them together.<br />
Incorrect connection could cause<br />
improper operation <strong>and</strong> damage<br />
to the product.<br />
Lower Plug<br />
Connector<br />
Housing<br />
Assembly<br />
Screw<br />
Upper<br />
Switch<br />
Housing<br />
Upper Plug<br />
Connector<br />
Figure 10e - Plug Connection <strong>and</strong><br />
Lower Switch Housing <strong>Installation</strong><br />
Lower<br />
Switch<br />
Housing<br />
2. Place the lower switch housing<br />
assembly over the upper switch<br />
housing. Align the side screw<br />
holes in the upper <strong>and</strong> lower<br />
switch housings. Attach the lower<br />
switch housing to the upper<br />
switch housing with three #6-32<br />
x 3/8" housing assembly screws.<br />
See Figure 10e.<br />
Note: If your fan does not include<br />
a light fixture, you may purchase<br />
an accessory light kit separately.<br />
See STEP 11 - INSTALLING LIGHT<br />
FIXTURE.<br />
41457-01 7/2000<br />
25