


You also want an ePaper? Increase the reach of your titles
YUMPU automatically turns print PDFs into web optimized ePapers that Google loves.
MUSIC JUKEBOX - Continued<br />
Saved Playlists<br />
'Saved Play List' is a easy way to make a Playlist via the GUI and save it<br />
so that it can be played at any time.<br />
Focus on a Album or Track in the order you want them saved and press<br />
the 'Green' button on the Remote Control and the QPL icon will be added<br />
to the Album or Track. To remove a QPL just focus on the Album or Track<br />
and press the 'Green' button and the QPL icon will be removed.<br />
Once you are happy with your Playlist selection press the 'Menu' button<br />
and the screen will open and you will see a option 'Save Playlist'. Select<br />
this option and a text dialogue screen will open allowing you to rename the<br />
Playlist. The Playlist will be saved to the 'Root' folder of your collection.<br />
To play a saved playlist press the 'Menu' button and select the Playlist<br />
option and all available Playlists will be listed.<br />
Making X3 compatible m3u Playlist with Playlist Creator 3<br />
Download and install Playlist Creator 3 -- Correct Playlist Creator 3 Setup Options<br />
1) Extended Information -- Uncheck the option ' Write extended information’<br />
2) Playlist Details -- Select 'Relative and 'Use Forward Slash instead of back slashes’<br />
3) Make your Playlist and save it to the 'Root' folder of your Music Collection in m3u format.<br />
Album Art on Music Jukebox Screensaver<br />
If you use a folder.jpg image in each folder with max size of 250 x 250 pixel (recommended size is 230 x 230<br />
pixel) it will be used in the Screensaver together with Album Tag information. For normal image manipulation,<br />
correct aspect ratio cropping and resizing of the folder.jpg we suggest a free program called Photoscape.<br />
Add to Jukebox<br />
Mp3 scan only - The Jukebox has a facility that enables you to add Albums to a pre scanned collection. If<br />
you are adding multiple Albums the easiest way would be to make a new folder with a date eg 'new_4July2012'<br />
and copy your new Albums into this folder. Now focus on the new folder 'new_4July2012' and press the 'Menu'<br />
button and select the option 'Add to Jukebox' . The new Albums will be added to the data base.<br />
Tracklist.xml- For Tracklist.xml it is probably a lot easier to just do a re-scan. For those who want the facility<br />
you can follow these instructions. Make a new folder eg 'new' and copy your new Albums into this folder. Open<br />
Tagscanner and browse to this folder 'new' and scan it and then export a Tracklist.xml. Now in the X3 Media<br />
Library navigate to the 'new' folder and focus on it then press the 'Menu' button and select the option 'Add to<br />
Jukebox' . The new Albums will be added to the data base. Now copy the contents of the folder 'new' to the root<br />
folder.<br />
Music Fan Art<br />
Make a Fan Art image 1280 x 720 pixels in jpg format called 'fanart.jpg' and copy it to a Album folder. The image<br />
will then be automatically used as the backdrop when playing the Album.<br />
Shuffle / Random Play<br />
Next/Previous Track function is supported in Shuffle/Random Play mode in the Music Jukebox but you cannot<br />
use Shuffle/Random Play and then try to select some other track to play as it is Data Base driven and the Tag<br />
Info will go out of sequence. If you want to play some other track when in Shuffle/Random Play mode then you<br />
must firstly select the 'All' mode on the Repeat button and then select the Track. Also if you want to change<br />
back to Shuffle/Random Play mode you need to start at Track1 and then select it.<br />
We suggest you visit the <strong>Mede8er</strong> Website for a more detailed <strong>User</strong> Guide<br />
Online Version - http://www.mede8er.com/mede8er_music_jukebox_user_guide.html<br />
Page30
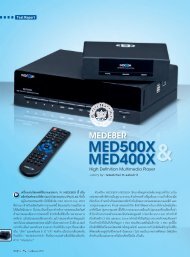


![Review [Media Center]: Mede8er MED500X (+ video)](https://img.yumpu.com/3934389/1/184x260/review-media-center-mede8er-med500x-video.jpg?quality=85)