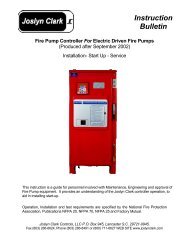
manual for model fd4 fire pump controllers - Steven Brown ...
manual for model fd4 fire pump controllers - Steven Brown ...
manual for model fd4 fire pump controllers - Steven Brown ...

You also want an ePaper? Increase the reach of your titles
YUMPU automatically turns print PDFs into web optimized ePapers that Google loves.
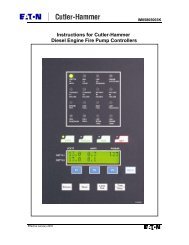
PART III: OPERATION OF THE CONTROLLER<br />
A. When the controller is the "Auto" mode and both circuit breakers are in the "On" position, the controller is in standby<br />
condition ready to start the engine automatically. A green pilot light above the "Auto" button will illuminate in this mode.<br />
Also, Battery #1 Fault and Battery #2 Fault lights should be off indicating that battery power is available.<br />
When the water pressure drops below a level which is set in System Config Screen 101, the Controller will actuate the starter<br />
motor and the cranking cycle will commence. If the engine starts and runs, cranking will cease and the protective circuits will be<br />
operative. If the engine fails to start after six (6) crank periods, cranking will cease, the "Engine Failed to Start" light will<br />
illuminate, and the alarm horn will sound. The battery alternating circuit alternates batteries on each crank attempt unless one<br />
battery is in a discharged state and incapable of cranking the engine. In this instance, the control will lock onto the other battery<br />
<strong>for</strong> the remaining cranking attempts. Dry contacts <strong>for</strong> remote indication of "Battery Failure/Missing Battery" are provided.<br />
The panel is wired so that optional remote start switches may be used, such as Deluge Valve, Remote Start pushbutton, Fire<br />
Alarm switches, etc. In addition, when “Power Failure Engine Startup” feature is enabled (System Config Screen 111), the<br />
Controller will automatically start the engine upon loss of Battery Charger output or AC Power loss, after an adjustable time<br />
delay (System Config Screen 112).<br />
While the engine is running, all protective circuits are operative. If the engine stops while running, and there is still an auto start<br />
demand, the control will attempt to restart the engine. If the engine fails to start the "Engine Failed to Start" light will<br />
illuminate and the alarm will sound. If, while the engine is operating, the oil pressure drops below a safe limit, the “Low Oil<br />
Pressure” light will illuminate immediately. After approximately seven (7) seconds the alarm will sound. Should the engine<br />
temperature exceed a safe limit while running, the “Engine High Water Temp.” light will illuminate and the alarm will sound<br />
indicating engine overheating.<br />
In case of Overspeed, the engine will be stopped and the "Engine Overspeed" light will illuminate and the alarm will sound.<br />
The light and alarm will stay on until the Engine Speed Switch and the Controller are <strong>manual</strong>ly reset. To <strong>manual</strong>ly reset the<br />
Controller, Press the “Off” button and the Press the "Reset" button on the OID <strong>for</strong> two seconds.<br />
The Controller may be configured as either "Manual" or "Automatic" stop as required (System Config Screen 104).<br />
"Manual" stop is set as standard. When Automatic stop is enabled the stop timer is preset at the factory to 30 minutes. Longer<br />
time settings can be set in System Config screen 105. When “Automatic Stop” is disabled, the engine will continue to run even<br />
though the pressure switch or other remote starting switch returns to its normal position. The engine can be stopped immediately<br />
only by pressing the stop button or by pressing the Off mode button. On engines that do not use the “energize to stop” method<br />
(i.e. Caterpillar), the engine may also be stopped by turning the circuit breakers BATT1 and BATT2 to OFF. If set up <strong>for</strong><br />
"Automatic" stop, the engine will be stopped automatically upon restoration to normal of whatever demand switch started the<br />
engine providing it has run at least 30 minutes or longer as set in System Config screen 105. If the demand period was less than<br />
the time set on the auto stop timer, the engine will continue to run until the timer times out and then will stop.<br />
B. When the "Test" mode button is pressed <strong>for</strong> two or more seconds, the engine will be started by causing a drop in water<br />
pressure. Failure alarm circuits will be operative in the "Test" mode. This method of starting provides a test of the Controller,<br />
thereby assuring proper operation when required. The engine will run <strong>for</strong> the time set in Auto Weekly Test Length Of Run Time<br />
(System Config Screen 109) or until the "Stop" push button is pressed or the “OFF” mode button is pressed.<br />
C. The "Manual" mode button is <strong>for</strong> <strong>manual</strong>ly starting the engine from either battery. The fuel and water solenoids are energized<br />
in this position, and the engine must be cranked by pushing one of the buttons located below the OID. "Manual Crank 1"<br />
cranks from Battery 1, and "Manual Crank 2" cranks from Battery 2. Pressing both buttons will result in cranking from both<br />
batteries simultaneously.<br />
D. When the engine is given a command to stop <strong>for</strong> any reason, terminal 12 will energize and will remain on <strong>for</strong> approximately 15<br />
seconds. The controller will not start until terminal 12 is de-energized again.<br />
E. Periodic Self Testing - The Test Run Timer can be set to give test runs on any day of the week and time of day desired. A<br />
timing element is incorporated in the control so that when the engine starts in this manner, it will run <strong>for</strong> a definite time be<strong>for</strong>e it<br />
shuts down. See System Config Screens 106 through 109 to set the starting time and length of engine running.<br />
F. Provision <strong>for</strong> sequential starting is accomplished by the use of adjustable time delay on pressure drop starting or “Deluge Valve”<br />
starting. On Multiple Pump installations these timers are set sequentially and progressively longer in time to prevent more than<br />
one (1) <strong>pump</strong> from starting simultaneously with another <strong>pump</strong>. Failure of the lead <strong>pump</strong> to start will not prevent subsequent<br />
<strong>pump</strong>s from starting. The time delay on starting is set in System Config Screen 103.<br />
Page 4 of 25<br />
File Name: Doc#586C.doc