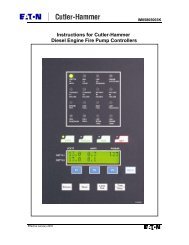
manual for model fd4 fire pump controllers - Steven Brown ...
manual for model fd4 fire pump controllers - Steven Brown ...
manual for model fd4 fire pump controllers - Steven Brown ...

Create successful ePaper yourself
Turn your PDF publications into a flip-book with our unique Google optimized e-Paper software.
(Caterpillar), or is connected other than through Terminal #1 (Clarke-G.M.), other means must be used to<br />
stop fuel flow to the engine to prevent starting.<br />
2. Press the "Test" mode button to start cranking the engine. Time the crank and rest periods, and count the number of<br />
cranks. There should be six (6) crank periods separated by five (5) rest periods each of approximately 15-seconds<br />
duration. The "Failed to Start" light should come on and the alarm horn should sound. Status indicator light <strong>for</strong><br />
Terminal #1 should come on as soon as the "Test" push button is pressed and the pressure drops below the low set<br />
point. Indicator lights <strong>for</strong> terminals 9 and 10 should come on alternately to indicate cranking cycle. (See above)<br />
3. Press the "Stop" push button to stop the engine and properly reconnect all leads.<br />
NOTE: In order to prevent discharging the starting batteries, this same test can be made without actually<br />
cranking the engine by disconnecting the starter cable and observing the action of the starter contactors<br />
and/or status indicator lights <strong>for</strong> terminals 9 and 10.<br />
c. CHECKING STARTING MOTOR RELEASE<br />
1. Press the “Test” mode button. Engine should start promptly and starting motor should release at approximately 1/3 of<br />
engine speed. Status indicator light <strong>for</strong> terminal #2 should come on to indicate speed switch has operated to disconnect<br />
cranking and the Engine Running LED should illuminate.<br />
NOTE: A convenient method of determining the exact instant the starter releases is to connect a battery test light or<br />
voltmeter across the starter terminals and observe when power is disconnected.<br />
2. Press the “Stop” push button to stop the engine.<br />
d. OIL PRESSURE FAILURE TEST:<br />
1. Press the "Test" mode button to start engine. When the engine is starting and oil pressure is not yet up to full pressure,<br />
the "Engine Low Oil Pressure" light will illuminate, but the horn will not sound. When pressure builds up, and the<br />
switch opens, the light will go out. This feature provides indication that the oil pressure switch contacts are operating<br />
in a normal manner.<br />
2. After the engine is running, connect a temporary jumper between terminal #4 and terminal #11.<br />
3. Both the "Engine Low Oil Pressure" light and status indicator light <strong>for</strong> terminal #4 should come on immediately.<br />
Wait approximately seven (7) seconds. Alarm horn should sound.<br />
4. Press the "Stop" push button to stop the engine and remove jumper between terminal #4 and terminal #11.<br />
5. Wait at least 30 seconds <strong>for</strong> elements to reset be<strong>for</strong>e making any further tests.<br />
e. WATER TEMPERATURE FAILURE TEST:<br />
1. Press the "Test" push button to start engine.<br />
2. Jumper contacts on water temperature switch on engine.<br />
3. Alarm horn sounds and the "High Water Temperature" light on controller illuminates immediately. Status indicator<br />
light <strong>for</strong> terminal #5 should come on with "High Water Temperature” light.<br />
4. Press the "Stop" push button to stop the engine and remove jumper on water switch.<br />
f. OVERSPEED FAILURE TEST:<br />
1. Press the "Test" mode button to start engine.<br />
2. Momentarily short the contacts on the engine speed switch, or connect a temporary jumper between terminal #3 and #6<br />
on the controller.<br />
3. The alarm horn sounds and the "Engine Overspeed" light will illuminate immediately. Engine comes to a stop.<br />
Status indicator lights <strong>for</strong> terminals #3 and #12 should come on with the "Engine Overspeed" light.<br />
4. Press the "Reset" button to reset the “Overspeed” alarm.<br />
g. AUTOMATIC STARTING TESTS:<br />
1. Place control in "Auto" position.<br />
2. Bleed off pressure in system until pressure drops below the low set point.<br />
Page 6 of 25<br />
File Name: Doc#586C.doc