USER'S GUIDE - Neopost
USER'S GUIDE - Neopost
USER'S GUIDE - Neopost

You also want an ePaper? Increase the reach of your titles
YUMPU automatically turns print PDFs into web optimized ePapers that Google loves.
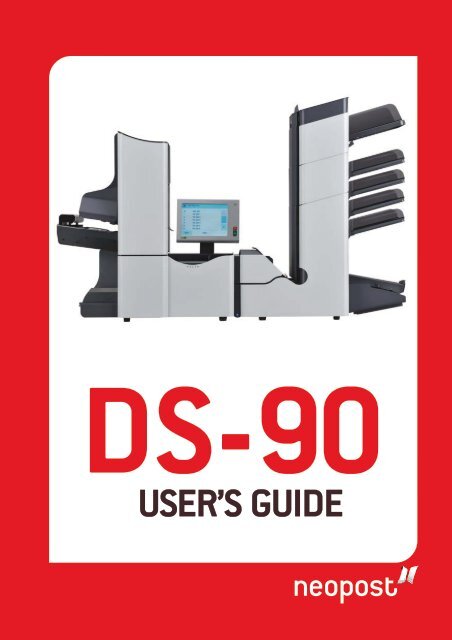
DS-90 DS-35<br />
USER’S <strong>GUIDE</strong>
Table of Contents<br />
1 Read this First ...............................................................................................1<br />
Warning............................................................................................................1<br />
About this manual.............................................................................................1<br />
Safety...............................................................................................................2<br />
Country Specific Conditions.............................................................................4<br />
End of Life........................................................................................................5<br />
2 Meet your Document System ......................................................................6<br />
Overview..........................................................................................................6<br />
Operating Controls...........................................................................................9<br />
Control Panel..................................................................................................10<br />
Installing the Document Feed Trays...............................................................11<br />
Power Up........................................................................................................12<br />
Home Menu....................................................................................................13<br />
Job Info...........................................................................................................14<br />
Side Guides....................................................................................................16<br />
Document Orientation....................................................................................17<br />
Filling the Document Feeder Tray..................................................................18<br />
Loading Envelopes.........................................................................................19<br />
Filling the Sealing Liquid Reservoir................................................................20<br />
Shut Down the System...................................................................................21<br />
3 Options ........................................................................................................22<br />
MaxiFeeder....................................................................................................22<br />
Installing the MaxiFeeder...............................................................................22<br />
Adjusting the MaxiFeeder Side Guides..........................................................23<br />
Adjusting the MaxiFeeder Document Separation...........................................24<br />
Feeding documents (MaxiFeeder).................................................................25<br />
High Capacity Document Feeder (HCDF)......................................................25<br />
Installing the HCDF........................................................................................26
Adjusting the HCDF Side Guides...................................................................26<br />
Document Separation for the HCDF..............................................................27<br />
Feeding documents (HCDF)..........................................................................27<br />
VersaFeeder (VF-3)........................................................................................28<br />
Installing the VersaFeeder..............................................................................29<br />
Operating controls (VersaFeeder)..................................................................30<br />
Adjusting the Side Guides (VersaFeeder)......................................................30<br />
Adjusting the Document Separation (VersaFeeder).......................................31<br />
Hopper Capacity (VersaFeeder).....................................................................32<br />
Support for Curved Reply Envelopes (option for VersaFeeder).....................33<br />
Power Stacker Support..................................................................................34<br />
High Capacity Envelope Hopper (EF-4).........................................................35<br />
High Capacity Conveyor Belt (CS-2)..............................................................37<br />
Installing the High Capacity Conveyor Belt....................................................37<br />
Operating the High Capacity Conveyor Belt...................................................38<br />
Catch Tray......................................................................................................38<br />
Catch Tray on Left Hand Side........................................................................38<br />
insert'n Frank / insert'n Mail ...........................................................................39<br />
Mail Piece Production Control (MPPC)..........................................................39<br />
4 Processing Mail Sets ..................................................................................41<br />
Introduction.....................................................................................................41<br />
Processing a Basic Mail Set...........................................................................42<br />
Processing a mail set with BRE or inserts......................................................43<br />
Document Separation.....................................................................................44<br />
Adjustment of the Document Stoppers...........................................................45<br />
Processing Daily Mail.....................................................................................46<br />
Test Run.........................................................................................................47<br />
Adjusting the Address Position.......................................................................47<br />
Adjusting the Envelope Insert Fingers............................................................48<br />
Verifying the Insert Position............................................................................49<br />
5 Working with Jobs ......................................................................................50<br />
What is a job...................................................................................................50
Creating a new job.........................................................................................50<br />
Performing a test run......................................................................................52<br />
Adjusting the Envelope Position.....................................................................54<br />
Using a job.....................................................................................................55<br />
Editing a job....................................................................................................55<br />
Copying a job.................................................................................................56<br />
Deleting a job.................................................................................................58<br />
Job settings....................................................................................................59<br />
Envelope settings...........................................................................................60<br />
Document settings..........................................................................................61<br />
Reading settings (option)...............................................................................63<br />
Double feed control settings...........................................................................66<br />
Job name........................................................................................................67<br />
Exit select settings..........................................................................................67<br />
Mailing/Franking settings (option)..................................................................72<br />
Mail Piece Production Control settings (option).............................................73<br />
6 Advanced Settings .....................................................................................74<br />
What are Advanced Setting..........................................................................74<br />
Opening the Advanced Settings.....................................................................75<br />
Changing the Display Settings.......................................................................75<br />
Viewing System info and Software versions..................................................77<br />
What are licensed options............................................................................78<br />
Activating an option........................................................................................79<br />
Test Menu.......................................................................................................80<br />
Running diagnostics.......................................................................................80<br />
Job Settings (Supervisor)...............................................................................81<br />
Flap Closer Offset..........................................................................................82<br />
Envelope Clearing..........................................................................................83<br />
System Output................................................................................................83<br />
Changing Document Offset............................................................................84<br />
Changing BRE Offset.....................................................................................85<br />
7 Reading .......................................................................................................87
Introduction.....................................................................................................87<br />
Reverse reading.............................................................................................88<br />
Document Orientation....................................................................................89<br />
BCR Code Description...................................................................................90<br />
Reading a configuration sheet (BCR only).....................................................92<br />
Running a BCR test........................................................................................93<br />
OMR Code Description..................................................................................95<br />
Running an OMR test.....................................................................................99<br />
2-track OMR.................................................................................................101<br />
8 Online Services .........................................................................................102<br />
Online Services............................................................................................102<br />
Start-up Online Services..............................................................................103<br />
Connecting to the server..............................................................................104<br />
Viewing the history.......................................................................................104<br />
Viewing messages.......................................................................................105<br />
Installing a new job or new software............................................................106<br />
Configuration Menu......................................................................................107<br />
Setting the telephone number......................................................................108<br />
Setting the prefix..........................................................................................108<br />
Selecting the country....................................................................................109<br />
Entering date and time.................................................................................109<br />
Setting the dial tone detection......................................................................110<br />
Setting the modem volume...........................................................................110<br />
9 Operator Maintenance .............................................................................111<br />
Maintenance Schedule.................................................................................111<br />
Clean and replace brushes..........................................................................112<br />
Replace or clean moistening cloth...............................................................112<br />
Resetting Photocells.....................................................................................113<br />
10 Fault Finding .............................................................................................114<br />
Error Messages............................................................................................114<br />
Clearing Stoppages......................................................................................115<br />
Envelope Hopper..........................................................................................116
Exit, Sealing and Inserting Area...................................................................117<br />
Lower Envelope Track..................................................................................117<br />
powerFold.....................................................................................................118<br />
flexFeed........................................................................................................119<br />
Collating Area...............................................................................................119<br />
versaFeeder.................................................................................................120<br />
Operator Troubleshooting.............................................................................121<br />
Trouble Shooting Table.................................................................................121<br />
11 Specifications ...........................................................................................125<br />
Technical Specifications...............................................................................125<br />
Hopper and feeder capacity.........................................................................126<br />
Configuration Dimensions............................................................................126<br />
Document and Insert Specifications.............................................................126<br />
Envelope and Document Set Specifications................................................127<br />
maxiFeeder Specifications...........................................................................128<br />
versaFeeder Specifications..........................................................................129<br />
High Capacity Envelope Hopper Specifications...........................................130<br />
High Capacity Conveyor Belt Specifications................................................131<br />
12 Terminology ..............................................................................................132<br />
Terminology..................................................................................................132<br />
13 EC Declaration of Conformity .................................................................138<br />
EC Declaration of Conformity DS-90, M8800, FPi 6600, FD6604...............138<br />
EC Declaration of Conformity MF-1.............................................................139<br />
EC Declaration of Conformity VF-3..............................................................140<br />
EC Declaration of Conformity EF-4..............................................................141<br />
EC Declaration of Conformity CS-2..............................................................142
1<br />
Warning<br />
Read this First<br />
1<br />
About this manual<br />
Ensure you have read and fully understood the safety requirements<br />
in this section.<br />
English<br />
Languages<br />
According to the EC (European Commission) declaration following the Low Voltage Directive<br />
(2006/95/EC), this operator manual must be available in the national language(s) of the<br />
country where the system is delivered. Therefore, if you do not have an operator manual<br />
in your country’s language(s), contact your authorized distributor.<br />
Software<br />
The software used for the reading option is based in part on the work of the Independent<br />
JPEG Group.<br />
Audience<br />
This manual is meant for operators of the document system.<br />
Trademarks<br />
maxiFeeder, insert'n Frank, powerFold, intelliDeck, flexFeed and versaFeeder<br />
are trademarks of <strong>Neopost</strong> however the affix will not be used further in this manual.<br />
1
Symbols<br />
1<br />
This manual uses the symbols listed below.<br />
WARNING : Indicates a human safety hazard.<br />
English<br />
ATTENTION : A risk to the equipment or mail could result from an<br />
action you may perform.<br />
NOTE : A remark that explains different cases or specificities.<br />
TIP : Advice to help save you time when processing your mail.<br />
SUPERVISOR : Indicates that you have to use the supervisor<br />
menu to perform the procedure.<br />
Safety<br />
Warnings<br />
• Disconnect the power supply before performing any maintenance.<br />
• Before connecting the system to the electrical supply, Ensure that the system is<br />
suitable for the local mains voltage. Refer to the serial plate on your system for voltage<br />
requirements.<br />
2
Safety Precautions<br />
• Only competent, trained personnel should operate this system. If non-trained<br />
personnel do operate this system, the manufacturer will not accept responsibility<br />
for any resulting accidents or injuries.<br />
• Only skilled persons, who are aware of the risks involved, may open the protective<br />
covers.<br />
For safety reasons, the system will not function when the covers are open.<br />
• Keep long hair, fingers, jewelry, etc. away from rotating and moving parts.<br />
• The power connection must be easily accessible, preferably close to the system.<br />
For safety reasons, it is essential that the system is connected to a socket outlet that<br />
has a protective earth (ground) connection.<br />
• Overcurrent protection in the equipment also relies on the branch circuit protection<br />
(max. 20 A).<br />
• The following part(s) is (are) considered the equipment disconnect device(s):<br />
- Power supply cord plug or appliance coupler.<br />
- 12-pole connector, located on the right-hand side.<br />
1<br />
English<br />
CAUTION: DOUBLE POLE / NEUTRAL FUSING<br />
(this means that after operating of the fuse, parts of the equipment<br />
that remain energized, might represent a hazard during servicing.)<br />
Precaution<br />
The general process of automated document handling can sometimes create a build up of<br />
static electricity. Therefore we recommend that the following measures are taken to reduce<br />
the side effects of any electrostatic charge.<br />
• Make sure that you operate the system within the recommended temperature and<br />
humidity conditions.<br />
• Make use of antistatic mats where appropriate.<br />
• If necessary, make use of an ionizer to reduce static charge build up in the room<br />
where the system is located.<br />
Please contact your supplier for further information.<br />
3
1<br />
English<br />
Country Specific Conditions<br />
Denmark<br />
In Denmark, certain types of Class 1 appliances may be provided with a plug that does not<br />
provide an adequate earth (ground) connection when inserted into a Danish socket outlet.<br />
Make sure the system has a good functioning connection that has protective earthing (the<br />
plug and socket outlet must match).<br />
Japan<br />
• Establish an earth (ground) connection before connecting the mains plug to the power<br />
supply.<br />
• First disconnect the power supply before removing the earth (ground) connection.<br />
4
End of Life<br />
The objectives of the European Community's environment policy are, in particular, to<br />
preserve, protect and improve the quality of the environment, protect human health and<br />
utilize natural resources prudently and rationally. That policy is based on the precautionary<br />
principle and principles that preventive action should be taken, that environmental damage<br />
should as a priority be rectified at source.<br />
Separating waste during collection is the precondition to ensure reuse and recycling of waste.<br />
The proper disposal of electrical or electronic equipment is necessary to achieve the chosen<br />
level of protection of human health and the environment in the European Community.<br />
More particularly, certain materials and components of waste electrical and electronic<br />
equipment need special treatment as improper handling or disposal on or into land, water<br />
or air would represent a major threat to the environment and human health.<br />
In order to facilitate collection and treatment separated from normal domestic waste,<br />
electrical and electronical equipment is marked with the following logo:<br />
1<br />
English<br />
By law, not only are you not allowed to dispose of the waste equipment via other waste<br />
channels, but we encourage you to actively contribute to the success of such collection<br />
and to the common good and better quality of life of present and future generations. For<br />
more information on the correct disposal of this product, please contact your local service<br />
organization.<br />
5
2<br />
Meet your Document<br />
System<br />
2<br />
Overview<br />
English<br />
Introduction<br />
The system is a folding and inserting system for processing mail easily. The system:<br />
• feeds documents<br />
• folds the documents<br />
• inserts the documents into envelopes<br />
• seals the envelopes<br />
• stacks the envelopes<br />
Automatic monitoring ensures the correct number of documents per envelope. The system<br />
can be operated by means of a user friendly interface. The settings of the system (types<br />
of documents, type of envelopes and the type of fold) is recorded in so called jobs. These<br />
jobs can be programmed by an authorized user.<br />
The system is equipped with a variety of special features, such as:<br />
• document thickness detection<br />
• programmable jobs<br />
• automatic jobs<br />
• flexFeed<br />
• double feed control<br />
• hopper swap<br />
• multifeed<br />
• daily mail<br />
• intelliDeck<br />
• powerFold.<br />
6
2<br />
English<br />
The figure shows an overview of the system.<br />
Document Feeders (flexFeed) (1)<br />
The flexFeed is the feeding part of the system. There are two types of feeders: the automatic<br />
and the special feeder. The automatic feeder does not require any adjustments for the<br />
separation. From a feeder you can feed one or more documents (multi feed). The feeders<br />
have a double feed control (DFC). DFC detects if more documents are fed instead of one.<br />
You can link feeders. This means that two feeders can be linked as pairs. When the first<br />
feeder is empty, the system switches to the other feeder. Meanwhile the empty feeder can<br />
be refilled without stopping the system.<br />
The upper automatic feeder is equipped with a 'daily mail' function. You can use this feeder<br />
to process sets of documents that you cannot process automatically (stapled documents<br />
and sets with varying thickness).<br />
Collating Area (2)<br />
All documents of a document set are collated and aligned in the collating area.<br />
7
2<br />
English<br />
intelliDeck(3)<br />
The intelliDeck automatically throws out incorrect sets of documents. In this way the system<br />
does not need to stop. Correct sets will be transported to the powerFold unit.<br />
powerFold (4)<br />
The fold unit folds the documents. The following fold types are possible (see Terminology<br />
on page 132):<br />
• No fold<br />
• V-fold<br />
• C-fold<br />
• Z-fold<br />
• Double V-fold<br />
Inserter (5)<br />
After the documents are folded, the documents are transported to the inserter. The inserter<br />
inserts the documents into a waiting envelope. The inserter seals the envelope or not,<br />
depending on the settings. Automatic monitoring ensures the correct number of inserts per<br />
envelope.<br />
Present on Deck (6)<br />
The documents inserted (or not) can leave the inserter from the upper unit (present on<br />
deck). This can occur when:<br />
• Clearing the machine;<br />
• Making a test set;<br />
• Depending on the reading code.<br />
Stacker (7)<br />
The documents inserted (or not) are transported to the stacker depending on the<br />
programmed job. The stacker automatically stacks inserted documents.<br />
Side exit (8)<br />
The documents inserted are transported to the side exit depending on the programmed<br />
job. The side exit can be used for sorting and stacking of documents into the catch tray as<br />
well as transporting to the optional conveyor belt or franking/mailing machine.<br />
Envelope Feeder (9)<br />
Envelopes that are placed on a stack by the user, are fed one by one into the system by<br />
the envelope feeder.<br />
8
Operating Controls<br />
2<br />
English<br />
A - catch tray (optional)<br />
B - side exit / stacker unit<br />
C - side guides stacker<br />
D - power inlet, power switch<br />
E - RS232 connector / USB / modem<br />
F - unlocking lever for upper unit<br />
G - display (operator panel)<br />
H - vertical transport<br />
I - hand grip vertical transport cover<br />
J - document feed tray<br />
K - collator arm<br />
L - intelliDeck (divert)<br />
M - powerFold<br />
N - locking handle powerFold<br />
O - handle for manual transport of the envelope<br />
P - handle for manual transport of the mail<br />
set<br />
Q - unlocking handle for rollers envelope<br />
track<br />
R - sealing liquid reservoir<br />
S - side cover (opened)<br />
T - thumb wheel for side guide adjustment<br />
U - side guides envelope feed tray<br />
V - flap for envelope separation adjustment<br />
W - envelope support<br />
9
Control Panel<br />
2<br />
English<br />
The control panel consists of the touch screen and the following buttons:<br />
A: On/Off ( ): Switches the system on or off. If the system is not used for one hour,<br />
the system switches to the power save mode. Press the On/Off button to switch back to<br />
the user mode.<br />
B: Stop ( ): The system completes the current mail set and stops, leaving the system<br />
empty and ready for a new set.<br />
C: Start ( ): The system starts to process mail sets.<br />
The display is covered with a thin pressure-sensitive layer. To avoid<br />
permanent damage of the display, do not use sharp objects to press<br />
on the display.<br />
10
Installing the Document Feed Trays<br />
Place the document feed trays in position:<br />
1. Hold the document feeder slightly inclined as shown in the figure.<br />
2<br />
English<br />
2. Place the front end of the document feed tray underneath the two black rollers.<br />
3. Move the document feed tray upwards (lifting the black rollers), until it is possible to<br />
‘hook’ the feeder into place.<br />
4. Move the document feed tray towards the machine and move the hooks over the<br />
mounting points (on both sides).<br />
5. Let the document feed tray rest on the machine.<br />
11
Power Up<br />
To start up the system:<br />
2<br />
You can severely damage the machine if it is connected to the<br />
incorrect power supply. Before plugging in the machine, check if<br />
the local voltage is the same as the voltage mentioned on the type<br />
plate.<br />
English<br />
1. Connect the system to the mains power supply.<br />
2. Use the power switch to switch the system on. The power switch is located on the<br />
back of the system.<br />
3. Press the on/off button next to the display. (Only necessary when the system is<br />
in standby mode.)<br />
The touch screen shows the home menu.<br />
12
Home Menu<br />
2<br />
When you start up the system, the ‘home’ menu appears. With the arrows you can scroll<br />
through the jobs. If you want more information on a job, select the job.<br />
If you just want to start without job definition, press [New job] and select [Automatic] (see<br />
Processing mail sets on page 41).<br />
English<br />
With the home button ( ) you get back to the home menu. The [Menu] button opens<br />
the advanced settings menu (see Opening the Advanced Settings on page 75).<br />
13
Job Info<br />
2<br />
If you want more information on a job, select the job in the ‘home’ menu.<br />
The ‘current job’ menu shows the following information of the selected job:<br />
English<br />
• Job number and Job name<br />
• Total: total number of envelopes that have been processed using this job<br />
• To do: number of envelopes to do. Only indicated if a ‘stop at’ value is set.<br />
• Stop at: number of processed envelopes at which the system stops. You can set this<br />
number with the [Counters] button.<br />
You can set it between 0 (switched off) and 9999. The system will continue until the<br />
job counter reaches the stop counter value. The system stops and can be restarted.<br />
The stop counter is switched off when it is set to zero.<br />
If you want to reset the daily job counter and the stop counter, press the [Reset TOTAL<br />
Counter] button in the ‘counters’ menu.<br />
The counter settings are job related.<br />
14
• A picture of the system with symbols for the selected features. The following<br />
symbols can be used:<br />
Shows the feeders selected to pick documents from (black<br />
is selected). Every selected feeder shows how many sheets<br />
will be fed from the feeder and the length of the sheets.<br />
This sign indicates that the relevant feeders are linked. This<br />
means that when one feeder is empty, the system automatically<br />
starts picking documents from the other feeder.<br />
This sign indicates that for the selected feeder OMR or BCR<br />
is switched on (optional).<br />
2<br />
English<br />
This sign indicates that the relevant feeder is set for daily<br />
mail.<br />
Gives information about the envelope size (ISO format or<br />
height in mm). An envelope with a cross means that no envelopes<br />
are used.<br />
Shows the type of fold, in this case C-fold.<br />
The sign indicates that for the relevant feeder the double<br />
feed detection is switched on.<br />
• [Edit]: use this button to edit the job (see Editing a job).<br />
• [Info]: if you press the [Info] button, the screen shows how to position the envelope<br />
and documents in the feeders. From this menu you can press a button to view the<br />
reading settings and insert'n Frank / insert'n Mail settings.<br />
15
Side Guides<br />
2<br />
To adjust the side guides it is best to remove the document feed tray from the feeder as<br />
follows:<br />
1. Push handle A downwards.<br />
English<br />
2. Lift the document feed tray upwards to unhook it and then pull it out from the feeder.<br />
3. Loosen the knob B half a turn.<br />
4. Grab the side guides in the middle and push them apart as far as possible.<br />
5. Put a small stack of documents between the side guides.<br />
6. Grab the side guides in the middle and push them towards the documents.The space<br />
between the side guides and the documents should be such that the documents have<br />
just enough play to move freely.<br />
7. Re-tighten knob B.<br />
8. Remove the stack of documents.<br />
9. Replace the document feed tray (see Installing document feeders on page 11).<br />
16
Document Orientation<br />
2<br />
English<br />
In case the optional extended powerFold is installed, the following feeding rules apply to<br />
documents with bottom address position:<br />
17
Filling the Document Feeder Tray<br />
Fill the document feeder tray as follows:<br />
2<br />
1. Open the left-hand side guide A by turning it downwards.<br />
The feed rollers will automatically be lifted.<br />
English<br />
2. Place a stack of documents between the side guides.<br />
3. Turn the left side guide upwards again.<br />
4. Feed the documents (depending on the type of documents and the type of fold) (see<br />
Document Orientation).<br />
18
Loading Envelopes<br />
Before you load the envelopes, make sure the envelope separation and side guides are<br />
correctly set. Proceed as follows:<br />
1. Rotate thumb wheel D to move the side guides C apart.<br />
2<br />
English<br />
2. Put a small stack of envelopes between the side guides.<br />
3. Move the side guides towards the envelopes. The space between the side guides and<br />
the envelopes should be such that the envelopes have just enough play to move freely.<br />
If the distance between the side guides is too large, the envelopes<br />
will twist sidewards, when transported into the machine.<br />
4. Pull down small lever B to set the separation.<br />
5. Insert one envelope up to the stoppers. The position of the envelope is flap down and<br />
trailing (bottom side of the envelope pointing to the system).<br />
6. Return lever B.<br />
7. Loosen the stack of envelopes and place the stack on top of the bottom envelope.<br />
19
8. Shift envelope support A in or out. The top side of the envelope must touch the dotted<br />
line on the support.<br />
2<br />
English<br />
9. Turn envelope support A to distribute the weight of the envelopes evenly on both<br />
sides.<br />
Filling the Sealing Liquid Reservoir<br />
1. Open the front cover B.<br />
20
2. Fill the reservoir A to the "Max" lip with sealing liquid.<br />
3. Close the front cover B.<br />
Before starting the job, wait approximately 5 minutes for the brushes to moisten or use<br />
moistened brushes. For instructions on the installation of brushes, see Clean and replace<br />
brushes on page 111.<br />
If the liquid reservoir is almost empty the touchscreen shows a message to warn you that<br />
you should refill the reservoir.<br />
Shut Down the System<br />
1. Press the [On/Off] button to shut down the system.<br />
When the system is busy, it completes and inserts the current set, stops and will be shut<br />
down.<br />
2<br />
English<br />
21
3<br />
Options<br />
MaxiFeeder<br />
3<br />
English<br />
The maxiFeeder is a feeder that can be loaded with a high number of documents. This<br />
feeder is intended to be used for Business Reply Envelopes (BRE), but also 'standard'<br />
documents up to 356 mm (14") length can be processed with it.<br />
Installing the MaxiFeeder<br />
The maxiFeeder should be installed at the position of feeder no. 1 and/or 4. If you install<br />
the maxiFeeder on position 4, you cannot use position 2 and 3 for document feeders.<br />
To install the maxiFeeder as follows:<br />
1. Lift the paper feed rollers with the front edge of the maxiFeeder.<br />
2. Move the maxiFeeder forward until it hooks behind the frame axle.<br />
3. Connect the connector A to the socket B.<br />
The maxiFeeder is auto-detected by the system when the system is switched on. This<br />
makes it easy to switch over from the standard document feeder tray to the maxiFeeder<br />
and vice versa.<br />
To make use of a maxiFeeder it is not necessary to (re-)program the jobs.<br />
To allow easier hooking on of the maxiFeeder it is advised to put<br />
the feeding plate in the rear position.<br />
22
Adjusting the MaxiFeeder Side Guides<br />
Adjust the side guides:<br />
1. Take a stack of documents/BREs and place them in the feeder tray.<br />
BREs with flap down and leading (top side pointing to system).<br />
3<br />
English<br />
2. Adjust the side guides by turning the thumb wheel A so the documents/BREs just fit<br />
and can move without resistance.<br />
Too much play causes skewing.<br />
23
Adjusting the MaxiFeeder Document Separation<br />
3<br />
When the maxiFeeder is used at an automatic separation feeder, the separation is set<br />
automatically.<br />
The maxiFeeder can also be used on a feeder position with a manually adjusted separation.<br />
To adjust, proceed as follows:<br />
1. Remove the document feeder trays 2 and 3.<br />
English<br />
The lowest feeder is feeder 1.<br />
2. Squeeze the two blue handles A and B and shift the feeding plate C as far as possible<br />
to the front.<br />
3. Push knob D forward until it clicks.<br />
4. Place a document/BRE on the feeder tray and slide it in the system till the leading<br />
edge is not visible anymore. Turn knob D counterclockwise if the separation is set to<br />
narrow.<br />
5. Push the document/BRE between the rollers.<br />
6. Turn knob D clockwise to get more resistance and counterclockwise if the separation<br />
is set to narrow.<br />
The separation is adjusted correctly when a slight resistance is felt on the<br />
document/BRE.<br />
7. Pull knob D back when ready.<br />
8. Replace the document feeder trays 2 and 3.<br />
24
Feeding documents (MaxiFeeder)<br />
To feed documents:<br />
When filling the maxiFeeder, make sure that the document/BREs<br />
are positioned parallel in relation to the feed plate to ensure correct<br />
feeding.<br />
The feeding plate assembly will be shifted up automatically (when the system starts<br />
processing) until documents/BREs are underneath the rubber paper pullers.<br />
1. Squeeze the two blue handles A and B.<br />
3<br />
English<br />
2. Shift the feeding plate C to the rear position.<br />
3. Loosen the stack of documents and place them in the feeder.<br />
BREs with flap down and leading (top side pointing to system).<br />
High Capacity Document Feeder (HCDF)<br />
The High Capacity Document Feeder is an option that can be delivered from factory, or<br />
added to a 2 or 4 station version by a service engineer. The High Capacity Document<br />
Feeder has a capacity for up to 725 sheets. The normal document feeder tray has a capacity<br />
of 325 sheets.<br />
25
Installing the HCDF<br />
To install the feeder tray of the HCDF:<br />
3<br />
English<br />
1. Pull down lever A.<br />
2. Hook in the feeder tray.<br />
3. Release lever A.<br />
Adjusting the HCDF Side Guides<br />
To adjust the side guides B:<br />
1. Loosen the knob D half a turn.<br />
2. Put a small stack of documents between the side guides.<br />
26
3. Rotate wheel E.<br />
The space between the side guides and the documents should be such that the<br />
documents have just enough play to move freely.<br />
4. Re-tighten knob D.<br />
Document Separation for the HCDF<br />
The document separation is set automatically. There are no manual adjustments needed.<br />
3<br />
Feeding documents (HCDF)<br />
To fill the document feeder tray:<br />
English<br />
1. Pull down lever A.<br />
The feeder rollers C move up to filling level.<br />
2. Place a stack of documents between the side guides (max. 725 sheets, 80 g/m²).<br />
Feed the documents (depending on the type of documents and the type of fold) (see<br />
Document Orientation on page 17).<br />
3. Release lever A.<br />
27
VersaFeeder (VF-3)<br />
3<br />
The versaFeeder is used to feed booklets, regardless of the thickness of the cover, to the<br />
document flow from the feeder to the inserter. Because of the location of the<br />
versaFeeder(downstream the feeder module) documents feeded by the versaFeeder will<br />
not be folded.<br />
English<br />
When the versaFeeder is added to the configuration this is shown in the screens at the<br />
display. The figure shows an example.<br />
28
Installing the VersaFeeder<br />
When installing the versaFeeder directly to the inserter, install the module in the following<br />
manner:<br />
Always switch off the system before connecting to, or disconnecting<br />
from any attached units.<br />
1. Disconnect the inserter connecting cable from the feeder module. Put the connecting<br />
cable to the right hand side of the feeder module.<br />
3<br />
English<br />
2. Place both hands under the left and right-hand side panel of the feeder module to<br />
unlock it from the inserter.<br />
3. Lift and uncouple the feeder module from the inserter. Move it backwards to create<br />
enough space for the versaFeeder.<br />
4. Place the versaFeeder between the inserter and feeder module. Place both hands<br />
under the left and right-hand side panel.<br />
5. Lift it above the inserter fixing plates and lower it until it locks into place. Both sides<br />
are now locked.<br />
6. Place both hands under the left and right-hand side panel of the feeder module.<br />
7. Lift the feeder module above the versaFeeder fixing plates and lower it until it locks<br />
into place. Both sides are now locked.<br />
8. Connect the 12-pole connector of the inserter to the 12-pole socket located on the<br />
right-hand side of the versaFeeder.<br />
9. Connect the 12-pole connector of the versaFeeder to the 12-pole socket of the feeder<br />
module.<br />
The power inlet is located on the right-hand side of the feeder and contains the main<br />
fuse.<br />
29
Operating controls (VersaFeeder)<br />
3<br />
English<br />
A - Separation adjustment wheel<br />
B - Side guides<br />
C - Hopper side guide adjustment thumbwheel<br />
D - Release handle separation unit<br />
E - Release handle feed unit<br />
F - Feed unit push down area<br />
Adjusting the Side Guides (VersaFeeder)<br />
The side guides can be adjusted manually as follows:<br />
1. Place a stack of documents into the feeder.<br />
2. Adjust the hopper side guides B by turning the thumbwheel C. Provide just enough<br />
space for the documents to move freely. Too much play causes skewing.<br />
30
Adjusting the Document Separation (VersaFeeder)<br />
The document separation can be adjusted manually as follows:<br />
Check before the adjustment that the release handle D for the<br />
separation unit is in the closed (down) position.<br />
1. Turn the separation adjustment wheel A counter clockwise until a document can be<br />
moved backwards and forwards without resistance.<br />
3<br />
English<br />
2. Turn the separation adjustment wheel clockwise until a slight resistance is felt on the<br />
document when the document is moved backwards and forwards.<br />
3. Turn the separation adjustment wheel clockwise to get more resistance or counter<br />
clockwise to lower the resistance.<br />
4. Check the separation before starting the system. After starting the system it may occur<br />
that more than one document at a time is pulled in. If this happens, turn the separation<br />
adjustment wheel more clockwise to obtain correct operation. For poor feeding turn<br />
the separation adjustment wheel counter clockwise.<br />
31
Hopper Capacity (VersaFeeder)<br />
To avoid irregular feeding there are three levels for the maximum heights of the hopper<br />
capacity. The symbols for these three levels are printed on the right hand side guide of the<br />
hopper. The level indication is a guideline.<br />
3<br />
Maximum hopper capacity of booklets with a tough cover (maximum<br />
height: 250 mm).<br />
English<br />
Maximum hopper capacity for booklets with a weak cover (maximum<br />
height: 150 mm).<br />
Maximum hopper capacity for single sheets: minimum sheet quality: 80<br />
gr/m2 (maximum height: 50 mm).<br />
32
Support for Curved Reply Envelopes (option for<br />
VersaFeeder)<br />
Depending on the quality of the paper, the conditions during storage, etc. envelopes can<br />
be curved. This can cause smaller reply envelopes to skew while being processed by the<br />
versaFeeder.<br />
A special support is available to allow curved envelopes to be correctly processed. It can<br />
be used for envelopes with a height up to 110 mm (4.33").<br />
3<br />
English<br />
To attach the support onto the hopper platform and adjust the support:<br />
1. Hold the support as indicated by the figure.<br />
2. Place both notches C at both sides into the sleeves.<br />
3. Lower the other end of the support. It will lock fully into place.<br />
4. Loosen knob B slightly by turning it counterclockwise.<br />
5. Move support in or outwards until the ruler indicates the height of the envelope (the<br />
side of the plate A is indicator).<br />
6. Turn knob B clockwise to tighten the support.<br />
33
Power Stacker Support<br />
3<br />
Depending on the inserted type and amount of documents, the filled envelopes may get<br />
stack fanshaped at the stacker.<br />
To prevent this, an optional power stacker support can be used in order to stack the<br />
envelopes correctly.<br />
English<br />
34
High Capacity Envelope Hopper (EF-4)<br />
For feeding large amounts of envelopes a high capacity envelope hopper can be installed.<br />
To start up the high capacity envelope hopper:<br />
1. Switch on the hopper.<br />
3<br />
English<br />
To ensure correct feeding envelope support A has to be adjusted parallel. Proceed<br />
as follows:<br />
2. Move the high capacity envelope hopper backwards, away from the inserter.<br />
3. Hold an envelope against the hopper plate B as indicated.<br />
4. Place the envelope support A such that the envelope is aligned with recess C.<br />
5. Apply the same alignment at the position of recess D.<br />
6. Adjust the inserter side guides and the separation as described in Loading Envelopes<br />
on page 19.<br />
7. Put an envelope in the envelope height measurement area.<br />
35
8. Rotate thumbwheel E to adjust the envelope height setting. The envelope should fit<br />
exactly in the space indicated by the arrows.<br />
3<br />
English<br />
9. Rotate thumbwheel F to adjust the side guides so, that the envelopes:- Fit exactly<br />
between the side guides- Can move freely<br />
10. Fill the envelope hopper with envelopes, positioned upside down. The flaps should<br />
face the inserter.<br />
11. Tip over the envelopes.<br />
12. Load the envelope feeder of the inserter with about 50 envelopes.<br />
13. Press the [Start] button.<br />
36<br />
The envelopes on the envelope hopper will be transported towards the feeder of the<br />
inserter. Envelopes will be transported and dropped in the inserter feeder until the<br />
envelopes reach a certain level. At that moment a sensor will detect the envelopes<br />
and the high capacity envelope hopper will stop transporting.<br />
When the sensor does not detect envelopes anymore the hopper will start again and<br />
the process will be repeated.
High Capacity Conveyor Belt (CS-2)<br />
The high capacity conveyor belt is designed for envelope transport from the inserter or<br />
franking device. The conveyor belt has two operation modes:<br />
• The belt moves continuously.<br />
• The belt moves in intervals. The belt moves about 45 mm (1.7 inch) each time a<br />
sensor detects the passage of an envelope.<br />
The guide plate and side guides prevent the envelopes from falling off the belt.<br />
Installing the High Capacity Conveyor Belt<br />
3<br />
English<br />
To install the high capacity conveyor belt:<br />
1. Move the conveyor belt to the correct position.<br />
2. Connect the adaptor C to the connecting lead.<br />
3. Connect the mains lead cable to the adapter.<br />
4. Connect the mains lead cable to the socket outlet.<br />
37
Operating the High Capacity Conveyor Belt<br />
3<br />
The conveyor belt switch has three positions:<br />
• Mode D: the belt moves in intervals.<br />
• Mode E: the belt is switched off.<br />
• Mode F: the belt moves continuously.<br />
English<br />
Catch Tray<br />
For stacking envelopes leaving from the side exit a catch tray can be mounted.<br />
Catch Tray on Left Hand Side<br />
Instead of a catch tray at the right hand (RH) side of the system it is also possible to install<br />
a catch tray on the left hand (LH) side. To achieve this it is necessary to reverse the side<br />
exit of the Stacker from RH to LH.<br />
Contact your supplier for more information about this option.<br />
This option can also be reversed.<br />
38
insert'n Frank / insert'n Mail<br />
If this system is connected to a mailing/franking system, insert'n Frank / insert'n Mail allows<br />
you to:<br />
• Switch automatic mailing/franking on or off<br />
• Remotely select a mailing/franking job<br />
• Set the printing/franking value (option)<br />
• Automatically set the printing/franking value using the inserter data<br />
For programming this option, see Mailing and Franking settings on page 72. Refer to the<br />
appendix for an extensive description of the mailing (franking) option.<br />
Mail Piece Production Control (MPPC)<br />
The document system can be equipped with Mail Piece Production Control. This option<br />
enables the system to verify the inserted documents or sets of documents with a database,<br />
which is generated when printing the documents. The system will give a warning when a<br />
mail piece is missing at the exit of the inserter. MPPC can be used together with a catch<br />
tray or with a conveyor belt.<br />
Refer to the appendix “Mail Piece Production Control” for an extensive description of this<br />
option.<br />
3<br />
English<br />
39
3<br />
English<br />
40
4<br />
Processing Mail Sets<br />
Introduction<br />
With the system you can process mail sets in the following ways:<br />
• Automatic job: The system automatically picks one sheet from each filled feeder<br />
and processes them into mail sets.<br />
The automatic feature is described in this chapter.<br />
• Manual job: various settings, not available in an Automatic job, can be stored for<br />
re-use in user-programmable jobs (Manual jobs). This includes the use of daily mail.<br />
Working with manual jobs is described in What is a job on page 50.<br />
Automatic job processes mail sets according to the following rules:<br />
• The machine picks one sheet from each filled feeder;<br />
• The picked documents will be folded (if necessary) and inserted into an envelope;<br />
• Only the feeders that feed successfully will be selected;<br />
• Only the Double Feed Control (DFC) of the upper feeder will be selected (this is done<br />
automatically).<br />
The following features are not supported with Automatic job processing.<br />
• Linked feeders (the option where, if one feeder is empty, the system automatically<br />
continues using another feeder);<br />
• Multifeed (picking more than one sheet from a certain feeder);<br />
• Daily mail (see Processing Daily Mail on page 46);<br />
• Reading functionality (see Reading Introduction on page 87);<br />
• No envelope mode (see Envelope settings on page 60);<br />
• Envelopes with open flap (see Envelope settings on page 60);<br />
• Exit select (see Exit select settings on page 67).<br />
If you want to use any of these features, you have to use Manual jobs to process the mail<br />
set (see What is a job on page 50).<br />
4<br />
English<br />
41
Processing a Basic Mail Set<br />
A basic mail set consists of documents from one or more document feeders. This set is<br />
inserted into an envelope.<br />
Before you start, make sure you have read the Introduction on processing mail sets.<br />
4<br />
1. From the home menu, press the [New job] button.<br />
2. Choose [Automatic] to start an Automatic job.<br />
3. Load the documents and envelopes into the feeders.<br />
English<br />
4. Press the [1x] test run button to create one mail set and follow the instructions on<br />
screen.<br />
After a successful test run, it is possible to use the [Save] button<br />
to save the settings of the Automatic job to a new job.<br />
5. Press the [start] button to start the mail set production.<br />
The system stops producing mail sets when one of the feeders is empty or the [stop] button<br />
is pressed.<br />
42
Processing a mail set with BRE or inserts<br />
A mail set with BRE consists of documents from one or more document feeders and an<br />
insert/BRE from the BRE feeder. This set is inserted into an envelope.<br />
Before you start, make sure you have read the Introduction on processing mail sets.<br />
Load the BREs with the flap down (flap leading).<br />
1. From the home menu, press the [New job] button.<br />
2. Choose [Automatic] to start an Automatic job.<br />
3. Load the documents, BREs or inserts and envelopes into the feeders.<br />
4<br />
English<br />
4. Press the [1X] test run button to create one mail set and follow the instructions on<br />
screen.<br />
5. Press the [start] button to start the mail set production.<br />
The system stops producing mail sets when one of the feeders is empty or the [stop] button<br />
is pressed.<br />
43
Document Separation<br />
4<br />
English<br />
The term ‘Document separation’ refers to the adjustment required for separating the upper<br />
document from the rest of the documents in the stack. This prevents pulling too much<br />
documents from the stack at the same time.<br />
The document separation for the automatic feeders is set automatically; there are no manual<br />
adjustments needed.<br />
Feeders 1 and 2 (the feeders in the two lowest positions) can be special feeders. The<br />
document separation for special feeders must be adjusted manually. While special feeder<br />
trays fit in all positions, adjusting the separation is only possible when they are fitted on<br />
position 1 and 2.<br />
Adjust the separation of special feeders as follows:<br />
Adjusting the separation (using a special feeder) is especially<br />
important when you want to process glossy materials.<br />
1. Push the knob A forward until it clicks.<br />
2. Place a document on the feed tray and slide it about 60 mm (2.4 inch) into the system<br />
(turn the knob A counter clockwise if the separation is set too narrow).<br />
3. Push the document between the separation rollers, which are behind the rubber paper<br />
pullers.<br />
4. Turn the knob A clockwise to get more resistance or counter clockwise to lower the<br />
resistance.<br />
The separation is adjusted correctly when a slight resistance is felt on the document.<br />
5. Pull the knob A back again when ready.<br />
44
Adjustment of the Document Stoppers<br />
The document stoppers mark the position at which the documents coming from the feeder<br />
turn towards the folding area. The position of the document stoppers is automatically<br />
determined by the system during the job programming.<br />
Initially the document stoppers are adjusted for position B. In this position a wide variety<br />
of documents can be handled (max. 297 mm; 11.7 inch) and adjustment is not needed.<br />
4<br />
English<br />
When a job is selected in which a different stopper position has been programmed, the<br />
operator has to put the document stoppers in the correct position as indicated by the display.<br />
To adjust the stopper position:<br />
1. Lift and hold the collator arm D.<br />
2. Squeeze the stopper and pull the front side tab up.<br />
3. Place the flat back tab into the correct slotted hole.<br />
4. Push the stopper into position.<br />
Stop position A can handle documents up to 148 mm (5.8 inch), stop position B can handle<br />
documents up to 297 mm (11.7 inch) and stop position C can handle documents up to 356<br />
mm (14 inch).<br />
45
Processing Daily Mail<br />
The daily mail function is only available when reading is not<br />
activated. When daily mail is set, the links to the daily mail feeder<br />
will be deselected automatically.<br />
4<br />
English<br />
When the daily mail function is selected DFC is not available.<br />
To process documents or sets of documents, which can not be processed automatically<br />
(e.g. stapled documents), the top feeder is equipped with a daily mail switch.<br />
To use the Daily Mail function:<br />
1.<br />
Select a job where the daily mail function is selected. You can recognize the daily mail<br />
by the<br />
icon in the job information menus.<br />
2. Turn down the left side guide A of the upper tray. Now you can see the Daily Mail<br />
handle B.<br />
3. Move the handle to the right to enable the Daily Mail function.<br />
4. Turn side guide A upwards.<br />
5. Press the [start] button to start the job.<br />
6. Place the document or document set in the feeder (see Filling the Document Feeder<br />
Tray on page 18).<br />
The document or document set will be folded and inserted into the envelope as<br />
described in the selected job.<br />
7. Place the next document or document set in the feeder. The system will keep running<br />
to process the inserted document or document set.<br />
46
8. When finished with Daily Mail, press the [stop] button to stop the job.<br />
9. Set the Daily Mail handle B to the ‘AUTO’ position to disable the Daily Mail and enable<br />
the automatic document separation.<br />
Test Run<br />
Before starting an Automatic job, it is possible to perform a single test run.<br />
This test run is intended to validate the settings of the Inserting System:<br />
• Inspect and adjust the stop position of the envelope.<br />
• Check the fold settings for one set.<br />
• Check if the address is correctly positioned behind the envelope window.<br />
Adjusting the Address Position<br />
If the address on your mail is not correctly positioned behind the envelope window, change<br />
the address position as follows:<br />
4<br />
English<br />
Adjusting the address position is only possible after running a test<br />
run (by using the [1x] button).<br />
1. Choose a job and press the [1x] button.<br />
2. Press No if asked if the mail set is correct.<br />
3. Press Yes if asked if the documents are inserted correctly.<br />
4. Press No if asked if the address is readable.<br />
5. Follow the steps in the wizard.<br />
47
Adjusting the Envelope Insert Fingers<br />
To make a good insert of the document set into the envelope, the insert fingers A should<br />
be about 5 mm (0.2 inch) inside the envelope.<br />
The outer fingers D should be about 5 to 10 mm (0.2 to 0.4 inch) from the edges of the<br />
envelope.<br />
4<br />
English<br />
To verify that the position of the fingers is correct:<br />
1. Choose a job and press the [1x] button.<br />
2. Follow the steps in the wizard.<br />
To adjust the envelope insert fingers:<br />
1. Loosen the knurled knob C on top of each finger.<br />
2. Adjust each finger so that the tip enters about 5 mm (0.2 inch) into the envelope.<br />
3. Re-tighten the knurled knob.The fingers can be moved sideways to the desired position.<br />
4. Place the outer fingers about 5 to 10 mm (0.2 to 0.4 inch) from the edges of the<br />
envelope.<br />
Check the position of the insert fingers when changing to a different<br />
type of envelope.<br />
48
Verifying the Insert Position<br />
To make a good insert of the document set into the envelope, the envelope should be<br />
positioned correctly. The document set is inserted correctly if the flap folding line of the<br />
envelope is positioned under the blue indicator B.<br />
4<br />
English<br />
To verify the insert position:<br />
This adjustment must only be checked in case of problems or when<br />
changing the envelope type.<br />
1. Choose a job and press the [1x] button.<br />
2. Lift the unlocking lever of the upper unit and pull up the upper unit.<br />
3. Press No until the question about envelope position appears.<br />
4. Press No again and follow the instructions on screen.<br />
49
5<br />
Working with Jobs<br />
What is a job<br />
5<br />
English<br />
If you have to process a lot of mail sets of the same type (for example bills), you can save<br />
the settings to a 'job'. The next time you just select the job and immediately start without<br />
defining any settings.<br />
The following settings are saved in a job:<br />
• Envelope type/size;<br />
• Sealing on/off;<br />
• Which document feeders should be used, how many documents should be fed from<br />
each feeder and document height for each feeder;<br />
• Feeder linking on/off;<br />
• If BREs or insert cards should be included;<br />
• Address position;<br />
• Fold settings;<br />
• Double feed control settings;<br />
• Reading settings (option);<br />
• Exit select settings;<br />
• Mailing and Franking settings (option);<br />
• Mail Piece Production Control settings (option);<br />
• Batch Counter, defining the number of mail sets that the job must process. The job<br />
will automatically stop processing when this number is reached.<br />
Creating a new job<br />
To create a new job:<br />
1. From the home menu, press the [New job] button.<br />
50
2. Press [Manual] to create a new job.<br />
For [Automatic], see Processing a basic mail set on page 42.<br />
5<br />
3. Enter the pin code 2546.<br />
English<br />
4. Press the [Job wizard] button to create a new job with the job creation wizard or press<br />
the [Advanced] button (experienced users only) to define the settings of the new job.<br />
If you use the job creation wizard, follow the steps on screen. If you use the advanced<br />
way of job programming, continue as follows:<br />
51
5. Press [OK] to confirm the selected free job number.<br />
A new selected job number starts with default settings.<br />
The job settings menu opens. The meaning of all buttons and settings is explained in<br />
Job settings on page 59.<br />
5<br />
English<br />
6. Press [Save] to save the job with the entered settings under the specified job number<br />
and name.<br />
To name a job, see Job name settings on page 67.<br />
7. Press the [1x] button to verify that the insert position and address position are correct<br />
(see Verifying the Insert Position on page 49 and Adjusting the address position on<br />
page 47).<br />
Performing a test run<br />
Before starting a job, it is possible to perform a single test run with the settings of the current<br />
job.<br />
To perform a test run:<br />
1. In the home menu, use the arrows to scroll through the Job selection list.<br />
52
2. Select the job you want to use.<br />
3. Click the [1x] button.<br />
5<br />
English<br />
4. Press the button if you want to adjust the envelope position before running<br />
the test run (see Adjusting the Envelope Position on page 54).<br />
5. Press the button if you to perform a test-run to test the exit select settings (see<br />
Exit select settings on page 67).<br />
6. Press the [1x] button to perform the test run.<br />
53
Adjusting the Envelope Position<br />
Before performing a test run, it is possible to adjust the envelope position.<br />
To adjust the envelope position:<br />
1. Press the button to start adjusting the envelope position.<br />
5<br />
English<br />
2. Use the arrows beneath the ruler to adjust the envelope position.<br />
3. Press the to check the new alignment.<br />
4. Press the [OK] button to accept the new alignment.<br />
54
Using a job<br />
If you want to use an existing job:<br />
1. From the home menu, select the job you want to use.<br />
5<br />
2. If you want to perform a test run:<br />
Press the [1x] button to do a test run.<br />
3. If you want to change the counter for this job:<br />
Press the [Counters] button to make changes to the amount of mail sets that the job<br />
produces.<br />
4. Press the [Start] button to start the job.<br />
English<br />
Editing a job<br />
To edit an existing job:<br />
1. From the home menu, select a job you want to edit.<br />
2. Press the [Edit] button.<br />
55
3. Enter the pin code 2546.<br />
The job settings menu opens. See Job settings on page 59 for the meaning of all<br />
buttons and settings.<br />
5<br />
English<br />
4. Press [Save] to save the job with the entered settings under the specified job number<br />
and name.<br />
5. Press the [1x] button to verify that the insert position and address position are correct<br />
(see Verifying the Insert Position on page 49 and Adjusting the address position on<br />
page 47).<br />
Copying a job<br />
To copy existing job settings to a new job:<br />
1. Press the [Supervisor] menu button from the main menu.<br />
2. Enter the pin code 2546.<br />
56
3. Press the [Job] menu button.<br />
The job menu opens.<br />
5<br />
4. Press the [Copy job] button.<br />
The copy job menu appears.<br />
English<br />
5. Press the arrows if you want to select another job number to copy from or to copy to.<br />
You can only copy job settings to new jobs.<br />
6. Press the button for details of the job to copy from.<br />
7. Press [OK] to copy the job settings.<br />
If all jobs are programmed the touch screen shows “No more free jobs”.<br />
It is possible to copy an Automatic job into a job. Before an Automatic job can be<br />
copied, it has to be defined successfully (see Processing a basic mail set on page<br />
42).<br />
57
Deleting a job<br />
To delete an existing job:<br />
1. Press the [Supervisor menu] button from the main menu.<br />
2. Enter the pin code 2546.<br />
5<br />
English<br />
3. Press the [Job menu] button.<br />
The job menu opens.<br />
58
4. Press the [Delete job] button.<br />
The delete job menu appears.<br />
When you press [OK], the job is deleted without a warning.<br />
5<br />
5. Select a job number and press [OK].<br />
English<br />
Job settings<br />
From the job settings menu the following settings are available:<br />
• Envelope settings (see Envelope settings on page 60);<br />
• Document settings (see Document settings on page 61);<br />
• Fold settings (see Fold settings);<br />
• Reading settings (if installed, see Reading settings);<br />
• Double feed control settings (see Double feed control settings on page 66);<br />
• Job name settings (see Job name settings on page 67);<br />
• Exit select settings (see Exit select settings on page 67);<br />
• Mailing/Franking settings (if installed) (see Mailing and Franking settings on<br />
page 72);<br />
• Mail Piece Production Control (MPPC) settings (if installed) See the appendix<br />
operator manual Mail Piece Production Control.<br />
If you want to view the job details of the current job, press the<br />
run a test, press the [1x] button.<br />
button. If you want to<br />
59
Envelope settings<br />
In the ‘envelope settings’ menu you can define the envelope properties and switch the<br />
sealing on and off.<br />
5<br />
English<br />
In the top of the screen, three selection buttons are displayed, from which one can be<br />
selected. The selected settings button will be highlighted.<br />
•<br />
Press the<br />
button to select an envelope with closed flap. This means that the<br />
envelopes are fed with closed flap. Use the first button to enter the applicable<br />
dimensions. It is also possible to select ISO standard envelopes or dimensions in<br />
inches (depends on the installation settings). The envelope height can be set between<br />
90 mm (3.5 inch) and 162 mm (6.38 inch). Use the second button to enter the<br />
weight of the envelopes in grams. Weight information is used for selecting exit settings<br />
Exit select settings on page 67.<br />
Use the<br />
• Press the<br />
button to define wether the envelopes have to be sealed or not.<br />
button to select an envelope with open flap. This means that envelopes<br />
are fed with open flap. Use the upper button to enter the applicable dimensions.<br />
The envelope height can be set between 90 mm (3.5 inch) and 162 mm (6.38 inch).<br />
It is also possible to select ISO standard envelopes or dimensions in inches (depends<br />
on the installation settings). Use the second button to enter the flap height. The<br />
flap height can be set between 32 mm and the envelope height minus 32 mm (1.26<br />
inch).<br />
• Press the button to define a job without inserting the documents in envelopes<br />
(no envelope mode). This can be useful for jobs, where documents only have to be<br />
sorted and/or folded. In this case, the exit will be set to the stacker.<br />
60
Document settings<br />
In the ‘document settings’ menu you define the document formats and the number of<br />
documents that must be picked from the different feeders.<br />
•<br />
Press the<br />
button to set the number of sheets for the different feeders.<br />
5<br />
• Press the button to select a feeder. The selected feeder is highlighted.<br />
• You can feed more than one document for your document set from each feeder. This<br />
is called Multi Feed.<br />
Press the arrows to change the number of sheets that must be picked from the<br />
highlighted feeder. When the number of documents is 0, the selected feeder will be<br />
deselected.<br />
English<br />
When a feeder is set to daily mail the number of documents is<br />
always 1 and can not be set in this menu.<br />
The maximum number of sheets in a set is 25. When folding is used<br />
the maximum set thickness is 8 sheets in letter fold and 10 sheets<br />
(80 gr./m2) in single fold.<br />
61
•<br />
Press the button to enter the document height. The height or the ISO format of<br />
the document will be displayed next to the relevant feeder.<br />
5<br />
English<br />
• Press the button to select a feeder. The selected feeder is highlighted.<br />
•<br />
Press the button to show a numeric keypad to enter the exact dimension of the<br />
document.<br />
Dimensions can be entered in mm, inches or as standard ISO paper dimensions<br />
(depending on installation settings). The system will not allow entering dimensions<br />
out of technical ranges. The document size can be set between 90 mm (3.54 inch)<br />
and 356 mm (14 inch).<br />
• The default document size setting of a new job is 297 mm (11.7 inch).<br />
•<br />
Press the button to link two feeders. This function enables to fill two adjacent<br />
feeders with the same documents. When the first feeder is empty, the system<br />
automatically swaps to the other feeder.<br />
• Press the<br />
button to select two adjacent feeders. The selected feeders will be<br />
highlighted. Press the button to link two highlighted feeders. The will be displayed<br />
between the selected feeders.<br />
When linking two feeders, the program will automatically apply the<br />
number and format of the documents of the lowest feeder to the<br />
other feeder.<br />
62
When a feeder is selected for reading, the feeder below can not be<br />
linked to this reading feeder. The reading feeder can be linked to<br />
a feeder above when it is not selected for selective feeding.<br />
•<br />
Press the button to enter the setting of the daily mail function.<br />
This function enables to process documents or sets of documents, which can not be<br />
processed automatically (see Processing Daily Mail on page 46). The upper feeder<br />
is automatically selected.<br />
• Press the button to enable the daily mail function. The icon appears behind<br />
the upper feeder. If you press the button again the daily mail function will be<br />
disabled.<br />
5<br />
The daily mail function is only available when reading is not<br />
activated. When daily mail is set, the links to the daily mail feeder<br />
will be deselected automatically.<br />
English<br />
When the daily mail function is selected DFC is not available.<br />
• Press the button to enter the document weights for all selected feeders. Weight<br />
information is used for selecting exit settings Exit select settings on page 67.<br />
Reading settings (option)<br />
For a full function description of reading, see Reading Introduction on page 87. In the<br />
‘reading settings’ menu it is possible to enable or disable the Optical Mark Recognition<br />
(OMR) or Barcode Reading (BCR) function and to adjust the basic settings. The first ‘reading<br />
settings’ menu covers the following settings:<br />
63
Code type: default is the setting ‘none’: reading is disabled. Change the setting with<br />
•<br />
the button. The following codes are possible:<br />
- 1-track OMR<br />
- BCR for reading barcodes (1D as well as 2D barcodes)<br />
- Flex 1-9 for reading customer specific codes (only if flex dongle is installed)<br />
• Reverse reading: press the<br />
reading).<br />
button to set reverse reading on or off (see Reverse<br />
5<br />
• Read from feeder: press the<br />
button to select a feeder to activate reading on.<br />
By pressing the [Next] button the next reading settings menu appears.<br />
English<br />
In this menu you can define the location and the width of the OMR code. The position from<br />
top should be between 15 mm (0.6 inch) and the document length minus 20 mm (0.8 inch).<br />
If you press [Next], you can load an OMR sheet to verify the OMR settings. The system<br />
processes the OMR sheet and shows the read marks. The information button shows the<br />
interpretation of the marks.<br />
If you selected BCR, you can update your barcode definition with a configuration sheet or<br />
load a sample BCR sheet to learn the BCR location. The system processes the BCR sheet<br />
and shows the read code. The information button shows the interpretation of the code.<br />
By pressing the [Next] button the next reading settings menu appears.<br />
64
• Stop on misread: define if the system should stop or not when a code is misread. In<br />
case of “yes”, the system stops after a misread. The incorrect set is diverted. After<br />
resetting the system, the final part of the set is also diverted and the system starts<br />
processing again. The diverted set should be checked by the operator.<br />
When “stop on misread” is set to “no”, the system does not stop after a misread.<br />
The incorrect set is diverted. The final part of the set is also diverted and then the<br />
system starts processing again. After 5 misreads in a row, the system stops and<br />
an error code is generated.<br />
• Stop on sheet overflow: define if the system should stop or not when a set exceeds<br />
the maximum number of sheets, as defined at the "Max. sheets setting". In case of<br />
“yes”, the system stops when the number is exceeded. The incorrect set is diverted.<br />
After resetting the system, the final part of the set is also diverted and the system<br />
starts processing again. The diverted set should be checked by the operator.<br />
When “stop on sheet overflow” is set to “no”, the system does not stop when a set<br />
exceeds the maximum number of sheets. The incorrect set is diverted. The final part<br />
of the set is also diverted and then the system starts processing again.<br />
• Max. sheets: use the arrow buttons to select the maximum amount of sheets in the<br />
set of documents.<br />
The maximum number of sheets in a set is 25. When the number<br />
of sheets exceeds 8 or 10, depending on the fold, the document<br />
can not be folded anymore. In this case, the maximum length of<br />
sheets is 148 mm for a C5/6 envelope. Also make sure that the fold<br />
is set to No fold. Ignoring this will certainly lead to stoppages.<br />
When the maximum number of sheets exceeds the programmed<br />
maximum number of sheets in a set, the system stops and error<br />
VS:110 will be displayed. After removing the set and pressing the<br />
[Reset] button, the system will start and repeat the process until<br />
an insert or divert mark is encountered, error VS:135 (final set part)<br />
will be displayed.<br />
5<br />
English<br />
By pressing the [Next] button the next reading settings menu appears.<br />
Select if an envelope leaves from the stacker if an exit code is read (‘on mark’) or if no exit<br />
code is read (‘on space’). For the side exit the opposite applies.<br />
65
Double feed control settings<br />
In the ‘DFC settings’ menu you can set Double Feed Control (DFC) for the different feeders<br />
on or off.<br />
5<br />
English<br />
• Press the button to select a feeder.<br />
•<br />
Press the button to switch the DFC on or off.<br />
When switched on, the icon is displayed. When a job is started, the first document<br />
taken per feeder is used for a reference measurement.<br />
When a document is exceeding that reference thickness an error will be displayed.<br />
• Press the button to set Continue on double on or off. If Continue on double is on<br />
(“yes”), the machine will not stop if two sheets are feeded instead of one. The<br />
document-set containing the double sheets will be diverted.<br />
When Daily mail is selected, the DFC will be switched off<br />
automatically for the upper (Daily mail) feeder.<br />
66
Job name<br />
It is possible to store the job with a meaningful job name, to easily recognize the job. This<br />
name is displayed at job selection. Enter a job name with the alpha-numeric keypad.<br />
5<br />
• Use the button to clear a character left of the cursor position (backspace).<br />
• Use the [CE] button to clear all entered characters and start again.<br />
Exit select settings<br />
English<br />
In the Exit select settings menu it is possible to change the sorting of filled envelopes that<br />
leave the system.<br />
You can choose between three or eight (if the optional reading is installed) selection criteria.<br />
The screen dump shows the possible settings for an OMR job.<br />
Possible exit settings are:<br />
•<br />
Select the<br />
button to set a preferred exit.<br />
Change the setting using the button. The following settings are possible:<br />
- Stacker: if you select stacker you can choose to let the system continue on the<br />
side exit if the stacker is full;<br />
- Side exit.<br />
67
•<br />
Select the<br />
button if you want to create batches.<br />
5<br />
English<br />
Alternate batches of inserted envelopes are stacked or leave from the side exit<br />
depending on the preset counter. The batch counter can be set from 1 to 500 in steps<br />
of one inserted envelop per exit. Default the batch counter is set to 50.<br />
•<br />
Select the<br />
thickness.<br />
button if you want to select the exit depending on document-set<br />
Use this menu to select the exit for document-sets that are too thin or too thick. At<br />
the inserter the thickness is measured and compared to a reference thickness.<br />
Depending on the selection in this menu the envelopes leave from the stacker or the<br />
side exit. The first document-set determines the reference thickness.<br />
68
•<br />
Select the<br />
button if you want to select the exit depending on reading code.<br />
The screen shows the selected exit if no exit code is read (space) or if an exit code<br />
is read. The selection is set in the reading settings, see 3.9.5 ”Reading Settings<br />
(Option)” on page 41. Use the button to set the exit mark toggle function to YES<br />
or NO. When this function is set to NO and depending on how it is programmed in<br />
the reading exit settings menu, envelopes leave from the stacker (or side exit) when<br />
an exit code is printed. When no exit code is printed the exit will change and envelopes<br />
leave from the side exit (or stacker). When this function is set to YES the exit will<br />
change from the stacker to the side exit and vica versa each time an exit code is<br />
printed.<br />
•<br />
Select the button if you want to select the exit depending on if the envelopes<br />
are closed (sealed) or open (not sealed).<br />
5<br />
English<br />
This selection is only possible with reading: no mark (space) means sealed, a mark<br />
means not sealed.<br />
69
•<br />
Select the<br />
filled envelope.<br />
button if you want to select the exit depending on the weight of the<br />
5<br />
English<br />
Use the button to select which envelopes will leave from the stacker and which<br />
from the side exit. The reference weight is calculated depending on the envelope<br />
weight and the weight of the inserted document-set. The weight of the inserted<br />
document-set depends on the amount of sheets (reading). To change the default<br />
reference weight, press the<br />
•<br />
Select the<br />
button.<br />
button if you want to create batches depending on the reading codes.<br />
The batch counter can be set from 1 to 500 in steps of one inserted envelop per exit.<br />
Default the batch counter is set to 50. The preferred exit will change if the batch is<br />
complete or an exit code changes. Use the button to set the exit mark toggle<br />
function to YES or NO. When this function is set to NO and depending on how it is<br />
programmed in the reading exit settings menu, envelopes leave from the stacker (or<br />
side exit) when an exit code is printed. When no exit code is printed the exit will<br />
change and envelopes leave from the side exit (or stacker). When this function is set<br />
to YES the exit will change from the stacker to the side exit and vica versa each time<br />
an exit code is printed.<br />
70
•<br />
Select the button if you want to select the exit depending on the weight of the<br />
filled envelope and reading codes.<br />
5<br />
Use the button to select which envelopes will leave from the stacker and which<br />
from the side exit. The reference weight is calculated depending on the envelope<br />
weight and the weight of the inserted document-set. To change this default reference<br />
weight, press the button. Press the button to see which exit the system chooses,<br />
depending on the weight and the reading codes.<br />
English<br />
71
Mailing/Franking settings (option)<br />
If this machine is connected to a mailing/franking machine, this option allows you to select<br />
the franking mode.<br />
5<br />
English<br />
Use the<br />
button to choose between:<br />
• Pass through: franking off<br />
• Franking: the mailing (franking) system will print/frank the envelopes according to<br />
the local mailing (franking) system settings. When you press the [Ok] button, you<br />
can choose a franking job from the franking machine.<br />
• Inserter: the mailing (franking) system will print/frank the envelopes according to the<br />
size data communicated by the inserter. When you press the [Ok] button, you can<br />
enter the weight of single documents and envelopes and the envelope width.<br />
To link a mailing (franking) job to the inserter job, use the arrow buttons to select a<br />
job. If no link is required, select ‘Current job’.<br />
Refer to the appendix for an extensive description of the mailing (franking) option.<br />
72
Mail Piece Production Control settings (option)<br />
For Mail Piece Production Control settings, see the appendix operator manual Mail Piece<br />
Production Control.<br />
5<br />
English<br />
73
6<br />
Advanced Settings<br />
What are Advanced Setting<br />
Advanced Settings are all settings that can be found under the Display Settings Menu and<br />
the Supervisor Menu.<br />
6<br />
English<br />
The Display Settings menu contains the following settings:<br />
• Set screen brightness (see Changing the Display Settings on page 75);<br />
• Set interface volume (see Changing the Display Settings on page 75);<br />
• Change screen orientation (see Changing the Display Settings on page 75).<br />
The Supervisor Menu contains the following settings:<br />
74
• System info (see Viewing System info and Software versions);<br />
• Options (see Activating an option on page 79);<br />
• Test (see Test menu on page 80);<br />
• Online Services (see Start-up Online Services on page 103);<br />
• Job menu (see What is a job);<br />
• Read config sheet (see Reading a configuration sheet on page 92);<br />
• Job settings (see Job Settings on page 81).<br />
Opening the Advanced Settings<br />
If you want to see or edit any of the Advanced Settings:<br />
1. From the home menu, press the [Menu] button.<br />
6<br />
English<br />
2. Choose if you want to see the Display Settings or the Supervisor Menu. Press the<br />
according button to enter that menu. Please note: to access the Supervisor Menu,<br />
enter the PIN-code 2546. After entering the correct pin code the Supervisor Menu<br />
appears.<br />
Changing the Display Settings<br />
From the Display Settings screen, you can change various settings.<br />
To change the Display Settings:<br />
1. Use the arrows next to the brightness symbol to increase or decrease the display<br />
brightness.<br />
75
2. Use the arrows next to the volume symbol to increase or decrease the interface volume.<br />
3. Press the button to toggle the orientation of the display screen. This function is<br />
useful in case of applications when the operator is working on the backside of the<br />
system.<br />
6<br />
English<br />
76
Viewing System info and Software versions<br />
From the Supervisor menu, you can view the System info and Software versions.<br />
Proceed as follows:<br />
1. From the Supervisor menu, press the [System info] button.<br />
The System info menu opens.<br />
Here, the following information is shown:<br />
- Flex certificate - this option is used for OMR;<br />
- Counter since last visit - the counter value since the last service visit;<br />
- Last error - The last error generated by the system.<br />
6<br />
English<br />
2. Press the [Software versions] button to view information on the version of the installed<br />
software.<br />
The ‘software versions’ menu opens.<br />
This screen shows the software versions that are present in the total system, see<br />
example.<br />
Pressing the [i] button shows the subversion revision numbers instead of the standard<br />
software version numbers. Generally these are used for development reasons, but<br />
sometimes it’s convenient to have them for trouble shooting reasons.<br />
77
What are licensed options<br />
The Option menu shows the following information:<br />
6<br />
English<br />
• Chip ID<br />
• System ID<br />
• Installed options.<br />
These software options are enabled using license codes. These license codes,<br />
together with the identification number of the machine enable the relevant options.<br />
The enabled and available software options are displayed in this screen. Contact<br />
your dealer for information about these license codes.<br />
The system supports the following licensed options:<br />
- Advanced reading (see Reading Introduction on page 87);<br />
- OMR 1 track (see OMR Code Description on page 95);<br />
- OMR 2 track (see OMR Code Description on page 95);<br />
- BCR 1D (see BCR Code Description on page 90);<br />
- BCR 2D (see BCR Code Description on page 90);<br />
- Flex reading (see Reading Introduction on page 87);<br />
- insert'n Frank / insert'n Mail (INF) (see Mailing and Franking settings on page<br />
72);<br />
- MPPC (see the operator manual 'Mail Piece Production Control');<br />
- OLS (see Online Services introduction on page 102).<br />
78
Activating an option<br />
To add a licensed option:<br />
1. In the Options screen, press the [Add] button.<br />
6<br />
2. Use the keypad to enter the license key code that you received from the supplier to<br />
activate the relevant option on this machine.<br />
If needed, use the arrow keys to navigate through the entered characters.<br />
3. Press the [OK] button to add the licensed option.<br />
The system will now verify the license key.<br />
4. Switch the system off and on.<br />
English<br />
79
Test Menu<br />
The Test menu can be used to check the system, reset all photocells and execute reading<br />
tests.<br />
The menu consists of the following functions:<br />
6<br />
English<br />
• Diagnostics - Use this function to check if all motors, clutches and sensors are<br />
correctly connected. This test derives the status of the actuators and clutches by<br />
briefly activating the actuators and then measuring the current (see Running<br />
diagnostics on page 80);<br />
• Reset photocells - Use this function to calibrate all photocells (see Resetting photocells<br />
on page 113);<br />
• OMR test - Use this function to test the OMR functionality (see Running an OMR test<br />
on page 99);<br />
• BCR test - Use this function to test the BCR functionality (see Running a BCR test<br />
on page 93).<br />
Running diagnostics<br />
To run a diagnostics of the system:<br />
1. In the Test menu, press the [Diagnostics] button. The Hardware test screen appears.<br />
2. Remove all documents and envelopes and close all covers before starting the diagnose.<br />
80
3. In the Hardware test menu, press the [Start diagnose] button.<br />
When the test is finished, the Status report is shown, showing a list of all problems<br />
found during diagnostics.<br />
4. If no problems were found, press the [OK] button.<br />
If problems have been found that can not be solved, call your service organization.<br />
Job Settings (Supervisor)<br />
Job settings normally will be changed by a service engineer only.<br />
Therefore first consult the supplier’s Helpdesk before changing any<br />
settings. Changes to the job settings can result in malfunctioning<br />
of jobs.<br />
6<br />
English<br />
81
The "job settings" menu (supervisor) can be opened from the "supervisor menu". From this<br />
menu system parameters can be set.<br />
The "job settings" menu shows the following functions:<br />
6<br />
English<br />
• Flap Closer - Use this option to improve the envelope sealing process by changing<br />
the flap closer offset for one or more defined jobs (see Changing the Flap Closer<br />
Offset on page 82);<br />
• Envelope clearing - Use this option to define when envelopes are cleared from the<br />
system (see Changing the Envelope Clearing on page 83);<br />
• System output - Use this option to change the output mode for one or more defined<br />
jobs (see Changing the System Output on page 83);<br />
• Document offset - Use this option to change the document offset for one or more<br />
defined jobs (see Changing the Document Offset on page 84);<br />
• BRE offset - Use this option to change the BRE offset for one or more defined jobs<br />
(see Changing the BRE Offset on page 85).<br />
Flap Closer Offset<br />
To change the flap closer offset for a selected job:<br />
1. Use the arrows next to "Select job" to select for which job (Job 1-25 or Auto) you want<br />
to make the changes.<br />
82
2. Use the arrows next to "Flap Closer offset" to change the Flap closer offset for the<br />
selected job.<br />
The offset can be varied between -20 and 20. If for example the offset is set to +10<br />
the sealing process will be activated 10 pulses later than initially.<br />
3. Press the [Save] button to save the changes to the selected job.<br />
Envelope Clearing<br />
6<br />
To define when envelopes are cleared:<br />
1. Use the next to "Job selection" to set wether the envelopes should be cleared<br />
(always, never or only after asking) when the operator selects a job.<br />
English<br />
2. Use the next to "Edit job" to set wether the envelopes should be cleared (always,<br />
never or only after asking) after the operator has edited a job.<br />
3. Press the [OK] button to accept the changes.<br />
System Output<br />
To change the output mode for a selected job:<br />
1. Use the arrows next to "Select job" to select for which job (Job 1-25 or Auto) you want<br />
to make the changes.<br />
83
6<br />
English<br />
2. Use the next to Output to change the Output mode for the selected job.<br />
Mode 1 focuses on the versatility of paper parameters (paper thickness; document<br />
length), i.e. correct operation under even extreme paper conditions.<br />
Mode 2 is the default mode, and focuses on high speed and is achieved as follows:<br />
- During multi feed (more than one page from one feeder) the movement on the<br />
collator is minimal. In mode 1 the divert unit will be used for completing the<br />
collating process.<br />
- During the transportation of a set from the collator into the powerFold, the next<br />
set is going into the collator already. This results in temporary overlapping sets<br />
with two different transport directions. In mode 1 the set has left the collator<br />
completely before the next set enters the collator.<br />
- Anticipation call for the envelope is used. That means that a (folded) set is<br />
leaving the powerFold already before the envelope is ready on the insert position.<br />
In mode 1 the envelope is on the insert position already before the set leaves<br />
the powerFold.<br />
It is advised to use Mode 1 with a paper thickness of 65 g/m2 or less, a document<br />
length of 12 inch (305 mm) or higher, and for situations where Mode 2 is not functioning<br />
properly. In all other cases Mode 2 is advised.<br />
3. Use the next to BRE with window to select if the reply envelope has a window or<br />
not.<br />
This option is only available for Output mode 2.<br />
4. Press the [Save] button to save the changes to the selected job.<br />
Changing Document Offset<br />
To change the document offset for a selected job:<br />
1. Use the arrows next to "Select job" to select for which job (Job 1-25 or Auto) you want<br />
to make the changes.<br />
84
2. Use the arrows next to "Document offset" to change the Document offset for the<br />
selected job.<br />
The vertical transport of documents fed by the various feeders is arranged in such a<br />
way that the documents are partially overlapping each other. This overlapping scheme<br />
ensures that the documents are properly aligned in the collator area.<br />
In the “document offset” menu you can set the extend to which the documents are not<br />
overlapping each other, i.e. the document offset value. The default value is 50 mm<br />
(2.0 inch). The document offset can be varied between 20 mm (0.8 inch) and 250 mm<br />
(9.8 inch).<br />
3. Press the [Save] button to save the changes to the selected job.<br />
Changing BRE Offset<br />
To change the BRE offset for a selected job:<br />
1. Use the arrows next to "Select job" to select for which job (Job 1-25 or Auto) you want<br />
to make the changes.<br />
6<br />
English<br />
85
6<br />
English<br />
2.<br />
Use the<br />
button next to BRE with window to set the BRE offset to On of Off.<br />
If a document is longer than the set address fold but shorter than the envelope height,<br />
this document sometimes will be unnecessarily folded. Under certain conditions this<br />
document can be prevented from being folded. This can be implemented with the<br />
menu “BRE offset” (BRE means Business Reply Envelope).<br />
For each of the jobs 1 through 25 and Automatic an offset can be switched on or off<br />
using the button.<br />
In the case of offset “on” the last document that was added to the set will be shifted<br />
from the rest of the set (offsetting). This document will be held back during a certain<br />
distance. This means that the trailing edge of this upper document leaves the collator<br />
at last. This document will not be folded. During the insertion into the envelope the<br />
documents of the set will be realigned.<br />
The conditions are:<br />
- The feeder that supplies this upper document (BRE) is set to one document per<br />
set (no multi feeding).<br />
- The document directly beneath this document must be at least 60 mm (2.4 inch)<br />
longer than the BRE.<br />
- The upper document must be longer than the set address fold.<br />
- The folding mode is either V-fold or C-fold (no Z-fold).<br />
- The upper document must be shorter than the envelope height.<br />
The whole BRE offset is based on friction between documents within a set. Therefore<br />
it is necessary to make use of these conditions to reduce the risk of bad transporting,<br />
folding and inserting.<br />
It is possible to use the BRE offset for a BRE and an enclosure<br />
(card) in one set. The extra condition is that this enclosure is equal<br />
to or smaller than the set address fold and should be placed direct<br />
underneath the BRE in the set.<br />
3. Press the [Save] button to save the changes to the selected job.<br />
86
7<br />
Reading<br />
Introduction<br />
The reading option allows the system to read special codes that are printed on<br />
the documents. The code contains information about the processing of the documents.<br />
The system can read the following code types:<br />
• 1-track OMR: Optical Mark Recognition<br />
• 2-track OMR<br />
7<br />
• BCR: BarCode Reading, 1D<br />
English<br />
• Barcode reading 2D<br />
• Flex 1-9<br />
Depending on the settings, the code tells the system if:<br />
• The document set is complete<br />
• Enclosures must be added to the set<br />
• The system must stop<br />
• The set is complete (no pages are missing)<br />
• The envelopes are transported to the side exit or to the stacker<br />
87
The sheets with the printed code are placed in a feeder. Depending on the programmed<br />
code, the other feeders can be used as selective feeders to add enclosures.<br />
In case of a Z-fold, the address has to be printed on the last page of the set (see Document<br />
orientation on page 89 for the code position). With the other fold types, the first sheet of a<br />
set always contains the address. A full length code is printed on every sheet of a set. The<br />
code must appear at the same location on every page regardless of the actual code length.<br />
The code on the last sheet of the set contains the insert instruction (unless reverse reading<br />
is used, see Reverse reading on page 88). The other sheets carry the accumulate<br />
instruction. If a parity check is used with OMR, this is checked on each sheet. If the “page<br />
n of m” code is used with BCR, the set will be inserted when n equals m.<br />
General requirements for printing codes<br />
7<br />
English<br />
If you print documents for reading:<br />
• Make sure the ribbon or toner quality is sufficient.<br />
• Print the code in black.<br />
• Codes on the same sheet must have equal intensity.<br />
• Print the code at the same position on every sheet.<br />
• Be aware of "background noise". The reading function can be disturbed by: color<br />
changes on the form, background design and a logo or copy on the opposite side of<br />
the sheet that will bleed through.<br />
• For matrix printers near letter quality (NLQ) printed characters are preferred to obtain<br />
maximum blackness (double strike).<br />
For more information on how to print a reading code on your<br />
document, contact your service organization.<br />
Reverse reading<br />
Reverse reading means that the insert mark (OMR) is on the first page of the set. The<br />
system will detect the end of a set by detecting the first page of the next set. In case of<br />
BCR use the Customer ID to complete a set. If the ID changes, the set is inserted.<br />
When reverse reading is used, the reverse reading symbol is shown in the "Job info" screen.<br />
In case the feeder runs empty, the last set is still on the collator because the beginning of<br />
the next set could not be detected. In this case the feeder empty message contains<br />
an [Ignore] function. By pressing the [Ignore] button the set on the collator will be inserted.<br />
Because of the feeding and collating principle, reverse reading has the following limitations:<br />
• The last mark of the code should be printed maximally 85 mm (3.3 inch) from the<br />
top.<br />
• Enclosures and selective enclosures cannot be handled.<br />
When a versaFeeder module is added to the system configuration,<br />
enclosures and selective enclosures can be handled with reverse<br />
reading.<br />
88
Document Orientation<br />
Switch on the reading function and set the position of the reading marks as described in<br />
BCR Code Description and OMR Code Description.<br />
Document orientation:<br />
7<br />
English<br />
89
BCR Code Description<br />
Position of the code on the document.<br />
7<br />
English<br />
Minimum line thickness of a bar: 0.25 mm (0.01 inch)<br />
The thickness ratio of thick bars versus thin bars: 2.2<br />
The white area in the picture shows the limits where the code can be printed.<br />
BCR license types<br />
There are two BCR license types:<br />
• Basic<br />
• Advanced<br />
90
BCR basic license<br />
For the BCR basic license the following functions are available:<br />
• Page N of M: as long as N is below M, the document set is not complete. As soon<br />
as N=M, the set is complete and will be inserted into an envelope.<br />
• Insert/Accumulate: defines when a document set is complete and must be inserted<br />
into an envelope.<br />
• Customer ID: BCR uses the Customer ID code to complete a set. This is only possible<br />
with reverse reading. If the ID changes, the set is inserted.<br />
At least codes for accumulate and insert are required.<br />
BCR advanced license<br />
For the BCR advanced license the following functions are available:<br />
• The basic functions (page N of M, insert/accumulate, Customer ID)<br />
• Sheet sequence - Every sheet has a number, regardless of the document set it is<br />
part of. If a sheet is missing, an error is generated.<br />
• Group sequence - Every document in a set has the same group number. If one<br />
document set is missing, an error is generated.<br />
• Divert (Divert & Continue) - The set will be diverted and the system continues.<br />
• Stop (Divert & Stop) - The set will be diverted and the system stops indicating error<br />
(VS:113 - Reading stop - Stop mark read).<br />
• Selective feed - If the system reads the command, an enclosure from the enclosure<br />
feeder is added to the set. This function is printed on the last sheet of a set. It is also<br />
possible to add an enclosure from the versaFeeder.<br />
• Sealing control - Determines if envelopes are sealed or not.<br />
• Present on Deck & Continue - The set leaves the system from the upper unit. The<br />
system does not stop processing. The envelopes are not sealed.<br />
• Present on Deck & Stop - The set leaves the system from the upper unit. The system<br />
stops. The envelopes are not sealed.<br />
• Exit selection - Determines if the envelope is transported to stacker or to the side<br />
exit.<br />
7<br />
English<br />
91
Reading a configuration sheet (BCR only)<br />
If you want to set the code definition for BCR, you can use a BCR configuration sheet.<br />
To read a configuration sheet:<br />
1. In the Supervisor menu, press the [Read config sheet] button.The Barcode<br />
configuration sheet menu appears.<br />
7<br />
English<br />
2. Load the barcode configuration sheet in the top feeder.<br />
3. Press the [Run sheet] button.The BCR settings screen appears.<br />
92
4. In the BCR settings screen, confirm that all settings are read correctly.<br />
Note that this screen consists of two parts. Use the arrows at the bottom of the screen<br />
to navigate between the two parts of this screen.<br />
5. Press the [Back] button to leave the BCR settings menu.<br />
6. Press the [Save] button to save the BCR settings that were read from the configuration<br />
sheet.<br />
Saving these settings will change, depending on the chosen code<br />
type, the barcode definition for jobs where 1D or 2D BCR (if<br />
available) is used.<br />
Running a BCR test<br />
To run a BCR test:<br />
7<br />
Before running a BCR test, select a job that uses BCR reading.<br />
1. In the Test menu, press the [BCR test] button. The BCR test menu appears.<br />
English<br />
93
2. Press the [Test] button to start the BCR test. After the test is finished, the Result<br />
screen appears.<br />
7<br />
English<br />
3. In the Results screen, evaluate the test results.<br />
Use the button to see the BCR info, or use the button to cycle through all<br />
BCR codes that were detected during the test. Select the one you want to use for<br />
reading.<br />
4. Press the [Back] button to return to the BCR test menu.<br />
94
OMR Code Description<br />
Position of the code on the document:<br />
7<br />
English<br />
Minimum line thickness of a mark: 0.2 mm (0.008 inch)<br />
Default the first mark from the top is set to: 100 mm (3.9 inch). This parameter is set in the<br />
job settings.<br />
The code must have a consistent number of marks on every page.<br />
The white area in the picture shows the limits where the code can be printed.<br />
OMR license types<br />
There are two OMR license types:<br />
• Basic<br />
• Advanced<br />
95
OMR basic license<br />
7<br />
For the OMR basic license the following functions are available:<br />
• Start mark: indicates the start of the code.<br />
• Insert/Accumulate: defines when a document set is complete and must be inserted<br />
into an envelope.<br />
• Parity check: by adding a parity mark the reading code can be checked. The sum of<br />
the marks must be even.<br />
• Safety Mark: is used as an extra security (only 1-track OMR). With skewed paper<br />
the reading head can miss part of the reading code. In these situations the safety<br />
mark is not read, and the system will give an error. The safety mark also indicates<br />
the end of the reading code. This mark must always be present on the document if<br />
it is part of the code definition.<br />
English<br />
The minimum code is one mark in one line (insert). However for reliability it is advised to<br />
use at least 2 marks. The first line is the start mark. A mark printed on the second line<br />
means insert. No mark on the second line means accumulate.<br />
In some cases, on request of the customer, the reading of the basic<br />
commands can be reversed by the service organization. This means<br />
that no mark is interpreted as an insert command and that for the<br />
accumulate command a mark has to be printed.<br />
96
OMR advanced license<br />
For the OMR advanced license the following functions are available:<br />
• The basic functions (Start, Insert, Parity, Safety)<br />
• Divert (Divert & Continue) - The set will be diverted and the system continues.<br />
• Stop (Divert & Stop) - The set will be diverted and the system stops indicating error<br />
(VS:113 - reading stop - Stop mark read).<br />
• Selective Feed (feeder 1-6 and the versaFeeder) - If the system reads the command,<br />
an enclosure from the enclosure feeder is added to the set. This function is printed<br />
on the last sheet of a set.<br />
• Exit control - Determines if the envelope is transported to stacker or to the side exit.<br />
• Present on deck - The set leaves the system from the upper unit. The system does<br />
not stop processing. The envelope is not sealed.<br />
• Present on deck and stop - The set leaves the system from the upper unit. The system<br />
stops. The envelope is not sealed.<br />
• Sealing control - Determines if envelopes are sealed or not. If a mark is printed, the<br />
envelope is not sealed.<br />
• Sequence Check - Sheets in a stack can accidentally get out of sequence or can be<br />
missing. This can be detected by the sequence check. Each sheet has a binary code<br />
that is a part of the reading code. Depending on the application one, two or three<br />
marks are used by sequence check.<br />
7<br />
English<br />
97
OMR general remarks<br />
General remarks:<br />
• In case of OMR the marks must always be used in the sequence as shown in the<br />
figure.<br />
7<br />
English<br />
• If a function is suppressed the following function will move upwards one line.<br />
• The mark definition is a service setting.<br />
98
An Example of OMR Code<br />
In the figure the legend for the following example is shown. In this example, a set of 8<br />
sheets with one selective feed and three sequence check marks is shown.<br />
• The first position is used for the start mark which must be printed on every sheet.<br />
• The second mark position is used for the insert/accumulate command. A printed<br />
mark means insert, no mark means accumulate. Therefore the mark is printed on<br />
the last sheet of the set.<br />
• Position 3 is reserved for selective feed from the enclosure feeder. Print a mark on<br />
position 3 when a selective feed from the enclosure feeder is required. The marks<br />
are printed on the last sheet of the set.<br />
• Position 4, 5 and 6 are used for the sequence check marks. In this case a three mark<br />
sequence check is used.<br />
Running an OMR test<br />
To run an OMR test:<br />
7<br />
English<br />
Before running an OMR test, select a job that uses OMR reading.<br />
1. In the Test menu, press the [OMR test] button. The OMR test menu appears.<br />
99
2. Press the [Test] button to start the OMR test. After the test is finished, the Result<br />
screen appears.<br />
7<br />
3. In the Results screen, evaluate the test results.<br />
Use the button to see the OMR info.<br />
4. Press the [Back] button to return to the OMR test menu.<br />
English<br />
100
2-track OMR<br />
2-track OMR uses two OMR-tracks to read OMR data. The main purpose of 2-track OMR<br />
is reliability. The marks on the second track are inverted. This means that when a mark is<br />
read at the first track, no mark (space) is expected at the second track.<br />
The insert/accumulate and divert (stop and continue) are combined in two marks. The start<br />
mark and safety mark are not available in 2-track OMR.<br />
The table shows an overview of the OMR-marks for 2-track OMR. A stands for the first<br />
track, B for the second track.<br />
7<br />
English<br />
101
8<br />
Online Services<br />
Online Services<br />
The folding and inserting system can be equipped with Online Services. This option enables<br />
the system to connect to a central server. During the connection data is downloaded to<br />
and uploaded from the system. The system always initiates the connection, it is not possible<br />
to make a connection from outside to the system.<br />
Ask your supplier if this option is available.<br />
8<br />
English<br />
102
Start-up Online Services<br />
To start-up Online Services:<br />
1. From the supervisor menu choose [Online services].<br />
The ‘Online Services’ menu shows the following functions:<br />
- Connection: opens the ‘connection’ menu to create a connection to a central<br />
server and to view the connection history (see Connecting to the server on page<br />
104).<br />
- Messages: opens the ‘messages’ menu to view received messages (see Viewing<br />
messages on page 105).<br />
- Configuration: opens the ‘configuration’ menus to change Online Services<br />
settings (see Configuration Menu on page 107).<br />
2. From the supervisor menu choose [Online services].<br />
8<br />
English<br />
The ‘Online Services’ menu shows the following functions:<br />
- Connection: opens the ‘connection’ menu to create a connection to a central<br />
server and to view the connection history (see Connecting to the server on page<br />
104).<br />
- Messages: opens the ‘messages’ menu to view received messages (see Viewing<br />
messages on page 105).<br />
- Configuration: opens the ‘configuration’ menus to change Online Services<br />
settings (see Configuration Menu on page 107).<br />
103
Connecting to the server<br />
The system makes a connection on fixed times. It is possible that you manually connect<br />
the system to the server.<br />
To connect to the server:<br />
1. Press [Connection] in the Online Services menu. The touch screen shows the<br />
connection menu.<br />
8<br />
English<br />
2. Press [Connect] to manually connect the system to the OLS server.You can view the<br />
status of the connection on the screen. The text on the button changes to Disconnect.<br />
3. Press [Disconnect] to terminate connection with the server.<br />
The ‘connection’ menu shows the following functions:<br />
- History: opens the ‘history’ menu to view the connection history (see Viewing<br />
the history on page 104).<br />
- New messages: this button appears when the system received new messages<br />
and opens the ‘messages’ menu (see Viewing messages on page 105).<br />
Viewing the history<br />
The ‘history’ menu shows previous connections of the system to the server.<br />
To view the history:<br />
1. Press the arrows to select a previous connection.<br />
104
2. Press the button to view details on selected previous connection.<br />
Viewing messages<br />
After pressing Messages in the ‘Online Services’ menu the touch screen will show messages<br />
received from the server. A message has content like a new job or new software.<br />
To view the messages:<br />
1. Press the arrows to select a message.<br />
In case a new job or new software can be installed the Continue button appears.<br />
2. Press the button for more information over a selected message.<br />
8<br />
English<br />
105
Installing a new job or new software<br />
After pressing Messages in the ‘Online Services’ menu the touch screen will show messages<br />
received from the server.<br />
In case a new job or new software can be installed the Continue button appears.<br />
8<br />
To install a new job or new software:<br />
1. Press [Continue].The new job available menu or new software menu appears.<br />
English<br />
2. Press the button for more information on the new job or new software.<br />
3. Press [Install] to install the new job or new software<br />
or<br />
press [Reject] to reject it.After pressing [Install] a confirmation menu opens:<br />
106
4. In case of a new job:<br />
Press the arrows to select a free job number (see Creating a new job).<br />
and<br />
Press [OK] to confirm the selected job number or press Cancel to return to the ‘new<br />
job available’ menu.<br />
5. In case of new software:<br />
Press [OK] to confirm the installation or [Cancel] to return to the new software menu.<br />
After confirming the installation of the new job or new software the ‘message’ menu<br />
appears.<br />
Configuration Menu<br />
After pressing Configuration in the ‘Online Services’ menu the ‘configuration’ menu opens.<br />
Use this menu to modify the OLS settings.<br />
8<br />
English<br />
The menu consists of two submenus containing the following functions:<br />
• Telephone number of server: contact your supplier for the telephone number of the<br />
OLS server.<br />
• Prefix: use this function in case you need to dial a certain number or string to access<br />
an outside line.<br />
• Country: the country from where you are dialing.<br />
• Date and time: current date and time.<br />
• Dial tone detection on/off : This setting is required if no dial tone is heard during<br />
establishing a connection. The default value is on. This setting is relevant to some<br />
PABX telephone switch systems.<br />
• Volume of modem: set the modem volume.<br />
107
Setting the telephone number<br />
To set the number:<br />
1. Press the button next to the telephone number.<br />
8<br />
English<br />
2. Enter the correct number using the numeric keypad.<br />
3. Press [OK] to confirm the new number.<br />
4. Press [OK] to confirm the modified settings and leave the Configuration Menu.<br />
Setting the prefix<br />
To set the prefix:<br />
1. Press the button next to the prefix.<br />
2. Enter the correct prefix using the numeric keypad.<br />
3. Press [OK] to confirm the new prefix.<br />
4. Press [OK] to confirm the modified settings and leave the Configuration Menu.<br />
108
Selecting the country<br />
To select a country from where you are dialing:<br />
1. Use the up and down arrows to select the country from where you are dialing.<br />
2. Press [OK] to confirm the modified settings and leave the Configuration Menu.<br />
8<br />
Entering date and time<br />
To enter the current date and time:<br />
1. Press the button next to the date/time.<br />
English<br />
2. Enter the correct date/time using the numeric keypad.<br />
3. Press [OK] to confirm the new date/time.<br />
4. Press [OK] to confirm the modified settings and leave the Configuration Menu.<br />
109
Setting the dial tone detection<br />
To toggle the dial tone detection:<br />
1. Press the button next to dialtone detection to toggle the dial tone detection on/off.<br />
8<br />
2. Press [OK] to confirm the modified settings and leave the Configuration Menu.<br />
English<br />
Setting the modem volume<br />
To set the modem volume:<br />
1. Press the button next to the volume symbol to increase/decrease the modem<br />
volume. Do not set the volume to zero as the sound of the modem is helpful during<br />
remote assistance.<br />
2. Press [OK] to confirm the modified settings and leave the Configuration Menu.<br />
110
9<br />
Operator Maintenance<br />
Maintenance Schedule<br />
Disconnect the mains power supply before performing any<br />
maintenance.<br />
The user must not attempt to service the appliance beyond that<br />
described in this operator manual. All other servicing must be carried<br />
out by qualified service personnel only.<br />
Please contact your authorized distributor.<br />
Maintenance<br />
frequency<br />
Daily<br />
Weekly<br />
When necessary<br />
Maintenance<br />
• Check the system functions.<br />
• Keep the system in proper condition by removing<br />
dust, paper remains, etc.<br />
The machine is delivered with an extra set of brushes.<br />
To always have one clean set available, it is recommended<br />
to soak one set in water and use the other set.<br />
• When dirty or saturated, clean the brushes of the<br />
envelope sealing or replace them (see Clean and<br />
replace brushes on page 112).<br />
• When dirty or saturated, clean the moistening cloth<br />
or replace if necessary (see Replace moistening<br />
cloth on page 112).<br />
• Clean feed and insert rollers as instructed by the<br />
Service Engineer.<br />
When the display warns about dusty sensors, clean the<br />
applicable sensors. After cleaning, always calibrate the<br />
photocells (see Resetting photocells on page 113).<br />
9<br />
English<br />
111
Clean and replace brushes<br />
When dirty or saturated, clean the brushes of the envelope sealing or replace them as<br />
follows:<br />
1. Moisten the new brushes in water.<br />
2. Remove the brushes one by one by pulling them down from the brush holder.<br />
3. Replace the brushes. Make sure that the studs on the brushes are fitted in the<br />
corresponding holes in the brush holder.<br />
9<br />
Replace or clean moistening cloth<br />
English<br />
When dirty or saturated, clean the moistening cloth or replace if necessary. Proceed as<br />
follows:<br />
1. Remove the sealing liquid reservoir from the system.<br />
2. Remove the cover with moistening cloth B.<br />
3. Remove clips A to remove the moistening cloth.<br />
4. Clean or replace the cloth.<br />
112
Resetting Photocells<br />
To calibrate all photocells:<br />
1. In the Test menu, press the [Reset photocells] button. The Calibrate photocells menu<br />
appears.<br />
2. Remove all documents and envelopes and close all covers before starting the<br />
calibration.<br />
3. In the Calibrate photocells menu, press the [Cal.] button.<br />
When the calibration is finished, the system returns to the Calibrate photocells menu.<br />
9<br />
English<br />
113
10Fault Finding<br />
Error Messages<br />
When an error occurs the display shows a screen showing the following information:<br />
• An indication of the area in which the error occurred<br />
• An error description<br />
• A suggested solution behind the pointing hand<br />
10<br />
English<br />
Press the button to view more information about the occurred error and about the<br />
possible actions to avoid the error from re-occurring.<br />
After solving the problem, press [Reset] to reset the error (the error screen will disappear).<br />
Special Errors<br />
• Reading errors (when reading is enabled)<br />
The document set is diverted. The operator must remove the document set and has<br />
to complete the set manually!<br />
• Technical errors<br />
The display shows a message. The error cannot be solved by operating personnel<br />
and assistance of the service support is needed.<br />
Warning Screen<br />
When a cover is opened, the display shows a warning screen with the message “Cover<br />
open and a suggested solution “Close cover”.<br />
114
Clearing Stoppages<br />
Stoppages can occur in the following areas:<br />
10<br />
1. flexFeed area<br />
2. Collating area<br />
3. powerFold area<br />
4. Lower envelope track<br />
5. Moistening and inserting area<br />
6. Sealing and exit area<br />
7. Envelope hopper<br />
English<br />
115
For clearing of stoppages, five system sections can be opened:<br />
10<br />
English<br />
A - loc, to reach the exit, sealing and inserting area<br />
B - side cover, to reach the lower envelope track<br />
C - powerFold cover, to reach the folding area<br />
D - vertical transport cover, to reach the vertical transport and feeding area<br />
E - collator arm, to reach the collating area<br />
Envelope Hopper<br />
When an envelope gets stuck in this area, remove the envelope as follows:<br />
1. Pull down small lever B. Pins C will come down.<br />
2. Push lever A to the right and hold it. Pins C will go up.<br />
3. Remove the stuck envelope.<br />
116
4. Release lever A.<br />
5. Make sure the separation setting is still correct (see Loading Envelopes on page 19).<br />
6. Return lever B.<br />
7. Press the [Reset] button to reset the error and restart the job.<br />
Exit, Sealing and Inserting Area<br />
When a stoppage occurs in the exit, sealing and inserting area, remove the material as<br />
follows:<br />
1. Open cover A.<br />
2. Remove all material.<br />
3. Close the cover.<br />
4. Press the [Reset] button to reset the error and restart the job.<br />
10<br />
Lower Envelope Track<br />
When a stoppage occurs in the lower envelope track, remove the envelopes as follows:<br />
English<br />
If needed, envelopes can be transported manually to the insert table or lower envelope<br />
track by means of handle C. To transport a mail set manually turn handle B.<br />
1. Open the side cover.<br />
117
2. Pull down the blue handle A.<br />
3. Remove the envelope(s) from the lower envelope track.<br />
4. Close the side cover.<br />
5. Press the [Reset] button to reset the error and restart the job.<br />
powerFold<br />
When a stoppage occurs in the powerFold, remove the documents from the powerFold as<br />
follows:<br />
10<br />
English<br />
1. Push the lower end of the locking handle A to open the powerFold cover B.<br />
2. Remove the documents from the powerFold.<br />
If necessary use the delivered pin to turn the rollers. The pin is<br />
delivered in the spare parts bag. Do not forget to remove the pin<br />
when finished.<br />
3. Close the powerFold cover.<br />
4. Press the [Reset] button to reset the error and restart the job.<br />
118
flexFeed<br />
When a stoppage occurs in the flexFeed, remove the documents from the flexFeed as<br />
follows:<br />
1. Pull the vertical transport hand grip A upward to open the vertical transport cover B.<br />
2. Remove the documents.<br />
3. Close the vertical transport cover B.<br />
4. Press the [Reset] button to reset the error and restart the job.<br />
Collating Area<br />
When a stoppage occurs in the collating area, remove the documents from the collating<br />
area as follows:<br />
10<br />
English<br />
1. Lift and hold the collator arm A.<br />
2. Remove the documents.<br />
119
3. Lower the collator arm.<br />
4. Press the [Reset] button to reset the error and restart the job.<br />
versaFeeder<br />
When a document is blocked in the separation unit the document can be removed as<br />
follows:<br />
10<br />
English<br />
1. Open the release handle for the separation unit D.<br />
2. Remove the documents. If necessary release the feed unit:<br />
- Place your hand on the push down area F.<br />
- Push down the release handle E.<br />
3. Open the feeder.<br />
The documents can be removed from the transportation area and from the rear side<br />
of the separation rollers.<br />
120
4. Close the feed unit:<br />
- Place your hand on the push down area F.<br />
- Push the feed unit down until it locks into place.<br />
5. Press [Reset] at the inserter to reset the error and restart the job.<br />
6. Place release handle D of the separation unit in the closed position.<br />
Operator Troubleshooting<br />
To resolve problems:<br />
1. Write down the error.<br />
2. Try to solve the problem by consulting the troubleshooting table.<br />
3. Switch the inserter off and on again, to verify system operation.<br />
4. When the error still occurs contact your service organization.<br />
When contacting the service organization, you will also be asked<br />
for the last error message and the software version of the installed<br />
software. To determine the software version, see Viewing System<br />
info and Software versions.<br />
Trouble Shooting Table<br />
10<br />
Symptom<br />
The system cannot<br />
be started after<br />
switching on.<br />
System stops with<br />
envelope at insert position<br />
(flap not open).<br />
Possible cause<br />
System not connected<br />
to mains.<br />
Fuse is blown.<br />
A cover is opened.<br />
Envelopes stacked<br />
reversed in the hopper.<br />
Envelope flap sticks.<br />
Wrong envelope type<br />
used (not according<br />
to specifications or<br />
job settings).<br />
Remedy<br />
Connect the system<br />
to the mains.<br />
Replace fuse below<br />
power switch.<br />
Close the covers.<br />
Check envelope feed<br />
adjustments. Place<br />
envelopes correctly in<br />
hopper.<br />
Store envelopes according<br />
to specifications.<br />
Change envelopes<br />
according to specifications.<br />
Reference<br />
-<br />
-<br />
-<br />
Loading Envelopes<br />
on page 19<br />
Envelope settings<br />
on page 60<br />
Envelope settings<br />
on page 60<br />
English<br />
121
10<br />
English<br />
Envelopes are double<br />
fed.<br />
Envelope stops<br />
skewed.<br />
Envelopes are fed irregularly.<br />
Flap is wrinkled and<br />
sometimes not<br />
opened.<br />
Fingers are placed on<br />
top of the envelope.<br />
Envelope separation<br />
not correctly set.<br />
Envelopes not placed<br />
properly in the hopper.<br />
Side guides of the<br />
envelope hopper are<br />
set too wide.<br />
Hopper almost empty.<br />
Separation set too<br />
narrow.<br />
Side guides set too<br />
narrow.<br />
Envelope support not<br />
positioned correctly.<br />
Envelope not within<br />
specifications.<br />
Flap sticks.<br />
Flap curled.<br />
Separation set too<br />
narrow.<br />
Fingers adjusted too<br />
deep into the envelope.<br />
Envelope stops too<br />
early.<br />
Adjust envelope separation.<br />
Check and replace if<br />
needed.<br />
Check side guides<br />
and adjust if needed.<br />
Refill hopper.<br />
Adjust envelope separation.<br />
Check side guides<br />
and adjust if needed.<br />
Reposition the envelope<br />
support.<br />
Check specifications<br />
and change envelopes<br />
if needed.<br />
Store envelopes according<br />
to specifications.<br />
Envelopes stored or<br />
manufactured improperly.<br />
Adjust envelope separation.<br />
Check fingers position,<br />
adjust if needed.<br />
Check envelope stop<br />
position, adjust if<br />
needed.<br />
Loading Envelopes<br />
on page 19<br />
Loading Envelopes<br />
on page 19<br />
Loading Envelopes<br />
on page 19<br />
Loading Envelopes<br />
on page 19<br />
Loading Envelopes<br />
on page 19<br />
Loading Envelopes<br />
on page 19<br />
Loading Envelopes<br />
on page 19<br />
Verifying the Insert<br />
Position on page 49<br />
Verifying the Insert<br />
Position on page 49<br />
Verifying the Insert<br />
Position on page 49<br />
Loading Envelopes<br />
on page 19<br />
Adjusting the envelope<br />
insert fingers on<br />
page 48<br />
Verifying the Insert<br />
Position on page 49<br />
122
System stops while<br />
inserting (stoppage at<br />
the inserting point).<br />
Flap not sufficiently<br />
moistened.<br />
Envelope not always<br />
ejected from sealer.<br />
Fingers not correctly<br />
adjusted.<br />
Inserted document<br />
too long for used envelope.<br />
Envelope throat incorrect.<br />
Envelope glued inside.<br />
Window not glued<br />
properly.<br />
Water level low.<br />
Brushes dry.<br />
Brushes dirty.<br />
Moistening felt dry.<br />
Moistening felt dirty.<br />
Brushes worn out.<br />
Moistening felt worn<br />
out.<br />
Inserted document<br />
too big.<br />
Document not inserted<br />
deep enough.<br />
Sealing area dirty.<br />
Check fingers position,<br />
adjust if needed.<br />
Check fold settings.<br />
Check envelope specifications.<br />
Eliminate faulty envelopes.<br />
Eliminate faulty envelopes.<br />
Check water level,<br />
refill if needed.<br />
Check brushes, replace<br />
if needed by the<br />
extra soaked set.<br />
Check brushes, clean<br />
if needed.<br />
Check the moistening<br />
felt, refill water tray if<br />
needed.<br />
Check the moistening<br />
felt, clean if needed.<br />
Replace brushes.<br />
Replace moistening<br />
felt.<br />
Check fold settings,<br />
adjust if needed.<br />
Check adjustment of<br />
envelope stop position<br />
and fingers.<br />
Clean sealing area.<br />
Adjusting the envelope<br />
insert fingers on<br />
page 48<br />
Fold settings<br />
Verifying the Insert<br />
Position on page 49<br />
-<br />
-<br />
Filling the Sealing Liquid<br />
Reservoir on<br />
page 20<br />
Maintenance Schedule<br />
on page 111<br />
Maintenance Schedule<br />
on page 111<br />
Filling the Sealing Liquid<br />
Reservoir on<br />
page 20<br />
Maintenance Schedule<br />
on page 111<br />
Maintenance Schedule<br />
on page 111<br />
Maintenance Schedule<br />
on page 111<br />
Fold settings<br />
Verifying the Insert<br />
Position on page 49<br />
Maintenance Schedule<br />
on page 111<br />
10<br />
English<br />
123
10<br />
No document fed.<br />
Skewed documents<br />
fed.<br />
Double documents<br />
fed.<br />
Document set not<br />
correctly inserted.<br />
Address not readable<br />
from window<br />
Feeder empty.<br />
Separation set too<br />
wide / too tight.<br />
Side guides set too<br />
narrow.<br />
Side guides set too<br />
wide.<br />
Separation set too<br />
wide.<br />
Insert position not<br />
correct.<br />
Insert fingers not correctly<br />
positioned.<br />
Address position not<br />
correctly defined.<br />
Refill feeder.<br />
Filling the document<br />
feeder tray on page<br />
18<br />
Adjust the separation. Adjusting Document<br />
Separation on page<br />
44<br />
Adjust the side<br />
guides.<br />
Adjust side guides.<br />
Adjusting the side<br />
guides on page 16<br />
Adjusting the side<br />
guides on page 16<br />
Adjust the separation. Adjusting Document<br />
Separation on page<br />
44<br />
Check insert position.<br />
Check insert finger<br />
position.<br />
Check address position.<br />
Verifying the Insert<br />
Position on page 49<br />
Adjusting the envelope<br />
insert fingers on<br />
page 48<br />
Adjusting the address<br />
position on page 47<br />
English<br />
124
11Specifications<br />
Technical Specifications<br />
Model<br />
Type<br />
Theoretical max. speed<br />
Power consumption<br />
Voltage tolerance<br />
Fuse<br />
Approvals<br />
Noise Level<br />
Operating temperature<br />
Humidity<br />
DS-90, M8800, FPi 6600, FD6604<br />
Folder and inserter system for medium office<br />
use.<br />
4300 inserts per hour, depending on application.<br />
100V AC/50Hz/4.0 Amps.<br />
115V AC/50/60Hz/4.0 Amps.<br />
230V AC/50Hz/2 Amps.<br />
100V: +6% / -10%<br />
115V: +6% / -10%<br />
230V: +10% / -10%<br />
100/115 Vac: T 5.0 A, 125 V .<br />
Time lag, 5.0 Amps. rated current, 125 V.<br />
230 Vac: T 3.15 A H, 250 V.<br />
Time lag, 3.15 Amps. rated current, high<br />
breaking capacity, 250 V.<br />
EMC Certificate conform EMC-Directive.<br />
FCC Certificate conform 47CFR, part 15<br />
CB Certificate conform IEC 60950-1<br />
UL Listed I.T.E. (Information Technology<br />
Equipment)<br />
Conform UL-IEC 60950-1, file E153801<br />
Conform NEN-EN-IEC 60950-1 and derivatives.<br />
Hopper and feeder capacity<br />
Envelope hopper<br />
Document feeder tray<br />
High Capacity Document Feeder tray<br />
325 envelopes (80 g/m²)<br />
325 sheets (80 g/m²)<br />
725 sheets (80 g/m²)<br />
Configuration Dimensions<br />
2 stations<br />
3/4 stations<br />
5/6 stations<br />
Height<br />
820 mm (32.3 inch)<br />
820 mm (32.3 inch)<br />
920 mm (36.2 inch)<br />
Width*<br />
460 mm (18.1 inch)<br />
460 mm (18.1 inch)<br />
460 mm (18.1 inch)<br />
Length<br />
1500 mm (59.1 inch)<br />
1500 mm (59.1 inch)<br />
1500 mm (59.1 inch)<br />
Weight<br />
118.5 kg (261 lbs)<br />
124.2 kg (274 lbs)<br />
140.0 kg (308 lbs)<br />
11<br />
* Width with catch tray 750 mm/29.5 inch<br />
Document and Insert Specifications<br />
English<br />
Paper quality<br />
Paper size<br />
Folding capacity<br />
Minimum 60 g/m² (15 lb bond)<br />
Maximum 250 g/m² (62.5 lb bond), when<br />
folded max. 170 g/m² (42.5 lb bond)<br />
Booklets up to approximately 2 mm (0.08<br />
inch)thickness, depending on stiffness<br />
Minimum width: 130 mm (5.1")<br />
Maximum width: 242 mm (9.5"), when folded<br />
230 mm (9.1")<br />
Minimum length: 90 mm (3.5")<br />
Maximum length: 356 mm (14")<br />
V-fold - 10 sheets (max. 80 g/m²)<br />
C-fold/Z-fold - 8 sheets (max. 80 g/m²)<br />
Double V-fold - 4 sheets (max. 80 g/m²)<br />
126
Envelope sizes<br />
Envelope quality<br />
Standard BRE (Business Reply Envelopes)<br />
Minimum 80 g/m² (20 lb bond)<br />
Maximum 120 g/m² (30 lb bond)<br />
Envelope and Document Set Specifications<br />
11<br />
Minimum<br />
size<br />
A<br />
160 mm<br />
6.3”<br />
B<br />
90 mm<br />
3.5”<br />
C<br />
32 mm<br />
1.25”<br />
D<br />
10 mm<br />
0.4”<br />
E<br />
-<br />
F<br />
84 mm<br />
3.3”<br />
G<br />
60 g/m2<br />
English<br />
Maximum<br />
size<br />
248 mm<br />
9.7”<br />
162 mm<br />
6.38”<br />
B-32<br />
B-1.25<br />
75 mm<br />
2.9”<br />
A-12*<br />
A-0.47**<br />
B-6<br />
B-0.2<br />
2.5 mm<br />
0.1”<br />
* Booklets up to approximately 2 mm (0.08 inch) thickness, depending on stiffness<br />
** When insert is more than 1 mm (0.04 inch): A-15 mm / A-0.6 inch<br />
Remarks:<br />
127
• The specification of the paper handling equipment is often wider than that of the<br />
envelopes and documents handled. The condition of material handled will limit the<br />
specified environmental conditions.<br />
• We recommend that materials to be handled are stored at a temperature of 20°C<br />
(68°F) with a relative humidity factor of 50%. If difference in temperature occurs<br />
between store room and mailing area, the material has to be stored near the machine<br />
at least 24 hours before use.<br />
• Self-copying paper may cause rubber parts to wear quicker. The rubber used in this<br />
machine has the best resistance to Wiggins Teape material.<br />
maxiFeeder Specifications<br />
11<br />
English<br />
Model<br />
Type<br />
Theoretical max. speed<br />
Power consumption<br />
Approvals<br />
Height<br />
Width<br />
Length<br />
Weight<br />
Noise level<br />
Operating temperature<br />
Humidity<br />
Feed tray capacity<br />
Document / BRE insert specifications<br />
Model MF-1<br />
High capacity feeder<br />
see Technical Specifications on page 125<br />
Low voltage supplied by the inserter system.<br />
EMC Certificate conform EMC-Directive.<br />
FCC Certificate conform 47CFR, part 15.<br />
UL Listed I.T.E. (Information Technology<br />
Equipment),<br />
conform UL-IEC 60950-1, file: E153801.<br />
Conform NEN-EN-IEC 60950-1 and derivatives.<br />
210 mm (8.3 inch)<br />
285 mm (11.2 inch)<br />
425 mm (16.7 inch)<br />
5.05 kg (11.1 lbs)<br />
see Technical Specifications on page 125<br />
10°C - 40°C (50°F-104°F)<br />
30%-80%<br />
1200 sheets A4 80 gr.<br />
320x Business Reply Envelopes<br />
See Document Specifications on page<br />
126 and Envelope Specifications on page<br />
127<br />
128
versaFeeder Specifications<br />
Model<br />
Type<br />
Theoretical max. speed<br />
Power consumption<br />
Approvals<br />
Height<br />
Width<br />
Length<br />
Weight<br />
Noise level<br />
Operating temperature<br />
Humidity<br />
Paper quality, feed<br />
unit<br />
Paper quality,<br />
transport unit<br />
VF-3<br />
Booklet feeding device for medium office<br />
use<br />
see Technical Specifications on page 125<br />
100V AC/50Hz/2.0 A<br />
115V AC/50/60Hz/2.0 A<br />
230V AC/50Hz/1 A<br />
EMC Certificate conform EMC-Directive.<br />
FCC Certificate conform 47CFR, part 15.<br />
CB Certificate conform IEC 60950-1.<br />
UL Listed I.T.E. (Information Technology<br />
Equipment), conform UL-IEC 60950-1, file:<br />
E153801.<br />
Conform NEN-EN-IEC 60950-1 and derivatives.<br />
407 mm (16.0 inch)<br />
440 mm (17.3 inch)<br />
500 mm (19.7 inch)<br />
30.5 kg (67.2 lbs)<br />
see Technical Specifications on page 125<br />
10°C - 40°C (50°F-104°F)<br />
30%-80%<br />
Minimum 80 g/m² (15 lb bond) single sheets<br />
(max. 500 sheets)<br />
Booklets up to approximately 2.5 mm<br />
(0.09") thickness<br />
Minimum 60 g/m² (15 lb bond)<br />
Thickness up to 3.2 mm (0.13")<br />
11<br />
English<br />
129
Document size<br />
Hopper tray capacity<br />
Minimum width: 120 mm (4.7")<br />
Maximum width: 243 mm (9.6")<br />
Minimum length: 90 mm (3.5")<br />
Maximum length: 162 mm (6.4")<br />
Booklets with a tough cover: maximum<br />
height 250 mm<br />
Booklets with a weak cover: maximum<br />
height 150 mm<br />
Single sheets (80 gr/m²): maximum height<br />
50 mm<br />
High Capacity Envelope Hopper Specifications<br />
11<br />
English<br />
Model<br />
Type<br />
Power consumption<br />
Approvals<br />
Height<br />
Width<br />
Length<br />
Weight<br />
Noise level<br />
Operating temperature<br />
Humidity<br />
Envelope sizes<br />
Feeder capacity<br />
EF-4<br />
High Capacity Envelope Feeder (HCEH)<br />
24V-1A max.<br />
EMC Certificate conform EMC-Directive.<br />
FCC Certificate conform 47CFR, part 15.<br />
CB Certificate conform IEC 60950-1.<br />
UL Listed I.T.E. (Information Technology<br />
Equipment), conform UL-IEC 60950-1, file:<br />
E153801.<br />
Conform NEN-EN-IEC 60950-1 and derivatives.<br />
200 mm (7.9 inch)<br />
375 mm (14.8 inch)<br />
670 mm (26.4 inch)<br />
22 kg (48.4 lbs)<br />
see Technical Specifications on page 125<br />
10°C - 40°C (50°F-104°F)<br />
30%-80%<br />
See Envelope Specifications on page 127<br />
max. 1000 envelopes<br />
130
High Capacity Conveyor Belt Specifications<br />
Model<br />
Type<br />
Power consumption<br />
Approvals<br />
Height<br />
Width<br />
Length<br />
Weight<br />
Noise level<br />
Theoretical max.<br />
speed<br />
Operating temperature<br />
Humidity<br />
Document / envelope<br />
size<br />
Max. capacity to be<br />
transported<br />
CS-2<br />
High Capacity Conveyor Belt (HCCB)<br />
24V-1A max.<br />
EMC Certificate conform EMC-Directive.<br />
FCC Certificate conform 47CFR, part 15.<br />
CB Certificate conform IEC 60950-1.<br />
UL Listed I.T.E. (Information Technology<br />
Equipment), conform UL-IEC 60950-1, file:<br />
E153801.<br />
Conform NEN-EN-IEC 60950-1 and derivatives.<br />
440 mm (17.3 inch) (including support legs)<br />
315 mm (12.4 inch)<br />
1310 mm (51.6 inch)<br />
19,5 kg (42.9 lbs)<br />
see Technical Specifications on page 125<br />
between 20 mm/s and 150 mm/s<br />
10°C - 40°C (50°F-104°F)<br />
30%-80%<br />
Minimum length 80 mm (3.2 inch)<br />
Maximum width 260 mm (10.2 inch)<br />
1000 envelopes. with a maximum weight of<br />
5 kg (11 lbs)<br />
11<br />
English<br />
131
12Terminology<br />
Terminology<br />
Term<br />
Address carrier<br />
Address position<br />
Description<br />
The address carrier is the document that carries the address of the<br />
person for who the mail-set is meant. The address must remain visible<br />
while enclosures are added and the document-set is folded. The fold<br />
type and selected envelope must ensure that the address is visible behind<br />
the window in the envelope. For personalized mailings there is always<br />
an address carrier present as long as envelope printing is not<br />
supported. Normally there is one address carrier.<br />
12<br />
English<br />
Automatic<br />
Automatic job<br />
Barcode Reading<br />
(BCR)<br />
Business Reply<br />
Envelope (BRE)<br />
Position of the address on the address carrier, measured from the upper<br />
left corner. The address position consists of a horizontal x coordinate,<br />
a vertical y coordinate, a horizontal width w and a vertical height h.<br />
The feature of an Inserting System to automatically determine its Job<br />
settings by measuring the sizes of documents and envelope. From all<br />
Feeders that are loaded one sheet will be taken. Based on the maximum<br />
document length (which is also the length of the documentset) and the<br />
length of the envelope the fold type is determined.<br />
A job that is created with the Automatic functionality.<br />
Barcode Reading is intended for reading and interpreting printed barcodes.<br />
The codes give information to the Inserting system about how<br />
to build-up and handle a set.<br />
Envelope included in outgoing mail-sets for addressee response purposes.<br />
132
C-fold<br />
Fold type in which a document-set is folded twice in which the folded<br />
flaps are on top of each other. This fold is illustrated in the picture below.<br />
The position of both folds is adjustable. Synonym: Letter fold.<br />
Clear<br />
Conveyor stacker<br />
Daily Mail<br />
Document<br />
Document-set<br />
Double Feed<br />
Control (DFC)<br />
Double parallel<br />
fold<br />
The function of an inserting system in which all mail-sets in progress<br />
are finished and the document path is left empty.<br />
Stacks up filled envelopes from the system.<br />
Capability of an inserting system to manually insert mail-sets one by<br />
one into the system, which are then inserted into an envelope. Optionally,<br />
depending on settings, additional enclosures can be added and the<br />
mail-set can be folded. This function is intended for small amounts of<br />
mail that each can have a different build-up.<br />
A document is one of the components of a mail-set. A document can<br />
consist of one or more sheets. Documents can be divided into address<br />
carriers and enclosures. For personalized mailings there is always one<br />
address carrier and an optional number of enclosures.<br />
The document-set is the physical collection of address carrier and enclosure(s)<br />
that is under production in the Inserting System. The document-set<br />
is completed during production and is to be inserted in the<br />
envelope. The number of enclosures can range from 0 to the limit opposed<br />
by the number of available Feeders. Once the document set has<br />
been inserted into an envelope it is called mail set.<br />
Double Feed Control is the sensor that measures the thickness of a<br />
sheet to check if the inserting system does not accidentally take more<br />
sheets than intended. DFC sensors exist on Feeders (double sheet<br />
detection). Currently DFCs on <strong>Neopost</strong> inserting systems perform relative<br />
measurements, which means that they need a cycle to 'learn' the<br />
thickness of a sheet. Also the length of the document is measured so<br />
partly overlapping sheets will be detected.<br />
See double V-fold.<br />
12<br />
English<br />
133
Double V-fold<br />
The double V-fold is a type of fold where the document is first folded<br />
halfway and the resulting folded set is again folded halfway. This fold<br />
is illustrated in the picture below.<br />
12<br />
English<br />
Envelope<br />
Extended<br />
powerFold<br />
Face down<br />
Face down<br />
leading<br />
Face down<br />
trailing<br />
Face up<br />
Face up leading<br />
Face up trailing<br />
Feeder<br />
Feeder linking<br />
Feed tray<br />
The position of both folds is adjustable. Synonym: double parallel fold.<br />
The envelope is the packaging of a mail set. Window envelopes are<br />
envelopes that have a transparent section through which the address<br />
on the address carrier can be read. Besides the normal top-closing<br />
window envelopes there are also bottom-closing envelopes.<br />
Option, makes bottom address applications and short folds possible.<br />
Situation in which the front of a sheet is facing downwards when placed<br />
in a document feeder.<br />
Situation in which the front of a sheet is facing downwards and the top<br />
of the sheet is closest to the separation unit in a document feeder.<br />
Situation in which the front of a sheet is facing downwards and the bottom<br />
of the sheet is closest to the separation unit in a document feeder.<br />
Situation in which the front of a sheet is facing upwards when placed in<br />
a document feeder.<br />
Situation in which the front of a sheet is facing upwards and the top of<br />
the sheet is closest to the separation unit in a document feeder.<br />
Situation in which the front of a sheet is facing upwards and the bottom<br />
of the sheet is closest to the separation unit in a document feeder.<br />
A Feeder is a Module for the input of documents to the inserting system.<br />
The Feeder separates documents sheet by sheet from the stack of<br />
documents in the feed tray.<br />
The ability to load two feeders with the same document type where the<br />
Inserting System automatically switches to a second feeder when the<br />
first feeder is empty and vice versa. In the mean time the first feeder<br />
can be refilled, so the inserting system can keep running without having<br />
to stop for refilling the feeders.<br />
Part of the feeder that contains the stack of documents.<br />
134
Flexcode OMR<br />
flexFeed<br />
High Capacity<br />
Document Feeder<br />
(HCDF)<br />
High Capacity<br />
Vertical Stacker<br />
(HCVS)<br />
Insert<br />
Inserter<br />
Inserting system<br />
insert'n Frank /<br />
insert'n Mail<br />
(mailing<br />
machine)<br />
intelliDeck<br />
Job<br />
Job counter<br />
Letter fold<br />
Linking<br />
maxiFeeder<br />
Multifeed<br />
An OMR code for which the meaning of the OMR marks can be programmed<br />
in a dedicated way for a specific customer. This is normally<br />
used to support the OMR codes from other suppliers.<br />
The flexFeed is the feeding part of the system.<br />
Optional feeder with a capacity for up to 725 sheets.<br />
Optional stacker that is mounted on the exit of the system, to stack filled<br />
envelopes.<br />
• An insert is the action of inserting a document-set into an envelope.<br />
• For native English speaking customers an insert is also a short,<br />
not to be folded document, usually an enclosure.<br />
An Inserter is the Module where the document-set is inserted into the<br />
envelope, the envelope is closed and if necessary sealed.<br />
The system of all the Modules that cooperate to perform the inserting<br />
function (accumulate document-set, fold and insert) and have a single<br />
point of control.<br />
Interface for the <strong>Neopost</strong> franking machine.<br />
To avoid stoppages the intelliDeck diverts duplicate on faulty documents<br />
before folding them while the system is still running.<br />
A job is an actually produced collection of mail-sets based on a certain<br />
Job Definition at a certain point in time for a specific purpose. It consists<br />
of:<br />
• The Job definition used for the production<br />
• Information about the batch size<br />
The counter that registers the number of mail-sets that is produced as<br />
part of a specific job.<br />
See C-fold.<br />
See Feeder Linking.<br />
Feeder with high capacity feed tray (e.g. 1200 sheets A4 80gr).<br />
The feature of an Inserting System in which more than one sheet is<br />
taken from a Feeder.<br />
12<br />
English<br />
135
12<br />
English<br />
OMR<br />
OMR code<br />
definition<br />
Online Services<br />
(OLS)<br />
Operator<br />
Optical Mark<br />
Recognition<br />
(OMR)<br />
powerFold<br />
Reading error<br />
Reading marks<br />
Remote<br />
diagnostics<br />
Service engineer<br />
Single fold<br />
Stop counter<br />
Supervisor<br />
Test run<br />
Thickness<br />
detection<br />
Tray<br />
Optical Mark Recognition<br />
Standard 1-track OMR code definition. Specifies the amount of reading<br />
marks used and the functionality linked to each of them (how each<br />
should be interpreted).<br />
The ability to connect the system to a central server for updates and<br />
other communication.<br />
The person operating a document system.<br />
Optical Mark Recognition is intended for reading and interpreting printed<br />
codes. These codes are one or more black marks which are read from<br />
a document. These marks give information to the Inserting system about<br />
how to build-up and handle a set.<br />
The powerFold can fold up tot 10 pages.<br />
Condition in which the system could not reliably read or interpret the<br />
OMR reading marks or barcode from a sheet.<br />
Marks added to documents containing finishing instructions that can be<br />
identified by a reading head and interpreted according to the used OMR<br />
code definition.<br />
The feature that makes it is possible to analyze a problem on an Inserting<br />
System from a remote location.<br />
Technical engineer whose task it is to resolve problems with systems<br />
in the field. Besides dealing with problems, service engineers are also<br />
responsible for preventive maintenance.<br />
See V-fold.<br />
Counter which sets the amount of envelopes to be filled. After filling this<br />
amount of envelopes the system will stop (even during a clear).<br />
Person who is responsible for the technical state of the machine. Normally<br />
a supervisor has access to programming functions, which are restricted<br />
for standard users.<br />
A test run is intended to validate the settings of the Inserting System:<br />
• Inspect and adjust the stop position of the envelope.<br />
• Check the fold settings for one set.<br />
• Check if the address is correctly positioned behind the envelope<br />
window.<br />
Checks the thickness of the document set. If the thickness is less or<br />
more than the set value an error message is displayed.<br />
Contains a stack of paper for a printer or inserter. This paper is supplied<br />
to the machine for further processing.<br />
136
V-fold<br />
A V-fold implies the document/set is folded once. The fold-position is<br />
adjustable. This fold is illustrated in the picture below:<br />
versaFeeder<br />
Vertical transport<br />
Z-fold<br />
Synonym: Single fold.<br />
Booklet feeding device.<br />
The vertical transport section between feeders and collator.<br />
A Z-fold means that a document is folded twice in such a way that each<br />
folded flap is on a different size of the folded document, resulting in a<br />
Z-shape. This fold is illustrated in the picture below.<br />
The position of both folds is adjustable. Synonyms: zigzag fold<br />
12<br />
English<br />
137
13EC Declaration of<br />
Conformity<br />
EC Declaration of Conformity DS-90, M8800, FPi 6600,<br />
FD6604<br />
(According to Annex III B of the Low Voltage Directive)<br />
Manufacturer: <strong>Neopost</strong> Technologies BV<br />
Address: De Tijen 3, 9201 BX Drachten, The Netherlands,<br />
herewith declares that the:<br />
DS-90, M8800, FPi 6600, FD6604<br />
which this declaration refers to, is in accordance with:<br />
• the conditions of the Low Voltage Directive 2006/95/EC and the following Directive:<br />
• EMC Directive 2004/108/EC and is in conformity with the following harmonised<br />
standard(s) or other such specifications:<br />
13<br />
EN 60950-1 (2006)<br />
EN 55022 (2011)<br />
EN 55024 (2010)<br />
EN 61000-3-2 (2006)<br />
EN 61000-3-3 (2008)<br />
EN 61000-4-2 (2008)<br />
EN 61000-4-3 (2006)<br />
EN 61000-4-4 (2005)<br />
EN 61000-4-5 (2007)<br />
EN 61000-4-6 (2009)<br />
EN 61000-4-11 (2004)<br />
EN 61000-6-2 (2005)<br />
EN 61000-6-3 (2007)<br />
English<br />
The Netherlands, Drachten, 01-02-2012<br />
F. Bosveld, Managing Director<br />
This is a class A product. In a domestic environment this product may cause radio<br />
interference in which case the user may be required to take adequate measures.<br />
138
Note: this equipment has been tested and found to comply with the limits for class A digital<br />
device, pursuant to Part 15 of the FCC Rules. These limits are designed to provide<br />
reasonable protection against harmful interference when the equipment is operated in a<br />
commercial environment. This equipment generates, uses, and can radiate radio frequency<br />
energy and, if not installed and used in accordance with this instruction manual, may cause<br />
harmful interference to radio communications. Operation of this equipment in a residential<br />
area is likely to cause harmful interference in which case the user will be required to correct<br />
the interference at his own expense<br />
EC Declaration of Conformity MF-1<br />
(According to Annex III B of the Low Voltage Directive)<br />
Manufacturer: <strong>Neopost</strong> Technologies BV<br />
Address: De Tijen 3, 9201 BX Drachten, The Netherlands,<br />
herewith declares that the:<br />
MF-1,<br />
which this declaration refers to, is in accordance with:<br />
• the conditions of the Low Voltage Directive 2006/95/EC and the following Directive:<br />
• EMC Directive 2004/108/EC and is in conformity with the following harmonised<br />
standard(s) or other such specifications:<br />
EN 60950-1 (2006)<br />
EN 55022 (1998)<br />
EN 55024 (1998)<br />
ENV 50204 (1995)<br />
EN 61000-3-2 (2000)<br />
EN 61000-4-2 (1995)<br />
EN 61000-4-3 (1996)<br />
EN 61000-4-4 (1995)<br />
EN 61000-4-5 (1995)<br />
EN 61000-4-6 (1996)<br />
EN 61000-4-11 (1994)<br />
13<br />
The Netherlands, Drachten, 01-02-2012<br />
English<br />
F. Bosveld, Managing Director<br />
This is a class A product. In a domestic environment this product may cause radio<br />
interference in which case the user may be required to take adequate measures.<br />
139
Note: this equipment has been tested and found to comply with the limits for class A digital<br />
device, pursuant to Part 15 of the FCC Rules. These limits are designed to provide<br />
reasonable protection against harmful interference when the equipment is operated in a<br />
commercial environment. This equipment generates, uses, and can radiate radio frequency<br />
energy and, if not installed and used in accordance with this instruction manual, may cause<br />
harmful interference to radio communications. Operation of this equipment in a residential<br />
area is likely to cause harmful interference in which case the user will be required to correct<br />
the interference at his own expense<br />
EC Declaration of Conformity VF-3<br />
(According to Annex III B of the Low Voltage Directive)<br />
Manufacturer: <strong>Neopost</strong> Technologies BV<br />
Address: De Tijen 3, 9201 BX Drachten, The Netherlands,<br />
herewith declares that the:<br />
VF-3,<br />
which this declaration refers to, is in accordance with:<br />
• the conditions of the Low Voltage Directive 2006/95/EC and the following Directive:<br />
• EMC Directive 2004/108/EC and is in conformity with the following harmonised<br />
standard(s) or other such specifications:<br />
13<br />
EN 60950-1 (2001)<br />
EN 55022 (1998)<br />
EN 55024 (1998)<br />
ENV 50204 (1995)<br />
EN 61000-3-2 (2000)<br />
EN 61000-4-2 (1995)<br />
EN 61000-4-3 (1996)<br />
EN 61000-4-4 (1995)<br />
EN 61000-4-5 (1995)<br />
EN 61000-4-6 (1996)<br />
EN 61000-4-11 (1994)<br />
English<br />
The Netherlands, Drachten, 01-02-2012<br />
F. Bosveld, Managing Director<br />
This is a class A product. In a domestic environment this product may cause radio<br />
interference in which case the user may be required to take adequate measures.<br />
140
Note: this equipment has been tested and found to comply with the limits for class A digital<br />
device, pursuant to Part 15 of the FCC Rules. These limits are designed to provide<br />
reasonable protection against harmful interference when the equipment is operated in a<br />
commercial environment. This equipment generates, uses, and can radiate radio frequency<br />
energy and, if not installed and used in accordance with this instruction manual, may cause<br />
harmful interference to radio communications. Operation of this equipment in a residential<br />
area is likely to cause harmful interference in which case the user will be required to correct<br />
the interference at his own expense<br />
EC Declaration of Conformity EF-4<br />
(According to Annex III B of the Low Voltage Directive)<br />
Manufacturer: <strong>Neopost</strong> Technologies BV<br />
Address: De Tijen 3, 9201 BX Drachten, The Netherlands,<br />
herewith declares that the:<br />
EF-4,<br />
which this declaration refers to, is in accordance with:<br />
• the conditions of the Low Voltage Directive 2006/95/EC and the following Directive:<br />
• EMC Directive 2004/108/EC and is in conformity with the following harmonised<br />
standard(s) or other such specifications:<br />
EN 60950-1 (2001)<br />
EN 55022 (1998)<br />
EN 55024 (1998)<br />
ENV 50204 (1995)<br />
EN 61000-3-2 (2000)<br />
EN 61000-4-2 (1995)<br />
EN 61000-4-3 (1996)<br />
EN 61000-4-4 (1995)<br />
EN 61000-4-5 (1995)<br />
EN 61000-4-6 (1996)<br />
EN 61000-4-11 (1994)<br />
13<br />
The Netherlands, Drachten, 01-02-2012<br />
English<br />
F. Bosveld, Managing Director<br />
This is a class A product. In a domestic environment this product may cause radio<br />
interference in which case the user may be required to take adequate measures.<br />
141
Note: this equipment has been tested and found to comply with the limits for class A digital<br />
device, pursuant to Part 15 of the FCC Rules. These limits are designed to provide<br />
reasonable protection against harmful interference when the equipment is operated in a<br />
commercial environment. This equipment generates, uses, and can radiate radio frequency<br />
energy and, if not installed and used in accordance with this instruction manual, may cause<br />
harmful interference to radio communications. Operation of this equipment in a residential<br />
area is likely to cause harmful interference in which case the user will be required to correct<br />
the interference at his own expense<br />
EC Declaration of Conformity CS-2<br />
(According to Annex III B of the Low Voltage Directive)<br />
Manufacturer: <strong>Neopost</strong> Technologies BV<br />
Address: De Tijen 3, 9201 BX Drachten, The Netherlands,<br />
herewith declares that the:<br />
CS-2,<br />
which this declaration refers to, is in accordance with:<br />
• the conditions of the Low Voltage Directive 2006/95/EC and the following Directive:<br />
• EMC Directive 2004/108/EC and is in conformity with the following harmonised<br />
standard(s) or other such specifications:<br />
13<br />
EN 60950-1 (2001)<br />
EN 55022 (1998)<br />
EN 55024 (1998)<br />
ENV 50204 (1995)<br />
EN 61000-3-2 (2000)<br />
EN 61000-4-2 (1995)<br />
EN 61000-4-3 (1996)<br />
EN 61000-4-4 (1995)<br />
EN 61000-4-5 (1995)<br />
EN 61000-4-6 (1996)<br />
EN 61000-4-11 (1994)<br />
English<br />
The Netherlands, Drachten, 01-02-2012<br />
F. Bosveld, Managing Director<br />
This is a class A product. In a domestic environment this product may cause radio<br />
interference in which case the user may be required to take adequate measures.<br />
142
Note: this equipment has been tested and found to comply with the limits for class A digital<br />
device, pursuant to Part 15 of the FCC Rules. These limits are designed to provide<br />
reasonable protection against harmful interference when the equipment is operated in a<br />
commercial environment. This equipment generates, uses, and can radiate radio frequency<br />
energy and, if not installed and used in accordance with this instruction manual, may cause<br />
harmful interference to radio communications. Operation of this equipment in a residential<br />
area is likely to cause harmful interference in which case the user will be required to correct<br />
the interference at his own expense<br />
13<br />
English<br />
143
Internet: www.neopost.com<br />
Version B 07/2012