Caché Installation Guide - InterSystems Documentation
Caché Installation Guide - InterSystems Documentation
Caché Installation Guide - InterSystems Documentation
You also want an ePaper? Increase the reach of your titles
YUMPU automatically turns print PDFs into web optimized ePapers that Google loves.
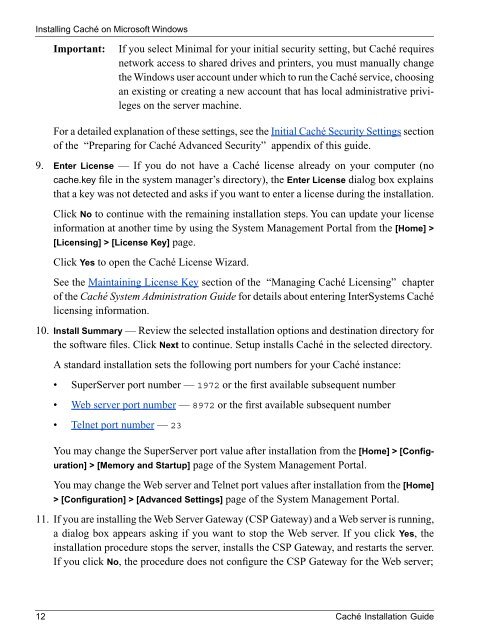
Installing <strong>Caché</strong> on Microsoft Windows<br />
Important:<br />
If you select Minimal for your initial security setting, but <strong>Caché</strong> requires<br />
network access to shared drives and printers, you must manually change<br />
the Windows user account under which to run the <strong>Caché</strong> service, choosing<br />
an existing or creating a new account that has local administrative privileges<br />
on the server machine.<br />
For a detailed explanation of these settings, see the Initial <strong>Caché</strong> Security Settings section<br />
of the “Preparing for <strong>Caché</strong> Advanced Security” appendix of this guide.<br />
9. Enter License — If you do not have a <strong>Caché</strong> license already on your computer (no<br />
cache.key file in the system manager’s directory), the Enter License dialog box explains<br />
that a key was not detected and asks if you want to enter a license during the installation.<br />
Click No to continue with the remaining installation steps. You can update your license<br />
information at another time by using the System Management Portal from the [Home] ><br />
[Licensing] > [License Key] page.<br />
Click Yes to open the <strong>Caché</strong> License Wizard.<br />
See the Maintaining License Key section of the “Managing <strong>Caché</strong> Licensing” chapter<br />
of the <strong>Caché</strong> System Administration <strong>Guide</strong> for details about entering <strong>InterSystems</strong> <strong>Caché</strong><br />
licensing information.<br />
10. Install Summary — Review the selected installation options and destination directory for<br />
the software files. Click Next to continue. Setup installs <strong>Caché</strong> in the selected directory.<br />
A standard installation sets the following port numbers for your <strong>Caché</strong> instance:<br />
• SuperServer port number — 1972 or the first available subsequent number<br />
• Web server port number — 8972 or the first available subsequent number<br />
• Telnet port number — 23<br />
You may change the SuperServer port value after installation from the [Home] > [Configuration]<br />
> [Memory and Startup] page of the System Management Portal.<br />
You may change the Web server and Telnet port values after installation from the [Home]<br />
> [Configuration] > [Advanced Settings] page of the System Management Portal.<br />
11. If you are installing the Web Server Gateway (CSP Gateway) and a Web server is running,<br />
a dialog box appears asking if you want to stop the Web server. If you click Yes, the<br />
installation procedure stops the server, installs the CSP Gateway, and restarts the server.<br />
If you click No, the procedure does not configure the CSP Gateway for the Web server;<br />
12 <strong>Caché</strong> <strong>Installation</strong> <strong>Guide</strong>


