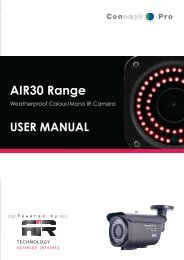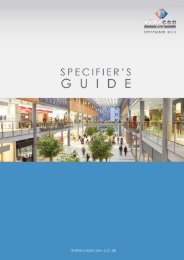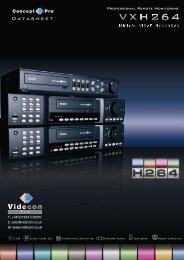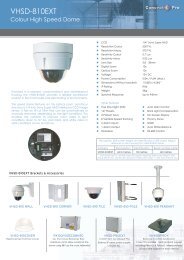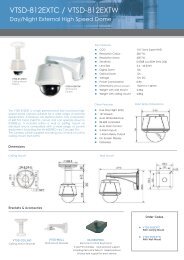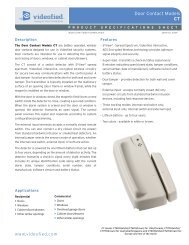
Manual - Building Block Video CCTV
Manual - Building Block Video CCTV
Manual - Building Block Video CCTV
- No tags were found...

You also want an ePaper? Increase the reach of your titles
YUMPU automatically turns print PDFs into web optimized ePapers that Google loves.
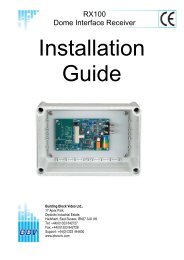
SETTINGS FOR NORMAL OPERATIONSeveral functions have more than one setting available for normal operation. These Settings for normaloperation can only be made when all programming settings have been carried out and programme modehas been exited.The DIP switches are used to select these settings as follows:Switch 1Switch ON then OFF activates self test.Switch 2Reverses zoom motor direction. ON = reversed.Switch 3Reverses focus direction. ON = reversed.Switch 4 Select iris-override voltage range. OFF = 2.5 - 12V , ON = 2.5 - 5.5VSwitch 5} See table below. (optional Photocell operation - requires photocell and clear box lid)Switch 6} See table below.Switch 7Activates Datum operation. ON = Datum activated.Switch 8OFF position selects normal operating mode.Table of settings for Switches 5 and 6:Switch 5: Switch 6: Setting selected:OFF OFF AUX 1 (lamps) output has normal, latching operation using LIGHTS buttonOFFON-AUX 1 (lamps) output is controlled by the photocell only (not supported with iss 2 pcb)ON OFF AUX 1 (lamps) output is controlled by alarm input(s)ON ON AUX 1 becomes a spare momentary outputN.B. Before starting, ensure that DIP switch 1 is in the OFF (left) position.Once all the required operating settings have been selected, a self test can be performed to test theprogramming and operation of the unit.PATROL MODE AND DATUM OPERATIONNote also the following points relating to Patrol mode and Datum operation.It is possible to initiate a Patrol manually from the Tx telemetry transmitter keyboard, even if Patrol Alwaysmode is not selected through the DIP switch settings on the receiver. Refer to the relevant Tx telemetrytransmitter manual for further details.There are two separate Patrols available to the operator from the Tx telemetry keyboard (Patrol 1 and Patrol2).When the receiver executes a Patrol, the unit cycles round all stored pre-sets, starting always with pre-set 1.The Tx1000 telemetry transmitter permits the operator to store up to 16 pre-sets in the receiver.The Tx400 telemetry transmitter allows the operator access to only the first 8 pre-sets.Storing pre-sets in the receiver automatically adds those pre-sets to Patrols 1 and 2.Individual pre-sets can be removed from either Patrol 1 or Patrol 2 using the Tx telemetry transmitterkeyboard, in order to allow the operator to create two different Patrol sequences.Independent delays (pauses between pre-set activations) are available for each Patrol, programmable fromthe Tx telemetry transmitter keyboard.If Patrol Always mode is selected, the unit returns to Patrol mode following a power loss (starting with pre-set1).If Patrol Always mode is selected, the unit reverts to Patrol mode after manual operation ceases, following adelay.<strong>Manual</strong> operation takes priority over a Patrol.Patrol Always mode permits the installation and operation of a system with no Tx telemetry transmitterkeyboard fitted for an operator.Care should be taken before programming the receiver for Patrol Always, since this cannot be de-activatedfrom the Tx telemetry keyboard.Patrol Always can only be de-activated by programming the receiver DIP switches.Programming the receiver for Datum = ON over-rides Patrol mode.If Datum is set to ON, the unit remains in that mode following a power loss.Telemetry Receiver Installation HandbookRx400DC2 July 2004 Rev6Page_32