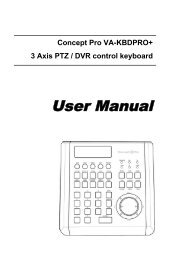
Manual - Building Block Video CCTV
Manual - Building Block Video CCTV
Manual - Building Block Video CCTV
- No tags were found...

You also want an ePaper? Increase the reach of your titles
YUMPU automatically turns print PDFs into web optimized ePapers that Google loves.
Patrol AlwaysTo start patrol always mode1. Program dip switches, see page 13, section 5.2. Start patrol 1 on Keypad, this safety feature stops the head moving until Patrol manually started.However the head may move at any time once the Patrol has been activated, after power down etc.To stop patrol always mode1. Program dip switches, see page 13, section 5.2. Stop the Patrol from a Keypad, by panning or tilting the head.PRESETS ON THE Rx400DCWhen using presets ensure correct connection of the feedback pots. Pay particular attention to ensuringthat power is not connected across one end of the pot and the wiper, as damage to the feedback pot mayensue.Beyond connecting the correct wiper to each function input, i.e. focus wiper to focus input etc., the installerdoes not need to worry about reversing the polarity/direction of travel. If, for instance, the pan/tilt head hasbeen installed upside down, the receiver will compensate for this arrangement.Before using presets it is necessary to use the self test function,turn SW1 ON momentarily. During the course of the self test thereceiver senses the feedback pot connections. If the cabling/travelis reversed then the unit will reset the relevant direction bits withinthe receiver. Subsequent searches to preset should now functioncorrectly.DO NOT PROGRAM PRESETS CLOSETO PHYSICAL ENDSTOPS (pan/tilt/zoom /focus)Options:1) Photocell / Clear box lid to allow cost effective switching of the lights relay using an on boardphotocell. This is a zero cost option which must be specified at order time.Please amend -Photocell to part code.2) Serial control of Mitsubishi CCD400 integrated camera. Full lens control, preset positioning, shutterspeed and backlight compensation can all be controlled using a simple 3 wire serial connection;+12Vdc, Gnd, Data. Please amend -Mitsi to part code.3) Serial control of the JVC TK-C1360E advanced frame integration camera. Full access to thecamera on screen menu is provided in a addition two scenes can be programmed. A scenecomprises the current camera settings, allowing a night and day setup.Please amend -JVC to part code.<strong>Manual</strong> revisions2 original combined manual2a Fixed Rx200Mk2 autopan/washer & wiper connection details – pages 5 & 6Fixed Rx400P zoom/focus reverse switch details – pages 15 & 16Fixed Rx400DC Zoom & Focus preset input connection details – page 243 Added 2 addition pages for Rx400P Mark II issue 5 pcb details – page 18Inserted safety notices on page 24 Inserted installation instructions for PCB-based ReceiversTelemetry Receiver Installation HandbookRx400DC2 July 2004 Rev6Page_33