Photo Lab Manual (PDF) - Richland College
Photo Lab Manual (PDF) - Richland College
Photo Lab Manual (PDF) - Richland College
You also want an ePaper? Increase the reach of your titles
YUMPU automatically turns print PDFs into web optimized ePapers that Google loves.
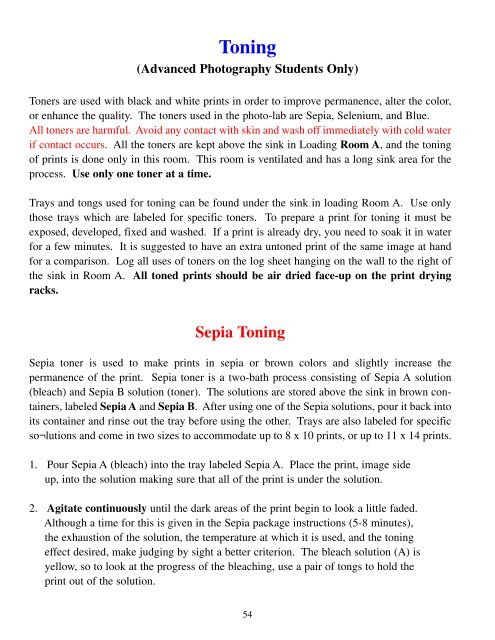
Toning(Advanced <strong>Photo</strong>graphy Students Only)Toners are used with black and white prints in order to improve permanence, alter the color,or enhance the quality. The toners used in the photo-lab are Sepia, Selenium, and Blue.All toners are harmful. Avoid any contact with skin and wash off immediately with cold waterif contact occurs. All the toners are kept above the sink in Loading Room A, and the toningof prints is done only in this room. This room is ventilated and has a long sink area for theprocess. Use only one toner at a time.Trays and tongs used for toning can be found under the sink in loading Room A. Use onlythose trays which are labeled for specific toners. To prepare a print for toning it must beexposed, developed, fixed and washed. If a print is already dry, you need to soak it in waterfor a few minutes. It is suggested to have an extra untoned print of the same image at handfor a comparison. Log all uses of toners on the log sheet hanging on the wall to the right ofthe sink in Room A. All toned prints should be air dried face-up on the print dryingracks.Sepia ToningSepia toner is used to make prints in sepia or brown colors and slightly increase thepermanence of the print. Sepia toner is a two-bath process consisting of Sepia A solution(bleach) and Sepia B solution (toner). The solutions are stored above the sink in brown containers,labeled Sepia A and Sepia B. After using one of the Sepia solutions, pour it back intoits container and rinse out the tray before using the other. Trays are also labeled for specificso¬lutions and come in two sizes to accommodate up to 8 x 10 prints, or up to 11 x 14 prints.1. Pour Sepia A (bleach) into the tray labeled Sepia A. Place the print, image sideup, into the solution making sure that all of the print is under the solution.2. Agitate continuously until the dark areas of the print begin to look a little faded.Although a time for this is given in the Sepia package instructions (5-8 minutes),the exhaustion of the solution, the temperature at which it is used, and the toningeffect desired, make judging by sight a better criterion. The bleach solution (A) isyellow, so to look at the progress of the bleaching, use a pair of tongs to hold theprint out of the solution.54


