- Page 1:
Your Complete Guide to Sustainable
- Page 4:
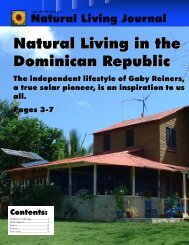
Special OfferNatural Living: The Wi
- Page 7 and 8:
Copyright 8 2004 John WilsonPublish
- Page 9 and 10:
AcknowledgementsThis book could not
- Page 11 and 12:
TRANSPORTATION 178VALUE CONNECTION
- Page 13 and 14:
Dazzling and tremendous how quick t
- Page 15 and 16:
our times in the struggle to stop t
- Page 17 and 18:
ChangeThings happen for a reasonAn
- Page 19 and 20:
Chapter 1OUR CURRENT SITUATIONMajor
- Page 21 and 22:
eing restarted slowly. It turns out
- Page 23 and 24:
insanity of war and the terrible de
- Page 25 and 26:
R The first large wind turbine has
- Page 27 and 28:
R Kalundborg, Denmark: This area is
- Page 29 and 30:
29> EcoVillage at Ithaca NewYork.
- Page 31 and 32:
television, advertising designed to
- Page 33 and 34:
Chapter 2A BRIEF HISTORY OFSUSTAINA
- Page 35 and 36:
sunlight entered them in winter, bu
- Page 37 and 38:
The History of Wind EnergyWind ener
- Page 39 and 40:
Chapter 3CHANGE?Change really can c
- Page 41 and 42:
consumers to ask the question, does
- Page 43 and 44:
Too Many Parking LotsThere are too
- Page 45 and 46:
all of these are now known to produ
- Page 47 and 48:
R Drug useR CrimeR PovertyR Terrori
- Page 49 and 50:
the economic assumption of endless
- Page 51 and 52:
much less. More than that, we could
- Page 53 and 54:
that reinforces scientific material
- Page 55 and 56:
To bring down the whole house of ca
- Page 57 and 58:
Big PictureThe vast scale and compl
- Page 59 and 60:
Find the Right Scale for Action In
- Page 61 and 62:
direct use of heat from the sun in
- Page 63 and 64:
Driven by an uncritical worship of
- Page 65 and 66:
The fact is that our earth system w
- Page 67 and 68:
This analysis suggests that the glo
- Page 69 and 70:
capitalism institutionalizes a syst
- Page 71 and 72:
to finance the types of projects th
- Page 73 and 74:
Much of it was formed before many o
- Page 75 and 76:
of time, gave Al Gore a new sense o
- Page 77 and 78:
corporations, or countries is that
- Page 79 and 80:
Natural Living1. Awareness2. Food3.
- Page 81 and 82:
Chapter 4TAKE THE FIRST STEPStart t
- Page 83 and 84:
e aware of nature, life, rocks, lea
- Page 85 and 86:
That is why Natural Living revolves
- Page 87 and 88:
• Transportation (cars and trucks
- Page 89 and 90:
5. Make a concerted effort to focus
- Page 91 and 92:
these changes. When youve achieved
- Page 93 and 94:
Natural LivingLife Activity Take Ac
- Page 95 and 96: Chapter 6NATURAL LIVING STEPSThe fo
- Page 97 and 98: Step 2: FoodReminder: You are what
- Page 99 and 100: Step 3: PlanReminder: Failure to pl
- Page 101 and 102: 6. Use local renewable sources of w
- Page 103 and 104: found the resources to achieve Natu
- Page 105 and 106: Step 4: HomeReminder: Home is where
- Page 107 and 108: for materials significantly minimiz
- Page 109 and 110: with nature and people who are of n
- Page 111 and 112: quantum mechanics, Gandhi has appli
- Page 113 and 114: Connect, in the article All Hands t
- Page 115 and 116: connecting, and building your relat
- Page 117 and 118: Step 7: CreativityReminder: If we c
- Page 119 and 120: Words of Truth by VincentI will try
- Page 121 and 122: · Get local businesses to provide
- Page 123 and 124: Chapter 7ORGANIC FOODTaking pleasur
- Page 125 and 126: More NutritiousThe variety and nutr
- Page 127 and 128: Chapter 8PLACELooking at your place
- Page 129 and 130: Chapter 9EFFICIENCYNot needing some
- Page 131 and 132: Chapter 10PASSIVE SOLAR HEATINGAND
- Page 133 and 134: R Hydronic heating to supplement st
- Page 135 and 136: Chapter 11STRAW BALECONSTRUCTION135
- Page 137 and 138: dampen the shock, bend, while not b
- Page 139 and 140: anywhere near the work site. Also,
- Page 141 and 142: are not many architects who are fam
- Page 143 and 144: · Wire mesh for window/door corner
- Page 145: windows allowing sufficient wire to
- Page 149 and 150: Each layer should be applied comple
- Page 151 and 152: Straw Bale Details: A Manual for De
- Page 153 and 154: This home in the city of Mississaug
- Page 155 and 156: ideas. This included the idea of th
- Page 157 and 158: feeds the existing water tank. This
- Page 159 and 160: desire to learn from nature. The pl
- Page 161 and 162: Active SolarWood stoveFood· Uni-so
- Page 163 and 164: DesignR Typically a green roof need
- Page 165 and 166: Chapter 13RENEWABLE ENERGYSYSTEMSNo
- Page 167 and 168: way to convert sunlight into electr
- Page 169 and 170: Case Study: Freedom Off-The-GridGai
- Page 171 and 172: Leonard bought the property in 1987
- Page 173 and 174: The home has lots of natural daylig
- Page 175 and 176: The appliances, washer and dryer ar
- Page 177 and 178: complete set of videos from the con
- Page 179 and 180: ecause at the time Leigh, my wife,
- Page 181 and 182: fuel driven economy even though the
- Page 183 and 184: Peace· True peace is a symbiosis w
- Page 185 and 186: Chapter 16THE JOURNEYIt started whe
- Page 187 and 188: Claire, our daughter is almost one
- Page 189 and 190: waves, wind and rain would soon swa
- Page 191 and 192: local restaurant was far enough to
- Page 193 and 194: charge the batteries when power is
- Page 195 and 196: The town of Cabarete providesplenty
- Page 197 and 198:
Every time we visit the wind is blo
- Page 199 and 200:
SOLAR HOT WATER SHOWERThis system a
- Page 201 and 202:
R CoconutsR MangoesR PapayaR Cherri
- Page 203 and 204:
Being an organic farmer is not alwa
- Page 205 and 206:
· Airtight walls: Airtight walls e
- Page 207 and 208:
· Reduced disposal of toxic produc
- Page 209 and 210:
DRINKABLE-WATER SYSTEMWater and Was
- Page 211 and 212:
Chapter 17PLANNING THE NEW HOUSEIn
- Page 213 and 214:
Most properties we saw had problems
- Page 215 and 216:
and piping systems would be require
- Page 217 and 218:
system pushed costs beyond the orig
- Page 219 and 220:
solar home design, excellent insula
- Page 221 and 222:
system that is being used to transf
- Page 223 and 224:
It is the goal of Natural Living to
- Page 225 and 226:
R Take advantage of the local straw
- Page 227 and 228:
R Straw-bale wall on north side of
- Page 229 and 230:
on the south side of the basement n
- Page 231 and 232:
costs. The results are houses of th
- Page 233 and 234:
Chapter 21BUILDINGOn my 34 th birth
- Page 235 and 236:
Pers walked us through the Kortrigh
- Page 237 and 238:
ough stucco wall, so they dont get
- Page 239 and 240:
Letting Light InNovember 2000The gr
- Page 241 and 242:
Green Roof withCentral Sky LightFeb
- Page 243 and 244:
Stacking BalesApril 2001Up go the b
- Page 245 and 246:
Finishing Stucco onthe Straw Bale W
- Page 247 and 248:
Green Roof ConceptMartin Liefhebber
- Page 249 and 250:
Wind TurbineOperating whileSolar Pa
- Page 251 and 252:
Wind and SolarGoing Full BlastAugus
- Page 253 and 254:
technologies such as straw-bale con
- Page 255 and 256:
R Staple the chicken wire to the ou
- Page 257 and 258:
sunshine from the south are where t
- Page 259 and 260:
XL wind turbine can generate up to
- Page 261 and 262:
R Extremely quiet, good sound insul
- Page 263 and 264:
R Silent operation;R Solid state el
- Page 265 and 266:
R The north wall has a minimal numb
- Page 267 and 268:
constant use. The second is lightin
- Page 269 and 270:
R Smaller size reduces energy requi
- Page 271 and 272:
R We selected only the most efficie
- Page 273 and 274:
R If office work is required then t
- Page 275 and 276:
albeit with just a single small LED
- Page 277 and 278:
what we had done wrong. Several wee
- Page 279 and 280:
Chapter 23FREQUENTLY ASKEDQUESTIONS
- Page 281 and 282:
summer, it absorbs the heat so that
- Page 283 and 284:
How much is the wind turbine?R The
- Page 285 and 286:
What is the grey/tin/silver roof/si
- Page 287 and 288:
What are composting toilets and how
- Page 289 and 290:
Chapter 25LOOKING BACKWeve lived in
- Page 291 and 292:
Chapter 25NATURAL LIVINGVISION OF T
- Page 293 and 294:
organic farmers have teamed up with
- Page 295 and 296:
offered at this central location.29
- Page 297 and 298:
floor solar waterheating and passiv
- Page 299 and 300:
Back at home the sun provides the r
- Page 301 and 302:
Chapter 26NEXT STEPSI know this boo
- Page 303 and 304:
Chapter 27RESOURCESBreathe Architec
- Page 305 and 306:
IkeaBirch wood kitchen cabinetry.We
- Page 307 and 308:
Appendix AWARNING TO HUMANITYIssued
- Page 309 and 310:
ForestsTropical rain forests, as we
- Page 311 and 312:
WHAT WE MUST DOFive inextricably li
- Page 313 and 314:
A new ethic is required -- a new at
- Page 315 and 316:
The Global SituationThe dominant pa
- Page 317 and 318:
. Promote social and economic justi
- Page 319 and 320:
c. Ensure that information of vital
- Page 321 and 322:
f. Strengthen local communities, en
- Page 323 and 324:
Earth Charter principles with an in
- Page 325 and 326:
"shadow science" origin is that mos
- Page 327 and 328:
constant slow re-radiation, resulti
- Page 329 and 330:
slab with a mortar adhesive and gro
- Page 331 and 332:
color to store the heat low. Cler e
- Page 333 and 334:
Figure 4b: Two-story sunspace: wint
- Page 335 and 336:
mentioned earlier, special care mus
- Page 337 and 338:
about 86 percent. Non-storage mater
- Page 339 and 340:
ecommended ratio. If water in conta
- Page 341 and 342:
the wall to 90%, compared to 60% fo
- Page 343 and 344:
Figure 7:When designing a solar hom
- Page 345 and 346:
STEP 2: Recommended Insulation Valu
- Page 347 and 348:
Figure 9: Use this map to find your
- Page 349 and 350:
oof is not glazed and the south wal
- Page 351 and 352:
walls with direct-gain windows abov
- Page 353 and 354:
BIBLIOGRAPHYVan der Ryn, the Toilet
- Page 355 and 356:
Berry, Thomas, THE GREAT WORK:OUR W
- Page 357 and 358:
connections, 15, 25, 49, 51, 53, 57
- Page 359 and 360:
health, 16, 39, 45, 48, 49, 54, 55,
- Page 361 and 362:
SScience, 113, 354sewage, 24, 40, 4
- Page 363:
Back Inside CoverJOHN WILSONis an a