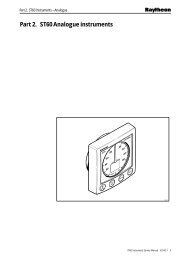
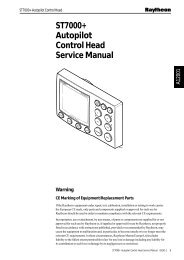
Autohelm Inboard Autopilots (ST6000 and ST7000 systems) Service ...
Autohelm Inboard Autopilots (ST6000 and ST7000 systems) Service ...
Autohelm Inboard Autopilots (ST6000 and ST7000 systems) Service ...
- No tags were found...

You also want an ePaper? Increase the reach of your titles
YUMPU automatically turns print PDFs into web optimized ePapers that Google loves.
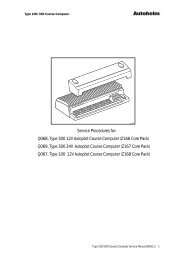
<strong>Autohelm</strong>1. Rotary Drive UnitThe rotary drive unit comprises a belt drive reduction stage from the motor, <strong>and</strong> a twostage epicyclic gearbox. An electro-magnetic clutch locks the outer ring of the firststage gearbox when drive is required. This arrangement provides very quietoperation with low backdrive torques.2. DismantlingAfter removing the unit from the boat <strong>and</strong> to gain access for drive motor, drive belt orclutch replacement, the following steps apply:-a) Unscrew <strong>and</strong> remove two caphead screws using M3 alien key. These screwssecure the plastic cover to the main unit. Ease the power supply <strong>and</strong> clutch cablesthrough the grommet whilst removing the plastic cover <strong>and</strong> finally remove the coveraltogether.b) If servicing the clutch assembly remove the dust cover as above then unscrew <strong>and</strong>remove the two caphead screws which secure the clutch rotor <strong>and</strong> plate assembly tothe two pillars holding it off the main assembly (use a M3 alien key).c) The clutch rotor is fixed to its plate by one caphead screw through the centre whichis spring loaded. Therefore, care should be taken to hold the clutch rotor as the screwis removed.d) If servicing the drive motor assembly, remove the dust cover as above thenunscrew <strong>and</strong> remove the 4 x 6mm caphead screws with washers <strong>and</strong> also the twolong hexagonal studs at the centre sides of the main assembly. The mounting coverassembly can now be removed from the master plate. Care must be taken whenremoving the cover assembly to ensure the drive gear disengages without damage.This is best done with the mounting cover placed down on the bench <strong>and</strong> the drivemotor facing uppermost so that the planet gears within the mounting cover will stay inplace. If they become dislodged keep them safely ready for reassembly.e) Support the motor, unscrew <strong>and</strong> remove the three M6 caphead screws <strong>and</strong>washers securing the motor to the master plate <strong>and</strong> slip the drive belt off the pulley.f) If replacing the drive belt it will only be necessary to loosen the three screws thatsecure the motor to take the tension off the belt whilst it is slipped off both pulleys.3. ReassemblyIn all cases rebuilding the unit is a straight reversal of the above procedures, but thefollowing points should be noted:-a) When refitting a drive motor ensure that the drivepulley is fitted to the motor shaft in the correct orientation (general assembly). Notealso that the motor shaft should be degreased with a suitable solvent <strong>and</strong> dried offthoroughly before bonding the pulley in place using Loctite 601 or equivalentanaerobic adhesive. Following bonding the unit should not be placed under full powerfor at least one hour.SeaTalk <strong>Service</strong> Manual 3