FR-F700 INSTRUCTION MANUAL (BASIC) - MRO Stop
FR-F700 INSTRUCTION MANUAL (BASIC) - MRO Stop
FR-F700 INSTRUCTION MANUAL (BASIC) - MRO Stop
- No tags were found...

Create successful ePaper yourself
Turn your PDF publications into a flip-book with our unique Google optimized e-Paper software.
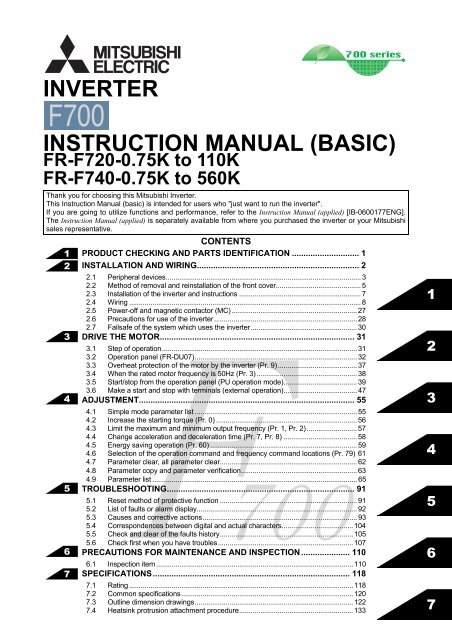
INVERTER<strong>INSTRUCTION</strong> <strong>MANUAL</strong> (<strong>BASIC</strong>)<strong>FR</strong>-F720-0.75K to 110K<strong>FR</strong>-F740-0.75K to 560KThank you for choosing this Mitsubishi Inverter.This Instruction Manual (basic) is intended for users who "just want to run the inverter".If you are going to utilize functions and performance, refer to the Instruction Manual (applied) [IB-0600177ENG].The Instruction Manual (applied) is separately available from where you purchased the inverter or your Mitsubishisales representative.1234567CONTENTSPRODUCT CHECKING AND PARTS IDENTIFICATION ............................. 1INSTALLATION AND WIRING...................................................................... 22.1 Peripheral devices..................................................................................................... 32.2 Method of removal and reinstallation of the front cover............................................ 52.3 Installation of the inverter and instructions ............................................................... 72.4 Wiring ........................................................................................................................ 82.5 Power-off and magnetic contactor (MC)................................................................. 272.6 Precautions for use of the inverter.......................................................................... 282.7 Failsafe of the system which uses the inverter....................................................... 30DRIVE THE MOTOR.................................................................................... 313.1 Step of operation..................................................................................................... 313.2 Operation panel (<strong>FR</strong>-DU07).................................................................................... 323.3 Overheat protection of the motor by the inverter (Pr. 9)......................................... 373.4 When the rated motor frequency is 50Hz (Pr. 3).................................................... 383.5 Start/stop from the operation panel (PU operation mode)...................................... 393.6 Make a start and stop with terminals (external operation)...................................... 47ADJUSTMENT............................................................................................. 554.1 Simple mode parameter list .................................................................................... 554.2 Increase the starting torque (Pr. 0) ......................................................................... 564.3 Limit the maximum and minimum output frequency (Pr. 1, Pr. 2).......................... 574.4 Change acceleration and deceleration time (Pr. 7, Pr. 8) ...................................... 584.5 Energy saving operation (Pr. 60) ............................................................................ 594.6 Selection of the operation command and frequency command locations (Pr. 79) 614.7 Parameter clear, all parameter clear....................................................................... 624.8 Parameter copy and parameter verification............................................................ 634.9 Parameter list .......................................................................................................... 65TROUBLESHOOTING................................................................................. 917005.6 Check first when you have troubles...................................................................... 1075.1 Reset method of protective function ....................................................................... 915.2 List of faults or alarm display................................................................................... 925.3 Causes and corrective actions................................................................................ 935.4 Correspondences between digital and actual characters..................................... 1045.5 Check and clear of the faults history..................................................................... 105PRECAUTIONS FOR MAINTENANCE AND INSPECTION ..................... 1106.1 Inspection item ...................................................................................................... 110SPECIFICATIONS..................................................................................... 1187.1 Rating .................................................................................................................... 1187.2 Common specifications......................................................................................... 1207.3 Outline dimension drawings.................................................................................. 1227.4 Heatsink protrusion attachment procedure........................................................... 1331234567
This instruction manual (basic) provides handling information and precautions for use of the equipment.Please forward this instruction manual (basic) to the end user.This section is specifically about safety mattersDo not attempt to install, operate, maintain or inspect the inverter until youhave read through this instruction manual (basic) and appendeddocuments carefully and can use the equipment correctly. Do not use theinverter until you have a full knowledge of the equipment, safetyinformation and instructions. In this instruction manual (basic), the safetyinstruction levels are classified into "WARNING" and "CAUTION".WARNINGCAUTIONAssumes that incorrect handling may cause hazardousconditions, resulting in death or severe injury.Assumes that incorrect handling may causehazardous conditions, resulting in medium orslight injury, or may cause physical damage only.CAUTION level may lead to a serious consequenceNote that even theaccording to conditions. Please follow strictly the instructions of both levelsbecause they are important to personnel safety.1. Electric Shock PreventionWARNING• While power is on or when the inverter is running, do not open the front cover.Otherwise you may get an electric shock.m• Do not run the inverter with the front cover or wiring cover removed.Otherwise, you may access the exposed high-voltage terminals or thecharging part of the circuitry and get an electric shock.• Even if power is off, do not remove the front cover except for wiring or periodicinspection.You may access the charged inverter circuits and get an electric shock.• Before starting wiring, inspection or switching EMC filter on/off connector,switch off the inverter power, check to make sure that the operation panelindicator is off, wait for at least 10 minutes after the power supply has beenswitched off, and check that there are no residual voltage using a tester or thelike. The capacitor is charged with high voltage for some time after power offand it is dangerous.• This inverter must be earthed (grounded). Earthing (grounding) must conform tothe requirements of national and local safety regulations and electrical codes.(NEC section 250, IEC 536 class 1 and other applicable standards)• Any person who is involved in the wiring or inspection of this equipmentshould be fully competent to do the work.• Always install the inverter before wiring. Otherwise, you may get an electricshock or be injured.• Perform setting dial and key operations with dry hands to prevent an electricshock. Otherwise you may get an electric shock.• Do not subject the cables to scratches, excessive stress, heavy loads orpinching. Otherwise you may get an electric shock.• Do not replace the cooling fan while power is on. It is dangerous to replacethe cooling fan while power is on.• Do not touch the printed circuit board with wet hands. You may get an electric shock.• When measuring the main circuit capacitor capacity (Pr. 259 Main circuitcapacitor life measuring = "1"), the DC voltage is applied to the motor for 1s atpowering off. Never touch the motor terminal, etc. right after powering off toprevent an electric shock.CAUTION2. Fire Prevention• Mount the inverter on an incombustible wall without holes, etc. Mounting it toor near combustible material can cause a fire.• If the inverter has become faulty, switch off the inverter power.A continuous flow of large current could cause a fire.• Do not connect a resistor directly to the DC terminals P/+, N/−. This could cause a fire.CAUTION3. Injury Prevention• Apply only the voltage specified in the instruction manual to each terminal.Otherwise, burst, damage, etc. may occur.• Ensure that the cables are connected to the correct terminals. Otherwise,burst, damage, etc. may occur.• Always make sure that polarity is correct to prevent damage, etc. Otherwise,burst, damage, etc. may occur.• While power is on or for some time after power-off, do not touch the inverteras it is hot and you may get burnt.4. Additional InstructionsAlso note the following points to prevent an accidental failure, injury, electricshock, etc.(1) Transportation and installationCAUTION• When carrying products, use correct lifting gear to prevent injury.• Do not stack the inverter boxes higher than the number recommended.• Ensure that installation position and material can withstand the weight of theinverter. Install according to the information in the instruction manual.• Do not install or operate the inverter if it is damaged or has parts missing. Thiscan result in breakdowns.• When carrying the inverter, do not hold it by the front cover or setting dial; itmay fall off or fail.• Do not stand or rest heavy objects on the product.• Check the inverter mounting orientation is correct.• Prevent other conductive bodies such as screws and metal fragments orother flammable substance such as oil from entering the inverter.• As the inverter is a precision instrument, do not drop or subject it to impact.• Use the inverter under the following environmental conditions. Otherwise, theinverter may be damaged.Ambient temperature -10°C to +50°C (non-freezing)Ambient humidity 90% RH or less (non-condensing)Storage temperature -20°C to +65°C *1Indoors (free from corrosive gas, flammableAtmospheregas, oil mist, dust and dirt)Maximum 1000m above sea level forAltitude, vibrationstandard operation. 5.9m/s 2 or less *2*1 Temperature applicable for a short time, e.g. in transit.*2 2.9m/s 2 or less for the 185K or more.Environment(2) Wiring• Do not install a power factor correction capacitor, surge suppressor or radionoise filter on the inverter output side.• The connection orientation of the output cables U, V, W to the motor will affectthe direction of rotation of the motor.(3) Test operation and adjustment• Before starting operation, confirm and adjust the parameters. A failure to doso may cause some machines to make unexpected motions.(4) Operation• When you have chosen the retry function, stay away from the equipment as itwill restart suddenly after an alarm stop.• Since the key is valid only when functions are set (refer to page 75),provide a circuit and switch separately to make an emergency stop (poweroff, mechanical brake operation for emergency stop, etc).• Make sure that the start signal is off before resetting the inverter alarm. Afailure to do so may restart the motor suddenly.• The load used should be a three-phase induction motor only. Connection of anyother electrical equipment to the inverter output may damage the inverter as wellas equipment.• Do not modify the equipment.• Do not perform parts removal which is not instructed in this manual. Doing somay lead to fault or damage of the inverter.• The electronic thermal relay function does not guarantee protection of themotor from overheating.• Do not use a magnetic contactor on the inverter input for frequent starting/stopping of the inverter.• Use a noise filter to reduce the effect of electromagnetic interference.Otherwise nearby electronic equipment may be affected.• Take measures to suppress harmonics. Otherwise power supply harmonicsfrom the inverter may heat/damage the power factor correction capacitor andgenerator.• When a 400V class motor is inverter-driven, please use an insulationenhancedmotor or measures taken to suppress surge voltages. Surgevoltages attributable to the wiring constants may occur at the motor terminals,deteriorating the insulation of the motor.• When parameter clear or all clear is performed, reset the requiredparameters before starting operations. Each parameter returns to the initialvalue.• The inverter can be easily set for high-speed operation. Before changing itssetting, fully examine the performances of the motor and machine.• In addition to the inverter's holding function, install a holding device to ensuresafety.• Before running an inverter which had been stored for a long period, alwaysperform inspection and test operation.• For prevention of damage due to static electricity, touch nearby metal beforetouching this product to eliminate static electricity from your body.(5) Emergency stop• Provide a safety backup such as an emergency brake which will prevent themachine and equipment from hazardous conditions if the inverter fails.• When the breaker on the inverter input side trips, check for the wiring fault(short circuit), damage to internal parts of the inverter, etc. Identify the causeof the trip, then remove the cause and power on the breaker.• When the protective function is activated, take the corresponding correctiveaction, then reset the inverter, and resume operation.(6) Maintenance, inspection and parts replacement• Do not carry out a megger (insulation resistance) test on the control circuit ofthe inverter.(7) Disposing of the inverter• Treat as industrial waste.CAUTIONCAUTIONWARNINGCAUTIONCAUTIONCAUTIONCAUTIONGeneral instructionsMany of the diagrams and drawings in this instruction manual (basic) showthe inverter without a cover, or partially open. Never run the inverter in thisstatus. Always replace the cover and follow this instruction manual (basic)when operating the inverter.A-1
— CONTENTS —1 PRODUCT CHECKING AND PARTS IDENTIFICATION 12 INSTALLATION AND WIRING 22.1 Peripheral devices...................................................................................................... 32.2 Method of removal and reinstallation of the front cover............................................. 52.3 Installation of the inverter and instructions................................................................. 72.4 Wiring.......................................................................................................................... 82.4.1 Terminal connection diagram .................................................................................................... 82.4.2 EMC filter................................................................................................................................... 92.4.3 Specification of main circuit terminal ....................................................................................... 102.4.4 Terminal arrangement of the main circuit terminal, power supply and the motor wiring ......... 102.4.5 Control circuit terminals ........................................................................................................... 192.4.6 Changing the control logic ....................................................................................................... 222.4.7 Wiring of control circuit ............................................................................................................ 242.4.8 When connecting the operation panel using a connection cable ............................................ 252.4.9 RS-485 terminal block ............................................................................................................. 262.4.10 Communication operation........................................................................................................ 262.5 Power-off and magnetic contactor (MC) ..................................................................272.6 Precautions for use of the inverter ...........................................................................282.7 Failsafe of the system which uses the inverter ........................................................ 303 DRIVE THE MOTOR 313.1 Step of operation ...................................................................................................... 313.2 Operation panel (<strong>FR</strong>-DU07) .....................................................................................323.2.1 Parts of the operation panel (<strong>FR</strong>-DU07).................................................................................. 323.2.2 Basic operation (factory setting) .............................................................................................. 333.2.3 Operation lock (Press [MODE] for an extended time (2s)) ...................................................... 343.2.4 Monitoring of output current and output voltage ...................................................................... 353.2.5 First priority monitor................................................................................................................. 353.2.6 Setting dial push ...................................................................................................................... 353.2.7 Change the parameter setting value ....................................................................................... 363.3 Overheat protection of the motor by the inverter (Pr. 9) .......................................... 373.4 When the rated motor frequency is 50Hz (Pr. 3) ..................................................... 383.5 Start/stop from the operation panel (PU operation mode)....................................... 393.5.1 Set the set frequency to operate (example: performing operation at 30Hz)............................ 393.5.2 Use the setting dial like a potentiometer to perform operation. ............................................... 403.5.3 Use switches to give a start command and a frequency setting (multi-speed setting) ............ 413.5.4 Perform frequency setting by analog (voltage input) ............................................................... 433.5.5 Perform frequency setting by analog (current input) ............................................................... 453.6 Make a start and stop with terminals (external operation)....................................... 473.6.1 Use the set frequency set by the operation panel (Pr. 79 = 3) ................................................ 473.6.2 Use switches to give a start command and a frequency setting(multi-speed setting) (Pr. 4 to Pr. 6) ........................................................................................ 49I
3.6.3 Perform frequency setting by analog (voltage input) ............................................................... 513.6.4 Change the frequency (60Hz) at the maximum voltage input (at 5V)...................................... 523.6.5 Perform frequency setting by analog (current input) ............................................................... 533.6.6 Change the frequency (60Hz) of the maximum value of potentiometer (at 20mA) ................. 544 ADJUSTMENT 554.1 Simple mode parameter list .....................................................................................554.2 Increase the starting torque (Pr. 0) .......................................................................... 564.3 Limit the maximum and minimum output frequency (Pr. 1, Pr. 2) ........................... 574.4 Change acceleration and deceleration time (Pr. 7, Pr. 8)........................................584.5 Energy saving operation (Pr. 60) ............................................................................. 594.5.1 Energy saving operation mode (setting "4") ............................................................................ 594.5.2 Optimum excitation control mode (setting "9")......................................................................... 594.6 Selection of the operation command and frequency command locations (Pr. 79).. 614.7 Parameter clear, all parameter clear.................................................................... 624.8 Parameter copy and parameter verification ......................................................... 634.8.1 Parameter copy ....................................................................................................................... 634.8.2 Parameter verification.............................................................................................................. 644.9 Parameter list ........................................................................................................... 654.9.1 List of parameters classified by purpose of use ...................................................................... 654.9.2 Used to display the extended parameters ............................................................................... 674.9.3 Parameter list .......................................................................................................................... 68CONTENTS5 TROUBLESHOOTING 915.1 Reset method of protective function.........................................................................915.2 List of faults or alarm display.................................................................................... 925.3 Causes and corrective actions ................................................................................. 935.4 Correspondences between digital and actual characters......................................1045.5 Check and clear of the faults history.................................................................. 1055.6 Check first when you have troubles .......................................................................1075.6.1 Motor does not start............................................................................................................... 1075.6.2 Motor generates abnormal noise........................................................................................... 1075.6.3 Motor generates heat abnormally.......................................................................................... 1075.6.4 Motor rotates in opposite direction ........................................................................................1085.6.5 Speed greatly differs from the setting.................................................................................... 1085.6.6 Acceleration/deceleration is not smooth................................................................................ 1085.6.7 Motor current is large............................................................................................................. 1085.6.8 Speed does not increase....................................................................................................... 1085.6.9 Speed varies during operation............................................................................................... 1085.6.10 Operation mode is not changed properly .............................................................................. 1095.6.11 Operation panel (<strong>FR</strong>-DU07) display is not operating............................................................. 1095.6.12 POWER lamp is not lit ........................................................................................................... 1095.6.13 Parameter write cannot be performed ................................................................................... 109II
6 PRECAUTIONS FOR MAINTENANCE AND INSPECTION 1106.1 Inspection item .......................................................................................................1106.1.1 Daily inspection ..................................................................................................................... 1106.1.2 Periodic inspection ................................................................................................................ 1106.1.3 Daily and periodic inspection................................................................................................. 1116.1.4 Display of the life of the inverter parts ................................................................................... 1126.1.5 Cleaning ................................................................................................................................ 1136.1.6 Replacement of parts ............................................................................................................ 1136.1.7 Inverter replacement.............................................................................................................. 1177 SPECIFICATIONS 1187.1 Rating .....................................................................................................................1187.2 Common specifications ..........................................................................................1207.3 Outline dimension drawings ...................................................................................1227.3.1 Inverter outline dimension drawings ...................................................................................... 1227.4 Heatsink protrusion attachment procedure............................................................1337.4.1 When using a heatsink protrusion attachment (<strong>FR</strong>-A7CN) ................................................... 1337.4.2 Protrusion of heatsink of the <strong>FR</strong>-F740-185K or more............................................................ 133APPENDICES 136Appendix 1For customers who have replaced the older model with thisinverter...................................................................................................... 136Appendix 1-1Replacement of the <strong>FR</strong>-F500 series ............................................................................. 136Appendix 1-2Replacement of the <strong>FR</strong>-A100 series .................................................... 137Appendix 2 Instructions for UL and cUL Compliance.................................................. 138Appendix 3 Instructions for Compliance with the European Directives....................... 140DU: Operation panel (<strong>FR</strong>-DU07)PU: Operation panel(<strong>FR</strong>-DU07) and parameter unit (<strong>FR</strong>-PU04/<strong>FR</strong>-PU07)Inverter: Mitsubishi inverter <strong>FR</strong>-<strong>F700</strong> series<strong>FR</strong>-<strong>F700</strong>: Mitsubishi inverter <strong>FR</strong>-<strong>F700</strong> seriesPr.: Parameter NumberPU operation: Operation using the PU (<strong>FR</strong>-DU07/<strong>FR</strong>-PU04/<strong>FR</strong>-PU07).External operation: Operation using the control circuit signalsCombined operation: Combined operation using the PU (<strong>FR</strong>-DU07/<strong>FR</strong>-PU04/<strong>FR</strong>-PU07) and external operationStandard motor: SF-JRConstant-torque motor: SF-HRCALONWORKS ® is registered trademarks of Echelon Corporation in the U.S.A. and other countries.DeviceNet is a registered trademark of ODVA (Open DeviceNet Vender Association, Inc.).Company and product names herein are the trademarks and registered trademarks of their respective owners.III
1PRODUCT CHECKING AND PARTS IDENTIFICATION1 PRODUCT CHECKING AND PARTS IDENTIFICATIONUnpack the inverter and check the capacity plate on the front cover and the rating plate on the inverter side face toensure that the product agrees with your order and the inverter is intact.• Inverter Type<strong>FR</strong> - F740 -5.5KSymbol Voltage ClassF720 Three-phase 200V classF740 Three-phase 400V classRS-485 terminals(Refer to page 26)Connector for plug-in option connection(Refer to the instruction manual of options.)Indicate invertercapacity (kW)Voltage/current input switch(Refer to page 8)AU/PTC switchover switch(Refer to the Instruction Manual (applied) Chapter 4.)EMC filter ON/OFF connector(Refer to page 9)PU connector(Refer to page 25)Cooling fan(Refer to page 114)Operation panel (<strong>FR</strong>-DU07)(Refer to page 5)Power lampLit when the control circuit(R1/L11, S1/L21) is suppliedwith power.Alarm lampLit when the inverter isin the alarm status(major fault).Front cover(Refer to page 5)Capacity plateCapacity plate<strong>FR</strong>-F740-5.5KInverter typeSerial numberControl circuitterminal block(Refer to page 10)Main circuit terminal block(Refer to page 19)Combed shapedwiring cover(Refer to page 13)Rating plateRating plateInverter typeApplied motorcapacityInput ratingOutput ratingSerial numberCharge lampLit when power issupplied to the maincircuit (Refer to page 10)<strong>FR</strong>-F740-5.5K• Accessory· Fan cover fixing screws (30K or less)(Refer to page 140)Capacity Screw Size (mm) Number200V400V2.2K to 5.5K M3 × 35 17.5K to 15K M4 × 40 218.5K to 30K M4 × 50 13.7K, 5.5K M3 × 35 17.5K to 18.5K M4 × 40 222K, 30K M4 × 50 1· DC reactor supplied (75K or more)· Eyebolt for hanging the inverter (37K to 315K)M8 × two piecesREMARKSFor removal and reinstallation of covers, refer to page 5.Harmonic suppression guidelineAll models of general-purpose inverters used by specific consumers are covered by "Harmonic suppression guideline for consumerswho receive high voltage or special high voltage". ( For further details, refer to the instruction manual (applied) chapter 3.)1
2 INSTALLATION AND WIRINGThree-phase AC power supplyUse within the permissible power supplyspecifications of the inverter.(Refer to page 118)Moulded case circuitbreaker (MCCB)or earth leakage currentbreaker (ELB), fuseThe breaker must be selected carefully sincean in-rush current flows in the inverter atpower on.(Refer to page 3)PLCRS-485 terminal blockThe inverter can beconnected with computerssuch as PLC.It supports Mitsubishi inverterprotocol and Modbus-RTU(binary) protocol.Inverter(<strong>FR</strong>-<strong>F700</strong>)The life of the inverter is influenced by ambienttemperature. The ambient temperature should be as lowas possible within the permissible range. Especially whenmounting the inverter inside an enclosure, take cautionsof the ambient temperature. (Refer to page 7)Wrong wiring might lead to damage of the inverter. Thecontrol signal lines must be kept fully away from the maincircuit to protect them from noise.(Refer to page 8)Refer to page 9 for the built-in EMC filter.Magnetic contactor(MC)Install the magnetic contactor to ensure safety.Do not use this magnetic contactor to start andstop the inverter.Doing so will cause the inverter life to be shorten.(Refer to page 3)Reactor (<strong>FR</strong>-HAL, <strong>FR</strong>-HEL)Reactors (option) should be used when powerharmonics measures are taken, the power factor isto be improved or the inverter is installed near alarge power supply system (1000kVA or more). Theinverter may be damaged if you do not use reactors.Select the reactor according to the model.For the 55K or less, remove the jumpers acrossterminals P/+-P1 to connect to the DC reactor.(Refer to the Instruction Manual (applied)Chapter 2.)AC reactor(<strong>FR</strong>-HAL)Noise filter(<strong>FR</strong>-BLF)The 55K or lesshas a built-in commonmode core.DC reactor(<strong>FR</strong>-HEL)For the 75K or more, a DCreactor is supplied.Always install the reactor.P/+ P1 R/L1 S/L2 T/L3P/+ N/-Earth(Ground)UVWNoise filter(<strong>FR</strong>-BSF01, <strong>FR</strong>-BLF)Install a noise filter to reducethe electromagnetic noisegenerated from the inverter.Effective in the range fromabout 1MHz to 10MHz.A wire should be wound fourturns at a maximum.MotorBrake unit(<strong>FR</strong>-BU2, <strong>FR</strong>-BU*1, MT-BU5*2)High power factorconverter(<strong>FR</strong>-HC*1, MT-HC*2)Power supply harmonicscan be greatly suppressed.Install this as required.*1 Compatible with the 55K or less.*2 Compatible with the 75K or more.Power regenerationcommon converter(<strong>FR</strong>-CV*1)Power regenerationconverter (MT-RC*2)Greater braking capabilityis obtained.Install this as required.P/+ PRP/+PRResistor unit(<strong>FR</strong>-BR*1, MT-BR5*2)The regenerative brakingcapability of the inverter can beexhibited fully.Install this as required.Earth(Ground)Devices connected to the outputDo not install a power factor correction capacitor,surge suppressor or radio noise filter on the outputside of the inverter.When installing a moulded case circuit breaker on theoutput side of the inverter, contact each manufacturerfor selection of the moulded case circuit breaker.Earth (Ground)To prevent an electric shock, always earth(ground) the motor and inverter.CAUTION· Do not install a power factor correction capacitor, surge suppressor or radio noise filter on the inverter output side. This willcause the inverter to trip or the capacitor, and surge suppressor to be damaged. If any of the above devices are connected,immediately remove them.· Electromagnetic wave interferenceThe input/output (main circuit) of the inverter includes high frequency components, which may interfere with the communicationdevices (such as AM radios) used near the inverter. In this case, set the EMC filter valid to minimize interference.(Refer to Instruction Manual (applied) Chapter 2.)· Refer to the instruction manual of each option and peripheral devices for details of peripheral devices.2
Peripheral devices2.1 Peripheral devicesCheck the inverter type of the inverter you purchased. Appropriate peripheral devices must be selected according tothe capacity. Refer to the following list and prepare appropriate peripheral devices:200V classMotorOutput (kW)*1Applicable Inverter TypeBreaker Selection*2,4Reactor connectionInput Side MagneticContactor*3Reactor connectionwithout withwith commercialpower-supplyoperation without with0.75 <strong>FR</strong>-F720-0.75K 30AF 10A 30AF 10A 30AF 10A S-N10 S-N101.5 <strong>FR</strong>-F720-1.5K 30AF 15A 30AF 15A 30AF 15A S-N10 S-N102.2 <strong>FR</strong>-F720-2.2K 30AF 20A 30AF 15A 30AF 20A S-N10 S-N103.7 <strong>FR</strong>-F720-3.7K 30AF 30A 30AF 30A 30AF 30A S-N20, N21 S-N105.5 <strong>FR</strong>-F720-5.5K 50AF 50A 50AF 40A 50AF 50A S-N25 S-N20, N217.5 <strong>FR</strong>-F720-7.5K 100AF 60A 50AF 50A 100AF 60A S-N25 S-N2511 <strong>FR</strong>-F720-11K 100AF 75A 100AF 75A 100AF 75A S-N35 S-N3515 <strong>FR</strong>-F720-15K 225AF 125A 100AF 100A 225AF 125A S-N50 S-N5018.5 <strong>FR</strong>-F720-18.5K 225AF 150A 225AF 125A 225AF 150A S-N65 S-N5022 <strong>FR</strong>-F720-22K 225AF 175A 225AF 150A 225AF 175A S-N80 S-N6530 <strong>FR</strong>-F720-30K 225AF 225A 225AF 175A 225AF 225A S-N95 S-N8037 <strong>FR</strong>-F720-37K 400AF 250A 225AF 225A 400AF 250A S-N150 S-N12545 <strong>FR</strong>-F720-45K 400AF 300A 400AF 300A 400AF 350A S-N180 S-N15055 <strong>FR</strong>-F720-55K 400AF 400A 400AF 350A 600AF 500A S-N220 S-N18075 <strong>FR</strong>-F720-75K ⎯ 400AF 400A 400AF 400A ⎯ S-N30090 <strong>FR</strong>-F720-90K ⎯ 400AF 400A 600AF 500A ⎯ S-N300110 <strong>FR</strong>-F720-110K ⎯ 600AF 500A 600AF 600A ⎯ S-N400*1 Selections for use of the Mitsubishi 4-pole standard motor with power supply voltage of 200VAC 50Hz.*2 Select the MCCB according to the power supply capacity.Install one MCCB per inverter.MCCB INV IMFor installations in the United States or Canada, use the appropriate UL and cUL listed Class RK5, Class Tor Class L type fuse or molded case circuit breaker (MCCB).(Refer to page 138.)MCCB INV IM*3 Magnetic contactor is selected based on the AC-1 class. The electrical durability of magnetic contactor is 500,000 times. When the magneticcontactor is used for emergency stop during motor driving, the electrical durability is 25 times.When using the MC for emergency stop during motor driving or using on the motor side during commercial-power supply operation, select theMC with class AC-3 rated current for the motor rated current.*4 When the breaker on the inverter primary side trips, check for the wiring fault (short circuit), damage to internal parts of the inverter, etc.Identify the cause of the trip, then remove the cause and power on the breaker.2INSTALLATION AND WIRING3
Peripheral devices400V classMotorOutput(kW)*1Applicable Inverter TypeBreaker Selection*2,4Reactor connectionInput Side MagneticContactor*3Reactor connectionwithout withwith commercialpower-supplyoperation without with0.75 <strong>FR</strong>-F740-0.75K 30AF 5A 30AF 5A 30AF 5A S-N10 S-N101.5 <strong>FR</strong>-F740-1.5K 30AF 10A 30AF 10A 30AF 10A S-N10 S-N102.2 <strong>FR</strong>-F740-2.2K 30AF 10A 30AF 10A 30AF 15A S-N10 S-N103.7 <strong>FR</strong>-F740-3.7K 30AF 20A 30AF 15A 30AF 20A S-N10 S-N105.5 <strong>FR</strong>-F740-5.5K 30AF 30A 30AF 20A 30AF 30A S-N20 S-N11, N127.5 <strong>FR</strong>-F740-7.5K 30AF 30A 30AF 30A 30AF 30A S-N20 S-N2011 <strong>FR</strong>-F740-11K 50AF 50A 50AF 40A 50AF 50A S-N20 S-N2015 <strong>FR</strong>-F740-15K 100AF 60A 50AF 50A 100AF 60A S-N25 S-N2018.5 <strong>FR</strong>-F740-18.5K 100AF 75A 100AF 60A 100AF 75A S-N25 S-N2522 <strong>FR</strong>-F740-22K 100AF 100A 100AF 75A 100AF 100A S-N35 S-N2530 <strong>FR</strong>-F740-30K 225AF 125A 100AF 100A 225AF 125A S-N50 S-N5037 <strong>FR</strong>-F740-37K 225AF 150A 225AF 125A 225AF 150A S-N65 S-N5045 <strong>FR</strong>-F740-45K 225AF 175A 225AF 150A 225AF 175A S-N80 S-N6555 <strong>FR</strong>-F740-55K 225AF 200A 225AF 175A 225AF 200A S-N80 S-N8075 <strong>FR</strong>-F740-75K ⎯ 225AF 225A 225AF 225A ⎯ S-N9590 <strong>FR</strong>-F740-90K ⎯ 225AF 225A 400AF 300A ⎯ S-N150110 <strong>FR</strong>-F740-110K ⎯ 225AF 225A 400AF 350A ⎯ S-N180132 <strong>FR</strong>-F740-132K ⎯ 400AF 400A 400AF 400A ⎯ S-N220150 <strong>FR</strong>-F740-160K ⎯ 400AF 400A 400AF 400A ⎯ S-N300160 <strong>FR</strong>-F740-160K ⎯ 400AF 400A 600AF 500A ⎯ S-N300185 <strong>FR</strong>-F740-185K ⎯ 400AF 400A 600AF 500A ⎯ S-N300220 <strong>FR</strong>-F740-220K ⎯ 600AF 500A 600AF 600A ⎯ S-N400250 <strong>FR</strong>-F740-250K ⎯ 600AF 600A 600AF 600A ⎯ S-N600280 <strong>FR</strong>-F740-280K ⎯ 600AF 600A 800AF 800A ⎯ S-N600315 <strong>FR</strong>-F740-315K ⎯ 800AF 700A 800AF 800A ⎯ S-N600355 <strong>FR</strong>-F740-355K ⎯ 800AF 800A 800AF 800A ⎯ S-N600400 <strong>FR</strong>-F740-400K ⎯ 1000AF 900A 1000AF 1000A ⎯ S-N800450 <strong>FR</strong>-F740-450K ⎯ 1000AF 1000A 1000AF 1000A ⎯500 <strong>FR</strong>-F740-500K ⎯ 1200AF 1200A 1200AF 1200A ⎯560 <strong>FR</strong>-F740-560K ⎯ 1600AF 1500A 1600AF 1600A ⎯1000ARated product1000ARated product1200ARated product*1 Selections for use of the Mitsubishi 4-pole standard motor with power supply voltage of 400VAC 50Hz.*2 Select the MCCB according to the power supply capacity.Install one MCCB per inverter.MCCB INV IMFor installations in the United States or Canada, use the appropriate UL and cUL listed Class RK5, Class Tor Class L type fuse or molded case circuit breaker (MCCB).(Refer to page 138.)MCCB INV IM*3 Magnetic contactor is selected based on the AC-1 class. The electrical durability of magnetic contactor is 500,000 times. When the magneticcontactor is used for emergency stop during motor driving, the electrical durability is 25 times.When using the MC for emergency stop during motor driving or using on the motor side during commercial-power supply operation, select theMC with class AC-3 rated current for the motor rated current.*4 When the breaker on the inverter primary side trips, check for the wiring fault (short circuit), damage to internal parts of the inverter, etc.Identify the cause of the trip, then remove the cause and power on the breaker.4
Method of removal and reinstallation of thefront cover2.2 Method of removal and reinstallation of the front cover•Removal of the operation panel1) Loosen the two screws on the operation panel.(These screws cannot be removed.)2) Push the left and right hooks of the operation paneland pull the operation panel toward you to remove.When reinstalling the operation panel, insert it straight to reinstall securely and tighten the fixed screws of theoperation panel.<strong>FR</strong>-F720-30K or less, <strong>FR</strong>-F740-30K or less•Removal1) Loosen the installation screws of the 2) Pull the front cover toward you to remove by pushing anfront cover.installation hook using left fixed hooks as supports.Front coverFront cover2•Reinstallation1) Insert the two fixed hooks on the left side ofthe front cover into the sockets of theinverter.2) Using the fixed hooks as supports,securely press the front coveragainst the inverter.(Although installation can be donewith the operation panel mounted,make sure that a connector issecurely fixed.)Installation hook3) Tighten the installationscrews and fix the frontcover.INSTALLATION AND WIRINGFront coverFront coverFront cover5
Method of removal and reinstallation of thefront cover<strong>FR</strong>-F720-37K or more, <strong>FR</strong>-F740-37K or more•Removal1) Remove installation screws on 2) Loosen the installationthe front cover 1 to remove the screws of the front cover 2.front cover 1.3) Pull the front cover 2 toward you toremove by pushing an installationhook on the right side using leftfixed hooks as supports.Installation hookFront cover 1Front cover 2•Reinstallation1) Insert the two fixed hooks on the left side of thefront cover 2 into the sockets of the inverter.2) Using the fixed hooks as supports, securelypress the front cover 2 against the inverter.(Although installation can be done with theoperation panel mounted, make sure that aconnector is securely fixed.)Front cover 2 Front cover 23) Fix the front cover 2 with theinstallation screws.4) Fix the front cover 1 with theinstallation screws.Front cover 2Front cover 1REMARKS⋅ For the <strong>FR</strong>-F740-185K or more, the front cover 1 is separated into two parts.CAUTION1. Fully make sure that the front cover has been reinstalled securely. Always tighten the installation screws of the front cover.2. The same serial number is printed on the capacity plate of the front cover and the rating plate of the inverter. Before reinstalling thefront cover, check the serial numbers to ensure that the cover removed is reinstalled to the inverter from where it was removed.6
2.3 Installation of the inverter and instructions• Installation of the InverterInstallation on the enclosure30K or less37K or more⋅⋅Installation of the inverter and instructionsCAUTIONWhen encasing multiple inverters, install them inparallel as a cooling measure.Install the inverter vertically.VerticalFix six positions for the <strong>FR</strong>-F740-185K to 400K and fix eight positionsfor the <strong>FR</strong>-F740-450K to 560K.Refer to the clearances below.• Install the inverter under the following conditions.Ambient temperature and humidityMeasurementposition5cm Inverter 5cmMeasurementposition5cmTemperature: -10°C to 50°CHumidity: 90% RH maximumLeave enough clearances and takecooling measures.5cmor more *55K or less10cm or more5cmor more *10cm or moreClearances (front)10cmor more75K or more*1cm or more for 3.7K or less20cm or more10cmor more20cm or moreClearances (side)5cm Inverteror more**1cm or more for 3.7K or lessREMARKS• For replacing the cooling fan of the <strong>FR</strong>-F740-185K or more, 30cm of space is necessary in front of the inverter.Refer to page 114 for fan replacement.• The inverter consists of precision mechanical and electronic parts. Never install or handle it in any of the followingconditions as doing so could cause an operation fault or failure.Direct sunlightVertical mounting(When installing two ormore inverters, installthem in parallel.)Vibration(5.9m/s 2 or more*)* 2.9m/s 2 or more for the185K or moreTransportation byholding the front coverHigh temperature,high humidityOil mist, flammablegas, corrosive gas,fluff, dust, etc.Horizontal placementMounting tocombustible material2INSTALLATION AND WIRING7
Wiring2.4 Wiring2.4.1 Terminal connection diagramSink logicMain circuit terminalControl circuit terminalThree-phase ACpower supplyMCCB*2. To supply power to thecontrol circuit separately,remove the jumper acrossR1/L11 and S1/L21.Frequency setting signal (Analog)Frequency settingpotentiometer1/2W1kΩ*5321Auxiliary (+)input (-)Terminal4 input(Currentinput)*5. It is recommended to use2W1kΩ when thefrequency setting signal ischanged frequently.MCJumper*2Control input signals (No voltage input allowed)Terminal functions Forwardvary with the input rotationterminal assignment start(Pr. 178 to Pr. 189) Reverse(Refer to the InstructionManual (applied)chapter 4)Multi-speedselection*3. AU terminalcan be usedas PTC inputterminal.rotationstartStart self-holding selectionHigh speedMiddle speedLow speedJog modeSecond function selectionTerminal 4 input selection(Current input selection)Selection of automatic restartafter instantaneouspower failureContact input common*4. Terminal inputspecifications can bechanged by analog inputspecifications switchover(Pr. 73, Pr. 267). Set thevoltage/current inputswitch in the OFFposition to select voltageinput (0 to 5V/0 to 10V)and ON to select currentinput (0 to 20mA).Output stopReset(+)(-)Earth(Ground)24VDC power supply(Common for external power supply transistor)(Refer to the InstructionManual (applied)chapter 4)*1. DC reactor (<strong>FR</strong>-HEL)Be sure to connect the DC reactorsupplied with the 75K or more.When a DC reactor is connectedto the 55K or less, remove thejumper across P1-P/+.Connectorfor plug-in optionconnectionEarth(ground) JumperR/L1S/L2T/L3R1/L11S1/L21STFSTRSTOPRHRMRLJOGRTMRSP1*1RES *3AUAUCSPTCMain circuitControl circuitSOURCEP/+Relay output 1(Fault output)CAUTION· To prevent a malfunction due to noise, keep the signal cables more than 10cm away from the power cables.· After wiring, wire offcuts must not be left in the inverter.Wire offcuts can cause an alarm, failure or malfunction. Always keep the inverter clean.When drilling mounting holes in an enclosure etc., take care not to allow chips and other foreign matter to enter the inverter.· Set the voltage/current input switch correctly. Operation with a wrong setting may cause a fault, failure or malfunction.SINKJumper *7.PR*7SE Open collector output commonSDSink/source commonPCPU*9. It is not necessarywhen calibrating theconnector indicator from the*4 Voltage/currentoperation panel.input switchIndicator10E(+10V) 4 2+ -(Frequency meter, etc.)ONFM10(+5V) OFFCalibrationMoving-coil type0 to 5VDC Initial valueSD resistor *91mA full-scale2 0 to 10VDCselected0 to 20mADC*45(Analog common)AM(+)Analog signal output1Initial5(0 to 10VDC)0 to ±10VDC value(-)0 to ±5VDC selected *4InitialTXD+RS-485 terminals4 to 20mADC value40 to 5VDCTXD-Data transmission0 to 10VDCRXD+RXD-Data receptionSGGNDPX*7 N/-ON EMC filterON/OFFOFF connector *8CN8*6UVWC1B1A1C2B2A2RUNSUIPFOLFUTerminatingresistor VCCResistor unit(Option)Brake unit(Option)Do not use PR and PX terminals.Please do not remove the jumperconnected to terminal PR and PX.Relay output 2RunningUp to frequencyInstantaneouspower failureOverloadFrequency detectionMotorIMRelay outputTerminal functionsvary with the outputterminal assignment(Pr. 195, Pr. 196)(Refer to the InstructionManual (applied)chapter 4)Open collector outputTerminal functionsvary with the outputterminal assignment(Pr. 190 to Pr. 194)(Refer to the InstructionManual (applied)chapter 4)Option connector 1*6. A CN8 (for MT-BU5)connector is providedwith the 75K or more.Earth(ground)cable*8.The 200V class 0.75K and 1.5Kare not provided with the ON/OFFconnector EMC filter.5V(Permissible loadcurrent 100mA)8
UVWWiring2.4.2 EMC filterThis inverter is equipped with a built-in EMC filter (capacitive filter) and common mode core.The EMC filter is effective for reduction of air-propagated noise on the input side of the inverter.The EMC filter is factory-set to disable (OFF). To enable it, fit the EMC filter ON/OFF connector to the ON position.The input side common mode core, built-in the 55K or less inverter, is always valid regardless of on/off of the EMC filteron/off connector.0.75K to 5.5K 7.5K, 11K15K or moreEMC filter OFF EMC filter ON EMC filter OFF EMC filter ON EMC filter OFF EMC filter ON(initial setting) (initial setting) (initial setting)<strong>FR</strong>-F720-2.2K to 5.5K<strong>FR</strong>-F740-0.75K to 5.5K<strong>FR</strong>-F720-7.5K, 11K<strong>FR</strong>-F740-7.5K, 11K<strong>FR</strong>-F720-15K<strong>FR</strong>-F740-15K, 18.5K<strong>FR</strong>-F720-18.5K to 30K<strong>FR</strong>-F740-22K, 30K<strong>FR</strong>-F720-37K or more<strong>FR</strong>-F740-37K or moreEMC filterON/OFFconnectorThe <strong>FR</strong>-F720-0.75K and 1.5K are not provided with the EMC filter ON/OFF connector. (Always ON)(1) Before removing a front cover, check to make sure that the indication of the inverter operation panel is off, wait forat least 10 minutes after the power supply has been switched off, and check that there are no residual voltageusing a tester or the like. (For the front cover removal method, refer to page 5.)(2) When disconnecting the connector, push the fixing tab and pull the connector straight without pulling the cable orforcibly pulling the connector with the tab fixed. When installing the connector, also engage the fixing tab securely.If it is difficult to disconnect the connector, use a pair of long-nose pliers, etc.EMC filterON/OFF connector(Side view)Disengage connector fixing tabWith tab disengaged,pull up connector straight.CAUTION⋅ Fit the connector to either ON or OFF.⋅ Enabling (turning on) the EMC filter increase leakage current. (Refer to Instruction Manual (applied) chapter 3)2INSTALLATION AND WIRINGWARNINGWhile power is on or when the inverter is running, do not open the front cover. Otherwise you may get an electric shock.9
Wiring2.4.3 Specification of main circuit terminalTerminalSymbolTerminal NameDescriptionR/L1,S/L2,T/L3AC power inputConnect to the commercial power supply.Keep these terminals open when using the high power factor converter(<strong>FR</strong>-HC, MT-HC) or power regeneration common converter (<strong>FR</strong>-CV).U, V, W Inverter output Connect a three-phase squirrel-cage motor.R1/L11,S1/L21P/+, N/-P/+, P1PR, PXPower supply forcontrol circuitBrake unitconnectionDC reactorconnectionConnected to the AC power supply terminals R/L1 and S/L2. To retainthe fault display and fault output or when using the high power factorconverter (<strong>FR</strong>-HC, MT-HC) or power regeneration common converter(<strong>FR</strong>-CV), remove the jumpers from terminals R/L1-R1/L11 and S/L2-S1/L21 and apply external power to these terminals.Do not turn off the power supply for control circuit (R1/L11, S1/L21) withthe main circuit power (R/L1, S/L2, T/L3) on. Doing so may damage theinverter. The circuit should be configured so that the main circuit power(R/L1, S/L2, T/L3) is also turned off when the power supply for controlcircuit (R1/L11, S1/L21) is off.15K or less 18.5K 22K or more200V class 60VA 80VA 80VA400V class 60VA 60VA 80VAConnect the brake unit (<strong>FR</strong>-BU, BU and MT-BU5), power regenerationcommon converter (<strong>FR</strong>-CV), high power factor converter (<strong>FR</strong>-HC andMT-HC) or power regeneration converter (MT-RC).For the 55K or less, remove the jumper across terminals P/+ - P1 andconnect the DC reactor. (Be sure to connect the DC reactor suppliedwith the 75K or more.)Please do not remove or use terminals PR and PX or the jumper connected.For earthing (grounding) the inverter chassis. Must be earthedEarth (ground)(grounded).2.4.4 Terminal arrangement of the main circuit terminal, power supply and the motorwiring200V class<strong>FR</strong>-F720-0.75K, 1.5K <strong>FR</strong>-F720-2.2K to 5.5KJumperScrew size (M4)R/L1 S/L2 T/L3PRJumperJumperScrew size (M4)JumperR/L1 S/L2 T/L3 N/- P/+ PRR1/L11S1/L21N/-P/+PXR1/L11S1/L21PXPower supplyIMMotorScrew size(M4)Charge lampAs this is an inside cover fixing screw,do not remove it.PowersupplyIMMotorScrew size(M4)Charge lamp10
Wiring<strong>FR</strong>-F720-7.5K, 11K<strong>FR</strong>-F720-15KCharge lampR1/L11 S1/L21Screw size(M4)JumperScrew size(M5) R1/L11 S1/L21R/L1 S/L2 T/L3N/-P/+ PRPXJumperCharge lampScrew size (M5)JumperR/L1 S/L2 T/L3 N/-JumperP/+PRIMPower supply Motor Screw size of terminal Screw size (M5)R1/L11, S1/L21, PRand PX is M4.Power supplyScrew size (M5)IMMotor<strong>FR</strong>-F720-18.5K to 30K<strong>FR</strong>-F720-37K to 55KScrew size (M4)Charge lampScrew sizeJumper(18.5K:M6, 22K/30K:M8)R1/L11 S1/L21PRR1/L11 S1/L21Screw size(M4)JumperCharge lampR/L1 S/L2 T/L3 N/- P/+IMJumperScrew size(37K:M8, 45K/55K:M10)Power supplyMotorScrew size (M6)R/L1 S/L2 T/L3 N/- P/+Jumper2<strong>FR</strong>-F720-75K to 110KR1/L11 S1/L21Screw size (M4)Charge lampJumperScrew size (M12)PowersupplyScrew size(37K:M6, 45K/55K:M8)IMMotorINSTALLATION AND WIRINGR/L1 S/L2 T/L3 N/-P/+P/+Power supplyScrew size (M12)(for option)Screw size(M10)P/+DC reactorIMMotor11
Wiring400V class<strong>FR</strong>-F740-0.75K to 5.5K<strong>FR</strong>-F740-7.5K, 11KScrew size (M4)JumperJumperR/L1 S/L2 T/L3 N/- P/+ PRCharge lampR1/L11S1/L21PXPowersupplyIMMotorScrew size(M4)Charge lampJumperScrew size(M4)R1/L11 S1/L21R/L1 S/L2 T/L3N/-P/+ PRPXJumper<strong>FR</strong>-F740-15K, 18.5K<strong>FR</strong>-F740-22K, 30KIMPower supply MotorScrew size(M4)Charge lampScrew size (M5)R1/L11 S1/L21Screw size(M4)JumperJumperP/+R1/L11 S1/L21Screw size (M4)Charge lampJumperPRScrew size (M6)R/L1 S/L2 T/L3 N/- P/+R/L1 S/L2 T/L3 N/-PRPower supplyScrew size (M5)IMMotorIMPower supply MotorScrew size (M6)Jumper<strong>FR</strong>-F740-37K to 55K<strong>FR</strong>-F740-75K to 110KR1/L11 S1/L21Screw size(M4)JumperCharge lampScrew size (M4)R1/L11 S1/L21Charge lampJumperScrew size (37K: M6, 45K/55K: M8)Screw size(75K: M8, 90K/110K: M10)Screw size (M10)Screw size(75K: M8, 90K/110K: M10)R/L1 S/L2 T/L3 N/- P/+JumperPowersupplyScrew size(37K: M6, 45K/55K: M8)IMMotorR/L1 S/L2 T/L3 N/- P/+PowersupplyP/+DC reactorIMMotorScrew size(75K: M8,90K/110K: M10)12
Wiring<strong>FR</strong>-F740-132K to 220KR1/L11 S1/L21 Screw size (M4)<strong>FR</strong>-F740-250K to 560KR1/L11 S1/L21Screw size (M4)Charge lampJumperCharge lampJumperScrew size(132K/160K: M10185K/220K: M12)R/L1 S/L2 T/L3 N/-P/+P/+R/L1 S/L2 T/L3 N/-Screw size (M12)P/+Screw size(M10)P/+IMPower supplyScrew size (M12)(for option)DC reactorMotorPower supplyP/+DC reactorIMMotorScrew size (M10)CAUTION· The power supply cables must be connected to R/L1, S/L2, T/L3. Never connect the power cable to the U, V, W of the inverter.Doing so will damage the inverter. (Phase sequence needs not to be matched.)· Connect the motor to U, V, W. At this time, turning on the forward rotation switch (signal) rotates the motor in thecounterclockwise direction when viewed from the motor shaft.· When wiring the inverter main circuit conductor of the 250K or more, tighten a nut from the right side of the conductor. Whenwiring two wires, place wires on both sides of the conductor. (Refer to the drawing below.) For wiring, use bolts (nuts) providedwith the inverter.2• Handling of the wiring cover(<strong>FR</strong>-F720-18.5K, 22K, <strong>FR</strong>-F740-22K, 30K)For the hook of the wiring cover, cut off the necessaryparts using a pair of long-nose pliers etc.CAUTIONCut off the same number of lugs as wires. If parts whereno wire is put through has been cut off (10mm or more),protective structure (JEM1030) becomes an open type(IP00).INSTALLATION AND WIRING13
Wiring(1) Cable sizes etc., of the main control circuit terminals and earth (ground) terminalsSelect the recommended cable size to ensure that a voltage drop will be 2% max.If the wiring distance is long between the inverter and motor, a main circuit cable voltage drop will cause the motortorque to decrease especially at the output of a low frequency.The following table indicates a selection example for the wiring length of 20m.200V class (when input power supply is 220V)Applicable InverterTypeTerminalScrewSize *4TighteningTorqueN·mCrimpingTerminalR/L1,S/L2,T/L3U, V, WCable SizesHIV, etc. (mm 2 ) *1 AWG/MCM *2 PVC, etc. (mm 2 ) *3R/L1,S/L2,T/L3U, V, WEarth(Ground)cableR/L1,S/L2,T/L3U, V, WR/L1,S/L2,T/L3U, V, WEarth(Ground)cable<strong>FR</strong>-F720-0.75K to2.2KM4 1.5 2-4 2-4 2 2 2 14 14 2.5 2.5 2.5<strong>FR</strong>-F720-3.7K M4 1.5 5.5-4 5.5-4 3.5 3.5 3.5 12 12 4 4 4<strong>FR</strong>-F720-5.5K M4 1.5 5.5-4 5.5-4 5.5 5.5 5.5 10 10 6 6 6<strong>FR</strong>-F720-7.5K M5 2.5 14-5 8-5 14 8 14 6 8 16 10 16<strong>FR</strong>-F720-11K M5 2.5 14-5 14-5 14 14 14 6 6 16 16 16<strong>FR</strong>-F720-15K M5 2.5 22-5 22-5 22 22 14 4 6 (*5) 25 25 16<strong>FR</strong>-F720-18.5K M6 4.4 38-6 38-6 38 38 22 2 2 35 35 25<strong>FR</strong>-F720-22K M8 (M6) 7.8 38-8 38-8 38 38 22 2 2 35 35 25<strong>FR</strong>-F720-30K M8 (M6) 7.8 60-8 60-8 60 60 38 1/0 1/0 50 50 25<strong>FR</strong>-F720-37K M8 (M6) 7.8 80-8 80-8 80 80 38 3/0 3/0 70 70 35<strong>FR</strong>-F720-45K M10 (M8) 14.7 100-10 100-10 100 100 60 4/0 4/0 95 95 50<strong>FR</strong>-F720-55K M10 (M8) 14.7 100-10 100-10 100 100 60 4/0 4/0 95 95 50<strong>FR</strong>-F720-75K M12 (M10) 24.5 150-12 150-12 125 125 38 MCM250 MCM250 ⎯ ⎯ ⎯<strong>FR</strong>-F720-90K M12 (M10) 24.5 150-12 150-12 150 150 38 2×4/0 2×4/0 ⎯ ⎯ ⎯<strong>FR</strong>-F720-110K M12 (M10) 24.5 100-12 100-12 2×100 2×100 38 2×4/0 2×4/0 ⎯ ⎯ ⎯*1 The cable size is that of the cable (HIV cable (600V class 2 vinyl-insulated cable) etc.) with continuous maximum permissible temperature of75°C. Assumes that the ambient temperature is 50°C or less and the wiring distance is 20m or less.*2 The recommended cable size is that of the cable (THHW cable) with continuous maximum permissible temperature of 75°C. Assumes that theambient temperature is 40°C or less and the wiring distance is 20m or less.(Selection example for use mainly in the United States.)*3 For the 15K or less, the recommended cable size is that of the cable (PVC cable) with continuous maximum permissible temperature of 70°C.Assumes that the ambient temperature is 40°C or less and the wiring distance is 20m or less.For the 18.5K or more, the recommended cable size is that of the cable (XLPE cable) with continuous maximum permissible temperature of90°C. Assumes that the ambient temperature is 40°C or less and wiring is performed in an enclosure.(Selection example for use mainly in Europe.)*4 The terminal screw size indicates the terminal size for R/L1, S/L2, T/L3, U, V, W, R1/L11, S1/L21, P/+, N/-, P1, and a screw for earthing(grounding).A screw for earthing (grounding) of the 7.5K, 11K is indicated in ( ).A screw for earthing (grounding) of the 22K or more is indicated in ( ).*5 When connecting the option unit to P/+, P1, N/-, use THHN cables for the option and terminals R/L1, S/L2, T/L3, U, V, W.14
Wiring400V class (when input power supply is 440V)ApplicableInverter TypeTerminalScrewSize *4TighteningTorqueN·mCrimping(Compression)TerminalR/L1, S/L2,T/L3U, V, WR/L1, S/L2,T/L3Cable SizesHIV, etc. (mm 2 ) *1 AWG/MCM *2 PVC, etc. (mm 2 ) *3U, V, WEarthR/L1, S/L2,(Ground)T/L3cableU, V, WR/L1, S/L2,T/L3U, V, WEarth(Ground)cable<strong>FR</strong>-F740-0.75K to3.7KM4 1.5 2-4 2-4 2 2 2 14 14 2.5 2.5 2.5<strong>FR</strong>-F740-5.5K M4 1.5 2-4 2-4 2 2 3.5 12 14 2.5 2.5 4<strong>FR</strong>-F740-7.5K M4 1.5 5.5-4 5.5-4 3.5 3.5 3.5 12 12 4 4 4<strong>FR</strong>-F740-11K M4 1.5 5.5-4 5.5-4 5.5 5.5 8 10 10 6 6 10<strong>FR</strong>-F740-15K M5 2.5 8-5 8-5 8 8 8 8 8 10 10 10<strong>FR</strong>-F740-18.5K M5 2.5 14-5 8-5 14 8 14 6 8 16 10 16<strong>FR</strong>-F740-22K M6 4.4 14-6 14-6 14 14 14 6 6 16 16 16<strong>FR</strong>-F740-30K M6 4.4 22-6 22-6 22 22 14 4 4 25 25 16<strong>FR</strong>-F740-37K M6 4.4 22-6 22-6 22 22 14 4 4 25 25 16<strong>FR</strong>-F740-45K M8 7.8 38-8 38-8 38 38 22 1 2 50 50 25<strong>FR</strong>-F740-55K M8 7.8 60-8 60-8 60 60 22 1/0 1/0 50 50 25<strong>FR</strong>-F740-75K M8 7.8 60-8 60-8 60 60 38 1/0 1/0 50 50 25<strong>FR</strong>-F740-90K M10 14.7 60-10 60-10 60 60 38 3/0 3/0 50 50 25<strong>FR</strong>-F740-110K M10 14.7 80-10 80-10 80 80 38 3/0 3/0 70 70 35<strong>FR</strong>-F740-132K M10 14.7 100-10 150-10 100 100 38 4/0 4/0 95 95 50<strong>FR</strong>-F740-160K M10 14.7 150-10 150-10 125 125 38 250 250 120 120 70<strong>FR</strong>-F740-185K M12 (M10) 24.5 150-12 150-12 150 150 38 300 300 150 150 95<strong>FR</strong>-F740-220K M12 (M10) 24.5 100-12 100-12 2×100 2×100 38 2×4/0 2×4/0 2×95 2×95 95<strong>FR</strong>-F740-250K M12 (M10) 24.5 100-12 100-12 2×100 2×100 38 2×4/0 2×4/0 2×95 2×95 95<strong>FR</strong>-F740-280K M12 (M10) 24.5 150-12 150-12 2×125 2×125 38 2×250 2×250 2×120 2×120 120<strong>FR</strong>-F740-315K M12 (M10) 24.5 150-12 150-12 2×150 2×150 38 2×300 2×300 2×150 2×150 150<strong>FR</strong>-F740-355K M12 (M10) 24.5 200-12 200-12 2×200 2×200 60 2×350 2×350 2×185 2×185 2×95<strong>FR</strong>-F740-400K M12 (M10) 24.5 C2-200 C2-200 2×200 2×200 60 2×400 2×400 2×185 2×185 2×95<strong>FR</strong>-F740-450K M12 (M10) 24.5 C2-250 C2-250 2×250 2×250 60 2×500 2×500 2×240 2×240 2×120<strong>FR</strong>-F740-500K M12 (M10) 24.5 C2-250 C2-250 2×250 2×250 100 2×500 2×500 2×240 2×240 2×120<strong>FR</strong>-F740-560K M12 (M10) 24.5 C2-200 C2-200 3×200 3×200 100 3×350 3×350 3×185 3×185 2×150*1 For the <strong>FR</strong>-F740-55K or less, the recommended cable size is that of the cable (e.g. HIV cable (600V class 2 vinyl-insulated cable)) with continuousmaximum permissible temperature of 75°C. Assumes that the ambient temperature is 50°C or less and the wiring distance is 20m or less.For the <strong>FR</strong>-F740-75K or more, the recommended cable size is that of the cable (e.g. LMFC (heat resistant flexible cross-linked polyethylene insulatedcable)) with continuous maximum permissible temperature of 90°C. Assumes that the ambient temperature is 50°C or less and wiring is performed in anenclosure.*2 For the <strong>FR</strong>-F740-45K or less, the recommended cable size is that of the cable (THHW cable) with continuous maximum permissible temperature of 75°C.Assumes that the ambient temperature is 40°C or less and the wiring distance is 20m or less.For the <strong>FR</strong>-F740-55K or more, the recommended cable size is that of the cable (THHN cable) with continuous maximum permissible temperature of 90°C.Assumes that the ambient temperature is 40°C or less and wiring is performed in an enclosure.(Selection example for use mainly in the United States.)*3 For the <strong>FR</strong>-F740-45K or less, the recommended cable size is that of the cable (PVC cable) with continuous maximum permissible temperature of 70°C.Assumes that the ambient temperature is 40°C or less and the wiring distance is 20m or less.For the <strong>FR</strong>-F740-55K or more, the recommended cable size is that of the cable (XLPE cable) with continuous maximum permissible temperature of 90°C.Assumes that the ambient temperature is 40°C or less and wiring is performed in an enclosure.(Selection example for use mainly in the Europe.)*4 The terminal screw size indicates the terminal size for R/L1, S/L2, T/L3, U, V, W, R1/L11, S1/L21, P/+, N/-, P1, and a screw for earthing (grounding).A screw for earthing (grounding) of the 185K or more is indicated in ( ).The line voltage drop can be calculated by the following formula:line voltage drop [V]=3 × wire resistance[mΩ/m] × wiring distance[m] × current[A]1000Use a larger diameter cable when the wiring distance is long or when it is desired to decrease the voltage drop (torquereduction) in the low speed range.CAUTION· Tighten the terminal screw to the specified torque.A screw that has been tighten too loosely can cause a short circuit or malfunction.A screw that has been tighten too tightly can cause a short circuit or malfunction due to the unit breakage.· Use crimping terminals with insulation sleeve to wire the power supply and motor.2INSTALLATION AND WIRING15
Wiring(2) Notes on earthing (grounding)• Leakage currents flow in the inverter. To prevent an electric shock, the inverter and motor must be earthed (grounded). Thisinverter must be earthed (grounded). Earthing (Grounding) must conform to the requirements of national and local safetyregulations and electrical codes. (NEC section 250, IEC 536 class 1 and other applicable standards)• Use the dedicated earth (ground) terminal to earth (ground) the inverter.(Do not use the screw in the casing, chassis, etc.)• Use the thickest possible earth (ground) cable. Use the cable whose size is equal to or greater than that indicated in theabove table, and minimize the cable length. The earthing (grounding) point should be as near as possible to the inverter.To be compliant with the European Directive (Low Voltage Directive), earth (ground) the inverteraccording to the instructions on page 140.(3) Total wiring lengthThe overall wiring length for connection of a single motor or multiple motors should be within the value in the table below.Pr. 72 PWM frequency selection Setting(carrier frequency)0.75K 1.5K 2.2K or More2 (2kHz) or less 300m 500m 500m3 to 15 (3kHz to 14.5kHz) * 200m 300m 500m* For the 75K or more, the setting range of Pr. 72 PWM frequency selection is "0 to 6".Total wiring length (1.5K or more)500m or less300mWhen driving a 400V class motor by the inverter, surge voltages attributable to the wiring constants may occur at themotor terminals, deteriorating the insulation of the motor.Take the following measures 1) or 2) in this case.1) Use a "400V class inverter-driven insulation-enhanced motor" and set frequency in Pr. 72 PWM frequency selectionaccording to wiring lengthWiring Length50m or less 50m to 100m exceeding 100mPr. 72 PWM frequency selection Setting14.5kHz or less 9kHz or less 4kHz or less(carrier frequency)2) Connect the surge voltage suppression filter (<strong>FR</strong>-ASF-H) to the 55K or less and the sine wave filter (MT-BSL/BSC)to the 75K or more on the inverter output side.CAUTION· Especially for long-distance wiring, the inverter may be affected by a charging current caused by the stray capacitances of thewiring, leading to a malfunction of the overcurrent protective function or fast response current limit function or a malfunction or faultof the equipment connected on the inverter output side. If fast-response current limit function malfunctions, disable this function.(For Pr.156 Stall prevention operation selection, refer to the Instruction Manual (applied) chapter 4.)· For details of Pr. 72 PWM frequency selection , refer to the Instruction Manual (applied) chapter 4. (When using an optional sine wavefilter (MT-BSL/BSC) for the 75K or more, set "25" in Pr.72 (2.5kHz)).· For explanation of surge voltage suppression filter (<strong>FR</strong>-ASF-H) and sine wave filter (MT-BSL/BSC), refer to the manual of eachoption.300m300m + 300m = 600m16
Wiring(4) Cable size of the control circuit power supply (terminal R1/L11, S1/L21)· Terminal Screw Size: M4· Cable size: 0.75mm 2 to 2mm 2· Tightening torque: 1.5N·m(5) When connecting the control circuit and the main circuit separately to the power supply(separate power)MCR/L1 InverterS/L2T/L3R1/L11S1/L21When fault occurs, opening of the electromagnetic contactor (MC) on theinverter power supply side results in power loss in the control circuit,disabling the fault output signal retention. Terminals R1/L11 and S1/L21 areprovided to hold a fault signal. In this case, connect the power supplyterminals R1/L11 and S1/L21 of the control circuit to the primary side of theMC.Remove the jumper• <strong>FR</strong>-F720-0.75K to 5.5K, <strong>FR</strong>-F740-0.75K to 5.5K1)Loosen the upper screws.2)Remove the lower screws.3)Remove the jumper4)Connect the separate powersupply cable for the controlcircuit to the lower terminals(R1/L11, S1/L21).3)1)2)R/L1S/L2T/L34)R1/L11 S1/L21R1/L11 S1/L212• <strong>FR</strong>-F720-7.5K, 11K, <strong>FR</strong>-F740-7.5K, 11K1)Remove the upper screws.2)Remove the lower screws.3)Remove the jumper.4)Connect the separate powersupply cable for the controlcircuit to the upper terminals(R1/L11, S1/L21).Main circuit terminal block3)1)2)R1/L11S1/L21R1/L11S1/L21INSTALLATION AND WIRING4)R/L1S/L2 T/L3Main circuitterminal block17
UVWWiring• <strong>FR</strong>-F720-15K, <strong>FR</strong>-F740-15K or more1)Remove the upper screws.2)Remove the lower screws.3)Pull the jumper toward you toremove.4)Connect the separate power supplycable for the control circuit to theupper terminals (R1/L11, S1/L21).Never connect the power cable toMCthe terminals in the lower stand.Doing so will damage the inverter.R/L1S/L2 T/L3R1/ S1/L11 L21 Power supplyterminal blockfor the control circuit3)Power supply terminal blockfor the control circuitR1/L11S1/L21Main power supply<strong>FR</strong>-F720-15K<strong>FR</strong>-F740-15K, 18.5K1)2)4)<strong>FR</strong>-F720-18.5K to 30K<strong>FR</strong>-F740-22K, 30K<strong>FR</strong>-F720-37K or more<strong>FR</strong>-F740-37K or morePower supplyterminal block forthe control circuitCAUTION· Do not turn off the control power (terminals R1/L11 and S1/L21) with the main circuit power (R/L1, S/L2, T/L3) on. Doing so maydamage the inverter. Make up a circuit which will switch off the main circuit power supply terminals R/L1, S/L2, T/L3 when thecontrol circuit power supply terminals R1/L11, S1/L21 are switched off.· Be sure to use the inverter with the jumpers across terminals R/L1-R1/L11 and S/L2-S1/L21 removed when supplying power fromother sources. The inverter may be damaged if you do not remove the jumper.· The voltage should be the same as that of the main control circuit when the control circuit power is supplied from other than theprimary side of the MC.· The power capacity necessary when separate power is supplied from R1/L11 and S1/L21 differs according to the inverter capacity.15K or less 18.5K 22K or more200V class 60VA 80VA 80VA400V class 60VA 60VA 80VA· If the main circuit power is switched off (for 0.1s or more) then on again, the inverter resets and a fault output will not be held.18
Wiring2.4.5 Control circuit terminalsindicates that terminal functions can be selected using Pr. 178 to Pr. 196 (I/O terminal function selection) (Refer toInstruction Manual (applied) chapter 4.)(1) Input signalsTypeTerminalSymbolTerminalNameDescriptionRatedSpecificationsRefer toContact inputSTFSTRSTOPRH,RM, RLJOGRTMRSRESAUCSSDPCForwardrotation startReverserotation startStart selfholdingselectionMulti-speedselectionJog modeselectionSecondfunctionselectionOutput stopResetTerminal 4 inputselectionPTC inputSelection ofautomaticrestart afterinstantaneouspower failureContact inputcommon (sink)(initial setting)Externaltransistorcommon(source)24VDC powersupply commonExternaltransistorcommon (sink)(initial setting)Contact inputcommon(source)24VDC powersupplyTurn on the STF signal to start forwardrotation and turn it off to stop.Turn on the STR signal to start reverserotation and turn it off to stop.Turn on the STOP signal to self-hold the start signal.When the STF andSTR signals are turnedon simultaneously, thestop command is given.Multi-speed can be selected according to the combination of RH,RM and RL signals.Turn on the JOG signal to select Jog operation (initial setting) andturn on the start signal (STF or STR) to start Jog operation.Turn on the RT signal to select second function.When the second function such as "second torque boost" and"second V/F (base frequency)" are set, turning on the RT signalselects these functions.Turn on the MRS signal (20ms or more) to stop the inverteroutput.Use to shut off the inverter output when stopping the motor byelectromagnetic brake.Used to reset fault output provided when fault occurs.Turn on the RES signal for more than 0.1s, then turn it off.Initial setting is for reset always. By setting Pr.75, reset can be setto enabled only at fault occurrence. Recover about 1s after resetis cancelled.Terminal 4 is made valid only when the AU signal is turned on. (Thefrequency setting signal can be set between 0 and 20mADC.)Turning the AU signal on makes terminal 2 (voltage input) invalid.AU terminal is used as PTC input terminal (thermal protection ofthe motor). When using it as PTC input terminal, set the AU/PTCswitch to PTC.When the CS signal is left on, the inverter restarts automatically atpower restoration. Note that restart setting is necessary for thisoperation. In the initial setting, a restart is disabled.(Refer to Pr. 57 Restart coasting time in Instruction Manual(applied) chapter 4.)Common terminal for contact input terminal (sink logic) and terminalFM.When connecting the transistor output (open collector output), suchas a programmable controller, when source logic is selected, connectthe external power supply common for transistor output to thisterminal to prevent a malfunction caused by undesirable currents.Common output terminal for 24VDC 0.1A power supply (PC terminal).Isolated from terminals 5 and SE.When connecting the transistor output (open collector output), suchas a programmable controller, when sink logic is selected, connectthe external power supply common for transistor output to thisterminal to prevent a malfunction caused by undesirable currents.Common terminal for contact input terminal (source logic).Can be used as 24VDC 0.1A power supply.Input resistance4.7kΩVoltage atopening: 21 to27VDCContacts atshort-circuited: 4to 6mADC47InstructionManual(applied)chapter 449InstructionManual(applied)chapter 4InstructionManual(applied)chapter 4InstructionManual(applied)chapter 49153InstructionManual(applied)chapter 4InstructionManual(applied)chapter 4----------------- —Power supplyvoltage range19.2 to 28.8VDCpermissible loadcurrent 100mA232INSTALLATION AND WIRING19
WiringTypeFrequency settingTerminalSymbol10E102415TerminalNameFrequencysetting powersupplyFrequencysetting(voltage)Frequencysetting(current)FrequencysettingauxiliaryFrequencysettingcommon*1 Set Pr.73, Pr.267, and a voltage/current input switch correctly, then input analog signals in accordance with the settings. Applying a voltage signalwith switch on (current input is selected) or a current signal with switch off (voltage input is selected) could cause component damage of theinverter or analog circuit of signal output devices.(2) Output signalsDescriptionWhen connecting the frequency setting potentiometer at an initialstatus, connect it to terminal 10.Change the input specifications of terminal 2 when connecting itto terminal 10E. (Refer to Pr. 73 Analog input selection inInstruction Manual (applied) chapter 4.)Inputting 0 to 5VDC (or 0 to 10V, 0 to 20mA) provides themaximum output frequency at 5V (10V, 20mA) and makes inputand output proportional. Use Pr. 73 to switch from among input 0to 5VDC (initial setting), 0 to 10VDC, and 0 to 20mA.Set the voltage/current input switch in the ON position to selectcurrent input (0 to 20mA).*1Inputting 4 to 20mADC (or 0 to 5V, 0 to 10V) provides themaximum output frequency at 20mA (5V, 10V) makes input andoutput proportional. This input signal is valid only when the AUsignal is on (terminal 2 input is invalid). Use Pr. 267 to switch fromamong input 4 to 20mA (initial setting), 0 to 5VDC, and 0 to10VDC. Set the voltage/current input switch in the OFF positionto select voltage input (0 to 5V/0 to 10V).*1(Refer to Instruction Manual (applied) chapter 4.)Inputting 0 to ±5 VDC or 0 to ±10VDC adds this signal to terminal2 or 4 frequency setting signal. Use Pr.73 to switch between theinput 0 to ±5VDC and 0 to ±10VDC (initial setting).Common terminal for frequency setting signal (terminal 2, 1 or 4)and analog output terminal AM. Do not earth (ground).RatedSpecifications10VDCPermissible loadcurrent 10mA5VDCPermissible loadcurrent 10mAVoltage input:Input resistance10kΩ ± 1kΩMaximumpermissiblevoltage 20VDCCurrent input:Input resistance245Ω ± 5ΩMaximumpermissiblecurrent 30mASwitch 1Switch 2Voltage/currentinput switch Input resistance10kΩ ± 1kΩMaximumpermissible voltage± 20VDCRefer toInstructionManual(applied)chapter 443, 5143, 5145, 53InstructionManual(applied)chapter 4----------------- -----TypeTerminalSymbolTerminalNameDescriptionRatedSpecificationsRefer toRelayA1,B1,C1A2,B2,C2Relay output 1(Fault output)Relay output 21 changeover contact output indicates that the inverterprotective function has activated and the output stopped.Fault: No conduction across B-C (Across A-C Continuity),Normal: Across B-C Continuity (No conduction across A-C)1 changeover contact outputContact capacity:230VAC 0.3A(Powerfactor=0.4)30VDC 0.3AInstructionManual(applied)chapter 4InstructionManual(applied)chapter 420
WiringTypeTerminalSymbolTerminalNameDescriptionRatedSpecificationsRefer toOpen collectorPulseRUNSUOLIPFFUSEFMAMInverterrunningUp tofrequencyOverloadwarningInstantaneouspower failureFrequencydetectionOpen collectoroutput commonFor meterAnalog signaloutputSwitched low when the inverter output frequency is equal to or higherthan the starting frequency (initial value 0.5Hz). Switched high duringstop or DC injection brake operation.*Switched low when the output frequencyreaches within the range of ±10% (initialvalue) of the set frequency. Switched highduring acceleration/deceleration and at astop. *Switched low when stall prevention isactivated by the stall preventionfunction. Switched high when stallprevention is cancelled. *Switched low when an instantaneouspower failure and under voltageprotections are activated. *Switched low when the inverter outputfrequency is equal to or higher than thepreset detected frequency and highwhen less than the preset detectedfrequency. *Alarm code (4bit)outputPermissible load24VDC (27VDCmaximum) 0.1A(A voltage drop is3.4V maximumwhen the signal ison.)* Low indicatesthat the opencollector outputtransistor is on(conducts).High indicatesthat thetransistor is off(does notconduct).InstructionManual(applied)chapter 4InstructionManual(applied)chapter 4InstructionManual(applied)chapter 4InstructionManual(applied)chapter 4InstructionManual(applied)chapter 4Common terminal for terminals RUN, SU, OL, IPF, FU ----------------- ----Select one e.g. output frequency frommonitor items. (Not output during inverterreset.)The output signal is proportional to themagnitude of the correspondingmonitoring item.Output item:Output frequency(initial setting)Output item:Output frequency(initial setting)Permissible loadcurrent 2mA1440 pulses/s at60HzOutput signal 0 to10VDCPermissible loadcurrent 1mA(load impedance10kΩ or more)Resolution 8 bitInstructionManual(applied)chapter 4InstructionManual(applied)chapter 42(3) CommunicationTypeRS-485RS-485 terminalsTerminalSymbol—TXD+RXD+TXD-RXD-SGTerminalNamePUconnectorInvertertransmissionterminalInverterreceptionterminalEarth (Ground)DescriptionWith the PU connector, communication can be made through RS-485.(for connection on a 1:1 basis only). Conforming standard : EIA-485 (RS-485). Transmission format : Multidrop. Communication speed : 4800 to 38400bps. Overall length : 500mWith the RS-485 terminals, communication can be made through RS-485.Conforming standard : EIA-485 (RS-485)Transmission format : Multidrop linkCommunication speed : 300 to 38400bpsOverall length : 500mRefer to2526INSTALLATION AND WIRING21
Wiring2.4.6 Changing the control logicThe input signals are set to sink logic (SINK) when shipped from the factory.To change the control logic, the jumper connector on the back of the control circuit terminal block must be moved to theother position.(The output signals may be used in either the sink or source logic independently of the jumper connector position.)1)Loosen the two installation screws in both ends of the control circuit terminal block. (These screws cannot beremoved.)Pull down the terminal block from behind the control circuit terminals.2)Change the jumper connector set to the sink logic (SINK) on the rear panel of the control circuit terminal block tosource logic (SOURCE).Jumper connector3)Using care not to bend the pins of the inverter's control circuit connector, reinstall the control circuit terminal blockand fix it with the mounting screws.CAUTION1. Make sure that the control circuit connector is fitted correctly.2. While power is on, never disconnect the control circuit terminal block.22
Wiring4)Sink logic and source logic⋅ In sink logic, a signal switches on when a current flows from the corresponding signal input terminal.Terminal SD is common to the contact input signals. Terminal SE is common to the open collector output signals.⋅ In source logic, a signal switches on when a current flows into the corresponding signal input terminal.Terminal PC is common to the contact input signals. Terminal SE is common to the open collector output signals.Current flow concerning the input/output signalwhen sink logic is selectedSink logicCurrent flow concerning the input/output signalwhen source logic is selectedSource logicPCCurrentSinkSTF RconnectorCurrentSTFSTRRRSourceconnectorSDInverterDC input (sink type)InverterDC input (source type)RUNTB1RRUNTB1RRRSE-+TB17SE+ -TB18• When using an external power supply for transistor output⋅24VDCSink logic typeUse terminal PC as a common terminal, and performwiring as shown below. (Do not connect terminal SD ofthe inverter with terminal 0V of the external powersupply. When using terminals PC-SD as a 24VDCpower supply, do not install a power supply in parallel inthe outside of the inverter. Doing so may cause amalfunction due to undesirable current.)QY40P type transistoroutput unitConstantvoltagecircuitTB1TB2 STRTB17STFCurrent flowPCTB1824VDC SDInverter24VDC(SD)⋅24VDCCurrent flowSource logic typeUse terminal SD as a common terminal, and performwiring as shown below. (Do not connect terminal PC ofthe inverter with terminal +24V of the external powersupply. When using terminals PC-SD as a 24VDCpower supply, do not install an external power supply inparallel with the inverter. Doing so may cause amalfunction in the inverter due to undesirable currents.)QY80 type transistoroutput unitConstantvoltagecircuitFuseTB1TB2TB17TB1824VDCPCSTFSTRSDInverter24VDC(SD)2INSTALLATION AND WIRINGCurrent flowCurrent flow23
Wiring2.4.7 Wiring of control circuit(1) Control circuit terminal layoutTerminal screw size: M3.5Tightening torque: 1.2N·mA1 B1 C1 A2 B2 C2 10E 10 2 5 4RLRMRHRTAUSTOP MRS RESSDFMAM1SERUNSUIPFOLFUSDSDSTF STR JOGCSPC(2) Wiring instructions1) Terminals 5, SD and SE are common to the I/O signals and isolated from each other. Do not earth (ground). Avoidconnecting the terminal SD and 5 and the terminal SE and 5.2) Use shielded or twisted cables for connection to the control circuit terminals and run them away from the main andpower circuits (including the 200V relay sequence circuit).3) Use two or more parallel micro-signal contacts or twin contacts toprevent a contact faults when using contact inputs since thecontrol circuit input signals are micro-currents.Micro signal contactsTwin contacts4) Do not apply a voltage to the contact input terminals (e.g. STF) of the control circuit.5) Always apply a voltage to the fault output terminals (A, B, C) via a relay coil, lamp, etc.6) It is recommended to use the cables of 0.75mm 2 gauge for connection to the control circuit terminals.If the cable gauge used is 1.25mm 2 or more, the front cover may be lifted when there are many cables running orthe cables are run improperly, resulting in an operation panel contact fault.7) The maximum wiring length should be 30m (200m for terminal FM).• Wiring of the control circuit of the 75K or moreFor wiring of the control circuit of the 75K or more, separate away from wiring of the main circuit.Make cuts in rubber bush of the inverter side and lead wires.Rubber bush(view from the inside)Make cuts along the lines inside witha cutter knife and such.24
Wiring2.4.8 When connecting the operation panel using a connection cableWhen connecting the operation panel (<strong>FR</strong>-DU07) to the inverter using a cable, the operation panel can be mountedon the enclosure surface and operationality improves.Parameter unit connection cable(<strong>FR</strong>-CB2)(option)Operation panel(<strong>FR</strong>-DU07)Operation panel connection connector(<strong>FR</strong>-ADP)(option)CAUTIONDo not connect the PU connector to the computer's LAN port, FAX modem socket or telephone connector.The inverter and machine could be damaged due to differences in electrical specifications.REMARKS⋅ Refer to page 5 for removal method of the operation panel.⋅ When using a commercially available connector and cable as a parameter unit connection cable, refer to Instruction Manual(applied) chapter 2.⋅ The inverter can be connected to the computer and <strong>FR</strong>-PU04/<strong>FR</strong>-PU07.2INSTALLATION AND WIRING25
Wiring2.4.9 RS-485 terminal block⋅⋅⋅⋅⋅Conforming standard: EIA-485(RS-485)Transmission format: Multidrop linkCommunication speed: MAX 38400bpsOverall length: 500mConnection cable:Twisted pair cable(4 paires)OPEN100ΩTerminating resistor switchFactory-set to "OPEN".Set only the terminating resistor switch ofthe remotest inverter to the "100Ω" position.RDA1(RXD1+)(RXD1-) RDB1(RXD2+) RDA2(RXD2-)RDB2RXDTXDSDA1 SDB1 SDA2 SDB2(TXD1+)(TXD1-)(TXD2+) (TXD2-)P5S(VCC)SG(GND)P5S(VCC)SG(GND)VCC2.4.10 Communication operationUsing the PU connector or RS-485 terminal, you canperform communication operation from a personalcomputer etc. When the PU connector is connectedwith a personal, FA or other computer by acommunication cable, a user program can run andmonitor the inverter or read and write to parameters.For the Mitsubishi inverter protocol (computer linkoperation), communication can be performed with thePU connector and RS-485 terminal.For the Modbus RTU protocol, communication can beperformed with the RS-485 terminal.PLCInverter Inverter InverterMultidrop link(32 inverters maximumare connectable)For further details, refer to(applied) chapter 4.Instruction Manual26
2.5 Power-off and magnetic contactor (MC)Power-off and magnetic contactor (MC)(1) Inverter input side magnetic contactor (MC)On the inverter input side, it is recommended to provide an MC for the following purposes.( Refer to page 3 for selection.)1)To release the inverter from the power supply when the inverter's protective function is activated or when the drive isnot functioning (e.g. emergency stop operation).2)To prevent any accident due to an automatic restart at restoration of power after an inverter stop made by a power failure3)The control power supply for inverter is always running and consumes a little power. When stopping the inverter for anextended period of time, powering off the inverter will save power slightly.4)To separate the inverter from the power supply to ensure safe maintenance and inspection workThe inverter's input side MC is used for the above purpose, select class JEM1038-AC3MC for the inverter input sidecurrent when making an emergency stop during normal operation.REMARKSSince repeated inrush current at powering on will shorten the life of the converter part (switching life is 100 million times (about500,000 times for the 200V class 37K or more)), frequent on/off must be avoided. Turn on/off the inverter start controlling terminals(STF, STR) to run/stop the inverter.MCPowersupplyOperation preparationOFF ONMC<strong>Stop</strong>MCStart/<strong>Stop</strong>OperationRARAMCCBT *1MCRAR/L1 US/L2 VT/L3 WR1/L11*2S1/L21InverterC1B1A1STF(STR)SD• Inverter start/stop circuit exampleAs shown on the left, always use the start signal(ON or OFF across terminals STF or STR-SD) tomake a start or stop.*1 When the power supply is 400V class, install a stepdowntransformer.*2 Connect the power supply terminals R1/L11, S1/L21of the control circuit to the primary side of the MC tohold an alarm signal when the inverter's protectivecircuit is activated. At this time, remove jumpersacross terminals R/L1-R1/L11 and S/L2-S1/L21.(Refer to page 17 for removal of the jumper.)(2) Handling of the inverter output side magnetic contactorSwitch the magnetic contactor between the inverter and motor only when both the inverter and motor are at a stop.When the magnetic contactor is turned on while the inverter is operating, overcurrent protection of the inverter andsuch will activate. When an MC is provided to switch to a commercial power supply, for example, it is recommended touse electronic bypass function Pr. 135 to Pr. 139 ( Instruction Manual (applied) chapter 4).To themotor2INSTALLATION AND WIRING27
Precautions for use of the inverter2.6 Precautions for use of the inverterThe <strong>FR</strong>-<strong>F700</strong> series is a highly reliable product, but incorrect peripheral circuit making or operation/handling methodmay shorten the product life or damage the product.Before starting operation, always recheck the following items.(1) Use crimping terminals with insulation sleeve to wire the power supply and motor.(2) Application of power to the output terminals (U, V, W) of the inverter will damage the inverter. Never perform such wiring.(3) After wiring, wire offcuts must not be left in the inverter.Wire offcuts can cause an alarm, failure or malfunction. Always keep the inverter clean. When drilling mounting holes inan enclosure etc., take care not to allow chips and other foreign matter to enter the inverter.(4) Use cables of the size to make a voltage drop 2% maximum.If the wiring distance is long between the inverter and motor, a main circuit cable voltage drop will cause the motor torqueto decrease especially at the output of a low frequency.Refer to page 14 for the recommended cable sizes.(5) The overall wiring length should be 500m maximum.Especially for long distance wiring, the fast-response current limit function may decrease or the equipment connected to thesecondary side may malfunction or become faulty under the influence of a charging current due to the stray capacity of thewiring. Therefore, note the overall wiring length. (Refer to page 16.)(6) Electromagnetic wave interferenceThe input/output (main circuit) of the inverter includes high frequency components, which may interfere with thecommunication devices (such as AM radios) used near the inverter. In this case, set the EMC filter valid to minimizeinterference. (Refer to page 9)(7) Do not install a power factor correction capacitor, surge suppressor or radio noise filter on the inverter output side.This will cause the inverter to trip or the capacitor and surge suppressor to be damaged. If any of the above devices isinstalled, immediately remove it.(8) Before starting wiring or other work after the inverter is operated, wait for at least 10 minutes after the power supply hasbeen switched off, and check that there are no residual voltage using a tester or the like. The capacitor is charged with highvoltage for some time after power off and it is dangerous.(9) A short circuit or earth (ground) fault on the inverter output side may damage the inverter modules.· Fully check the insulation resistance of the circuit prior to inverter operation since repeated short circuits caused byperipheral circuit inadequacy or an earth (ground) fault caused by wiring inadequacy or reduced motor insulationresistance may damage the inverter modules.· Fully check the to-earth (ground) insulation and phase to phase insulation of the inverter output side before power-on.Especially for an old motor or use in hostile atmosphere, securely check the motor insulation resistance etc.(10) Do not use the inverter input side magnetic contactor to start/stop the inverter.Always use the start signal (ON/OFF of STF and STR signals) to start/stop the inverter.(Refer to page 8)(11) Do not apply a voltage higher than the permissible voltage to the inverter I/O signal circuits.Application of a voltage higher than the permissible voltage to the inverter I/O signal circuits or opposite polarity maydamage the I/O devices. Especially check the wiring to prevent the speed setting potentiometer from being connectedincorrectly to short terminals 10E-5.(12) Provide electrical and mechanical interlocks for MC1 andMC2 which are used for bypass operation.When the wiring is incorrect or if there is an electronicbypass circuit as shown on the right, the inverter will bedamaged when the power supply is connected to theinverter U, V, W terminals due to arcs generated at the timeof switch-over or chattering caused by a sequence error.PowersupplyR/L1S/L2T/L3UVWInverterMC1InterlockMC2IMUndesirable current28
Precautions for use of the inverter(13) If the machine must not be restarted when power is restored after a power failure, provide a magnetic contactor in theinverter's input side and also make up a sequence which will not switch on the start signal.If the start signal (start switch) remains on after a power failure, the inverter will automatically restart as soon as thepower is restored.(14) Instructions for overload operationWhen performing an operation of frequent start/stop of the inverter, increase/decrease in the temperature of thetransistor element of the inverter may repeat due to a continuous flow of large current, shortening the life from thermalfatigue. Since thermal fatigue is related to the amount of current, the life can be increased by reducing bound current,starting current, etc. Decreasing current may increase the life. However, decreasing current will result in insufficienttorque and the inverter may not start. Therefore, increase the inverter capacity to have enough allowance for current.(15) Make sure that the specifications and rating match the system requirements.(16) When the motor speed is unstable, due to change in the frequency setting signal caused by electromagnetic noises fromthe inverter, take the following measures when applying the motor speed by the analog signal.· Do not run the signal cables and power cables (inverter I/O cables) in parallel with each other and do not bundle them.· Run signal cables as far away as possible from power cables (inverter I/O cables).· Use shield cables as signal cables.· Install a ferrite core on the signal cable (Example: ZCAT3035-1330 TDK).2INSTALLATION AND WIRING29
Failsafe of the system which uses theinverter2.7 Failsafe of the system which uses the inverterWhen a fault occurs, the inverter trips to output a fault signal. However, a fault output signal may not be output at an inverterfault occurrence when the detection circuit or output circuit fails, etc. Although Mitsubishi assures best quality products,provide an interlock which uses inverter status output signals to prevent accidents such as damage to machine when theinverter fails for some reason and at the same time consider the system configuration where failsafe from outside the inverter,without using the inverter, is enabled even if the inverter fails.(1) Interlock method which uses the inverter status output signalsBy combining the inverter status output signals to provide an interlock as shown below, an inverter alarm can bedetected.No Interlock Method Check Method Used Signals Refer to Page1)Inverter protectivefunction operationOperation check of an alarm contactCircuit error detection by negative logic2) Inverter running status Operation ready signal check3) Inverter running status4) Inverter running statusLogic check of the start signal andrunning signalLogic check of the start signal andoutput currentFault output signalALM signalOperation ready signal(RY signal)Start signal(STF signal, STR signal)Running signal (RUN signal)Refer to the chapter4 of the InstructionManual (applied)).Refer to the chapter4 of the InstructionManual (applied)).Refer to the chapter4 of the InstructionManual (applied)).(2) Backup method outside the inverterEven if the interlock is provided by the inverter status signal, enough failsafe is not ensured depending on the failurestatus of the inverter iteself. For example, even if the interlock is provided using the inverter fault output signal, startsignal and RUN signal output, there is a case where a fault output signal is not output and RUN signal is kept outputeven if an inverter fault occurs.Provide a speed detector to detect the motor speed and current detector to detect the motor current and consider thebackup system such as cheking up as below according to the level of importance of the system.1) Start signal and actual operation checkCheck the motor running and motor current while the start signal is input to the inverter by comparing the start signal tothe inverter and detected speed of the speed detector or detected current of the current detector. Note that the motorcurrent runs as the motor is running for the period until the motor stops since the inverter starts decelerating even if thestart signal turns off. For the logic check, configure a sequence considering the inverter deceleration time. In addition, it isrecommended to check the three-phase current when using the current detector.2) Command speed and actual operation checkCheck if there is no gap between the actual speed and commanded speed by comparing the inverter speed commandand detected speed of the speed detector.ControllerStart signal(STF signal, STR signal)Output current detection signalY12 signalRefer to the chapter4 of the InstructionManual (applied)).System failureInverterSensor(speed, temperature,air volume, etc.)To the alarm detection sensor30
3DRIVE THE MOTORStep of operation3 DRIVE THE MOTOR3.1 Step of operationThe inverter needs frequency command and start command. Turning the start command onstart the motor rotating and the motor speed is determined by the frequency command (setfrequency).Refer to the flow chart below to perform setting.Step of f operationInstallation/mounting{Refer to page 7}Wiring of the powersupply and motor{Refer to page 10}System examinationHowto give a startcommand?Start command using the PU connector andRS-485 terminal of the inverter and plug-inoption (Communication)Refer to Instruction Manual (applied) chapter 4.Start command withon the operation panel (PU)Connect a switch, relay, etc.to the control circuitterminal block of the inverterto give a start command. (External)How togive a frequencycommand?How togive a frequencycommand?Set from thePU (<strong>FR</strong>-DU07/<strong>FR</strong>-PU04/<strong>FR</strong>-PU07).(PU)Change frequencywith ON/OFF switchesconnected to terminals(multi-speed setting)Perform frequencysetting by a currentoutput device(Connection acrossterminals 4-5)Perform frequencysetting by a voltageoutput device(Connection acrossterminals 2-5)(External) (External) (External){Refer to page 39} {Refer to page 41} {Refer to page 45} {Refer to page 43}Set from thePU (<strong>FR</strong>-DU07/<strong>FR</strong>-PU04/<strong>FR</strong>-PU07).Change of frequencywith ON/OFF switchesconnected to terminals(multi-speed setting)CAUTIONCheck the following items before powering on the inverter.· Check that the inverter is installed correctly in a correct place. (Refer to page 7)· Check that wiring is correct. (Refer to page 8)· Check that no load is connected to the motor.Perform frequencysetting by a currentoutput device(Connection acrossterminals 4-5)Perform frequencysetting by a voltageoutput device(Connection acrossterminals 2-5)(PU) (External) (External) (External){Refer to page 47} {Refer to page 49} {Refer to page 53} {Refer to page 51}·When protecting the motor from overheat by the inverter, set Pr.9 Electronic thermal O/L relay (Refer topage 37)·When the rated frequency of the motor is 50Hz, set Pr.3 Base frequency (Refer to page 38)31
Operation panel (<strong>FR</strong>-DU07)3.2 Operation panel (<strong>FR</strong>-DU07)3.2.1 Parts of the operation panel (<strong>FR</strong>-DU07)Operation mode indicationPU: Lit to indicate PU operation mode.EXT: Lit to indicate external operation mode.NET: Lit to indicate network operation mode.Unit indication· Hz: Lit to indicate frequency.· A: Lit to indicate current.· V: Lit to indicate voltage.(Flicker when the set frequency monitor isdisplayed.)Monitor(4-digit LED)Shows the frequency, parameternumber, etc.Setting dial(Setting dial: Mitsubishi inverterdial)Used to change thefrequency setting andparameter values.Rotation direction indicationFWD: Lit during forward rotationREV: Lit during reverse rotationOn: Forward/reverse operationFlickering: When the frequency command isnot given even if theforward/reverse command is given.When the MRS signal is input.Monitor indicationLit to indicate monitoring mode.No functionStart commandforward rotationStart commandreverse rotation<strong>Stop</strong> operationFault can be resetModeswitchoverUsed to changeeach setting mode.Used to set each setting.If pressed during operation, monitorchanges as below;RunningfrequencyOutputcurrentOutputvoltage* Energy saving monitor is displayed when theenergy saving monitor of Pr. 52 is set.*Operation mode switchoverUsed to switch between the PU and external operation mode.When using the external operation mode (operation using a separatelyconnected frequency setting potentiometer and start signal), press this key tolight up the EXT indication. (Change the Pr.79 value to use the combined mode.)PU: PU operation modeEXT: External operation mode32
3DRIVE THE MOTOROperation panel (<strong>FR</strong>-DU07)3.2.2 Basic operation (factory setting)Operation mode switchoverAt powering on (external operation mode)PU Jog operation modeFaults history Parameter settingMonitor/frequency settingPU operation mode(output frequency monitor)Parameter setting mode(Refer to page 36)Parameter clearValue changeOutput current monitorValue change[Operation for displaying faults history]Past eight faults can be displayed.(The latest fault is ended by ".".)When no fault history exists,Parameterall clear(Refer to page 105)is displayed.Output voltage monitorDisplay the currentsettingParameter and a setting valueflicker alternately.Parameter write is completed!!Parameter copy(Example)and frequency flicker.Frequency setting has beenwritten and completed!!(Example)Fault clear33
Operation panel (<strong>FR</strong>-DU07)3.2.3 Operation lock (Press [MODE] for an extended time (2s))Operation using the setting dial and key of the operation panel can be made invalid to prevent parameterchange and unexpected start and stop.· Set "10 or 11" in Pr. 161, then press for 2s to make the setting dial and key operation invalid.· When the setting dial and key operation is made invalid, appears on the operation panel.When the setting dial and key operation is invalid,appears if the setting dial or key operation isperformed. (When the setting dial or key operation is not performed for 2s, the monitor display appears.)· To make the setting dial and key operation valid again, press for 2s.POINTSet "0" (extended mode parameter valid) in Pr.160 User group read selection.Set "10 or 11" (key lock mode valid) in Pr.161 Frequency setting/key lock operation selection.OperationDisplay1.Screen at powering onThe monitor display appears.2.Press to choose the PUoperation mode.3.Press to choose the parametersetting mode.PU indication is lit.The parameternumber readpreviouslyappears.4.Turn until (Pr. 160) appears.5.Press to read the currently set value." "(initial value) appears.6.Turn to changeit to the setting value of " ".7.Pressto set.Flicker ··· Parameter setting complete!!8.Change Pr. 161 to the setting value of " "in the similar manner.(Refer to step 4 to 7.)Flicker ··· Parameter setting complete!!9.Pressfor 2s to show the key lock mode.Press for 2s.Functions valid even in the operation lock status<strong>Stop</strong> and reset with .CAUTIONRelease the operation lock to release the PU stop by key operation.34
3DRIVE THE MOTOROperation panel (<strong>FR</strong>-DU07)3.2.4 Monitoring of output current and output voltagePOINTMonitor display of output frequency, output current and output voltage can be changed by pushingmonitoring mode.duringOperationDisplay1.Press during operation to choose the outputfrequency monitor2.Independently of whether the inverter is runningin any operation mode or at a stop, the outputcurrent monitor appears by pressing .3.Pressto show the output voltage monitor.3.2.5 First priority monitorHold downfor 1s to set monitor description to be appeared first in the monitor mode.(To return to the output frequency monitor, hold downfor 1s after displaying the output frequency monitor.)3.2.6 Setting dial pushPush the setting dial () to display the set frequency currently set.35
Operation panel (<strong>FR</strong>-DU07)3.2.7 Change the parameter setting valueChanging example Change the Pr. 1 Maximum frequency .OperationDisplay1.Screen at powering onThe monitor display appears.2.Pressmode.to choose the PU operationPU indication is lit.3.Press to choose the parametersetting mode.The parameternumber readpreviously appears.4. Pr. 1) appears.5.Press to read the currently set value." "(initial value) appears.6.Turnto change it to the setvalue " ".7.Pressto set.Flicker ··· Parameter setting complete!!· By turning , you can read another parameter.· Press to show the setting again.· Press twice to show the next parameter.· Press twice to return the monitor to frequency monitor.toare displayed ... Why?appears. ...... Write disable errorappears. ...... Write error during operationappears. ...... Calibration errorappears. ..... Mode designation errorFor details refer to page 93.REMARKS⋅ The number of digits displayed on the operation panel (<strong>FR</strong>-DU07) is four. Only the upper four digits of values can be displayedand set. If the values to be displayed have five digits or more including decimal places, the fifth or later numerals can not bedisplayed nor set.(Example) When Pr.1When 60Hz is set, 60.00 is displayed.When 120Hz is set, 120.0 is displayed. The second decimal places can not be displayed nor set.36
3DRIVE THE MOTOROverheat protection of the motor by the inverter (Pr. 9)3.3 Overheat protection of the motor by the inverter (Pr. 9)Set the rated motor current in Pr. 9 Electronic thermal O/L relay to protect the motor from overheat.ParameterNumber9 Electronic thermal O/L relayName Initial Value Setting Range *2 DescriptionInverter ratedcurrent *155K or less75K or more*1 Refer to page 118 for the rated inverter current value.*2 The minimum setting increments are 0.01A for the 55K or less and 0.1A for the 75K or more.0 to 500A0 to 3600ASet the rated motor current.Changing exampleChange the Pr. 9 Electronic thermal O/L relay setting to 2.0A according to the motor rated current.(<strong>FR</strong>-F740-0.75K)OperationDisplay1.Screen at powering onThe monitor display appears.2.Press to choose the PUoperation mode.PU indication is lit.3.Press to choose the parametersetting mode.The parameter numberread previously appears.4.Turn until " "(Pr. 9Electronic thermal O/L relay) appears.5.Press to show the currentlyset value. (2.1A for 0.75K)Refer to page118 for initialvalue of theinverter ratedcurrent.6.Turnto changethe set value to " ". (2.0A)7.Pressto set.· By turning , you can read another parameter.Flicker ··· Parameter setting complete!!· Press to show the setting again.· Press twice to show the next parameter.CAUTION· Protective function by electronic thermal relay function is reset by inverter power reset and reset signal input. Avoidunnecessary reset and power-off.· When two or more motors are connected to the inverter, they cannot be protected by the electronic thermal relay function.Install an external thermal relay to each motor.· When the difference between the inverter and motor capacities is large and the setting is small, the protective characteristics ofthe electronic thermal relay function will be deteriorated. In this case, use an external thermal relay.· A special motor cannot be protected by the electronic thermal relay function. Use an external thermal relay.· PTC thermistor output built-in the motor can be input to the PTC signal (AU terminal). For details, refer to InstructionManual (applied) chapter 4.37
When the rated motor frequency is 50Hz(Pr. 3)3.4 When the rated motor frequency is 50Hz (Pr. 3)First, check the motor rating plate. If a frequency given on the rating plate is "50Hz" only, always set Pr. 3 Base frequencyto "50Hz". If it remains at "60Hz", the voltage may become too low and torque shortage occurs, resulting in an overloadtrip. It may result in an inverter trip (E.OC) due to overload.ParameterNumberName Initial Value Setting Range Description3 Base frequency 60Hz 0 to 400HzSet the frequency when the motorrated torque is generated.Changing exampleChange Pr. 3 Base frequency to 50Hz according to the motor rated frequency.OperationDisplay1.Screen at powering onThe monitor display appears.2.Pressmode.to choose the PU operationPU indication is lit.3.Press to choose the parametersetting mode.4.Turnuntil Pr. 3 Base frequencyThe parameternumberread previouslyappears.appears.5.Press to show the currently setvalue. (60Hz)6.Turnvalue to "to change the set". (50Hz)7.Pressto set.Flicker ··· Parameter setting complete!!· By turning , you can read another parameter.· Press to show the setting again.· Press twice to show the next parameter.38
3DRIVE THE MOTORStart/stop from the operation panel (PUoperation mode)3.5 Start/stop from the operation panel (PU operation mode)POINTFrom where is the frequency command given?· Operation at the frequency set in the frequency setting modeof the operation panel →Refer to 3.5.1 (Refer to page 39)· Operation using the setting dial as the potentiometer→Refer to 3.5.2 (Refer to page 40)· Change of frequency with ON/OFF switches connected toterminals →Refer to 3.5.3 (Refer to page 41)· Frequency setting with a voltage input signal→Refer to 3.5.4 (Refer to page 43)· Frequency setting with a current input signal→Refer to 3.5.5 (Refer to page 45)[Connection diagram]Three-phaseAC power supplyInverterR/L1S/L2T/L3<strong>FR</strong>-DU073.5.1 Set the set frequency to operate (example: performing operation at 30Hz)Operation1.Screen at powering onThe monitor display appears.Display,,UVWMotor2.Press to choose the PUoperation mode.3.Turn to show the frequencyyou want to set.The frequency flickers for about 5s.4.While the value is flickering,press to set the frequency.If you do not press , the value flickers for about 5sand the display then returns to " " (monitor display) Hz.At this time, return to "Step 3" and set the frequency again.5.After the value flickered for about 3s,the display returns to " " (monitor display).Press (or ) to start operation.6.To change the set frequency, perform theoperation in above steps 3 and 4.(Starts from the previously set frequency.)( )PU indication is lit.Flickers forabout 5sFlicker ··· Frequency setting complete!!3s later7.Pressto stop.Operation cannot be performed at the set frequency ... Why?Did you carry out step 4 within 5s after step 3? (Did you press within 5s after turning ?)The frequency does not change by turning ... Why?Check to see if the operation mode selected is the external operation mode. (Press to change tothe PU operation mode.)Operation does not change to the PU operation mode ... Why?Check that "0" (initial value) is set in Pr. 79 Operation mode selection.Check that the start command is not on.Change acceleration time Pr. 7 (Refer to page 58)Change deceleration time Pr. 8 (Refer to page 58)For example, limit the motor speed to 60Hz maximum. Set "60Hz" in Pr. 1. (Refer to page 57)REMARKS· Press to show the set frequency.· can also be used like a potentiometer to perform operation. (Refer to page 40)39
Start/stop from the operation panel (PUoperation mode)3.5.2 Use the setting dial like a potentiometer to perform operation.POINTSet "0" (extended mode parameter valid) in Pr. 160 User group read selection.Set "1" (setting dial potentiometer mode) in Pr. 161 Frequency setting/key lock operation selection.Operation exampleChange the frequency from 0Hz to 60Hz during operationOperationDisplay1. Screen at powering onThe monitor display appears.2. Press to choose the PU operationmode.PU indication is lit.3. Press to choose the parametersetting mode.The parameter numberpreviously read appears.4. Turn until (Pr. 160) appears.5. Press to read the currently set value." " (initial value) appears.6. Turn to change it tothe setting value of " ".7. Press to set.Flicker ··· Parameter setting complete!!8. Change Pr. 161 to the setting value of " "in the similar manner. (Refer to step 4 to 7.)9. Mode/monitor checkPress twice to choosemonitor/frequency monitor.Flicker ··· Parameter setting complete!!10. Press (or ) to start the inverter.11. Turn until " " appears.The flickering frequency is the set frequency.You need not press .The frequency flickers for about 5s.REMARKS· If flickering "60.00" turns to "0.0", the Pr. 161 Frequency setting/key lock operation selection setting may not be "1".· Independently of whether the inverter is running or at a stop, the frequency can be set by merely turning .40
3DRIVE THE MOTORStart/stop from the operation panel (PUoperation mode)3.5.3 Use switches to give a start command and a frequency setting (multi-speedsetting)POINT· Use / to give a start command.· Pr. 79 Operation mode selection must be set to "4" (external/PU combined operation mode 2)· The initial values of the terminals RH, RM, RL are 60Hz, 30Hz, and 10Hz. (Refer to page 49 to change frequencies .)· Operation at 7-speed can be performed by turning on two (or three) terminals simultaneously.(Refer to Instruction Manual (applied) chapter 4.)[Connection diagram]Three-phaseAC power supplyHigh speedMiddle speedLow speedInverterR/L1S/L2T/L3RHRMRLSD<strong>FR</strong>-DU07UVWMotorOutput frequency (Hz)RHRMRLSpeed 1(High speed)Speed 2(Middle speed)Speed 3 Speed 4(Low speed)Speed 5Speed 6ON ON ON ONONON ON ONONONONSpeed 7Time,OperationDisplay1. Screen at powering onThe monitor display appears.2. Press to choose the parameter settingmode.The parameter numberread previously appears.3. Turn until (Pr. 79) appears.4. Press to read the currently set value." "(initial value) appears.5. Turn to change it to thesetting value " ".6. Press to set.7. Mode/monitor checkPress twice to choose themonitor/frequency monitor.8. Press the start switch (or ).FWD (or REV) flickers.When the frequency command is notgiven, it flickers.Flicker ··· Parameter setting complete!!Flickering41
Start/stop from the operation panel (PUoperation mode)Operation9. Turn on the low speed switch (RL).The output frequency increases to " "(10Hz) according to Pr. 7 Acceleration time.10. Turn off the low speed switch (RL).The output frequency decreases to " "(0Hz) according to Pr. 8 Deceleration time.Low speedLow speedDisplayFlickering11. Turn off the start switch .FWD (or REV) turns off.60Hz for the RH, 30Hz for the RM and 10Hz for the RL are not output when they are turned on ... Why?Check for the setting of Pr. 4, Pr. 5, and Pr. 6 once again.Check for the setting of Pr. 1 Maximum frequency and Pr. 2 Minimum frequency once again.(Refer to page 57.)Check that Pr. 180 RL terminal function selection = "0", Pr. 181 RM terminal function selection = "1", Pr.182 RH terminal function selection ="2", and Pr. 59 Remote function selection = "0". (all are initial values)[FWD (or REV)] lamp is not lit ... Why?Check that wiring is correct. Check the wiring once again.Check for the Pr. 79 setting once again. (Pr. 79 must be set to "4".)(Refer to page 61.)Change the frequency of the terminal RL, RM, and RH. ... How?Refer to page 49 to change the running frequency at each terminal in Pr. 4 Multi-speed setting (highspeed), Pr. 5 Multi-speed setting (middle speed), and Pr. 6 Multi-speed setting (low speed).42
3DRIVE THE MOTOR3.5.4 Perform frequency setting by analog (voltage input)POINT· Use / to give a start command.Start/stop from the operation panel (PUoperation mode)· Pr. 79 Operation mode selection must be set to "4" (external/PU combined operation mode 2)[Connection diagram](The inverter supplies 5V of power to the frequency setting potentiometer.(Terminal 10))Three-phaseAC power supplyR/L1S/L2T/L3InverterUVWMotorFrequency settingpotentiometer1025<strong>FR</strong>-DU07,OperationDisplay1. Screen at powering onThe monitor display appears.2. Press to choose the parameter settingmode.The parameter numberread previously appears.3. Turn until (Pr. 79) appears.4. Press to read the currently set value." "(initial value) appears.5. Turn to change it tothe setting value " ".6. Press to set.7. Mode/monitor checkPress twice to choose themonitor/frequency monitor.Flicker ··· Parameter setting complete!!8. StartPress the start switch (or ).Operation status indication of FWD (or REV)flickers.CAUTIONWhen both the forward switch and reverseswitch turn on, the inverter will not start.Also, if both switch turn on while running,the inverter stops.9. Acceleration → constant speedTurn the potentiometer (frequency settingpotentiometer) clockwise slowly to full.The frequency value on the indicationincreases according to Pr. 7 Accelerationtime until " "(60Hz) is displayed.( )Flickering43
Start/stop from the operation panel (PUoperation mode)Operation10. DecelerationTurn the potentiometer (frequency settingpotentiometer) counterclockwise slowly to full.The frequency value on the indication decreasesaccording to Pr. 8 Deceleration time unitl " "(0.00Hz) is displayed and operation status indicationof FWD or REV flickers.The motor stops.Display<strong>Stop</strong>Flickering11. <strong>Stop</strong>Press .Operation status indication of FWD (or REV)turns off.Change the frequency (60Hz) of the maximum value of potentiometer (at 5V)Adjust the frequency in Pr. 125 Terminal 2 frequency setting gain frequency. (Refer to page 52.)Change the frequency (0Hz) of the minimum value of potentiometer (at 0V)Adjust the frequency in calibration parameter C2 Terminal 2 frequency setting bias frequency. (Refer toInstruction Manual (applied) chapter 4.)44
3DRIVE THE MOTORStart/stop from the operation panel (PUoperation mode)3.5.5 Perform frequency setting by analog (current input)POINT· Use / to give a start command.· Turn the AU signal on.· Pr. 79 Operation mode selection must be set to "4" (external/PU combined operation mode 2)[Connection diagram]InverterThree-phaseR/L1UAC power supply S/L2V MotorT/L3WAU signalAUOutput of theadjustment meter(4 to 20mADC)SD4(+)5(-) <strong>FR</strong>-DU07,OperationDisplay1. Screen at powering onThe monitor display appears.2. Press to choose the parameter setting mode.The parameter numberread previously appears.3. Pr. 79) appears.4. Press to read the currently set value." "(initial value) appears.5. Turn to change it to the settingvalue " ".6. Press to set.Flicker ··· Parameter setting complete!!7. Mode/monitor checkPress twice to choose the monitor/frequencymonitor.8. StartCheck that the terminal 4 input selection signal(AU) is on.Press the start switch (or ).FWD or REV of operation status indication flickers.CAUTIONWhen both the forward switch and reverseswitch turn on, the inverter will not start.Also, if both switch turn on while running,the inverter stops.( )Flickering45
Start/stop from the operation panel (PUoperation mode)OperationDisplay9. Acceleration → constant speedPerform 20mA input.The frequency value on the indication increasesaccording to Pr. 7 Acceleration timeuntil " " (60.00Hz) is displayed.Output of theadjustment meter(4 to 20mADC)10. DecelerationPerform 4mA input.The frequency value on the indicationdecreases according to Pr. 8 Deceleration timeuntil " " (0.00Hz) is displayed and theoperation status indication of FWD or REVflickers.The motor stops.Output of theadjustment meter(4 to 20mADC)<strong>Stop</strong>Flickering11. <strong>Stop</strong>Press .FWD or REV of the operation status indicationturns off.REMARKSPr. 184 AU terminal function selection must be set to "4" (AU signal) (initial value). (Refer tochapter 4.)Instruction Manual (applied)Change the frequency (60Hz) at the maximum current input (at 20mA, initial value)Adjust the frequency in Pr. 126 Terminal 4 frequency setting gain frequency. (Refer to page 54.)Change the frequency (0Hz) at the minimum current input (at 4mA, initial value)Adjust the frequency in calibration parameter C5 Terminal 4 frequency setting bias frequency. (Refer toInstruction Manual (applied) chapter 4.)46
3DRIVE THE MOTORMake a start and stop with terminals(external operation)3.6 Make a start and stop with terminals (external operation)POINTFrom where is the frequency command given?· Operation at the frequency set in the frequency setting mode of the operation panel → Refer to 3.6.1(Refer to page 47)· Give a frequency command by switch (multi-speed setting) → Refer to 3.6.2 (Refer to page 49)· Perform frequency setting by a voltage output device → Refer to 3.6.3 (Refer to page 51)· Perform frequency setting by a current output device → Refer to 3.6.5 (Refer to page 53)3.6.1 Use the set frequency set by the operation panel (Pr. 79 = 3)POINT· Switch terminal STF(STR)-SD on to give a startcommand.· Set "3" in Pr. 79 (External/PU combinedoperation mode 1).· Refer to page 39 for the set frequency by theoperation panel.[Connection diagram]Three-phaseAC power supplyForward rotationstartReverse rotationstartInverterR/L1S/L2T/L3STFSTRSD<strong>FR</strong>-DU07UVWMotorOperationDisplay1.Screen at powering onThe monitor display appears.2.Press to choose the parametersetting mode.The parameternumber readpreviously appears.3. Pr. 79) appears.4.Press to read the currently set value." "(initial value) appears.5.Turn to change it to thesetting value " ".6.Pressto set.7.Turn the start switch (STF or STR) on.•The motor runs at the frequencyset in the set frequency mode of theoperation panel.8.Turn to change running frequency.Display the frequency you want to set.The frequency flickers for about 5s.Flicker ··· Parameter setting complete!!Forwardrotation ReverserotationONFlickers for about 5s47
Make a start and stop with terminals(external operation)OperationDisplay9.While the value is flickering,press to set the frequency.If you do not press ,the value flickers Flicker ··· Frequency setting complete!!for about 5s and the display then returnsto (display) Hz. At this time, return to"Step 3" and set the frequency again.Forwardrotation Reverse10.Turn the start switch (STF or STR) off.The motor decelerates according toPr. 8 Deceleration time to stop.OFFrotationREMARKS· Pr. 178 STF terminal function selection must be set to "60" (or Pr. 179 STR terminal function selection must be set to "61").(all are initial values)· When Pr. 79 Operation mode selection is set to "3", multi-speed operation (refer to page 49) is also made valid.<strong>Stop</strong>When the inverter is stopped by of the operation panel (<strong>FR</strong>-DU07), and aredisplayed alternately.1. Turn the start switch (STF or STR) off.Flickering2. The display can be reset by .48
3DRIVE THE MOTOR3.6.2 Use switches to give a start command and a frequency setting(multi-speed setting) (Pr. 4 to Pr. 6)Make a start and stop with terminals(external operation)POINT· Start command by terminal STF (STR)-SD· Frequency command by terminal RH, RM, RL and STR-SD· [EXT] must be lit. (When [PU] is lit, switch it to [EXT] with .)· The initial values of the terminals RH, RM, RL are 60Hz, 30Hz, and 10Hz. (Use Pr. 4, Pr. 5 and Pr. 6 to change.)· Operation at 7-speed can be performed by turning two (or three) terminals simultaneously. (Refer toInstruction Manual (applied) chapter 4.)[Connection diagram]InverterThree-phaseAC power supplyForwardrotation startReverserotation startR/L1S/L2T/L3STFSTRUVWMotorOutput frequency (Hz)Speed 1(High speed)Speed 2(Middle speed)Speed 3 Speed 4(Low speed)Speed 5Speed 6Speed 7High speedMiddle speedLow speedRHRMRLRHRMRLON ON ON ONONON ON ONONONONTimeSDChanging exampleSet "50Hz" in Pr. 4 Multi-speed setting (high speed) and turn on terminal RH and STF (STR)-SD tooperate.Operation1. Power on → operation mode checkFor the initial setting, the inverter operates inthe external operation mode [EXT] whenpowering on. Check that the operationcommand indication is [EXT].If not displayed, press to change to theexternal [EXT] operation mode. If the operationmode still does not change, set Pr. 79 to change tothe external operation mode. (Refer to page 61.)2. Press to choose the parametersetting mode.ONDisplayThe parameter numberread previously appears.3. Turn until (Pr. 4) appears.4. Press to read the currently set value." "(initial value) appears. (60.00Hz)5. Turn to change it to the settingvalue " ". (50.00Hz)6. Press to set.Flicker ··· Parameter setting complete!!49
Make a start and stop with terminals(external operation)Operation7. Mode/monitor checkPress twice to choose themonitor/frequency monitor.8. Turn on the high speed switch (RH).ONHigh speedMiddle speedLow speedDisplay9. Turn the start switch (STF or STR) on." " (50Hz) appears.• 30Hz appears when RM is on and 10Hzappears when RL is on.ONForward rotationReverse rotation10. <strong>Stop</strong>Turn the start switch (STF or STR) off.The motor stops according to Pr. 8Deceleration time.ForwardrotationOF<strong>FR</strong>everserotation<strong>Stop</strong>[EXT] is not lit even whenis pressed ... Why?Switchover of the operation mode withis valid when Pr. 79 = "0" (initial value).60Hz, 30Hz and 10Hz are not output from RH, RM and RL respectively when they are turned on. ... Why?Check for the setting of Pr. 4, Pr. 5, and Pr. 6 once again.Check for the setting of Pr. 1 Maximum frequency and Pr. 2 Minimum frequency once again. (Refer topage 57)Check for the Pr. 79 setting once again. (Pr. 79 must be set to "0" or "2".) (Refer to page 61)Check that Pr. 180 RL terminal function selection = "0", Pr. 181 RM terminal function selection = "1",Pr. 182 RH terminal function selection = "2" and Pr. 59 Remote function selection = "0". (all are initialvalues)[FWD (or REV)] is not lit. ... Why?Check that wiring is correct. Check it again.Check that "60" is set in Pr. 178 STF terminal function selection (or "61" is set in Pr. 179 STR terminalfunction selection)?(all are initial values)How is the frequency setting from 4 to 7 speed ?The setting differs according to Pr. 24 to Pr. 27 (multi-speed setting). Refer to Instruction Manual(applied) chapter 4.Perform multi-speed operation higher than 8 speed. ... How?Use the REX signal to perform the operation. Refer to Instruction Manual (applied) chapter 4.REMARKS· External operation is fixed by setting "2" (external operation mode) in Pr. 79 Operation mode selection when you do not want to taketime pressing or when you want to use the current start command and frequency command. (Refer to page 61)50
3DRIVE THE MOTOR3.6.3 Perform frequency setting by analog (voltage input)Make a start and stop with terminals(external operation)[Connection diagram](The inverter supplies 5V of power to frequency setting potentiometer. (Terminal 10))Three-phaseAC power supplyForward rotationstartReverse rotationstartInverterR/L1 US/L2 VT/L3 WSTFSTRSDMotorFrequency settingpotentiometer1025OperationON1.Power on → operation mode checkFor the initial setting, the inverter operatesin the external operation mode [EXT] whenpowering on. Check that the operationcommand indication is [EXT]. If not displayed,press to change to the external [EXT]operation mode. If the operation mode stilldoes not change, set Pr. 79 to change to theexternal operation mode. (Refer to page 61.)2.StartTurn the start switch (STF or STR) on.Operation status indication of FWD (or REV) ONflickers.CAUTIONWhen both the forward switch and reverseswitch are on, the inverter will not start.Also, if both switches turn on while running,the inverter decelerates to stop.ForwardrotationReverserotationDisplayFlickering3.Acceleration → constant speedTurn the potentiometer (frequency settingpotentiometer) clockwise slowly to full.The frequency value on the indicationincreases according to Pr. 7Acceleration time until "4.DecelerationTurn the potentiometer (frequency settingpotentiometer) counterclockwise slowly to full.The frequency value of the indicationdecreases according to Pr. 8 Decelerationtime until " " (0.00Hz) is displayed.The motor stops.5.<strong>Stop</strong>Turn the start switch (STF or STR) off." (60Hz) is displayed.ForwardrotationReverserotation<strong>Stop</strong>FlickeringOFFWhen you want to operate in the external operation mode always at powering on or when you want tosave the trouble of input, set "2" (external operation mode) in Pr. 79 Operation mode selection tochoose external operation mode always.REMARKSPr. 178 STF terminal function selection must be set to "60" (or Pr. 179 STR terminal function selection must be set to "61").(all are initial values)51
Make a start and stop with terminals(external operation)The motor will not rotate ... Why?Check that [EXT] is lit.[EXT] is valid when Pr. 79 = "0" (initial value).Use to lit [EXT].Check that wiring is correct. Check once again.Change the frequency (0Hz) of the minimum value of potentiometer (at 0V)Adjust the frequency in calibration parameter C2 Terminal 2 frequency setting bias frequency. (Refer toInstruction Manual (applied) chapter 4.)When you want to compensate frequency setting, use terminal 1.For details, refer to Instruction Manual (applied) chapter 4.3.6.4 Change the frequency (60Hz) at the maximum voltage input (at 5V)Changing exampleWhen you use the 0 to 5VDC input to change frequency at 5V from 60Hz (initial value) to50Hz, set "50Hz" in Pr. 125.OperationDisplay1.Turn until (Pr. 125) appears.2.Press to show the currently set value." "(60.00Hz)3.Turnto "to change the set value". (50.00Hz)The frequency meter (indicator) connected to across terminals FM-SD does not indicate just 50Hz ... Why?The meter can be adjusted by calibration parameter C0 FM terminal calibration. (Refer toInstruction Manual (applied) chapter 4.)Set frequency at 0V using calibrationInitial valueparameter C2 and adjust the indicator using60Hzcalibration parameter C0.(Refer tochapter 4.)REMARKS4.Pressto set.Flicker ··· 50Hz output at 5V input complete!!5.Mode/monitor checkPress twice to choose the monitor/frequency monitor.6.To check the setting, turn the start switch (STF or STR) onand input 5V (turn the potentiometer clockwise slowly to full.)(Refer to 3.6.3 steps 2 to 5)Instruction Manual (applied)Output frequency(Hz)BiasC2(Pr. 902)0100%0 Frequency setting signal 5V010VC3 (Pr. 902) C4 (Pr. 903)Gain Pr.125As other adjustment methods of frequency setting voltage gain, there are methods to adjust with a voltage applied to acrossterminals 2-5 and adjust at any point without a voltage applied.(Refer to Instruction Manual (applied) chapter 4 for the setting method of calibration parameter C4.)52
3DRIVE THE MOTOR3.6.5 Perform frequency setting by analog (current input)Make a start and stop with terminals(external operation)POINT· Switch terminal STF(STR)-SD on to give a start command.· Turn the AU signal on.· Set "2" (external operation mode) in Pr. 79 Operation mode selection[Connection diagram]Forward rotation startReverse rotation startAU signalThree-phaseAC power supplyInverterR/L1S/L2T/L3STFSTRAUUVWMotorCurrent signalsource(4 to 20mADC)SD4(+)5(-)Operation1.Power on → operation mode checkFor the initial setting, the inverter operates inthe external operation mode [EXT] whenpowering on. Check that the operationcommand indication is [EXT]. If not displayed,press to change to the external [EXT]operation mode. If the operation mode still doesnot change, set Pr. 79 to change to the externaloperation mode. (Refer to page 61.)2.StartTurn the start switch (STF or STR) on.FWD or REV of operation indication flickers.CAUTIONWhen both the forward switch and reverseswitch are on, the inverter will not start.Also, if both switches turn on while running,the inverter decelerates to stop.ONForwardrotationONReverserotationDisplayFlickering3.Acceleration → constant speedPerform 20mA input.The frequency value on the indicationincreases according to Pr. 7Acceleration time until " " (60.00Hz)is displayed.4.DecelerationPerform 4mA input.The frequency value on the indicationdecreases according to Pr. 8Deceleration time until " " (0.00Hz)is displayed and FWD or REV of the operationstatus indication flickers.The motor stops.5.<strong>Stop</strong>Turn the start switch (STF or STR) off.Current signalsource(4 to 20mADC)Current signalsource(4 to 20mADC)ForwardrotationReverserotation<strong>Stop</strong>FlickeringOF<strong>FR</strong>EMARKSPr. 184 AU terminal function selection must be set to "4" (AU signal) (initial value). (Refer to4.)Instruction Manual (applied) chapter53
Make a start and stop with terminals(external operation)The motor will not rotate ... Why?Check that [EXT] is lit.[EXT] is valid when Pr. 79 = "0" (initial value).Useto lit [EXT].Check that the AU signal is on.Turn the AU signal on.Check that wiring is orrect. Check it again.Change the frequency (0Hz) of the minimum value of potentiometer (at 4mA)Adjust the frequency in calibration parameter C5 Terminal 4 frequency setting bias frequency.(Refer to Instruction Manual (applied) chapter 4.)3.6.6 Change the frequency (60Hz) of the maximum value of potentiometer (at 20mA)Changing examplePUEXTWhen you use the 4 to 20mA input and want to change the frequency at 20mA from 60Hz (initialvalue) to 50Hz, set "50Hz" in Pr. 126.OperationDisplay1.Turn until (Pr. 126) appears.2.Press to show the currently set value." "(60.00Hz)3.Turn to change the set value to " ".(50.00Hz)4.Press to set the value.5.Mode/monitor checkPress twice to choose themonitor/frequency monitor.Flicker ··· 50Hz output at 20mA input complete!!The frequency meter (indicator) connected to across terminals FM-SD does not indicate just 50Hz ... Why?The meter can be adjusted by calibration parameter C0 FM terminal calibration.(Refer to Instruction Manual (applied) chapter 4.)Set frequency at 4mA using calibrationparameter C5 and adjust the indicator usingcalibration parameter C0.(Refer tochapter 4.)REMARKS6.To check the setting, turn the start switch (STF or STR)on and input 20mA. (Refer to 3.6.5 steps 2 to 5)Instruction Manual (applied)Output frequency(Hz)C5(Pr. 904)Initial value00204 Frequency setting signal100%20mAC6 (Pr. 904) C7 (Pr. 905)As other adjustment methods of frequency setting voltage gain, there are methods to adjust with a voltage applied to acrossterminals 4-5 and adjust at any point without a voltage applied.(Refer to Instruction Manual (applied) chapter 4 for the setting method of calibration parameter C7.)60HzBiasGainPr. 12654
4ADJUSTMENTSimple mode parameter list4 ADJUSTMENT4.1 Simple mode parameter listFor simple variable-speed operation of the inverter, the initial setting of the parameters may be used as they are. Set thenecessary parameters to meet the load and operational specifications. Parameter setting, change and check can be made fromthe operation panel (<strong>FR</strong>-DU07). For details of parameters, refer to Instruction Manual (applied) chapter 4.POINTOnly simple mode parameters are displayed by the initial setting of Pr. 160 User group read selection. Set Pr. 160 Usergroup read selection as required. (Refer to page 36 for parameter change.)Simple mode parameter listPr. 160Description9999Only the simple mode parameters can be displayed.(Initial Value)0 Simple mode and extended mode parameters can be displayed.1 Only the parameters registered in the user group can be displayed.ParameterNumberNameIncrements0 Torque boost 0.1%12MaximumfrequencyMinimumfrequency0.01HzInitialValue6/4/3/2/1.5/1%*1120/60Hz*2Range0 to 30%0 to 120Hz0.01Hz 0Hz 0 to 120Hz3 Base frequency 0.01Hz 60Hz 0 to 400Hz45Multi-speed setting(high speed)Multi-speed setting(middle speed)0.01Hz 60Hz 0 to 400Hz0.01Hz 30Hz 0 to 400HzApplicationsSet to increase a starting torque or when themotor with a load will not rotate, resulting in analarm [OL] and a trip [OC1]*1 Initial values differ according to the invertercapacity. (0.75K/1.5K to 3.7K/5.5K, 7.5K/11K to37K/45K, 55K/75K or more)Set when the maximum output frequency needto be limited.*2 Initial values differ according to the invertercapacity. (55K or less/75K or more)Set when the minimum output frequency needto be limited.Set when the rated motor frequency is 50Hz.Check the motor rating plate.Set when changing the preset speed in theparameter with a terminal.6Multi-speed setting(low speed)0.01Hz 10Hz 0 to 400Hz7 Acceleration time 0.1s 5/15s*3 0 to 3600s Acceleration/deceleration time can be set.8 Deceleration time 0.1s 10/30s*3 0 to 3600s*3 Initial values differ according to the invertercapacity. (7.5K or less/11K or more)96079125126160Electronic thermalO/L relayEnergy savingcontrol selectionOperation modeselectionTerminal 2frequency settinggain frequencyTerminal 4frequency settinggain frequencyUser group readselection0.01/0.1A*4Inverterratedcurrent0 to 500/0 to 3600A*41 0 0, 4, 91 0 0, 1, 2, 3, 4, 6, 70.01Hz 60Hz 0 to 400HzProtect the motor from overheat by the inverter.Set the rated motor current.*4 Setting increments and setting range differaccording to the inverter capacity.(55K or less/75K or more)The inverter output voltage is minimized whenusing for fan and pump applications.Select the start command location and frequencysetting location.Frequency for the maximum value of thepotentiometer (at 5V) can be changed.0.01Hz 60Hz 0 to 400Hz Frequency at 20mA input can be changed. 54Referto1 9999 0, 1, 9999 Make extended parameters valid —56573849583759615255
Increase the starting torque (Pr. 0)4.2 Increase the starting torque (Pr. 0)Set this parameter when "the motor with a load will not rotate", "an alarm [OL] is output, resulting in an invertertrip due to [OC1], etc.ParameterNumberName0 Torque boostChanging exampleInitial Value0.75K 6%1.5K to 3.7K 4%5.5K, 7.5K 3%11K to 37K 2%45K, 55K 1.5%75K or more 1%When the motor with a load will not rotate,increase the Pr. 0 value 1% by 1% unit bylooking at the motor movement. (The guidelineis for about 10% change at the greatest.)SettingRange0 to 30%100%OutputvoltageDescriptionMotor torque in the lowfrequencyrange can beadjusted to the load to increasethe starting motor torque.Pr.0Pr.46Settingrange0Outputfrequency(Hz)BasefrequencyOperationDisplay1.Screen at powering onThe monitor display appears.2.Pressto choose the PU operation mode.PU indication is lit.3.Press to choose the parametersetting mode.The parameternumber readpreviously appears.4. Pr. 0) appears.5.Press to read the currently set value." "(initial value is 6% for the 0.75K)appears.The initial valuediffers accordingto the capacity.6.Turn" ".7.Pressto change it to the set valueto set.· By turning , you can read another parameter.· Press to show the setting again.· Press twice to show the next parameter.Flicker ··· Parameter setting complete!!REMARKS· A too large setting may cause the motor to overheat, resulting in an overcurrent trip (OL (overcurrent alarm) then E.OC1 (Overcurrenttrip during acceleration)), thermal trip (E.THM (Motor overload trip), and E.THT (Inverter overload trip)).When a fault (E.OC1) occurs, release the start command, and decrease the Pr. 0 value 1% by 1% to reset. (Refer to page 97.)POINTIf the inverter still does not operate properly after the above measures, adjust Pr. 80 Motor capacity(simple magneticflux vector control) [extended mode]. (Refer to Instruction Manual (applied) chapter 4.)56
4ADJUSTMENTLimit the maximum and minimumoutput frequency (Pr. 1, Pr. 2)4.3 Limit the maximum and minimum output frequency (Pr. 1, Pr. 2)ParameterNumberName1 Maximum frequencyInitial Value55K or less75K or more120Hz60HzSettingRange0 to 120Hz2 Minimum frequency 0Hz 0 to 120HzDescriptionSet the upper limit of the outputfrequency.Set the lower limit of the outputfrequency.Changing exampleLimit the frequency set by the potentiometer,etc. to 60Hz maximum.(Set "60"Hz in Pr. 1 Maximum frequency.)Output frequency(Hz)Clamped at themaximum frequencyPr.1Pr.18Pr.2Frequency setting0Clamped at the (4mA)minimum frequency5, 10V(20mA)OperationDisplay1.Screen at powering onThe monitor display appears.2.Pressmode.to choose the PU operationPU indication is lit.3.Press to choose the parametersetting mode.The parameternumber readpreviously appears.4. Pr. 1) appears.5.Press to read the currently set value." "(initial value) appears.6.Turnto change it to the setvalue " ".7.Pressto set.Flicker ··· Parameter setting complete!!· By turning , you can read another parameter.· Press to show the setting again.REMARKS· Press twice to show the next parameter.· The output frequency is clamped by the Pr. 2 setting even if the set frequency is lower than the Pr. 2 setting (The frequency willnot decrease to the Pr. 2 setting.)Note that Pr. 15 Jog frequency has higher priority than the minimum frequency.· When the Pr. 1 setting is changed, frequency higher than the Pr. 1 setting can not be set by .· When performing a high speed operation at 120Hz or more, setting of Pr. 18 High speed maximum frequency is necessary.(Refer to Instruction Manual (applied) chapter 4.)CAUTIONIf the Pr. 2 setting is higher than the Pr. 13 Starting frequency value, note that the motor will run at the setfrequency according to the acceleration time setting by merely switching the start signal on, without entry ofthe command frequency.57
Change acceleration and deceleration time(Pr. 7, Pr. 8)4.4 Change acceleration and deceleration time (Pr. 7, Pr. 8)Set in Pr. 7 Acceleration time a larger value for a slower speed increase and a smaller value for a faster speed increase.Set in Pr. 8 Deceleration time a larger value for a slower speed decrease and a smaller value for a faster speed decrease.ParameterNumberName7 Acceleration time8 Deceleration timeInitial ValueSettingRange7.5K or less 5s 0 to 3600/11K or more15s 360s *7.5K or less 10s 0 to 3600/11K or more30s 360s *DescriptionSet the motor acceleration time.Set the motor deceleration time.* Depends on the Pr. 21 Acceleration/deceleration time increments setting. The initial value for the setting range is "0 to 3600s" and setting increments is"0.1s".Changing exampleChange the Pr. 7 Acceleration time setting from "5s"to "10s".Pr.20(60Hz)Outputfrequency (Hz)RunningfrequencyTimeAccelerationtimePr.7DecelerationtimePr.8OperationDisplay1.Screen at powering onThe monitor display appears.2.Pressmode.to choose the PU operationPU indication is lit.3.Press to choose the parametersetting mode.The parameternumber readpreviously appears.4. Pr. 7) appears.5.Press to read the currently set value." "(initial value) appears.The initial valuediffers accordingto the capacity.6.Turn to change it to the setvalue " ".7.Pressto set.· By turning , you can read another parameter.· Press to show the setting again.· Press twice to show the next parameter.Flicker ··· Parameter setting complete!!58
4ADJUSTMENTEnergy saving operation (Pr. 60)4.5 Energy saving operation (Pr. 60)Without a fine parameter setting, the inverter automatically performs energy saving operation.This inverter is appropriate for fan and pump applicationsParameterNumberNameInitialValue60 Energy saving control selection 0SettingRangeRemarks0 Normal operation mode4 Energy saving operation mode9 Optimum excitation control mode4.5.1 Energy saving operation mode (setting "4")· When "4" is set in Pr. 60, the inverter operates in the energy saving operation mode.· In the energy saving operation mode, the inverter automatically controls the output voltage to minimize theinverter output voltage during a constant operation.REMARKS· For applications a large load torque is applied to or machines repeat frequent acceleration/deceleration, an energy savingeffect is not expected.4.5.2 Optimum excitation control mode (setting "9")· When "9" is set in Pr. 60, the inverter operates in the optimum excitation control mode.· The optimum excitation control mode is a control system which controls excitation current to improve the motorefficiency to maximum and determines output voltage as an energy saving method.REMARKS· When the motor capacity is too small as compared to the inverter capacity or two or more motors are connected to oneinverter, the energy saving effect is not expected.CAUTION· When the energy saving mode and optimum excitation control mode are selected, deceleration time may be longer than thesetting value. Since overvoltage alarm tends to occur as compared to the constant torque load characteristics, set a longerdeceleration time.· The energy saving mode and optimum excitation control functions only under V/F control.When a value other than "9999" is set in Pr. 80 Motor capacity (simple magnetic flux control), the energy saving mode andoptimum excitation control does not function.(For simple magnetic flux vector control, refer to Instruction Manual (applied) chapter 4.)POINTWhen you want to check the energy saving effect, refer toenergy saving effect monitor.Instruction Manual (applied) chapter 4 to check the59
Energy saving operation (Pr. 60)OperationDisplay1.Screen at powering onThe monitor display appears.2.Pressmode.to choose the PU operationPU indication is lit.3.Press to choose the parametersetting mode.The parameternumber previouslyread appears.4.Turn until (Pr. 60)appears.5.Press to read the currently set value." "(initial value) appears.6.Turn to change it to the setvalue " ".7.Pressto set.REMARKS8. Perform normal operation.When you want to check the energy saving effect,refer to the instruction manual (applied) chapter 4to check the energy saving effect monitor.· By turning , you can read another parameter.· Press to show the setting again.· Press twice to show the next parameter.Flicker ··· Parameter setting complete!!If the motor decelerates to stop, the deceleration time may be longer than the set time. Since overvoltage tends to occur ascompared to the constant torque characteristics, set a longer deceleration time.60
4ADJUSTMENTSelection of the operation command andfrequency command locations (Pr. 79)4.6 Selection of the operation command and frequencycommand locations (Pr. 79)Select the start command location and frequency command location.ParameterNumberNameInitialValueSettingRangeDescriptionLED Indication: Off: OnUse external/PU switchover mode (pressto switchExternal operation mode0between the PU and external operation mode. (Refer topage 39))At power on, the inverter is in the external operationmode.PU operation mode1 Fixed to PU operation mode2Fixed to external operation modeOperation can be performed by switching between theexternal and NET operation mode.External operation modeNET operation modeExternal/PU combined operation mode 1Running frequencyStart signal79Operationmodeselection03PU (<strong>FR</strong>-DU07/<strong>FR</strong>-PU04/<strong>FR</strong>-PU07) setting orexternal signal input (multispeedsetting, acrossterminals 4-5 (valid whenAU signal turns on)).External signal input(terminal STF, STR)External/PU combined operation mode 2Running frequencyStart signal4External signal input(Terminal 2, 4, 1, JOG,multi-speed selection, etc.)Input from the PU (<strong>FR</strong>-DU07/<strong>FR</strong>-PU04/<strong>FR</strong>-PU07)( , )PU operation mode6Switchover modeSwitch among PU operation, external operation, andNET operation while keeping the same operation status.External operation modeNET operation modeExternal operation mode (PU operation interlock)X12 signal ON*PU operation modeOperation mode can be switched to the PU operationmode.7(output stop during external operation)External operation modeX12 signal OFF*Operation mode can not be switched to the PUoperation mode.* For the terminal used for the X12 signal (PU operation interlock signal) input, set "12" in Pr. 178 to Pr. 189 (input terminal function selection) to assignfunctions.For Pr. 178 to Pr. 189, refer to Instruction Manual (applied) chapter 4.When the X12 signal is not assigned, function of the MRS signal switches from MRS (output stop) to PU operation interlock signal.61
Parameter clear, all parameter clear4.7 Parameter clear, all parameter clearPOINT· Set "1" in Pr. CL parameter clear, ALLC All parameter clear to initialize parameters.· Refer to the parameter list on page 68 for parameters to be cleared with this operation.OperationDisplay1.Screen at powering onThe monitor display appears.2.Pressmode.to choose the PU operationPU indication is lit.3.Press to choose the parametersetting mode.The parameternumber readpreviously appears.4.Turn until " ", " "appears.Parameter clear All parameter clear5.Press to read the currently set value." "(initial value) appears.6.Turnto change it tothe setting value " ".Parameter clear All parameter clear7.Pressto set.Flicker ··· Parameter setting complete!!· Turn to read another parameter.· Press to show the setting again.· Press twice to show the next parameter.and are displayed alternately ... Why?The inverter is not in the PU operation mode.1. Press .is lit and the monitor (4 digit LED) displays "0" (Pr. 79 = "0" (initial value)).2. Carry out operation from step 6 again.62
4ADJUSTMENT4.8 Parameter copy and parameter verificationParameter copy and parameter verificationPCPY SettingDescription0 Cancel1 Copy the source parameters to the operation panel.2 Write the parameters copied to the operation panel into the destination inverter.3 Verify parameters in the inverter and operation panel. (Refer to page 64.)REMARKS· When the copy destination inverter is not the <strong>FR</strong>-<strong>F700</strong> series or parameter copy write is performed after parameter copy read isstopped, “model error ( )” is displayed.· Refer to the parameter list on page 68 and later for availability of parameter copy.· When the power is turned off or an operation panel is disconnected, etc. during parameter copy write, perform write again or check thevalues by parameter verification.4.8.1 Parameter copyParameter settings can be copied to multiple inverters.OperationDisplay1.Connect the operation panel to thecopy source inverter.• Connect it during a stop.2.Press to choose the parametersetting mode.The parameternumber previouslyread appears.3.Turn until (parameter copy)appears.4.Press to to read the currently set value." "(initial value) appears.5.Turn to change it tothe setting value " ".6.Press to copy the source parametersto the operation panel.About 30s laterThe frequency flickersfor about 30sFlicker ··· Parameter copy complete!!7.Connect the operation panel to thecopy source inverter.8.After performing steps 2 to 5,turn to change it to " ".9.Press to write the parameters copied tothe operation panel to the destination inverter.The frequency flickersfor about 30s10.When copy is completed," " and " " flicker.11.After writing the parameter values to the copydestination inverter, always reset the inverter,e.g. switch power off once, before starting operation.Flicker ··· Parameter copy complete!!63
Parameter copy and parameter verificationappears...Why? Parameter read error. Perform operation from step 3 again.appears...Why? Parameter write error. Perform operation from step 8 again.and flicker alternatelyAppears when parameters are copied between the inverter of 55K or less and 75K or more.1. Set "0" in Pr. 160 User group read selection.2. Set the following setting (initial value) in Pr. 989 Parameter copy alarm release.55K or less75K or morePr. 989 Setting 10 1003. Reset Pr. 9, Pr. 30, Pr. 51, Pr. 52, Pr. 54, Pr. 56, Pr. 57, Pr. 70, Pr. 72, Pr. 80, Pr. 90, Pr. 158, Pr. 190 to Pr. 196, Pr. 557,Pr. 893.4.8.2 Parameter verificationWhether same parameter values are set in other inverters or not can be checked.Operation1.Replace the operation panel on theinverter to be verified.• Replace it during a stop.Display2.Screen at powering onThe monitor display appears.3.Press to choose the parametersetting mode.The parameternumber readpreviously appears.4.Turn until (parameter copy)appears.5.Press to read the currently setvalue." "(initial value) appears.6.Turn to change it to the set value" "(parameter copy verification mode).7.Press to read the parameter settingof the verified inverter to the operation panel.The frequency flickersfor about 30s• If different parameters exist, differentparameter numbers and flicker.• Hold downto verify.Flickering8.It there is no difference,flicker to complete verification.andFlicker ··· Parameter verification complete!!REMARKSWhen the copy destination inverter is not the <strong>FR</strong>-<strong>F700</strong> series, "model error ()" is displayed.flickers ... Why?Set frequencies, etc. may be different. Check set frequencies.64
4ADJUSTMENTParameter list4.9 Parameter list4.9.1 List of parameters classified by purpose of useSet the parameters according to the operating conditions. The following list indicates purpose of use andcorresponding parameters.Adjust the output torque ofthe motor (current)Limit the output frequencySet V/F patternFrequency setting withterminals (contact input)Acceleration/decelerationtime/pattern adjustmentSelection and protection of amotorMotor brake and stopoperationFunction assignment ofexternal terminal and controlMonitor display and monitoroutput signalDetection of output frequencyand currentPurpose of UseParameter NumberManual torque boost Pr. 0, Pr. 46Simple magnetic flux vector control Pr. 80, Pr. 90Slip compensation Pr. 245 to Pr. 247Stall prevention operationPr. 22, Pr. 23, Pr. 48, Pr. 49, Pr. 66, Pr.148, Pr. 149, Pr. 154, Pr. 156, Pr. 157Maximum/minimum frequency Pr. 1, Pr. 2, Pr. 18Avoid mechanical resonance points (frequency jump) Pr. 31 to Pr. 36Base frequency, voltage Pr. 3, Pr. 19, Pr. 47V/F pattern matching applications Pr. 14Adjustable 5 points V/F Pr. 71, Pr. 100 to Pr. 109Multi-speed setting operationPr. 4 to Pr. 6, Pr. 24 to Pr. 27,Pr. 232 to Pr. 239Jog operation Pr. 15, Pr. 16Input compensation of multi-speed and remote setting Pr. 28Remote setting function Pr. 59Acceleration/deceleration time setting Pr. 7, Pr. 8, Pr. 20, Pr. 21, Pr. 44, Pr. 45Starting frequency Pr. 13, Pr. 571Acceleration/deceleration pattern and backlash measures Pr. 29, Pr. 140 to Pr. 143Regeneration avoidance functions at deceleration Pr. 882 to Pr. 886Motor protection from overheat (electronic thermal relayfunction)Pr. 9, Pr. 51Use the constant torque motor (applied motor) Pr. 71DC injection brake Pr. 10 to Pr. 12Selection of regeneration unit Pr. 30, Pr. 70Selection of motor stopping method Pr. 250Decelerate the motor to a stop at instantaneous power failure Pr. 261 to Pr. 266Function assignment of input terminal Pr. 178 to Pr. 189Start signal selection Pr. 250Logic selection of output stop signal (MRS) Pr. 17Selection of action conditions of the second function signal (RT) Pr. 155Terminal assignment of output terminal Pr. 190 to Pr. 196Detection of output frequency (SU, FU, FU2 signal) Pr. 41 to Pr. 43, Pr. 50Detection of output current (Y12 signal)Detection of zero current (Y13 signal)Pr. 150 to Pr. 153, Pr. 166,Pr. 167Remote output function (REM signal) Pr. 495 to Pr. 497Speed display and speed setting Pr. 37, Pr. 144Change of DU/PU monitor descriptionsCumulative monitor clearPr. 52, Pr. 170, Pr. 171, Pr. 563, Pr.564, Pr. 891Change of the monitor output from terminal FM and AM Pr. 54 to Pr. 56, Pr. 158, Pr. 867Adjustment of terminal FM and AM (calibration) C0 (Pr. 900), C1 (Pr. 901)Energy saving monitor Pr. 891 to Pr. 899Detection of output frequency (SU, FU, FU2 signal) Pr. 41 to Pr. 43, Pr. 50Detection of output current (Y12 signal)Detection of zero current (Y13 signal)Pr. 150 to Pr. 153, Pr. 166,Pr. 16765
Parameter listOperation selection at powerfailure and instantaneouspower failureOperation setting at faultoccurrenceEnergy saving operationReduction of the motor noiseMeasures against noise andleakage currentsFrequency setting by analoginputMisoperation prevention andparameter setting restrictionSelection of operation modeand operation locationCommunication operationand settingSpecial operation andfrequency controlUseful functionsSetting from the parameterunit and operation panelPurpose of UseRestart operation after instantaneous power failure/FlyingstartDecelerate the motor to a stop at instantaneous power failure Pr. 261 to Pr. 266Pr. 57, Pr. 58, Pr. 162 to Pr. 165, Pr.299, Pr. 611Retry function at fault occurrence Pr. 65, Pr. 67 to Pr. 69Output function of fault code Pr. 76Input/output phase loss protection selection Pr. 251, Pr. 872Regeneration avoidance function Pr. 882 to Pr. 886Energy saving control selection Pr. 60How much energy can be saved (energy saving monitor) Pr. 891 to Pr. 899Carrier frequency and SoftPWM selection Pr. 72, Pr. 240, Pr. 260Noise elimination at the analog input Pr. 74Analog input selection Pr. 73, Pr. 267Override function Pr. 73, Pr. 252, Pr. 253Noise elimination at the analog input Pr. 74Change of analog input frequency,adjustment of voltage, current input and frequency(calibration)Pr. 125, Pr. 126, Pr. 241,C2 to C7 (Pr. 902 to Pr. 905)Compensation at the analog input Pr. 242, Pr. 243Reset selection, disconnected PU detection Pr. 75Prevention of parameter rewrite Pr. 77Prevention of reverse rotation of the motor Pr. 78Display necessary parameters only. (user group) Pr. 160, Pr. 172 to Pr. 174Control of parameter write by communication Pr. 342Operation mode selection Pr. 79Operation mode when power is on Pr. 79, Pr. 340Operation command source and speed command sourceduring communication operationPr. 338, Pr. 339Selection of the NET mode operation control source Pr. 550Selection of the PU mode operation control source Pr. 551PU connector communicationPr. 117 to Pr. 124,Pr. 331 to Pr. 337, Pr. 341, Pr. 539Control of parameter write by communication Pr. 342ModbusRTU communication specifications Pr. 343Operation command source and speed command sourceduring communication operationPr. 338, Pr. 339Selection of the NET mode operation control source Pr. 550ModbusRTU protocol (communication protocol selection) Pr. 549PID control Pr. 127 to Pr. 134, Pr. 575 to Pr. 577Switch between the inverter operation and commercialpower-supply operation to usePr. 135 to Pr. 139, Pr. 159Free parameter Pr. 888, Pr. 889Increase cooling fan life Pr. 244To determine the maintenance time of parts. Pr. 255 to Pr. 259, Pr. 503, Pr. 504How much energy can be saved (energy saving monitor) Pr. 60, Pr. 891 to Pr. 899Parameter unit language switchover Pr. 145Operation selection of the operation panel Pr. 161Buzzer control of the operation panel Pr. 990Contrast adjustment of the parameter unit Pr. 991Parameter Number66
4ADJUSTMENTParameter list4.9.2 Used to display the extended parametersOperationDisplay1. Screen at powering onThe monitor display appears.2. Press to choosethe PU operation mode.PU indication is lit.3. Press to choose the parametersetting mode.The parameternumber readpreviously appears.4. Turn until (Pr. 160)appears.5. Press to read the currently set value." " (initial value) appears.6. Turn to change it to the set value" ".7. Press to set.Flicker ··· Parameter setting complete!!· By turning , you can read another parameter.· Press to show the setting again.· Press twice to show the next parameter.After parameter setting is completed, press once to show the alarm history andpress twice to return to the monitor display. To change settings of other parameters,perform the operation in above steps 3 to 7.Error display?If the operation panel does not have the write precedenceREMARKSIf the setting has not been changed, the value does not flicker and the next parameter number appears.Pr. 160Description9999Only the simple mode parameters can be displayed.(Initial Value)0 Simple mode and extended mode parameters can be displayed.1 Only the parameters registered in the user group can be displayed.67
Parameter list4.9.3 Parameter list indicates simple mode parameters.FunctionManual torque boostMaximum/minimumfrequencyBase frequency, voltageMulti-speed setting operationParameterRelatedparametersNameIncrements0 Torque boost 0.1%46Second torqueboost1 MaximumfrequencyInitialValue6/4/3/2/1.5/1%*10.1% 99990.01Hz120/60Hz*2Range0 to 30%DescriptionSet the output voltage at 0Hz as %.*1 Initial values differ according to theinverter capacity. (0.75K / 1.5K to 3.7K /5.5K, 7.5K / 11K to 37K / 45K, 55K /75K or more)ParametercopyParameterclearAllparameterclear◦: enabled× : disabled◦ ◦ ◦0 to 30%Set the torque boost when the RT signalis on. ◦ ◦ ◦9999 Without second torque boost0 to 120HzSet the upper limit of the output frequency.*2 The setting depends on the invertercapacity. (55K or less/75k or more)◦ ◦ ◦2 Minimum frequency 0.01Hz 0Hz 0 to 120Hz Set the lower limit of the output frequency. ◦ ◦ ◦18High speedmaximumfrequency0.01Hz120/60Hz*3120 to 400Hz3 Base frequency 0.01Hz 60Hz 0 to 400Hz19474 5 6 24to27232to239Base frequencyvoltageSecond V/F (basefrequency)Multi-speed setting(high speed)Multi-speed setting(middle speed)Multi-speed setting(low speed)Multi-speed setting(4 speed to 7speed)Multi-speed setting(8 speed to 15speed)0.1V 99990.01Hz 9999Set when performing the operation at120Hz or more.*3 The setting depends on the invertercapacity. (55K or less/75k or more)Set the frequency when the motor ratedtorque is generated. (50Hz/60Hz)0 to 1000V Set the base voltage.8888 95% of power supply voltage9999 Same as power supply voltage◦ ◦ ◦◦ ◦ ◦◦ ◦ ◦0 to 400HzSet the base frequency when the RTsignal is on. ◦ ◦ ◦9999 Second V/F is invalid0.01Hz 60Hz 0 to 400Hz Set frequency when the RT signal is on. ◦ ◦ ◦0.01Hz 30Hz 0 to 400Hz Set frequency when the RM signal is on. ◦ ◦ ◦0.01Hz 10Hz 0 to 400Hz Set frequency when the RL signal is on. ◦ ◦ ◦0.01Hz 99990.01Hz 99990 to 400Hz,9999 Frequency from 4 speed to 15 speed canbe set according to the combination of the0 to 400Hz,9999RH, RM, RL and REX signals.9999: not selected◦ ◦ ◦◦ ◦ ◦68
4ADJUSTMENTParameter listFunctionAcceleration/deceleration time settingMotor protectionfrom overheat(electronic thermalrelay function)DC injection brakeStarting frequencyParameter7 Acceleration time8 Deceleration time202144459 1011Relatedparameters51Acceleration/decelerationreference frequencyAcceleration/deceleration timeincrementsSecondacceleration/deceleration timeSeconddeceleration timeElectronic thermalO/L relaySecond electronicthermal O/L relay0.1/0.01s0.1/0.01s5/15s *410/30s*50 to 3600/360s0 to 3600/360s0.01Hz 60Hz 1 to 400Hz1 00.1/0.01s0.1/0.01s0.01/0.1A *60.01/0.1A *75s9999Inverterratedcurrent9999010 to 3600/360s0 to 3600/360sSet the motor acceleration time.*4 Initial values differ according to the invertercapacity. (7.5K or less/11K or more)Set the motor deceleration time.*5 Initial values differ according to the invertercapacity. (7.5K or less/11K or more)Set the frequency referenced asacceleration/deceleration time. Set thefrequency change time from stop to Pr. 20for acceleration/deceleration time.Increments: 0.1sRange: 0 to 3600sIncrements: 0.01sRange: 0 to 360sIncrements andsetting range ofacceleration/deceleration timesetting can bechanged.Set the acceleration/deceleration timewhen the RT signal is on.◦ ◦ ◦◦ ◦ ◦◦ ◦ ◦◦ ◦ ◦◦ ◦ ◦Set the deceleration time when the RTsignal is on. ◦ ◦ ◦9999 Acceleration time = deceleration time0 to 500/0 to 3600A*60 to 500A0 to 3600A*799990 to 120HzDC injection brakeoperation frequency 0.01Hz 3Hz 9999DC injection brakeoperation time0.1s 0.5sSet the rated motor current.*6 The setting depends on the invertercapacity (55K or less/75k or more)Made valid when the RT signal is on.Set the rated motor current.*7 The setting depends on the invertercapacity (55K or less/75k or more)Second electronic thermal O/L relayinvalidSet the operation frequency of the DCinjection brake.Operate when the output frequencybecomes less than or equal toPr.13 Starting frequency.0 DC injection brake disabledSet the operation time of the DC injection0.1 to 10sbrake.0 DC injection brake disabled◦ ◦ ◦◦ ◦ ◦◦ ◦ ◦◦ ◦ ◦12DC injection brake0.1% 4/2/1%Set the DC injection brake voltage (torque).*8 Initial values differ according to theoperation voltage*8 0.1 to 30%inverter capacity. (7.5K or less/11K to◦ ◦ ◦55K/75K or more)13 Starting frequency 0.01Hz 0.5Hz 0 to 60Hz Starting frequency can be set. ◦ ◦ ◦571NameHolding time at astartIncrementsInitialValue0.1s 9999Range0.0 to 10.0sDescriptionSet the holding time of Pr.13 Startingfrequency.9999 Holding function at a start is invalidParametercopyParameterclearAllparameterclear◦: enabled× : disabled◦ ◦ ◦Parameter listV/F pattern matchingapplications14Load patternselection1 10 For constant torque load1 For reduced-torque load◦ ◦ ◦69
Parameter listFunctionJog operationParameter15 Jog frequency 0.01Hz 5Hz 0 to 400Hz Set the frequency for jog operation. ◦ ◦ ◦16RelatedparametersNameJog acceleration/deceleration timeIncrements0.1/0.01sInitialValue0.5sRange0 to 3600/360sDescriptionSet the acceleration/deceleration time forjog operation. Set the time taken to reachthe frequency set in Pr.20 Acceleration/deceleration reference frequency foracceleration/deceleration time. (Initialvalue is 60Hz)In addition, acceleration/deceleration timecan not be set separately.ParametercopyParameterclearAllparameterclear◦: enabled× : disabled◦ ◦ ◦Logic selectionof output stopsignal (MRS)—Stall prevention operation17 MRS input selection 1 018 Refer to Pr.1 and Pr.2.19 Refer to Pr.3.20,21 Refer to Pr.7 and Pr.8.2223484966148149154156157Stall preventionoperation levelStall preventionoperation levelcompensationfactor at doublespeedSecond stallpreventionoperation currentSecond stallpreventionoperation frequencyStall preventionoperation reductionstarting frequencyStall preventionlevel at 0V inputStall preventionlevel at 10V inputVoltage reductionselection duringstall preventionoperationStall preventionoperation selectionOL signal outputtimer— 24 to 27 Refer to Pr. 4 to Pr. 6.0.1% 120%0.1% 99990.1% 120%0.01Hz0Hz0 Open input always2Normally closed input (NC contact inputspecifications)Stall prevention operation selection0becomes invalid.Set the current value at which stall0.1 to 150%prevention operation is started.9999 Analog variable0 to 200%◦ ◦ ◦◦ ◦ ◦The stall operation level can be reducedwhen operating at a high speed above therated frequency. ◦ ◦ ◦9999 Constant according to Pr.220 Second stall prevention operation invalid0.1 to 150%The stall prevention operation level canbe set.0 Second stall prevention operation invalid0.01 to400Hz0.01Hz 60Hz 0 to 400HzSet the frequency at which stallprevention operation of Pr. 48 is started.9999 Pr.48 is valid when the RT signal is on.Set the frequency at which the stalloperation level is started to reduce.◦ ◦ ◦◦ ◦ ◦◦ ◦ ◦0.1% 120% 0 to 150% Stall prevention operation level can be ◦ ◦ ◦changed by the analog signal input to0.1% 150% 0 to 150% terminal 1.◦ ◦ ◦1 11 00.1s 0s010 to 31,100, 101With voltagereductionWithout voltagereductionYou can selectwhether to useoutput voltagereduction duringstall preventionoperation or not.Pr. 156 allows you to select whether to usestall prevention or not according to theacceleration/deceleration status.◦ ◦ ◦◦ ◦ ◦0 to 25sSet the output start time of the OL signaloutput when stall prevention is activated. ◦ ◦ ◦9999 Without the OL signal output70
4ADJUSTMENTParameter listFunctionInput compensationof multi-speed andremote settingParameter28RelatedparametersNameMulti-speed inputcompensationselectionIncrementsInitialValue1 0Range0 Without compensation1 With compensationDescriptionParametercopyParameterclearAllparameterclear◦: enabled× : disabled◦ ◦ ◦Parameter listAcceleration/decelerationpattern and backlash measuresSelection of regeneration unitAvoid mechanicalresonance points(frequency jump)Speed display andspeed setting293014014114214370Acceleration/deceleration patternselectionBacklashaccelerationstopping frequencyBacklashaccelerationstopping timeBacklashdecelerationstopping frequencyBacklashdecelerationstopping timeRegenerativefunction selectionSpecial regenerativebrake duty1 00.01Hz 1Hz 0 to 400Hz0 Linear acceleration/ deceleration1 S-pattern acceleration/deceleration A2 S-pattern acceleration/deceleration B3 Backlash measures◦ ◦ ◦◦ ◦ ◦0.1s 0.5s 0 to 360sSet the stopping frequency and time forbacklash measures.Valid when Pr.29="3"◦ ◦ ◦0.01Hz 1Hz 0 to 400Hz ◦ ◦ ◦0.1s 0.5s 0 to 360s ◦ ◦ ◦1 00.1% 0% 0 to 10%31 Frequency jump 1A 0.01Hz 999932 Frequency jump 1B 0.01Hz 999933 Frequency jump 2A 0.01Hz 999934 Frequency jump 2B 0.01Hz 999935 Frequency jump 3A 0.01Hz 999936 Frequency jump 3B 0.01Hz 999937 Speed display 1 0144Speed settingswitchover1 455K or less0 Brake unit120 to 400Hz,99990 to 400Hz,99990 to 400Hz,99990 to 400Hz,99990 to 400Hz,99990 to 400Hz,9999Setting can not bemade.High power factorconverter, powerregenerationcommon converter75K or moreWithoutregenerativefunctionBrake unit,Power regenerationconverterHigh power factorconverterSet this parameter when a brake unit orpower regeneration converter is used.Setting can be made for the 75K or more.1A to 1B, 2A to 2B, 3A to 3B is frequencyjumps9999: Function invalid0 Frequency display, setting1 to 9998 Set the machine speed at 60Hz.0, 2, 4, 6,8, 10, 102,104, 106,108, 110Set the number of motor poles whendisplaying the motor speed.◦ ◦ ◦◦ ◦ ◦◦ ◦ ◦◦ ◦ ◦◦ ◦ ◦◦ ◦ ◦◦ ◦ ◦◦ ◦ ◦◦ ◦ ◦◦ ◦ ◦71
Parameter listFunctionDetection of output frequency(SU, FU, FU2 signal)——Change of DU/PU monitor descriptionsCumulative monitor clearChange of the monitoroutput from terminalFM and AMParameter41Up-to-frequencysensitivity42Output frequencydetectionOutput frequency43 detection forreverse rotation50Second outputfrequency detection44, 45 Refer to Pr. 7 and Pr. 8.46 Refer to Pr. 0.47 Refer to Pr. 3.48, 49 Refer to Pr. 22 and Pr. 23.50 Refer to Pr. 41 to Pr. 43.51 Refer to Pr. 9.52545556Relatedparameters170171268563564891158NameDU/PU main displaydata selectionWatt-hour meterclearOperation hourmeter clearMonitor decimaldigits selectionEnergization timecarrying-over timesOperating timecarrying-over timesCumulative powermonitor digit shiftedtimesFM terminalfunction selectionFrequencymonitoringreferenceCurrent monitoringreferenceAM terminalfunction selectionIncrements0.1% 10% 0 to 100% Set the level where the SU signal turns on. ◦ ◦ ◦0.01Hz 6Hz 0 to 400Hz0.01Hz 9999Set the frequency where the FU signalturns on.◦ ◦ ◦0 to 400HzSet the frequency where the FU signalturns on in reverse rotation. ◦ ◦ ◦9999 Same as Pr.42 setting0.01Hz 30Hz 0 to 400HzSet the frequency where the FU2 signal turnson.1 00, 5, 6, 8 to14, 17, 20, 23to 25, 50 to57, 100Select the monitor to be displayed on theoperation panel and parameter unit.The setting value of "9" is available onlyfor the 75K or more.0 Set "0" to clear the watt-hour meter monitor.1 999910Set the maximum value when monitoringfrom communication to 0 to 9999kWh.9999Set the maximum value when monitoringfrom communication to 0 to 65535kWh.1 9999 0, 9999Set "0" to clear the operation time monitor.Setting "9999" has no effect.0 Displays the monitor as integral value.1 9999 1 Displays the monitor in increments of 0.1.9999 No fixed decimal positionThe numbers of cumulative energization1 0 0 to 65535 time monitor exceeded 65535h is displayed.Reading onlyThe numbers of operation time monitor1 0 0 to 65535 exceeded 65535h is displayed.Reading onlySet the number of times to shift the0 to 4 cumulative power monitor digit.1 9999Clamp the monitor value at maximum.No shift9999 Clear the monitor value when it exceedsthe maximum value.1 to 3, 5, 6, 8 Select the monitor output to terminal FM.1 1 to 14, 17, 21, The setting value of "9" is available only24, 50, 52, 53 for the 75k or more.0.01Hz 60Hz 0 to 400Hz0.01/0.1A *9InitialValueInverterratedcurrent1 1Range0 to 500/0 to 3600A*91 to 3, 5, 6,8 to 14,17, 21, 24,50, 52, 53DescriptionSet the full-scale value to output theoutput frequency monitor value to terminalFM and AM.Set the full-scale value to output the outputcurrent monitor value to terminal FM and AM.*9 The setting depends on the invertercapacity (55K or less/75k or more)Select the monitor output to terminal AM.The setting value of "9" is available onlyfor the 75K or more.◦ ◦ ◦◦ ◦ ◦× × ◦× × ×◦ ◦ ◦× × ×× × ×◦ ◦ ◦◦ ◦ ◦◦ ◦ ◦◦ ◦ ◦◦ ◦ ◦867 AM output filter 0.01s 0.01s 0 to 5s Set the output filter of terminal AM. ◦ ◦ ◦ParametercopyParameterclearAllparameterclear◦: enabled× : disabled72
4ADJUSTMENTParameter listFunctionRestart operationafter instantaneouspower failureParameter5758Relatedparameters162163164165NameRestart coastingtimeRestart cushiontimeAutomatic restartafter instantaneouspower failureselectionFirst cushion timefor restartFirst cushionvoltage for restartStall preventionoperation level forrestartIncrementsInitialValue0.1s 999900.1 to 5s/0.1 to 30s*109999 No restartThe coasting time is as follows:1.5K or less................................... 0.5s,2.2K to 7.5K .................................. 1.0s,11K to 55K .................................... 3.0s,75K or more .................................. 5.0sSet the waiting time for inverter-triggeredrestart after an instantaneous power failure.*10 The setting depends on the invertercapacity (55K or less/75k or more)◦ ◦ ◦0.1s 1s 0 to 60s Set a voltage starting time at restart. ◦ ◦ ◦1 0Range0 With frequency search1Without frequency search (reducedvoltage system)10 Frequency search at every start11 Reduced voltage at every start◦ ◦ ◦0.1s 0s 0 to 20s Set a voltage starting time at restart. ◦ ◦ ◦Consider according to the magnitude of0.1% 0% 0 to 100% load (moment of inertia/torque).◦ ◦ ◦0.1% 120% 0 to 150%DescriptionConsider the rated inverter current as100% and set the stall preventionoperation level during restart operation.0 Without rotation direction detectionParametercopyParameterclearAllparameterclear◦: enabled× : disabled◦ ◦ ◦Parameter listRemote setting function59299611Rotation directiondetection selectionat restartingAcceleration time ata restartRemote functionselection1 99990.1s 5/15s *111 01 With rotation direction detection99990 to 3600s9999When Pr. 78="0", the rotation direction isdetected.When Pr. 78="1","2", the rotation directionis not detected.Set the accelerationtime to reach the setfrequency at arestart.Acceleration time forrestart is the normalacceleration time(e.g. Pr. 7).RH, RM, RL signalfunction0Multi-speed setting ⎯1 Remote setting Yes2 Remote setting No3 Remote setting*11 The settingdepends on theinverter capacity(55K or less/75kor more)Frequency settingstorage functionNo (Turning STF/STR off clearsremotely-setfrequency.)◦ ◦ ◦◦ ◦ ◦◦ ◦ ◦Energy savingcontrol selection60 Energy savingcontrol selection1 00 Normal operation mode4 Energy saving operation mode9 Optimum excitation control mode◦ ◦ ◦73
Parameter listFunctionRetry function at alarm occurrence—65 Retry selection 1 0 0 to 5 A fault for retry can be selected. ◦ ◦ ◦67Number of retries atfault occurrence1 00 No retry function1 to 10101 to 11068 Retry waiting time 0.1s 1s 0 to 10sRetry count display69erase66 Refer to Pr.22 and Pr.23.67 to 69 Refer to Pr.65.— 70 Refer to Pr.30.Use the constanttorque motor(applied motor)Carrier frequencyand SoftPWMselectionParameter1 0 071 Applied motor 1 072RelatedparametersPWM frequencyselection240 Soft-PWMoperation selection260NamePWM frequencyautomaticswitchoverIncrementsInitialValue1 21 11 1012200 to 15/0 to 6, 25*12Set the number of retries at faultoccurrence. A fault output is not providedduring retry operation.Set the number of retries at faultoccurrence. (The setting value minus 100is the number of retries.) A fault output isprovided during retry operation.Set the waiting time from when an inverterfault occurs until a retry is made.Clear the number of restarts succeededby retry.Thermal characteristics of a standardmotorThermal characteristics of the Mitsubishiconstant-torque motorThermal characteristic of standard motorAdjustable 5 points V/FMitsubishi standard motor (SF-JR 4P1.5kW or less)PWM carrier frequency can be changed.The setting displayed is in [kHz].Note that 0 indicates 0.7kHz, 15 indicates14.5kHz and 25 indicates 2.5kHz.*12 The setting depends on the invertercapacity (55K or less/75k or more)0 Soft-PWM invalid101RangeDescriptionWhen Pr. 72="0 to 5" ("0 to 4" for the 75K ormore), Soft-PWM is valid.PWM carrier frequency is constantindependently of load.When the carrier frequency is set to 3kHzor more (Pr. 72≥3), perform continuousoperation at less than 85% of the ratedinverter current.Decreases PWM carrier frequencyautomatically when load increases.ParametercopyParameterclearAllparameterclear◦: enabled× : disabled◦ ◦ ◦◦ ◦ ◦◦ ◦ ◦◦ ◦ ◦◦ ◦ ◦◦ ◦ ◦◦ ◦ ◦74
4ADJUSTMENTParameter listFunctionAnalog input selectionParameter73Relatedparameters242243Analog inputselectionTerminal 1 addedcompensationamount (terminal 2)Terminal 1 addedcompensationamount (terminal 4)1 10 to 7,10 to 170.1% 100% 0 to 100%0.1% 75% 0 to 100%252 Override bias 0.1% 50% 0 to 200%253 Override gain 0.1% 150% 0 to 200%267NameTerminal 4 inputselectionIncrementsInitialValue1 0012RangeYou can select the input specifications ofterminal 2 (0 to 5V, 0 to 10V, 0 to 20mA)and input specifications of terminal 1 (0 to±5V, 0 to ±10V).To change the terminal 2 to the voltageinput specification (0 to 5V/ 0 to 10V), turnOFF(initial status) the voltage/currentinput switch 2. To change it to the currentinput(0 to 20mA), turn ON the voltage/current input switch 2. Override andreversible operation can be selected.Set the ratio of added compensationamount when terminal 2 is the mainspeed.Set the ratio of added compensationamount when terminal 4 is the mainspeed.Set the bias side compensation value ofoverride function.Set the gain side compensation value ofoverride function.Terminal 4 input 4 to20mATerminal 4 input 0 to5VTerminal 4 input 0 to10VDescriptionTurn ON thevoltage/currentinput switch 1(initial status).Turn OFF thevoltage/currentinput switch 1.ParametercopyParameterclearAllparameterclear◦: enabled× : disabled◦ × ◦◦ ◦ ◦◦ ◦ ◦◦ ◦ ◦◦ ◦ ◦◦ × ◦Parameter listNoise eliminationat the analog input74Input filter timeconstant1 1 0 to 8The primary delay filter time constant forthe analog input can be set.A larger setting results in a larger filter.◦ ◦ ◦Reset selection,disconnected PUdetection75Reset selection/disconnected PUdetection/PU stopselection1 140 to 3,14 to 17You can select the reset input acceptance,disconnected PU (<strong>FR</strong>-DU07/<strong>FR</strong>-PU04/<strong>FR</strong>-PU07) connector detection function and PUstop function.For the initial value, reset always enabled,without disconnected PU detection, andwith PU stop function are set.◦ × ×Output functionof alarm code76Fault code outputselection1 00 Without fault code output1 With fault code output2 Fault code output at fault occurrence only◦ ◦ ◦Prevention ofparameter rewrite77Parameter writeselection1 00 Write is enabled only during a stop1 Parameter write is disabled.2Parameter write is enabled in anyoperation mode regardless of operationstatus.◦ ◦ ◦Prevention ofreverse rotationof the motor78Reverse rotationprevention selection1 0Both forward and reverse rotations0allowed1 Reverse rotation disallowed2 Forward rotation disallowed◦ ◦ ◦75
Parameter listFunctionOperation mode selectionSimple magneticflux vectorcontrolAdjustable 5 points V/FParameter79 80340Operation modeselectionCommunicationstartup modeselectionMotorcapacity(simplemagnetic flux vectorcontrol)90 Motor constant (R1)100101102103104105106107108109RelatedparametersNameV/F1(firstfrequency)V/F1(first frequencyvoltage)V/F2(secondfrequency)V/F2(secondfrequency voltage)V/F3(thirdfrequency)V/F3(thirdfrequency voltage)V/F4(fourthfrequency)V/F4(fourthfrequency voltage)V/F5(fifthfrequency)V/F5(fifth frequencyvoltage)71 Refer to page 74.Increments1 01 00.01kW/0.1kW*130.001Ω/0.01mΩ*InitialValue999999990.01Hz 99990 External/PU switchover mode1 Fixed to PU operation mode2 Fixed to External operation mode3 External/PU combined operation mode 14 External/PU combined operation mode 26 Switchover modeExternal operation mode (PU operation7interlock)0 As set in Pr.79.1, 210, 120.4 to 55/0 to 3600kW*13Started in the network operation mode.When the setting is "2", it will resume the preinstantaneouspower failure operation modeafter an instantaneous power failure occurs.Started in the network operation mode.Operation mode can be changed betweenthe PU operation mode and networkoperation mode from the operation panel.When the setting is "12", it will resume the preinstantaneouspower failure operation modeafter an instantaneous power failure occurs.To select the simple magnetic flux vectorcontrol, set the capacity of the motorused.*13 The setting depends on the invertercapacity (55K or less/75k or more)9999 V/F control is performed0 to 50Ω/0 to 400mΩ*1499990 to 400Hz,9999Used to set the motor primary resistancevalue.(Normally setting is not necessary.)*14 The setting depends on the invertercapacity (55K or less/75k or more)Use the Mitsubishi motor (SF-JR, SF-HRCA) constants◦ ◦ ◦◦ ◦ ◦◦ ◦ ◦◦ × ◦◦ ◦ ◦0.1V 0V 0 to 1000V ◦ ◦ ◦0.01Hz 99990 to 400Hz,9999◦ ◦ ◦0.1V 0V 0 to 1000V ◦ ◦ ◦0 to 400Hz,0.01Hz 99999999 Set each points (frequency, voltage) of V/ ◦ ◦ ◦F pattern.0.1V 0V 0 to 1000V 9999: No V/F setting◦ ◦ ◦0.01Hz 99990 to 400Hz,9999◦ ◦ ◦0.1V 0V 0 to 1000V ◦ ◦ ◦0.01Hz 9999Range0 to 400Hz,9999DescriptionParametercopyParameterclear◦ ◦ ◦0.1V 0V 0 to 1000V ◦ ◦ ◦Allparameterclear◦: enabled× : disabled76
4ADJUSTMENTParameter listFunctionPU connector communicationParameter117118119120121122123124Relatedparameters342551NamePU communicationstation numberPU communicationspeedPU communicationstop bit lengthPU communicationparity checkNumber of PUcommunicationretriesPU communicationcheck time intervalPU communicationwaiting time settingPU communicationCR/LF selectionCommunicationEEPROM writeselectionPU mode operationcommand sourceselectionIncrementsInitialValue1 0 0 to 311 1921 11 21 10.1s 99991 99991 11 01 248, 96, 192,384Specify the inverter station number.Set the inverter station numbers when two ormore inverters are connected to one personalcomputer.Set the communication speed.The setting value × 100 equals thecommunication speed.For example, the communication speed is19200bps when the setting value is "192".<strong>Stop</strong> bit length data length0 1bit 8bit1 2bit 8bit10 1bit 7bit11 2bit 7bit0 Without parity check1 With odd parity check2 With even parity check0 to 109999Set the permissible number of retries atoccurrence of a data receive error.If the number of consecutive errorsexceeds the permissible value, theinverter will come to trip.If a communication error occurs, theinverter will not come to trip.0 No PU connector communicationSet the communication check time interval.If a no-communication state persists for0.1 to 999.8slonger than the permissible time, theinverter will come to trip.9999 No communication check◦ ◦ ◦◦ ◦ ◦◦ ◦ ◦◦ ◦ ◦◦ ◦ ◦◦ ◦ ◦Set the waiting time between data0 to 150mstransmission to the inverter and response. ◦ ◦ ◦9999 Set with communication data.0 Without CR/LF1 With CR2 With CR/LF0112RangeDescription◦ ◦ ◦Parameter values written bycommunication are written to the EEPROMand RAM. ◦ ◦ ◦Parameter values written bycommunication are written to the RAM.Select the RS-485 terminals as the PUoperation mode control source.Select the PU connector as the PUoperation mode control source.ParametercopyParameterclearAllparameterclear◦: enabled× : disabled◦ ◦ ◦Parameter list77
Parameter listFunctionChange of analog input frequency,adjustment of voltage, current input and frequency (calibration)ParameterRelatedparametersName125 Terminal 2frequency settinggain frequency126 Terminal 4frequency settinggain frequencyAnalog input241 display unitswitchoverTerminal 2C2frequency setting(902)bias frequencyTerminal 2C3frequency setting(902)biasTerminal 2C4frequency setting(903)gainTerminal 4C5frequency setting(904)bias frequencyTerminal 4C6frequency setting(904)biasTerminal 4C7frequency setting(905)gainIncrementsInitialValue0.01Hz 60Hz 0 to 400Hz0.01Hz 60Hz 0 to 400Hz1 0Range0.01Hz 0Hz 0 to 400Hz0.1% 0% 0 to 300%0.1% 100% 0 to 300%0.01Hz 0Hz 0 to 400Hz0.1% 20% 0 to 300%0.1% 100% 0 to 300%Set the frequency of terminal 2 input gain(maximum).Set the frequency of terminal 4 input gain(maximum).0 Displayed in %1 Displayed in V/mADescriptionSelect the unit foranalog input display.Set the frequency on the bias side ofterminal 2 input.Set the converted % of the bias sidevoltage (current) of terminal 2 input.Set the converted % of the gain sidevoltage of terminal 2 input.Set the frequency on the bias side ofterminal 4 input.Set the converted % of the bias sidecurrent (voltage) of terminal 4 input.Set the converted % of the gain sidecurrent (voltage) of terminal 4 input.The parameter number in parentheses is the one for use with the parameter unit (<strong>FR</strong>-PU04/<strong>FR</strong>-PU07).ParametercopyParameterclearAllparameterclear◦: enabled× : disabled◦ × ◦◦ × ◦◦ ◦ ◦◦ × ◦◦ × ◦◦ × ◦◦ × ◦◦ × ◦◦ × ◦78
4ADJUSTMENTParameter listFunctionPID controlParameter127PID controlautomaticswitchoverfrequency0.01Hz 9999128 PID action selection 1 10129RelatedparametersNamePID proportionalbandIncrementsInitialValue130 PID integral time 0.1s 1s131 PID upper limit 0.1% 9999132 PID lower limit 0.1% 9999133 PID action set point 0.01% 9999Range0 to 400Hz9999DescriptionSet the frequency at which the control isautomatically changed to PID control.Without PID automatic switchoverfunction1011PID reverse actionPID forward actionDeviation valuesignal (terminal 1)20 PID reverse action Measured valueinput (terminal 4)21 PID forward action Set value (terminal2 or Pr. 133)50 PID reverse action Deviation valuesignal input51 PID forward action (LONWORKS, CC-Link communication)60 PID reverse action Measured value,set value input61 PID forward action (LONWORKS, CC-Link communication)If the proportional band is narrow(parameter setting is small), the0.1% 100% 0.1 to 1000%manipulated variable varies greatly with aslight change of the measured value.Hence, as the proportional band narrows,the response sensitivity (gain) improvesbut the stability deteriorates, e.g. huntingoccurs.Gain K = 1/proportional band9999 No proportional controlFor deviation step input, time (Ti) requiredfor only the integral (I) action to providethe same manipulated variable as that for0.1 to 3600sthe proportional (P) action. As the integraltime decreases, the set point is reachedearlier but hunting occurs more easily.9999 No integral control.Set the upper limit value.If the feedback value exceeds the setting, the0 to 100% FUP signal is output. The maximum input(20mA/5V/10V) of the measured value(terminal 4) is equivalent to 100%.9999 No functionSet the lower limit value.If the measured value falls below the settingrange, the FDN signal is output.0 to 100%The maximum input (20mA/5V/10V) of themeasured value (terminal 4) is equivalent to100%.9999 No function0 to 100% Used to set the set point for PID control.9999 Terminal 2 input voltage is the set point.ParametercopyParameterclearAllparameterclear◦: enabled× : disabled◦ ◦ ◦◦ ◦ ◦◦ ◦ ◦◦ ◦ ◦◦ ◦ ◦◦ ◦ ◦◦ ◦ ◦Parameter list79
Parameter listSwitch between the inverter operation and commercial power-supply operation to usePID controlFunction—Parameter134 PID differential time 0.01s 9999135136575576577Output interruptiondetection timeOutput interruptiondetection levelOutput interruptioncancel levelElectronic bypasssequence selectionMC switchoverinterlock time0.1s 1s0.01 to10.00s0.01Hz 0Hz 0 to 400Hz0.1% 1000% 900 to 1100%1 00.1s 1s 0 to 100s137 Start waiting time 0.1s 0.5s 0 to 100s138139Relatedparameters159NameBypass selection ata faultAutomaticswitchoverfrequency frominverter to bypassoperationAutomaticswitchoverfrequency rangefrom bypass toinverter operation140 to 143 Refer to Pr.29.144 Refer to Pr.37.IncrementsInitialValue1 00.01Hz 99990.01Hz 9999For deviation lamp input, time (Td)required for providing only themanipulated variable for the proportional(P) action. As the differential timeincreases, greater response is made to adeviation change.9999 No differential control.If the output frequency after PID operationremains lower than the Pr. 576 setting for0 to 3600slonger than the time set in Pr. 575, theinverter stops operation.9999 Without output interruption functionSet the frequency at which the outputinterruption processing is performed.Set the level (Pr.577 minus 1000%) torelease the PID output interruptionfunction.0 Without electronic bypass sequence1 With electronic bypass sequence01Range0 to 60HzSet the operation interlock time of MC2and MC3.Set the time slightly longer (0.3 to 0.5s orso) than the time from when the ON signalenters MC3 until it actually turns on.Inverter output is stopped (motor coast) atinverter fault.Operation is automatically switched tobypass operation at inverter fault (Notswitched when an external thermal erroroccurs)Set the frequency to switch inverteroperation to bypass operation.9999 Without automatic switchover0 to 10Hz9999DescriptionValid during automatic switchoveroperation (Pr.139 ≠ 9999)When the frequency command decreasesbelow (Pr.139 to Pr.159) after operation isswitched from inverter operation tobypass operation, the inverterautomatically switches operation toinverter operation and operates at thefrequency of frequency command.When the inverter start command (STF/STR) is turned off, operation is switchedto inverter operation also.Valid during automatic switchoveroperation (Pr.139 ≠ 9999)When the inverter start command (STF/STR) is turned off after operation isswitched from inverter operation tobypass operation, operation is switched tothe inverter operation and the motordecelerates to stop.ParametercopyParameterclearAllparameterclear◦: enabled× : disabled◦ ◦ ◦◦ ◦ ◦◦ ◦ ◦◦ ◦ ◦◦ ◦ ◦◦ ◦ ◦◦ ◦ ◦◦ ◦ ◦◦ ◦ ◦◦ ◦ ◦80
4ADJUSTMENTParameter listFunction0 Japanese1 English2 Germany145PU display3 French1 0language selection4 Spanish5 Italian6 Swedish7 Finnish— 148,149 Refer to Pr.22 and Pr.23.150Output currentdetection level0.1% 120% 0 to 150%Parameter unitlanguage switchoverDetection of output current (Y12 signal)Detection of zero current (Y13 signal)151152153166167Output currentdetection signaldelay timeZero currentdetection levelZero currentdetection timeOutput currentdetection signalretention timeOutput currentdetection operationselection— 154 Refer to Pr.22 and Pr.23.Selection of actionconditions of thesecond function—Display of appliedparameters and usergroup functionParameter155RelatedparametersRT signal functionvalidity conditionselection156, 157 Refer to Pr.22 and Pr.23.158 Refer to Pr.54 to Pr.56.159 Refer to Pr.135 to Pr.139.160 172173NameUser group readselectionUser groupregistered display/batch clearUser groupregistrationIncrementsInitialValue0.1s 0s 0 to 10s0.1% 5% 0 to 150%0.01s 0.5s 0 to 1s0.1s 0.1s1 01 01 99991 01 9999174 User group clear 1 99990 to 10s999901010999910RangeSet the output current detection level.100% is the rated inverter current.Set the output current detection period.Set the time from when the output currenthas risen above the setting until the outputcurrent detection signal (Y12) is output.Set the zero current detection level.Suppose that the rated inverter current is100%.Set this parameter to define the periodfrom when the output current drops belowthe Pr.152 value until the zero currentdetection signal (Y13) is output.Set the retention time when the Y12signal is on.The Y12 signal on status is retained.The signal is turned off at the next start.Operation continues when the Y12 signalis onThe inverter is brought to trip when theY12 signal is on. (E.CDO)Second function is immediately madevalid with on of the RT signal.Second function is valid only during theRT signal is on and constant speedoperation.(Invalid during acceleration/deceleration)Only the simple mode parameters can bedisplayed.Only the parameters registered in the usergroup can be displayed.Simple mode and extended modeparameters can be displayed.◦ × ×◦ ◦ ◦◦ ◦ ◦◦ ◦ ◦◦ ◦ ◦◦ ◦ ◦◦ ◦ ◦◦ ◦ ◦◦ ◦ ◦(0 to 16)Displays the number of cases registered asa user group (reading only). ◦ × ×9999 Batch clear the user group registration0 to 999,99990 to 999,9999DescriptionSet the parameter numbers to beregistered to the user group.Read value is always "9999".Set the parameter numbers to be clearedfrom the user group.Read value is always "9999".ParametercopyParameterclearAllparameterclear◦: enabled× : disabled◦ × ×◦ × ×Parameter list81
Parameter listFunctionOperation selectionof the operation panel—Function assignment of input terminalParameter161Frequency setting/key lock operationselection1 0162 to 165 Refer to Pr.57 and Pr.58.166, 167 Refer to Pr.150 to Pr.153.168, 169 Parameter for manufacturer setting. Do not set.170, 171 Refer to Pr.52.172 to 174 Refer to Pr.160.178179180181182183184185186187188189RelatedparametersNameSTF terminalfunction selectionSTR terminalfunction selectionRL terminal functionselectionRM terminalfunction selectionRH terminalfunction selectionRT terminal functionselectionAU terminalfunction selectionJOG terminalfunction selectionCS terminalfunction selectionMRS terminalfunction selectionSTOP terminalfunction selectionRES terminalfunction selectionIncrementsInitialValue1 601 611 0011011Range0 to 8, 10 to12, 14, 16,24, 25, 60,62, 64 to 67,99990 to 8, 10 to12, 14, 16,24, 25, 61,62, 64 to 67,9999Setting dial frequencysetting modeSetting dialpotentiometer modeSetting dial frequencysetting modeSetting dialpotentiometer modeDescriptionKey lock modeinvalidKey lock modevalid0: Low-speed operation command1: Middle-speed operation command2: High-speed operation command3: Second function selection4: Terminal 4 input selection5: Jog operation selection6: Selection of automatic restart afterinstantaneous power failure7: External thermal relay input8: Fifteen speed selection10: Inverter operation enable signal (<strong>FR</strong>-HC,ParametercopyParameterclear◦ × ◦◦ × ◦◦ × ◦◦ × ◦0 to 8,1 1 10 to 12, 14,◦ × ◦MT-HC, <strong>FR</strong>-CV connection)16, 24, 25,11: <strong>FR</strong>-HC, MT-HC connection,1 2 62, 64 to 67,instantaneous power failure detection ◦ × ◦999912: PU operation external interlock1 3 14: PID control valid terminal16: PU-external operation switchover◦ × ◦0 to 8, 24: Output stop10 to 12, 14, 25: Start self-holding selection11145616, 24, 25,62 to 67,999960: Forward rotation command (assigned toSTF terminal (Pr.178) only)61: Reverse rotation command (assigned toSTR terminal (Pr.179) only)62: Inverter reset63: PTC thermistor input (assigned to AUterminal (Pr.184) only)◦◦◦×××◦◦◦0 to 8,64: PID forward/reverse action switchover10 to 12, 14,65: PU-NET operation switchover1 24 16, 24, 25,66: External-NET operation switchover◦ × ◦62, 64 to 67,67: Command source switchover99991 25 9999: No function◦ × ◦1 62 ◦ × ◦Allparameterclear◦: enabled× : disabled82
4ADJUSTMENTParameter listFunctionTerminal assignment of output terminal—Increase coolingfan lifeParameter190191192193194RUN terminalfunction selectionSU terminalfunction selectionIPF terminalfunction selectionOL terminal functionselectionFU terminal functionselection195 ABC1 terminalfunction selection196ABC2 terminalfunction selection232 to 239 Refer to Pr.4 to Pr.6.240 Refer to Pr.72.241 Refer to Pr.125 and Pr.126.242, 243 Refer to Pr.73.244RelatedparametersNameCooling fanoperation selectionIncrementsInitialValue1 00 to 5, 7, 8,10 to 19, 25,26, 45 to 47,64, 70,0, 100: Inverter running1, 101: Up to frequency2, 102: Instantaneous power failure/undervoltage3, 103: Overload warning4, 104: Output frequency detection5, 105: Second output frequency◦ × ◦1 1 ◦ × ◦90 to 96, 98, detection99, 7, 107: Regenerative brake prealarm100 to 105, (Only for the 75K or more)107, 108, 8, 108: Electronic thermal relay function1 2 110 to 116, prealarm◦ × ◦125, 126, 10, 110: PU operation mode145 to 147, 11, 111: Inverter operation ready164, 170, 12, 112: Output current detection190 to 196, 13, 113: Zero current detection1 3 198, 199,◦ × ◦14, 114: PID lower limit9999 15, 115: PID upper limit1 416, 116: PID forward/reverse rotationoutput◦ × ◦17, —: Bypass operation switchoverMC118, —: Bypass operation switchoverMC219, —: Bypass operation switchover1 99MC325, 125: Fan fault output◦ × ◦0 to 5, 7, 8,10 to 19, 25,26, 45 to 47,64, 70, 90,91, 94 to 96,98, 99,100 to 105,107, 108,110 to 116,125, 126,145 to 147,164, 170,26, 126: Heatsink overheat pre-alarm45, 145: Inverter running and startcommand is on46, 146: During deceleration atoccurrence of power failure(retained until release)47, 147: During PID control activated64, 164: During retry70, 170: PID output interruption90, 190: Life alarm91, 191: Fault output 3 (power-off signal)92, 192: Energy saving average value1 9999190, 191,updated timing194 to 196, 93, 193: Current average monitor signal◦ × ◦198, 199,999994, 194: Fault output 295, 195: Maintenance timer signal96, 196: Remote output98, 198: Alarm output99, 199: Fault output9999:No function0 to 99: Positive logic, 100 to 199:Negative logic1 101RangeDescriptionOperates at power onCooling fan on/off control invalid (Thecooling fan is always on at power on)Cooling fan on/off control validThe fan is normally on during inverteroperation. The fan switches on/offaccording to the temperature during astop of the inverter whose status ismonitored.ParametercopyParameterclearAllparameterclear◦: enabled× : disabled◦ ◦ ◦Parameter list83
Parameter listFunctionSlip compensationSelection of motorstopping methodInput/output phasefailure protectionselection245 Rated slip 0.01% 9999246247Slip compensationtime constantConstant-powerrange slipcompensationselection0.01s 0.5s 0.01 to 10s1 9999250 <strong>Stop</strong> selection 0.1s 9999251872Output phasefailure protectionselectionInput phase lossprotection selection— 252, 253 Refer to Pr.73.Display of the life of the inverter partsParameter255256257258259RelatedparametersNameLife alarm statusdisplayInrush current limitcircuit life displayControl circuitcapacitor lifedisplayMain circuitcapacitor lifedisplayMain circuitcapacitor lifemeasuringIncrementsInitialValue1 11 00 to 50% Used to set the rated motor slip.9999 No slip compensation099990 to 100s1000 to1100s999988881 0 (0 to 15)1% 100% (0 to 100%)1% 100% (0 to 100%)1% 100% (0 to 100%)1 0 0, 1RangeUsed to set the response time of slipcompensation. When the value is madesmaller, response will be faster. However,as load inertia is greater, a regenerativeovervoltage (E.OV) error is more liableto occur.◦ ◦ ◦◦ ◦ ◦Slip compensation is not made in theconstant output range (frequency rangeabove the frequency set in Pr.3) ◦ ◦ ◦Slip compensation is made in the constantoutput range.The motor is coastedto a stop when thepreset time elapsesafter the start signalis turned off.When 1000s to1100s is set (Pr. 250setting-1000)s later,the motor coasts tostop.DescriptionWhen the start signalis turned off, themotor decelerates tostop.STF signal:Forward rotationstartSTR signal:Reverse rotationstartSTF signal: StartsignalSTR signal:Forward/reversesignalSTF signal:Forward rotationstartSTR signal:Reverse rotationstartSTF signal: StartsignalSTR signal:Forward/reversesignal0 Without output phase loss protection1 With output phase loss protection0 Without input phase loss protection1 With input phase loss protectionDisplay whether the control circuitcapacitor, main circuit capacitor, coolingfan, and each parts of the inrush currentlimit circuit has reached the life alarmoutput level or not.Display the deterioration degree of theinrush current limit circuit. Reading onlyDisplay the deterioration degree of thecontrol circuit capacitor. Reading onlyDisplay the deterioration degree of themain circuit capacitor. Reading onlyThe value measured by Pr. 259 isdisplayed.Start measuring the main circuit capacitor life.Switch the power supply on again andcheck the Pr. 259 setting. Measurement iscomplete if the setting is "3". Set thedeterioration degree in Pr.258.ParametercopyParameterclearAllparameterclear◦: enabled× : disabled◦ ◦ ◦◦ ◦ ◦◦ ◦ ◦× × ×× × ×× × ×× × ×◦ ◦ ◦84
4ADJUSTMENTParameter listFunction— 260 Refer to Pr.72.Decelerate the motor to a stop at instantaneous power failure—Parameter261262263264265RelatedparametersNamePower failure stopselectionSubtractedfrequency atdeceleration startSubtraction startingfrequencyPower-failuredeceleration time 1Power-failuredeceleration time 2Increments1 00.01Hz 3Hz 0 to 20Hz0.01Hz0.1/0.01s0.1/0.01sInitialValue60Hz5s9999012Range0 to 120Hz99990 to 3600/360s0 to 3600/360s266Power failuredeceleration timeswitchoverfrequency0.01Hz 60Hz 0 to 400Hz267 Refer to Pr.73.268 Refer to Pr.52.269 Parameter for manufacturer setting. Do not set.299 Refer to Pr.57, Pr. 58.DescriptionCoasting to stopWhen undervoltage or power failureoccurs, the inverter output is shut off.When undervoltage or a power failureoccurs, the inverter can be decelerated toa stop.When undervoltage or a power failure occurs,the inverter can be decelerated to a stop.If power is restored during a power failure, theinverter accelerates again.Normally operation can be performed withthe initial value unchanged. But adjust thefrequency according to the magnitude ofthe load specifications (moment of inertia,torque).When output frequency ≥ Pr.263Decelerate from the speed obtainedfrom output frequency minus Pr.262.When output frequency < Pr.263Decelerate from output frequencyDecelerate from the speed obtained fromoutput frequency minus Pr.262.Set a deceleration slope down to thefrequency set in Pr.266.◦ ◦ ◦◦ ◦ ◦◦ ◦ ◦◦ ◦ ◦Set a deceleration slope below thefrequency set in Pr.266. ◦ ◦ ◦9999 Same slope as in Pr.264Set the frequency at which thedeceleration slope is switched from thePr.264 setting to the Pr.265 setting.ParametercopyParameterclearAllparameterclear◦: enabled× : disabled◦ ◦ ◦Parameter list85
Parameter listFunctionPU connector communicationParameter331332333334335336337338339341342343Relatedparameters539RS-485communicationstation numberRS-485communicationspeedRS-485 communicationstop bit lengthRS-485 communicationparity check selectionRS-485 communicationretry countRS-485communicationcheck time intervalRS-485 communicationwaiting time settingCommunicationoperation commandsourceCommunicationspeed commandsourceRS-485 communicationCR/LF selectionCommunicationEEPROM writeselectionCommunicationerror countModbus-RTUcommunicationcheck time interval1 01 960 to 31(0 to 247)3, 6, 12, 24,48, 96, 192,3841 1 0, 1, 10, 111 2 0, 1, 21 10.1s 0s1 99991 01 00 to 10,999900.1 to999.8sSet the inverter station number.(same specifications as Pr.117 ) When "1"(Modbus-RTU protocol) is set in Pr.551, thesetting range within parenthesis is applied.Used to select the communication speed.(same specifications as Pr.118)Select stop bit length and data length.(same specifications as Pr.119)Select the parity check specifications.(same specifications as Pr.120)Set the permissible number of retries atoccurrence of a data receive error. (samespecifications as Pr.121)RS-485 communication can be made, butthe inverter will come to trip in the NEToperation mode.Set the communication check time interval.(same specifications as Pr.122)9999 No communication check0 to 150ms,9999Set the waiting time between datatransmission to the inverter and response.(same specifications as Pr.123)0 Operation command source communication1 Operation command source external0 Speed command source communication121 1 0, 1, 21 01 0 (read only)0.1s 9999549 Protocol selection 1 0550551NameNET modeoperation commandsource selectionPU mode operationcommand sourceselectionIncrementsInitialValue1 99991 20100.1 to999.8s999901Speed command source external (Frequencysetting from communication is invalid,terminal 2 and 1 setting from external is valid)Speed command source external (Frequencysetting from communication is valid, terminal2 and 1 setting from external is invalid)Select presence/absence of CR/LF.(same specifications as Pr.124)Parameter values written by communicationare written to the EEPROM and RAM.Parameter values written bycommunication are written to the RAM.Display the number of communicationerrors during Modbus-RTU communication.Read only.Displayed only when Modbus-RTUprotocol is selected.Modbus-RTU communication can bemade, but the inverter will come to trip inthe NET operation mode.Set the interval of communication check time.(same specifications as Pr. 122)No communication check (signal lossdetectiion) is made)Mitsubishi inverter(computer link)protocolModbus-RTUprotocol0 Communication option valid1 Inverter RS-485 terminal valid999912RangeDescriptionAfter setting change,reset (switch poweroff, then on) theinverter.The setting change isreflected after a reset.Automatic recognition of thecommunication optionNormally, the RS-485 terminals are valid.Communication option is valid when thecommunication option is mounted.Select the RS-485 terminals as the PUoperation mode control source.Select the PU connector as the PUoperation mode control source.ParametercopyParameterclearAllparameterclear◦: enabled× : disabled◦ ◦ ◦◦ ◦ ◦◦ ◦ ◦◦ ◦ ◦◦ ◦ ◦◦ ◦ ◦◦ ◦ ◦◦ ◦ ◦◦ ◦ ◦◦ ◦ ◦◦ ◦ ◦× × ×◦ ◦ ◦◦ ◦ ◦◦ ◦ ◦◦ ◦ ◦86
4ADJUSTMENTParameter listFunction— 340 Refer to Pr.79.Remote outputfunction(REM signal)Maintenance of parts—Current average valuemonitor signal495496497Remote outputselectionRemote output data1Remote output data21 0503 Maintenance timer 1 0 0 (1 to 9998)504Maintenance timeralarm output settime011011Remote output dataclear at powering offRemote output dataretention even atpowering offRemote output dataclear at powering offRemote output dataretention even atpowering offRemote outputdata clear atinverter resetRemote outputdata retention evenat inverter reset◦ ◦ ◦1 0 0 to 4095× × ×Output terminal can be switched on and off.1 0 0 to 4095 × × ×1 99990 to 99989999 No function539,Refer to Pr.331 to Pr.339, Pr.341 to Pr.343.549, 550551 Refer to Pr.117 to Pr.124, Pr.331 to Pr.339, Pr.341 to Pr.343.555556557Current averagetimeData output masktimeCurrent averagevalue monitor signaloutput referencecurrent— 563, 564 Refer to Pr.52.——ParameterRelatedparametersNameIncrements0.1s 1s 0.1 to 1.0s0.1s 0s 0.0 to 20.0s0.01/0.1A*15571 Refer to Pr.13.575 to 577 Refer to Pr.127 to Pr.134.611 Refer to Pr.57 and Pr.58.867 Refer to Pr.54 to Pr.56.872 Refer to Pr.251.InitialValueRatedinvertercurrentRange0 to 500/0 to 3600A*15DescriptionDisplay the cumulative energization timeof the inverter in 100h increments.Reading onlyWriting the setting of "0" clears thecumulative energization time.× × ×Set the time taken until when the maintenancetimer alarm output signal (Y95) is output. ◦ × ◦Set the time taken to average the currentduring start bit output (1s).Set the time for not obtaining (mask)transient state data.Set the reference (100%) for outputtingthe signal of the current average value.*15 Setting increments and setting rangediffer according to the inverter capacity.(55K or less/75K or more)ParametercopyParameterclearAllparameterclear◦: enabled× : disabled◦ ◦ ◦◦ ◦ ◦◦ ◦ ◦Parameter list87
Parameter listFunctionRegeneration avoidance functionFreeparameterParameter882883884885886RelatedparametersNameRegenerationavoidanceoperation selectionRegenerationavoidanceoperation levelRegenerationavoidance atdecelerationdetection sensitivityRegenerationavoidancecompensationfrequency limitvalueRegenerationavoidance voltagegainIncrements1 00.1V DC380V/760V*0 Regeneration avoidance function invalid12300 to 800V1 0 0 to 50.01HzInitialValue6HzRange0 to 10Hz0.1% 100% 0 to 200%DescriptionRegeneration avoidance function isalways validRegeneration avoidance function is validonly during a constant speed operationSet the bus voltage level at whichregeneration avoidance operates.When the bus voltage level is set tolow, overvoltage error will be less apt tooccur. However, the actual decelerationtime increases.* The initial value differs according to thevoltage level. (200V class / 400V class)Set sensitivity to detect the bus voltagechange.1 (Low) → 5 (High)Set the limit value of frequency whichrises at activation of regenerationavoidance function.9999 Frequency limit invalidAdjust responsiveness at activation ofregeneration avoidance.A larger setting will improve responsivenessto the bus voltage change. However, theoutput frequency could become unstable.◦ ◦ ◦◦ ◦ ◦◦ ◦ ◦◦ ◦ ◦◦ ◦ ◦888 Free parameter 1 1 9999 0 to 9999Parameters you can use for your ownpurposes.◦ × ×Used for maintenance, management, etc.889 Free parameter 2 1 9999 0 to 9999by setting a unique number to eachinverter when multiple inverters are used.◦ × ×ParametercopyParameterclearAllparameterclear◦: enabled× : disabled88
4ADJUSTMENTParameter listFunctionEnergy saving monitorParameter891 Refer to Pr.52.892 Load factor 0.1% 100% 30 to 150%893894895Energy savingmonitor reference(motor capacity)Control selectionduring commercialpower-supplyoperationPower saving ratereference value0.01/0.1kW*16Inverterratedcapacity1 01 9999896 Power unit cost 0.01 9999897898899RelatedparametersNamePower savingmonitor averagetimePower savingcumulative monitorclearOperation time rate(estimated value)IncrementsInitialValue1 99991 99990.1% 99990.1 to 55/0 to 3600kW*16Set the load factor for commercial powersupplyoperation.This value is used to calculate the powerconsumption estimated value duringcommercial power supply operation.Set the motor capacity (pump capacity).Set when calculating power saving rateand average power saving rate value.*16 The setting depends on the invertercapacity (55K or less/75k or more)0 Discharge damper control (fan)1 Inlet damper control (fan)2 Valve control (pump)3Commercial power-supply drive (fixedvalue)Consider the value during commercial0power-supply operation as 100%1 Consider the Pr.893 setting as 100%.9999 No function◦ ◦ ◦◦ ◦ ◦◦ ◦ ◦◦ ◦ ◦0 to 500Set the power unit cost. Display the powersaving rate on the energy saving monitor ◦ ◦ ◦9999 No function0 Average for 30 minutes1 to 1000h Average for the set time9999 No function0 Cumulative monitor value clear1 Cumulative monitor value hold10Range9999DescriptionCumulative monitor continue(communication data upper limit 9999)Cumulative monitor continue(communication data upper limit 65535)Use for calculation of annual power0 to 100% saving amount. Set the annual operationratio (consider 365 days × 24hr as 100%).9999 No functionParametercopyParameterclearAllparameterclear◦: enabled× : disabled◦ ◦ ◦◦ ◦ ◦◦ ◦ ◦Parameter list89
Parameter listFunctionAdjustment ofterminal FMand AM(calibration)———C0(900)C1(901)C2(902)C3(902)C4(903)C5(904)C6(904)C7(905)— 989Buzzer controlof the operationpanelParameterRelatedparametersNameFM terminalcalibrationAM terminalcalibrationTerminal 2frequency settingbias frequencyTerminal 2frequency settingbiasTerminal 2frequency settinggainTerminal 4frequency settingbias frequencyTerminal 4frequency settingbiasTerminal 4frequency settinggainParameter copyalarm releaseIncrements--- --- ------ --- ---Refer to Pr.125 and Pr.126.1InitialValue10/100*17990 PU buzzer control 1 1Range10, 100Calibrate the scale of the meterconnected to terminal FM.Calibrate the scale of the analog meterconnected to terminal AM.Parameters for alarm release atparameter copy*17 The setting depends on the invertercapacity (55K or less/75k or more)0 Without buzzer1 With buzzerDescriptionParametercopyParameterclearAllparameterclear◦: enabled× : disabled◦ × ◦◦ × ◦◦ × ◦◦ ◦ ◦Contrast adjustmentof the parameter unitParameter clear,parameter copy991PU contrastadjustment1 58 0 to 63Contrast adjustment of the LCD of theparameter unit (<strong>FR</strong>-PU04/<strong>FR</strong>-PU07) canbe performed.0 (Light) → 63 (Dark)◦ ◦ ◦Pr.CL Parameter clear 1 0 0, 1Setting "1" returns all parameters except calibrationparameters to the initial values.ALLC All parameter clear 1 0 0, 1 Setting "1" returns all parameters to the initial values.Er.CL Fault history clear 1 0 0, 1 Setting "1" will clear eight past faults.PCPY Parameter copy 1 00 Cancel1 Read the source parameters to the operation panel.Write the parameters copied to the operation panel to the2destination inverter.3 Verify parameters in the inverter and operation panel.The parameter number in parentheses is the one for use with the parameter unit (<strong>FR</strong>-PU04/<strong>FR</strong>-PU07).90
Reset method of protective function5 TROUBLESHOOTINGWhen an alarm (major failures) occurs in the inverter, the protective function is activated bringing the inverter to analarm stop and the PU display automatically changes to any of the following error (alarm) indications.If your fault does not correspond to any of the following errors or if you have any other problem, please contact yoursales representative.• Retention of alarm output signal.................. When the magnetic contactor (MC) provided on the input side of the inverter isopened at the activation of the protective function, the inverter's control powerwill be lost and the alarm output will not be held.• Alarm display ........................................... When the protective function is activated, the operation panel displayautomatically switches to the above indication.• Resetting method............................................When the protective function is activated, the inverter output is kept stopped.Unless reset, therefore, the inverter cannot restart. (Refer to page 91.)• When the protective function is activated, take the corresponding corrective action, then reset the inverter, andresume operation.Not doing so may lead to the inverter fault and damage.Inverter alarm displays are roughly divided as below.(1) Error messageA message regarding operational fault and setting fault by the operation panel (<strong>FR</strong>-DU07) or parameter unit (<strong>FR</strong>-PU04/<strong>FR</strong>-PU07) is displayed. The inverter does not trip.(2) WarningsThe inverter does not trip even when a warning is displayed. However, failure to take appropriate measures willlead to a major fault.(3) Minor faultThe inverter does not trip. You can also output a minor fault signal by making parameter setting.(4) Maijor faultWhen a fault occurs, the inverter trips and a fault signal is output.5.1 Reset method of protective function(1) Resetting the inverterThe inverter can be reset by performing any of the following operations. Note that the internal thermal integrated valueof the electronic thermal relay function and the number of retries are cleared (erased) by resetting the inverter.Recover about 1s after reset is cancelled.Operation 1: ..... Using the operation panel, press to reset the inverter.(Enabled only when a fault occurs. (Refer to page 97 for major fault.))Operation 2: ...... Switch power off once, then switch it on again.Operation 3: . .... Turn on the reset signal (RES) for more than 0.1s. (If the RES signal iskept on, "Err." appears (flickers) to indicate that the inverter is in a resetstatus.)ONOFFInverterRESSDTROUBLESHOOTING591
List of faults or alarm display5.2 List of faults or alarm displayError messageWarningsMinor faultMajor faultOperation PanelIndicationtotoNameRefertoE--- Faults history 105HOLD Operation panel lock 93Er1 to 4 Parameter write error 93rE1 to 4 Copy operation error 93Err. Error 94OL Stall prevention (overcurrent) 95oL Stall prevention (overvoltage) 95RB Regenerative brake prealarm 96THElectronic thermal relayfunction prealarm96PS PU stop 95MT Maintenance signal output 96CP Parameter copy 96FN Fan fault 96E.OC1Overcurrent trip duringacceleration97E.OC2Overcurrent trip duringconstant speed97E.OC3Overcurrent trip duringdeceleration or stop97E.OV1Regenerative overvoltagetrip during acceleration97E.OV2Regenerative overvoltagetrip during constant speed98E.OV3Regenerative overvoltage tripduring deceleration or stop98E.THTInverter overload trip(electronic thermal relay function)98E.THMMotor overload trip(electronic thermal relay function)98E.FIN Fin overheat 99E.IPF Instantaneous power failure 99E.BEBrake transistor alarmdetection/internal circuit error99E.UVT Undervoltage 99E.ILF* Input phase loss 100E.OLT Stall prevention 100Major faultOperation PanelIndicationE.GF//Output side earth (ground)fault overcurrent100E.LF Output phase loss 100E.OHTExternal thermal relayoperation *2100E.PTC* PTC thermistor operation 100E.OPT Option fault 101E.OP1 Communication option fault 101E. 1 Option fault 101E.PEParameter storage devicefault101E.PUE PU disconnection 102E.RET Retry count excess 102E.PE2*Parameter storage devicefault101E. 6 /E. 7 /E.CPUNameCPU error 102E.CTEOperation panel powersupply short circuit, RS-485terminal power supply short102circuitE.P2424VDC power output shortcircuit102E.CDO*Output current detectionvalue exceeded103E.IOH*Inrush current limit circuitfault103E.SER*Communication fault(inverter)103E.AIE* Analog input fault 103E.13 Internal circuit fault 103Referto* If an error occurs when using the <strong>FR</strong>-PU04/<strong>FR</strong>-PU07, "Fault 14" isdisplayed on the <strong>FR</strong>-PU04/<strong>FR</strong>-PU07.92
5.3 Causes and corrective actions(1) Error MessageA message regarding operational troubles is displayed. Output is not shut off.Operation PanelIndicationHOLDName Operation panel lockCauses and corrective actionsDescription Operation lock mode is set. Operation other than is made invalid. (Refer to page 34.)Check point ------------Corrective action Press for 2s to release lock.Operation PanelIndicationNameDescriptionCheck pointOperation PanelIndicationNameDescriptionCheck pointCorrective actionEr1Write disable error1. You attempted to make parameter setting when Pr. 77 Parameter write selection has been set to disableparameter write.2. Frequency jump setting range overlapped.3. Adjustable 5 points V/F settings overlapped4. The PU and inverter cannot make normal communication1. Check the setting of Pr. 77 Parameter write selection (Refer to Instruction Manual (applied) chapter 4.)2. Check the settings of Pr. 31 to 36 (frequency jump). (Refer to Instruction Manual (applied) chapter 4.)3. Check the settings of Pr. 100 to Pr. 109 (Adjustable 5 points V/F). (Refer to Instruction Manual (applied)chapter 4.)4. Check the connection of the PU and inverter.Er2Write error during operationWhen parameter write was performed during operation with a value other than "2" (writing is enabledindependently of operating status in any operation mode) is set in Pr. 77 and the STF (STR) is on.1. Check the Pr. 77 setting. (Refer to Instruction Manual (applied) chapter 4.)2. Check that the inverter is not operating.1. Set "2" in Pr. 77.2. After stopping operation, make parameter setting.Operation PanelIndicationNameDescriptionCheck pointEr3Calibration errorAnalog input bias and gain calibration values are too close.Check the settings of C3, C4, C6 and C7 (calibration functions). (Refer tochapter 4.)Instruction Manual (applied)Operation PanelIndicationEr4Name Mode designation errorDescription You attempted to make parameter setting in the NET operation mode when Pr. 77 is not "2".Check point1. Check that operation mode is "PU operation mode".2. Check the Pr. 77 setting. (Refer to Instruction Manual (applied) chapter 4.)1. After setting the operation mode to the "PU operation mode", make parameter setting. (Refer to pageCorrective action 61.)2. After setting "2" in Pr. 77, make parameter setting.TROUBLESHOOTING5Operation PanelIndicationrE1Name Parameter read errorDescription An error occurred in the EEPROM on the operation panel side during parameter copy reading.Check point ------------Corrective action· Make parameter copy again. (Refer to page 63.)· Check for an operation panel (<strong>FR</strong>-DU07) failure. Please contact your sales representative.93
Causes and corrective actionsOperation PanelIndicationNameDescriptionCheck pointCorrective actionOperation PanelIndicationNameDescriptionCheck pointCorrective actionrE2Parameter write error1. You attempted to perform parameter copy write during operation.2. An error occurred in the EEPROM on the operation panel side during parameter copy writing.Is the FWD or REV LED of the operation panel (<strong>FR</strong>-DU07) lit or flickering?1. After stopping operation, make parameter copy again. (Refer to page 63.)2. Check for an operation panel (<strong>FR</strong>-DU07) failure. Please contact your sales representative.rE3Parameter verification error1. Data on the operation panel side and inverter side are different.2. An error occurred in the EEPROM on the operation panel side during parameter verification.Check for the parameter setting of the source inverter and inverter to be verified.1. Press to continue verification.Make parameter verification again. (Refer to page 64.)2. Check for an operation panel (<strong>FR</strong>-DU07) failure. Please contact your sales representative.Operation PanelIndicationNameDescriptionCheck pointCorrective actionOperation PanelIndicationDescriptionCorrective actionrE4Model error1. A different model was used for parameter write and verification during parameter copy.2. When parameter copy write is stopped after parameter copy read is stopped1. Check that the verified inverter is the same model.2. Check that the power is not turned off or an operation panel is not disconnected, etc. duringparameter copy read.1. Use the same model (<strong>FR</strong>-<strong>F700</strong> series) for parameter copy and verification.2. Perform parameter copy read again.Err.1. The RES signal is on2. The PU and inverter cannot make normal communication (contact fault of the connector)3. When the control circuit power (R1/L11, S1/L21) and the main circuit power(R/L1, S/L2, T/L3) areconnected to a separate power, it may appear at turning on of the main circuit. It is not a fault.1. Turn off the RES signal.2. Check the connection of the PU and inverter.94
(2) WarningsWhen the protective function is activated, the output is not shut off.Operation Panel<strong>FR</strong>-PU04OLIndication<strong>FR</strong>-PU07NameStall prevention (overcurrent)DescriptionCheck pointCorrective actionDuringaccelerationDuringconstantspeedoperationDuringdecelerationOLCauses and corrective actionsWhen the output current of the inverter exceeds the stall prevention operation level (Pr.22 Stall prevention operation level, etc.), this function stops the increase in frequency untilthe overload current decreases to prevent the inverter from resulting in overcurrent trip.When the overload current has decreased below stall prevention operation level, thisfunction increases the frequency again.When the output current of the inverter exceeds the stall prevention operation level (Pr.22 Stall prevention operation level, etc.), this function lowers the frequency until theoverload current decreases to prevent overcurrent trip. When the overload current hasdecreased below stall prevention operation level, this function increases the frequencyup to the set value.When the output current of the inverter exceeds the stall prevention operation level (Pr.22 Stall prevention operation level, etc.), this function stops the decrease in frequency untilthe overload current decreases to prevent the inverter from resulting in overcurrent trip.When the overload current has decreased below stall prevention operation level, thisfunction decreases the frequency again.1. Check that the Pr. 0 Torque boost setting is not too large.2. Check that the Pr. 7 Acceleration time and Pr. 8 Deceleration time settings are not too small.3. Check that the load is not too heavy.4. Are there any failure in peripheral devices?5. Check that the Pr. 13 Starting frequency is not too large.· Check the motor for use under overload.1. Increase or decrease the Pr. 0 Torque boost value 1% by 1% and check the motor status. (Refer to page 56.)2. Set a larger value in Pr. 7 Acceleration time and Pr. 8 Deceleration time. (Refer to page 58.)3. Reduce the load weight.4. Try simple magnetic flux vector control (Pr. 80).5. Change the Pr. 14 Load pattern selection setting.6. Set stall prevention operation current in Pr. 22 Stall prevention operation level. (The initial value is .)The acceleration/deceleration time may change. Increase the stall prevention operation level with Pr.22 Stall prevention operation level, or disable stall prevention with Pr. 156 Stall prevention operationselection. (Use Pr. 156 to set either operation continued or not at OL operation.)Operation PanelIndicationNameDescriptionCheck pointCorrective actionOperation PanelIndicationNameoLStall prevention (overcurrent)Duringdeceleration<strong>FR</strong>-PU04<strong>FR</strong>-PU07oL· If the regenerative energy of the motor becomes excessive and exceeds theregenerative energy consumption capability, this function stops the decrease infrequency to prevent overvoltage trip. As soon as the regenerative energy hasdecreased, deceleration resumes.· If the regenerative energy of the motor becomes excessive when regenerationavoidance function is selected (Pr. 882 = 1), this function increases the speed toprevent overvoltage trip. (Refer to Instruction Manual (applied) chapter 4.)· Check for sudden speed reduction.· Regeneration avoidance function (Pr. 882 to Pr. 886) is being used? (Refer to Instruction Manual(applied) chapter 4.)The deceleration time may change.Increase the deceleration time using Pr. 8 Deceleration time.PSPU stop<strong>FR</strong>-PU04<strong>FR</strong>-PU07Description <strong>Stop</strong> with of the PU is set in Pr. 75 Reset selection/disconnected PU detection/PU stop selection. (For Pr.75, refer to Instruction Manual (applied) chapter 4.)PSTROUBLESHOOTING5Check point Check for a stop made by pressing of the operation panel.Corrective action Turn the start signal off and release with .95
Causes and corrective actionsOperation PanelIndicationNameDescriptionCheck pointCorrective actionOperation PanelIndicationNameDescriptionCheck pointCorrective actionOperation PanelIndicationNameDescriptionCheck pointCorrective action<strong>FR</strong>-PU04RBRB<strong>FR</strong>-PU07Regenerative brake prealarmAppears if the regenerative brake duty reaches or exceeds 85% of the Pr. 70 Special regenerative brakeduty value. When the setting of Pr. 70 Special regenerative brake duty is the initial value (Pr. 70 = "0"), thiswarning does not occur. If the regenerative brake duty reaches 100%, a regenerative overvoltage(E. OV_) occurs.The RBP signal can be simultaneously output with the [RB] display. For the terminal used for the RBPsignal output, assign the function by setting "7" (positive logic) or "107" (negative logic) in any of Pr. 190to Pr. 196 (output terminal function selection). (Refer to Instruction Manual (applied) chapter 4)Appears only for the 75K or more.• Check that the brake resistor duty is not high.• Check that the Pr. 30 Regenerative function selection and Pr. 70 Special regenerative brake duty values arecorrect.• Increase the deceleration time.• Check the Pr. 30 Regenerative function selection and Pr. 70 Special regenerative brake duty values.<strong>FR</strong>-PU04THTH<strong>FR</strong>-PU07Electronic thermal relay function prealarmAppears if the cumulative value of the Pr. 9 Electronic thermal O/L relay reaches or exceeds 85% of thepreset level. If it reaches 100% of the Pr. 9 Electronic thermal O/L relay setting, a motor overload trip (E.THM) occurs.The THP signal can be simultaneously output with the [TH] display. For the terminal used for the THPsignal output, assign the function by setting "8" (positive logic) or "108" (negative logic) in any of Pr. 190to Pr. 196 (output terminal function selection). (Refer to Instruction Manual (applied) chapter 4)1. Check for large load or sudden acceleration.2. Is the Pr. 9 Electronic thermal O/L relay setting is appropriate? (Refer to page 37.)1. Reduce the load weight or the number of operation times.2. Set an appropriate value in Pr. 9 Electronic thermal O/L relay. (Refer to page 37.)<strong>FR</strong>-PU04 ————MT<strong>FR</strong>-PU07 MTMaintenance signal outputIndicates that the cumulative energization time of the inverter has reached a given time.When the setting of Pr. 504 Maintenance timer alarm output set time is the initial value (Pr. 504 = "9999"),this warning does not occur.The Pr. 503 Maintenance timer setting is larger than the Pr. 504 Maintenance timer alarm output set timesetting. (Refer to Instruction Manual (applied) chapter 4.)Setting "0" in Pr. 503 Maintenance timer erraces the signal.Operation PanelIndicationNameDescriptionCheck pointCorrective action<strong>FR</strong>-PU04 ————CP<strong>FR</strong>-PU07 CPParameter copyAppears when parameters are copied between models with capacities of 55K or less and 75K or more.Resetting of Pr.9, Pr.30, Pr.51, Pr.52, Pr.54, Pr.56, Pr.57, Pr.70, Pr.72, Pr.80, Pr.90, Pr.158, Pr.190 to Pr.196,and Pr.893 is necessary.Set the initial value in Pr. 989 Parameter copy alarm release.(3) AlarmWhen an alarm occurs, the output is not shut off. You can also output an alarm signal by making parametersetting. (Set "98" in any of Pr. 190 to Pr. 196 (output terminal function selection). (Refer to Instruction Manual(applied) chapter 4.))Operation PanelIndicationNameDescriptionCheck pointCorrective actionFNFan fault<strong>FR</strong>-PU04<strong>FR</strong>-PU07For the inverter that contains a cooling fan, appears on the operation panel when the cooling fanstops due to a fault or different operation from the setting of Pr. 244 Cooling fan operation selection.Check the cooling fan for a fault.Check for fan fault. Please contact your sales representative.FN96
Causes and corrective actions(4) FaultWhen a fault occurs, the inverter trips and a fault signal is output.Operation PanelIndicationNameDescriptionCheck pointCorrective action<strong>FR</strong>-PU04E.OC1OC During Acc<strong>FR</strong>-PU07Overcurrent trip during accelerationWhen the inverter output current reaches or exceeds approximately 170% of the rated current duringacceleration, the protective circuit is activated to stop the inverter output.1. Check for sudden acceleration.2. Check that the downward acceleration time is not long in vertical lift application.3. Check for output short circuit.4. Check that the Pr. 3 Base frequency setting is not 60Hz when the motor rated frequency is 50Hz.5. Check that stall prevention operation is correct.6. Check that the regeneration is not performed frequently. (Check that the output voltage becomeslarger than the V/F reference voltage at regeneration and overcurrent occurs due to the highvoltage.)1. Increase the acceleration time.(Shorten the downward acceleration time in vertical lift application.)2. When "E.OC1" is always lit at starting, disconnect the motor once and start the inverter.If "E.OC1" is still lit, contact your sales representative.3. Check the wiring to make sure that output short circuit does not occur.4. Set the Pr. 3 Base frequency to 50Hz. (Refer to page 38.)5. Perform a correct stall prevention operation. (Refer to Instruction Manual (applied) chapter 4.)6. Set base voltage (rated voltage of the motor, etc.) in Pr. 19 Base frequency voltage. (Refer toInstruction Manual (applied) chapter 4.)Operation PanelIndicationNameDescriptionCheck pointCorrective actionOperation PanelIndicationNameDescriptionCheck pointCorrective actionOperation PanelIndicationNameDescriptionCheck pointCorrective action<strong>FR</strong>-PU04E.OC2Stedy Spd OC<strong>FR</strong>-PU07Overcurrent trip during constant speedWhen the inverter output current reaches or exceeds approximately 170% of the rated current duringconstant speed operation, the protective circuit is activated to stop the inverter output.1. Check for sudden load change.2. Check for output short circuit.3. Check that stall prevention operation is correct.1. Keep load stable.2. Check the wiring to avoid output short circuit.3. Check that stall prevention operation setting is correct.(Refer to Instruction Manual (applied) chapter 4.)<strong>FR</strong>-PU04E.OC3OC During Dec<strong>FR</strong>-PU07Overcurrent trip during deceleration or stopWhen the inverter output current reaches or exceeds approximately 170% of the rated inverter currentduring deceleration (other than acceleration or constant speed), the protective circuit is activated tostop the inverter output.1. Check for sudden speed reduction.2. Check for output short circuit.3. Check for too fast operation of the motor's mechanical brake.4. Check that stall prevention operation setting is correct.1. Increase the deceleration time.2. Check the wiring to avoid output short circuit.3. Check the mechanical brake operation.4. Check that stall prevention operation setting is correct.(Refer to Instruction Manual (applied) chapter 4.)<strong>FR</strong>-PU04E.OV1OV During Acc<strong>FR</strong>-PU07Regenerative overvoltage trip during accelerationIf regenerative energy causes the inverter's internal main circuit DC voltage to reach or exceed thespecified value, the protective circuit is activated to stop the inverter output. The circuit may also beactivated by a surge voltage produced in the power supply system.Check for too slow acceleration. (e.g. during descending acceleration with lifting load)· Decrease the acceleration time.· Use regeneration avoidance function (Pr. 882 to Pr. 886).(Refer to Instruction Manual (applied) chapter 4.)TROUBLESHOOTING597
Causes and corrective actionsOperation PanelIndicationNameDescriptionCheck pointCorrective actionOperation PanelIndicationNameDescriptionCheck pointCorrective action<strong>FR</strong>-PU04E.OV2Stedy Spd OV<strong>FR</strong>-PU07Regenerative overvoltage trip during constant speedIf regenerative energy causes the inverter's internal main circuit DC voltage to reach or exceed thespecified value, the protective circuit is activated to stop the inverter output. The circuit may also beactivated by a surge voltage produced in the power supply system.Check for sudden load change.· Keep load stable.· Use regeneration avoidance function (Pr. 882 to Pr. 886). (Refer to Instruction Manual (applied)chapter 4.)· Use the brake unit or power regeneration common converter (<strong>FR</strong>-CV) as required.<strong>FR</strong>-PU04E.OV3OV During Dec<strong>FR</strong>-PU07Regenerative overvoltage trip during deceleration or stopIf regenerative energy causes the inverter's internal main circuit DC voltage to reach or exceed thespecified value, the protective circuit is activated to stop the inverter output. The circuit may also beactivated by a surge voltage produced in the power supply system.Check for sudden speed reduction.· Increase the deceleration time. (Set the deceleration time which matches the moment of inertia ofthe load)· Longer the brake cycle.· Use regeneration avoidance function (Pr. 882 to Pr. 886). (Refer to Instruction Manual (applied)chapter 4.)· Use the brake unit or power regeneration common converter (<strong>FR</strong>-CV) as required.Operation Panel<strong>FR</strong>-PU04E.THTIndication<strong>FR</strong>-PU07Inv. OverloadName Inverter overload trip (electronic thermal relay function) *1If a current not less than 120% of the rated output current flows and overcurrent trip does not occurDescription (170% or less), the electronic thermal relay activated to stop the inverter output in order to protect theoutput transistors. (Overload capacity 120% 60s inverse-time characteristic)Check point Check the motor for use under overload.Corrective action Reduce the load weight.Operation Panel<strong>FR</strong>-PU04E.THMMotor OvrloadIndication<strong>FR</strong>-PU07Name Motor overload trip (electronic thermal relay function) *1The electronic thermal relay function in the inverter detects motor overheat due to overload or reducedcooling capability during constant-speed operation and pre-alarm (TH display) is output when the I 2 tvalue reaches 85% of the Pr. 9 Electronic thermal O/L relay setting and the protection circuit is activatedDescriptionto stop the inverter output when the I 2 t value reaches the specified value. When running a specialmotor such as a multi-pole motor or multiple motors, provide a thermal relay on the inverter output sidesince such motor(s) cannot be protected by the electronic thermal relay function.1. Check the motor for use under overload.2. Check that the setting of Pr. 71 Applied motor for motor selection is correct. (Refer to InstructionCheck pointManual (applied) chapter 4.)3. Check that stall prevention operation setting is correct.1. Reduce the load weight.2. For a constant-torque motor, set the constant-torque motor in Pr. 71 Applied motor.Corrective action3. Check that stall prevention operation setting is correct. (Refer to Instruction Manual (applied)chapter 4.)*1 Resetting the inverter initializes the internal thermal integrated data of the electronic thermal relay function.98
Causes and corrective actionsOperation PanelIndicationNameDescriptionCheck pointCorrective actionOperation PanelIndicationNameDescriptionCheck pointCorrective actionOperation PanelIndicationNameDescriptionCheck pointCorrective actionOperation PanelIndicationNameDescriptionCheck pointCorrective action<strong>FR</strong>-PU04E.FINH/Sink O/Temp<strong>FR</strong>-PU07Fin overheatIf the heatsink overheats, the temperature sensor is actuated to stop the inverter output.The FIN signal can be output when the temperature becomes approximately 85% of the heatsinkoverheat protection operation temperature.For the terminal used for the FIN signal output, assign the function by setting "26" (positive logic) or"126" (negative logic) in any of Pr. 190 to Pr. 196 (output terminal function selection). (Refer toInstruction Manual (applied) chapter 4)1. Check for too high ambient temperature.2. Check for heatsink clogging.3. Check that the cooling fan is stopped. (Check that is displayed on the operation panel.)1. Set the ambient temperature to within the specifications.2. Clean the heatsink.3. Replace the cooling fan.<strong>FR</strong>-PU04E.IPFInst. Pwr. Loss<strong>FR</strong>-PU07Instantaneous power failureIf a power failure occurs for longer than 15ms (this also applies to inverter input shut-off), the instantaneouspower failure protective function is activated to trip the inverter in order to prevent the control circuit frommalfunctioning. If a power failure persists for longer than 100ms, the fault output is not provided, and theinverter restarts if the start signal is on upon power restoration. (The inverter continues operating if aninstantaneous power failure is within 15ms.) In some operating status (load magnitude, acceleration/deceleration time setting, etc.), overcurrent or other protection may be activated upon power restoration.When instantaneous power failure protection is activated, the IPF signal is output. (Refer to InstructionManual (applied) chapter 4)Find the cause of instantaneous power failure occurrence.· Remedy the instantaneous power failure.· Prepare a backup power supply for instantaneous power failure.· Set the function of automatic restart after instantaneous power failure (Pr. 57). (Refer toInstruction Manual (applied) chapter 4.)<strong>FR</strong>-PU04E.BEBr. Cct. Fault<strong>FR</strong>-PU07Brake transistor alarm detection/internal circuit errorThis function stops the inverter output if an alarm occurs in the brake circuit, e.g. damaged braketransistors when using functions of the 75K or more.In this case, the inverter must be powered off immediately.For the 55K or less, it appears when an internal circuit error occurred.· Reduce the load inertia.· Check that the frequency of using the brake is proper.· Check that the brake resistor selected is correct.For the 75K or more, when the protective function is activated even if the above measures are taken,replace the brake unit with a new one.For the 55K or less, replace the inverter.<strong>FR</strong>-PU04E.UVTUnder Voltage<strong>FR</strong>-PU07UndervoltageIf the power supply voltage of the inverter decreases, the control circuit will not perform normal functions.In addition, the motor torque wiil be insufficient and/or heat generation will increase. To prevent this, ifthe power supply voltage decreases below about 150V (300VAC for the 400V class), this functionstops the inverter output.When a jumper is not connected across P/+-P1, the undervoltage protective function is activated.When undervoltage protection is activated, the IPF signal is output. (Refer to Instruction Manual(applied) chapter 4)1. Check for start of large-capacity motor.2. Check that a jumper or DC reactor is connected across terminals P/+-P1.1. Check the power supply system equipment such as the power supply.2. Connect a jumper or DC reactor across terminals P/+-P1.3. If the problem still persists after taking the above measure, please contact your sales representative.TROUBLESHOOTING599
Causes and corrective actionsOperation PanelIndicationNameDescriptionCheck pointCorrective action<strong>FR</strong>-PU04 Fault 14E.ILF<strong>FR</strong>-PU07 Input phase lossInput phase lossThis fault is output when function valid setting (=1) is set in Pr. 872 Input phase loss protection selectionand one phase of the three phase power input is lost. When the setting of Pr. 872 Input phase lossprotection selection is the initial value (Pr. 872 = "0"), this fault does not occur. (Refer to InstructionManual (applied) chapter 4.)Check for a break in the cable for the three-phase power supply input.· Wire the cables properly.· Repair a brake portion in the cable.· Check the Pr. 872 Input phase loss protection selection setting.Operation PanelIndicationNameE.OLT<strong>FR</strong>-PU04<strong>FR</strong>-PU07Stll Prev STP ( OL shown during stallprevention operation)Stall preventionDescriptionIf the frequency has fallen to 0.5Hz by stall prevention operation and remains for 3s, a fault (E.OLT)appears and trips the inverter. OL appears while stall prevention is being activated.Check point · Check the motor for use under overload. (Refer to Instruction Manual (applied) chapter 4.)Corrective action · Reduce the load weight.Operation PanelIndicationNameDescriptionCheck pointCorrective actionOperation PanelIndicationNameDescriptionCheck pointCorrective actionOperation PanelIndicationNameDescriptionCheck pointCorrective actionOperation PanelIndicationNameDescriptionCheck pointCorrective action<strong>FR</strong>-PU04E.GFGround Fault<strong>FR</strong>-PU07Output side earth (ground) fault overcurrentThis function stops the inverter output if an earth (ground) fault overcurrent flows due to an earth(ground) fault that occurred on the inverter's output (load) side.Check for an earth (ground) fault in the motor and connection cable.Remedy the earth (ground) fault portion.<strong>FR</strong>-PU04E.LFE. LF<strong>FR</strong>-PU07Output phase lossThis function stops the inverter output if one of the three phases (U, V, W) on the inverter's output side(load side) is lost.· Check the wiring (Check that the motor is normal.)· Check that the capacity of the motor used is not smaller than that of the inverter.· Wire the cables properly.· Check the Pr. 251 Output phase failure protection selection setting.<strong>FR</strong>-PU04E.OHTOH Fault<strong>FR</strong>-PU07External thermal relay operationIf the external thermal relay provided for motor overheat protection, or the internally mountedtemperature relay in the motor, etc. switches on (contacts open), the inverter output is stopped.Functions when "7" (OH signal) is set to any of Pr. 178 to Pr. 189 (input terminal function selection).This protective function does not function in the initial status (OH signal is not assigned).· Check for motor overheating.· Check that the value of 7 (OH signal) is set correctly in any of Pr. 178 to Pr. 189 (input terminal functionselection).· Reduce the load and operating duty.· Even if the relay contacts are reset automatically, the inverter will not restart unless it is reset.<strong>FR</strong>-PU04 Fault 14E.PTC<strong>FR</strong>-PU07 PTC activatedPTC thermistor operationTrips when the motor overheat status is detected for 10s or more by the external PTC thermistor inputconnected to the terminal AU.This fault functions when "63" is set in Pr. 184 AU terminal function selection and AU/PTC switchoverswitch is set in PTC side. When the initial value (Pr. 184 = "4") is set, this fault does not occur.· Check the connection between the PTC thermistor switch and thermal relay protector.· Check the motor for operation under overload.· Is valid setting ( = 63) selected in Pr. 184 AU terminal function selection ? (Refer to InstructionManual (applied) chapter 4.)Reduce the load weight.100
Causes and corrective actionsOperation PanelIndicationNameDescriptionCheck pointCorrective actionOperation PanelIndicationNameDescriptionCheck pointCorrective actionOperation PanelIndicationNameDescriptionCheck pointCorrective action<strong>FR</strong>-PU04E.OPTOption Fault<strong>FR</strong>-PU07Option faultAppears when the AC power supply is connected to the terminal R/L1, S/L2, T/L3 accidentally when ahigh power factor converter is connected.· Check that the AC power supply is not connected to the terminal R/L1, S/L2, T/L3 when a high powerfactor converter (<strong>FR</strong>-HC, MT-HC) or power regeneration common converter (<strong>FR</strong>-CV) is connected.· Check the parameter (Pr. 30) setting and wiring.· The inverter may be damaged if the AC power supply is connected to the terminal R/L1, S/L2, T/L3when a high power factor converter is connected. Please contact your sales representative.· Return the switch for the manufacturer setting of the plug-in option to the initial status. (Refer toinstruction manual of each option)<strong>FR</strong>-PU04E.OP1Option 1 Fault<strong>FR</strong>-PU07Communication option fault<strong>Stop</strong>s the inverter output when a communication line error occurs in the communication option.· Check for a wrong option function setting and operation.· Check that the plug-in option is plugged into the connector securely.· Check for a brake in the communication cable.· Check that the terminating resistor is fitted properly.· Check the option function setting, etc.· Connect the plug-in option securely.· Check the connection of communication cable.<strong>FR</strong>-PU04E. 1Fault 1<strong>FR</strong>-PU07Option fault<strong>Stop</strong>s the inverter output if a contact fault or the like of the connector between the inverter andcommunication option occurs.Appears when the switch for the manufacturer setting of the plug-in option is changed.1. Check that the plug-in option is plugged into the connector securely.2. Check for excess electrical noises around the inverter.1. Connect the plug-in option securely.2. Take measures against noises if there are devices producing excess electrical noises around the inverter.If the problem still persists after taking the above measure, please contact your sales representativeor distributor.3. Return the switch position for the manufacturer setting of the plug-in option to the initial status. (Referto instruction manual of each option)Operation PanelIndicationNameDescriptionCheck pointCorrective action<strong>FR</strong>-PU04E.PECorrupt Memry<strong>FR</strong>-PU07Parameter storage device fault (control circuit board)Trips when a fault occurred in parameters stored (EEPROM failure)Check for too many number of parameter write times.Please contact your sales representative.When performing parameter write frequently for communication purposes, set "1" in Pr. 342 to enableRAM write. Note that powering off returns the inverter to the status before RAM write.Operation Panel<strong>FR</strong>-PU04 Fault 14E.PE2Indication<strong>FR</strong>-PU07 PR storage alarmNameParameter storage device fault (main circuit board)Description Trips when a fault occurred in parameters stored (EEPROM failure)Check point ——————Corrective action Please contact your sales representative.TROUBLESHOOTING5101
Causes and corrective actionsOperation PanelIndicationNameDescriptionCheck pointCorrective actionOperation PanelIndicationNameDescriptionCheck pointCorrective action<strong>FR</strong>-PU04E.PUEPU Leave Out<strong>FR</strong>-PU07PU disconnection· This function stops the inverter output if communication between the inverter and PU is suspended,e.g. the operation panel and parameter unit is disconnected, when "2", "3", "16" or "17" was set in Pr.75 Reset selection/disconnected PU detection/PU stop selection.· This function stops the inverter output when communication errors occurred consecutively for morethan permissible number of retries when a value other than "9999" is set in Pr. 121 Number of PUcommunication retries during the RS-485 communication with the PU connector.· This function also stops the inverter output if communication is broken within the period of time set inPr. 122 PU communication check time interval during the RS-485 communication with the PU connector.· Check that the <strong>FR</strong>-DU07 or parameter unit (<strong>FR</strong>-PU04/<strong>FR</strong>-PU07) is fitted tightly.· Check the Pr. 75 setting.Fit the <strong>FR</strong>-DU07 or parameter unit (<strong>FR</strong>-PU04/<strong>FR</strong>-PU07) securely.<strong>FR</strong>-PU04E.RETRetry No Over<strong>FR</strong>-PU07Retry count excessIf operation cannot be resumed properly within the number of retries set, this function trips the inverter.Functions only when Pr. 67 Number of retries at fault occurrence is set. When the initial value (Pr. 67 = "0")is set, this fault does not occur.Find the cause of alarm occurrence.Eliminate the cause of the error preceding this error indication.Operation PanelIndicationNameDescriptionCheck pointCorrective actionOperation PanelIndicationNameDescriptionCheck pointCorrective actionOperation PanelIndicationNameDescriptionCheck pointCorrective actionE. 6Fault 6E. 7<strong>FR</strong>-PU04<strong>FR</strong>-PU07Fault 7E.CPUCPU FaultCPU error<strong>Stop</strong>s the inverter output if the communication error of the built-in CPU occurs.Check for devices producing excess electrical noises around the inverter.· Take measures against noises if there are devices producing excess electrical noises around theinverter.· Please contact your sales representative.<strong>FR</strong>-PU04 ————E.CTE<strong>FR</strong>-PU07 E.CTEOperation panel power supply short circuit, RS-485 terminal power supply short circuitWhen the operation panel power supply (PU connector) is shorted, this function shuts off the poweroutput. At this time, the operation panel (parameter unit) cannot be used and RS-485 communicationfrom the PU connector cannot be made. When the internal power supply for the RS-485 terminals areshorted, this function shuts off the power output.At this time, communication from the RS-485 terminals cannot be made.To reset, enter the RES signal or switch power off, then on again.1. Check for a short circuit in the PU connector cable.2. Check that the RS-485 terminals are connected correctly.1. Check the PU and cable.2. Check the connection of the RS-485 terminals<strong>FR</strong>-PU04E.P24E.P24<strong>FR</strong>-PU0724VDC power output short circuitWhen the 24VDC power output from the PC terminal is shorted, this function shuts off the power output.At this time, all external contact inputs switch off. The inverter cannot be reset by entering the RESsignal. To reset it, use the operation panel or switch power off, then on again.· Check for a short circuit in the PC terminal output.· Remedy the earth (ground) fault portion.102
Causes and corrective actionsOperation PanelIndicationNameDescriptionCheck pointOperation PanelIndicationNameDescriptionCheck pointCorrective actionOperation PanelIndicationNameDescriptionCheck pointCorrective action<strong>FR</strong>-PU04 Fault 14E.CDO<strong>FR</strong>-PU07 OC detect levelOutput current detection value exceededTrips when the output current exceeds the Pr. 150 Output current detection level setting.Functions when Pr. 167 Output current detection operation selection is set to "1". When the initial value (Pr.167 = "0") is set, this fault does not occur.Check the settings of Pr. 150 Output current detection level, Pr. 151 Output current detection signal delay time,Pr. 166 Output current detection signal retention time, Pr. 167 Output current detection operation selection.(Refer to Instruction Manual (applied) chapter 4.)<strong>FR</strong>-PU04 Fault 14E.IOH<strong>FR</strong>-PU07 Inrush overheatInrush current limit circuit faultTrips when the resistor of the inrush current limit circuit overheats. The inrush current limit circuit failure· Check that frequent power ON/OFF is not repeated.· Check that no meltdown is found in the primary side fuse (5A) in the power supply circuit of theinrush current suppression circuit contactor (<strong>FR</strong>-F740-132K or more) or no fault is found in the powersupply circuit of the contactor.· Check that the power supply circuit of inrush current limit circuit contactor is not damaged.Configure a circuit where frequent power ON/OFF is not repeated.If the problem still persists after taking the above measure, please contact your sales representative.<strong>FR</strong>-PU04 Fault 14E.SER<strong>FR</strong>-PU07 VFD Comm errorCommunication fault (inverter)This function stops the inverter output when communication error occurs consecutively for more thanpermissible retry count when a value other than "9999" is set in Pr. 335 RS-485 communication retry countduring RS-485 communication from the RS-485 terminals. This function also stops the inverter output ifcommunication is broken for the period of time set in Pr. 336 RS-485 communication check time interval.Check the RS-485 terminal wiring.Perform wiring of the RS-485 terminals properly.Operation PanelIndicationNameDescriptionCheck pointCorrective actionOperation PanelIndicationNameDescriptionCorrective action<strong>FR</strong>-PU04 Fault 14E.AIE<strong>FR</strong>-PU07 Analog in errorAnalog input faultTrips when 30mA or more is input or a voltage (7.5V or more) is input with the terminal 2/4 set tocurrent input.Check the setting of Pr. 73 Analog input selection and Pr. 267 Terminal 4 input selection. (Refer toInstruction Manual (applied) chapter 4.)Either give a frequency command by current input or set Pr. 73 Analog input selection or Pr. 267 Terminal4 input selection to voltage input.<strong>FR</strong>-PU04E.13<strong>FR</strong>-PU07Internal circuit faultTrips when an internal circuit error occurred.Please contact your sales representative.Fault 13CAUTION• If protective functions of E.ILF, E.PTC, E.PE2, E.CDO, E.IOH, E.SER, E.AIE are activated when using the <strong>FR</strong>-PU04, "Fault 14"appears.Also when the faults history is checked on the <strong>FR</strong>-PU04, the display is "E.14".• If faults other than the above appear, contact your sales representative.TROUBLESHOOTING5103
Correspondences between digital andactual characters5.4 Correspondences between digital and actual charactersThere are the following correspondences between the actual alphanumeric characters and the digital charactersdisplayed on the operation panel.ActualDigitalActualDigitalActualDigital0AM1BN2CO3Do4EP5FS6GT7HU8IV9JrL-104
5.5 Check and clear of the faults history(1) Check for the faults historyCheck and clear of the faults historyMonitor/frequency setting[Operation panel is usedfor operation]Parameter setting[Parameter setting change]Faults history[Operation for displaying faults history]Eight past faults can be displayed with the setting dial.(The latest fault is ended by ".".)When no fault exists,is displayed.Output frequencyOutput currentFlickeringFlickeringFlickeringEnergization timeOutput voltageFlickeringFlickeringFlickeringFlickeringPress thesettingdial.Press thesettingdial.Press thesettingdial.Faults history number(The number of past faults is displayed.)TROUBLESHOOTING5105
Check and clear of the faults history(2) Clearing procedurePOINT· The faults history can be cleared by setting "1" in Er.CL Faults history clear.OperationDisplay1.Screen at powering onThe monitor display appears.2.Press to choose the parametersetting mode.3.appears.The parameternumber previouslyread appears.4.Press to read the currently set value." "(initial value) appears.5.Turn to changeit to the setting value " ".6.Pressto set.· Press to read another parameter.· Press to show the setting again.· Press twice to show the next parameter.Flicker ··· Faults history clear complete!!106
Check first when you have troubles5.6 Check first when you have troublesPOINTIf the cause is still unknown after every check, it is recommended to initialize the parameters (initial value) then resetthe required parameter values and check again.5.6.1 Motor does not start1) Check the value of Pr. 0 Torque boost setting. (Refer to page 56)2) Check the main circuit.Check that a proper power supply voltage is applied (operation panel display is provided).Check that the motor is connected properly.Check that the jumper across P/+-P1 is connected.3) Check the input signalsCheck that the start signal is input.Check that both the forward and reverse rotation start signals are not input simultaneously.Check that the frequency setting signal is not zero. (When the frequency command is 0Hz and thestart command is entered, FWD or REV LED on the operation panel flickers.)Check that the AU signal is on when terminal 4 is used for frequency setting signal.Check that the output stop signal (MRS) or reset signal (RES) is not on.Check that the CS signal is not OFF with automatic restart after instantaneous power failure functionis selected (Pr. 57 ≠ "9999").Check that the sink or source jumper connector is fitted securely. (Refer to page 22.)Check that the voltage/current input switch is correctly set for analog input signal (0 to 5V/0 to 10V, 4to 20mA).4) Check the parameter settingsCheck that Pr. 78 Reverse rotation prevention selection is not selected.Check that the Pr. 79 Operation mode selection setting is correct.Check that the bias and gain (calibration parameter C2 to C7) settings are correct.Check that the Pr. 13 Starting frequency setting is not greater than the running frequency.Check that frequency settings of each running frequency (such as multi-speed operation) are not zero.Check that especially the Pr. 1 Maximum frequency setting is not zero.Check that the Pr. 15 Jog frequency setting is not lower than the Pr. 13 Starting frequency setting.Check that the operation location by Pr. 550 and Pr. 551 is correct.5) Inspection of loadCheck that the load is not too heavy.Check that the shaft is not locked.5.6.2 Motor generates abnormal noiseNo carrier frequency noises (metallic noises) are generated.Soft-PWM control to change the motor tone into an unoffending complex tone is factory-set to validby Pr.72 PWM frequency selection.Adjust Pr.72 PWM frequency selection to change the motor tone.(When operating the inverter with the carrier frequency of 3kHz or more set in Pr. 72, the carrierfrequency will automatically decrease if the output current of the inverter exceeds the value inparenthesis of the rated output current on page 118. This may cause the motor noise to increase. Butit is not a fault.)Check for any mechanical looseness.Contact the motor manufacturer.TROUBLESHOOTING55.6.3 Motor generates heat abnormallyIs the fan for the motor is running? (Check for accumulated dust.)Check that the load is not too heavy. Lighten the load.Check that the inverter output voltages (U, V, W) balanced.Check that the Pr.0 Torque boost setting is correct.Was the motor type set? Check the setting of Pr. 71 Applied motor.107
Check first when you have troubles5.6.4 Motor rotates in opposite directionCheck that the phase sequence of output terminals U, V and W is correct.Check that the start signals (forward rotation, reverse rotation) are connected properly. (Refer to page 47)5.6.5 Speed greatly differs from the settingCheck that the frequency setting signal is correct. (Measure the input signal level.)Check that the Pr. 1, Pr. 2, Calibration parameter C2 to C7 settings are correctCheck that the input signal lines are not affected by external noise.(Use shielded cables)Check that the load is not too heavy.Check that the Pr. 31 to Pr. 36 (frequency jump) settings are correct.5.6.6 Acceleration/deceleration is not smoothCheck that the acceleration and deceleration time settings are not too short.Check that the load is not too heavy.Check that the torque boost (Pr. 0, Pr. 46) setting is not too large and the stall prevention function is notactivated.5.6.7 Motor current is largeCheck that the load is not too heavy.Check that the Pr. 0 Torque boost setting is correct.Check that the Pr. 3 Base frequency setting is correct.Check that the Pr. 14 Load pattern selection setting is appropriate.Check that the Pr. 19 Base frequency voltage setting is correct.5.6.8 Speed does not increaseCheck that the Pr. 1 Maximum frequency setting is correct. (If you want to run the motor at 120Hz or more,set Pr. 18 High speed maximum frequency. (Refer to Instruction Manual (applied) chapter 4.))Check that the load is not too heavy.(In agitators, etc., load may become heavier in winter.)Check that the torque boost (Pr. 0, Pr. 46) setting is not too large and the stall prevention function is notactivated.Check that the brake resistor is not connected to terminals P/+-P1 accidentally.5.6.9 Speed varies during operation1) Inspection of loadCheck that the load is not varying.2) Check the input signalsCheck that the frequency setting signal is not varying.Check that the frequency setting signal is not affected by noise.Check for a malfunction due to undesirable currents when the transistor output unit is connected.(Refer to page 23)3) OthersCheck that the wiring length is not too long for V/F control108
Check first when you have troubles5.6.10 Operation mode is not changed properly1) Inspection of loadCheck that the STF or STR signal is off.When it is on, the operation mode cannot be changed.2) Parameter settingCheck the Pr. 79 setting.When the Pr. 79 Operation mode selection setting is "0" (initial value), the inverter is placed in theexternal operation mode at input power-on. At this time, pressing on the operation panel(press when the parameter unit (<strong>FR</strong>-PU04/<strong>FR</strong>-PU07) is used) switches the mode to the PUoperation mode. For other values (1 to 4, 6, 7), the operation mode is limited accordingly.5.6.11 Operation panel (<strong>FR</strong>-DU07) display is not operatingCheck that the operation panel is connected to the inverter securely.5.6.12 POWER lamp is not litCheck that wiring is securely performed and installation is correct.5.6.13 Parameter write cannot be performedMake sure that operation is not being performed (signal STF or STR is not ON).Make sure that you are not attempting to set the parameter in the external operation mode.Check Pr. 77 Parameter write selection.Check Pr. 161 Frequency setting/key lock operation selection.TROUBLESHOOTING5109
Inspection item6 PRECAUTIONS FOR MAINTENANCE AND INSPECTIONThe inverter is a static unit mainly consisting of semiconductor devices. Daily inspection must be performed to preventany fault from occurring due to the adverse effects of the operating environment, such as temperature, humidity, dust,dirt and vibration, changes in the parts with time, service life, and other factors.• Precautions for maintenance and inspectionFor some short time after the power is switched off, a high voltage remains in the smoothing capacitor. When accessingthe inverter for inspection, wait for at least 10 minutes after the power supply has been switched off, and then makesure that the voltage across the main circuit terminals P/+-N/− of the inverter is not more than 30VDC using a tester,etc.6.1 Inspection item6.1.1 Daily inspectionBasically, check for the following faults during operation.(1) Motor operation fault(2) Improper installation environment(3) Cooling system fault(4) Unusual vibration and noise(5) Unusual overheat and discolorationDuring operation, check the inverter input voltages using a tester.6.1.2 Periodic inspectionCheck the areas inaccessible during operation and requiring periodic inspection.Consult us for periodic inspection.1) Check for cooling system fault.................Clean the air filter, etc.2) Tightening check and retightening ...........The screws and bolts may become loose due to vibration, temperaturechanges, etc.Tighten them according to the specified tightening torque. (Refer to page 14.)3) Check the conductors and insulating materials for corrosion and damage.4) Measure insulation resistance.5) Check and change the cooling fan and relay.110
Inspection item6.1.3 Daily and periodic inspectionArea ofInspectionGeneralMaincircuitControlcircuitprotectivecircuitCoolingsystemDisplayLoadmotorInspection ItemSurroundingenvironmentInspection ItemCheck the ambient temperature, humidity, dirt,corrosive gas, oil mist , etcOverall unit Check for unusual vibration and noise ◦Power supplyvoltageGeneralConductors, cablesTransformer/reactorCheck that the main circuit voltages and controlvoltages are normal *1IntervalCorrective Action atAlarm Occurrence*1 It is recommended to install a device to monitor voltage for checking the power supply voltage to the inverter.*2 One to two years of periodic inspection cycle is recommended. However, it differs according to the installation environment.Consult us for periodic inspection.DailyPeriodic*2◦ Improve emvironmentCheck alarm location andretighten◦ Inspect the power supply(1)Check with megger (across main circuitterminals and earth (ground) terminal).◦ Contact the manufacturer(2)Check for loose screws and bolts. ◦ Retighten(3)Check for overheat traces on the parts. ◦ Contact the manufacturer(4)Check for stain ◦ Clean(1)Check conductors for distortion.(2)Check cable sheaths for breakage anddeterioration (crack, discoloration, etc.)Check for unusual odor and abnormal increase inwhining sound.◦Terminal block Check for damage. ◦SmoothingaluminumelectrolyticcapacitorRelay/contactorOperation checkParts checkOverallAluminumelectrolyticcapacitorCooling fanHeatsinkAir filter, etc.Indication◦ Contact the manufacturer◦ Contact the manufacturer<strong>Stop</strong> the device and contactthe manufacturer.<strong>Stop</strong> the device and contactthe manufacturer.(1)Check for liquid leakage. ◦ Contact the manufacturer(2)Check for safety valve projection and bulge. ◦ Contact the manufacturer(3)Visual check and judge by the life check of themain circuit capacitor (Refer to page 112)◦Check that the operation is normal and no chatteris heard.(1)Check that the output voltages across phaseswith the inverter operated alone is balanced(2)Check that no fault is found in protective anddisplay circuits in a sequence protectiveoperation test.◦ Contact the manufacturer◦ Contact the manufacturer◦ Contact the manufacturer(1)Check for unusual odor and discoloration. ◦<strong>Stop</strong> the device and contactthe manufacturer.(2)Check for serious rust development ◦ Contact the manufacturer(1)Check for liquid leakage in a capacitor anddeformation trance(2)Visual check and judge by the life check of thecontrol circuit capacitor. (Refer to page 112.)◦ Contact the manufacturer◦(1)Check for unusual vibration and noise. ◦ Replace the fan(2)Check for loose screws and bolts ◦ Retighten(3)Check for stain ◦ Clean(1)Check for clogging ◦ Clean(2)Check for stain ◦ Clean(1)Check for clogging ◦ Clean or replace(2)Check for stain ◦ Clean or replace(1)Check that display is normal. ◦ Contact the manufacturer(2)Check for stain ◦ CleanMeter Check that reading is normal ◦Operation checkCheck for vibration and abnormal increase inoperation noise◦<strong>Stop</strong> the device and contactthe manufacturer.<strong>Stop</strong> the device and contactthe manufacturer.Customer'sCheckPRECAUTIONS FOR MAINTENANCE AND INSPECTION6111
Inspection item6.1.4 Display of the life of the inverter partsThe self-diagnostic alarm is output when the life span of the control circuit capacitor, cooling fan, each parts of theinrush current limit circuit is near to give an indication of replacement time .The life alarm output can be used as a guideline for life judgement.PartsJudgement levelMain circuit capacitor 85% of the initial capacityControl circuit capacitor Estimated 10% life remainingInrush current limit circuit Estimated 10% life remaining (Power on: 100,000 times left)Cooling fanLess than 50% of the predetermined speedFor the life check of the main circuit capacitor, the alarm signal (Y90) will not be output if a measuring method of (2) isnot performed. (Refer to page 113.)(1) Display of the life alarm· Pr. 255 Life alarm status display can be used to confirm that the control circuit capacitor, main circuit capacitor,cooling fan, and each parts of the inrush current limit circuit has reached the life alarm output level.bit 157 00 0 0 0 0 0 0 0 0 0 0 0 1 0 0 1Pr. 255 Bit(decimal) (binary)15 111114 111013 110112 110011 101110 10109 10018 10007 01116 01105 01014 01003 00112 00101 00010 0000Inrush CurrentLimit Circuit Lifebit0 Control circuit capacitor lifebit1 Main circuit capacitor lifebit2 Cooling fan lifebit3 Inrush current limit circuit lifeCoolingFan LifeMain CircuitCapacitor Life• Pr.255 readControl CircuitCapacitor Life: with alarm, : without alarm• Pr.255 setting readBit image is displayedin decimalPOINTLife check of the main circuit capacitor needs to be done by Pr. 259. (Refer to page 113.)112
Inspection item(2) Measuring method of life of the main circuit capacitor· If the value of capacitor capacity measured before shipment is considered as 100%, Pr. 255 bit1 is turned on whenthe measured value falls below 85%.· Measure the capacitor capacity according to the following procedure and check the deterioration level of thecapacitor capacity.1) Check that the motor is connected and at a stop.2) Set "1" (measuring start) in Pr. 2593) Switch power off. The inverter applies DC voltage to the motor to measure the capacitor capacity while theinverter is off.4) After confirming that the LED of the operation panel is off, power on again.5) Check that "3" (measuring completion) is set in Pr. 259, then read Pr. 258 and check the life of the main circuitcapacitor.REMARKS· When the main circuit capacitor life is measured under the following conditions, "forced end" (Pr. 259 = "8") or "measuring error"(Pr. 259 = "9") occurs or it remains in "measuring start" (Pr. 259 = "1").When measuring, avoid the following conditions to perform.(a) <strong>FR</strong>-HC, MT-HC, <strong>FR</strong>-CV, or sine wave filter is connected.(b) Terminal R1/L11, S1/L21 or DC power supply is connected to the terminals P/+ and N/−.(c) Switch power on during measuring.(d) The motor is not connected to the inverter.(e) The motor is running.(The motor is coasting.)(f) The motor capacity is two rank smaller as compared to the inverter capacity.(g) The inverter is at an alarm stop or an alarm occurred while power is off.(h) The inverter output is shut off with the MRS signal.(i) The start command is given while measuring.· Operating environment:Ambient temperature (annual average 40°C (free from corrosive gas, flammable gas, oil mist, dust anddirt))Output current (80% of the rated current of Mitsubishi standard 4P motor)POINTFor the accurate life measuring of the main circuit capacitor, perform after more than 3h passed since the turn off ofthe power as it is affected by the capacitor temperature.6.1.5 CleaningAlways run the inverter in a clean status.When cleaning the inverter, gently wipe dirty areas with a soft cloth immersed in neutral detergent or ethanol.CAUTIONDo not use solvent, such as acetone, benzene, toluene and alcohol, as they will cause the inverter surface paint to peel off.The display, etc. of the operation panel (<strong>FR</strong>-DU07) and parameter unit (<strong>FR</strong>-PU04/<strong>FR</strong>-PU07) are vulnerable to detergent andalcohol. Therefore, avoid using them for cleaning.6.1.6 Replacement of partsThe inverter consists of many electronic parts such as semiconductor devices.The following parts may deteriorate with age because of their structures or physical characteristics, leading to reducedperformance or fault of the inverter. For preventive maintenance, the parts must be replaced periodically.Use the life check function as a guidance of parts replacement.Part Name Standard Replacement Interval *1 DescriptionCooling fan 10 years Replace (as required.)Main circuit smoothing capacitor 10 years *2 Replace (as required.)On-board smoothing capacitor 10 years Replace the board (as required)Relays − as required.Fuse (185K or more) 10 years Replace the fuse (as required)*1 *Replacement years for when the yearly average ambient temperature is 40°C(without corrosive gas, flammable gas, oil mist, dust and dirt etc)*2 Output current : equivalent to rating current of the Mitsubishi standard motor (4 poles)PRECAUTIONS FOR MAINTENANCE AND INSPECTION6CAUTIONFor parts replacement, consult the nearest Mitsubishi FA Center.113
Inspection item(1) Cooling fanThe replacement interval of the cooling fan used for cooling the parts generating heat such as the main circuitsemiconductor is greatly affected by the ambient temperature. When unusual noise and/or vibration is noticedduring inspection, the cooling fan must be replaced immediately.CAUTIONFor parts replacement, consult the nearest Mitsubishi FA Center.F720Inverter Type Fan Type Units2.2K to 5.5K MMF-06F24ES-RP1 BKO-CA1638H01 17.5K to 15K MMF-08D24ES-RP1 BKO-CA1639H01 218.5K, 22K MMF-12D24DS-RP1 BKO-CA1619H01 130KMMF-06F24ES-RP1 BKO-CA1638H01 1MMF-12D24DS-RP1 BKO-CA1619H01 137K to 55K MMF-12D24DS-RP1 BKO-CA1619H01 275K to 110K MMF-12D24DS-RP1 BKO-CA1619H01 33.7K, 5.5K MMF-06F24ES-RP1 BKO-CA1638H01 17.5K, 18.5K MMF-08D24ES-RP1 BKO-CA1639H01 222K, 30K MMF-12D24DS-RP1 BKO-CA1619H01 137K MMF-09D24TS-RP1 BKO-CA1640H01 2F74045K to 75K2MMF-12D24DS-RP1 BKO-CA1619H0190K to 160K 3185K, 220K3250K to 315K 9LB1424H5H034355K, 400K 5450K to 560K 9LB1424S5H04 6The <strong>FR</strong>-F720-0.75K, 1.5K, <strong>FR</strong>-F740-0.75K to 2.2K are not provided with a cooling fan.• Removal (<strong>FR</strong>-F720-2.2K to 110K, <strong>FR</strong>-F740-3.7K to 160K)1) Push the hooks from above and remove the fan cover.<strong>FR</strong>-F720-2.2K to 5.5K<strong>FR</strong>-F740-3.7K, 5.5K2)Disconnect the fan connectors.3)Remove the fan.<strong>FR</strong>-F720-7.5K to 30K<strong>FR</strong>-F740-7.5K to 30K<strong>FR</strong>-F720-37K or more<strong>FR</strong>-F740-37K to 160KFan coverFan connectionconnectorFanFan coverFan *Fan connectionconnectorFan coverFan *Fan connectionconnector<strong>FR</strong>-F720-2.2K to 5.5K<strong>FR</strong>-F740-3.7K, 5.5K<strong>FR</strong>-F720-7.5K to 30K<strong>FR</strong>-F740-7.5K to 30K* The number of cooling fans differs according to the inverter capacity. (Refer to page 114)<strong>FR</strong>-F720-37K or more<strong>FR</strong>-F740-37K to 160K114
Inspection item• Reinstallation (<strong>FR</strong>-F720-2.2K to 110K, <strong>FR</strong>-F740-3.7K to 160K)1) After confirming the orientation of the fan, reinstall the fan so that the arrow on the left of "AIR FLOW" faces up.AIR FLOW2) Reconnect the fan connectors.<strong>FR</strong>-F720-2.2K to 5.5K<strong>FR</strong>-F740-3.7K, 5.5K<strong>FR</strong>-F720-7.5K to 15K<strong>FR</strong>-F740-7.5K to 18.5K3)Reinstall the fan cover.2. Insert hooks untilyou hear a clicksound.<strong>FR</strong>-F720-30K<strong>FR</strong>-F720-37K to 110K<strong>FR</strong>-F740-37K to 160K1. Insert hooks intoholes.<strong>FR</strong>-F720-2.2K to 5.5K<strong>FR</strong>-F740-3.7K, 5.5K1. Insert hooks intoholes.2. Insert hooks untilyou hear a clicksound.<strong>FR</strong>-F720-7.5K to 30K<strong>FR</strong>-F740-7.5K to 30K<strong>FR</strong>-F720-18.5K, 22K<strong>FR</strong>-F740-22K, 30K1. Insert hooks intoholes.2. Insert hooks untilyou hear a clicksound.<strong>FR</strong>-F720-37K to 110K<strong>FR</strong>-F740-37K to 160KCAUTION• Installing the fan in the opposite air flow direction can cause the inverter life to be shorter.• When installing the fan, use care to prevent wires from being caught between the inverter and fan.• Switch the power off before replacing fans. Since the inverter circuits are charged with voltage even after power off,replace fans only when the inverter cover is on the inverter to prevent an electric shock accident.PRECAUTIONS FOR MAINTENANCE AND INSPECTION6115
Inspection item• Removal (<strong>FR</strong>-F740-185K or more)1) Remove a fan cover.2) After removing a fan connector, remove a fan block.3) Remove a fan.Fan *3)Fan connectionconnector2)1)* The number of cooling fans differs according to the inverter capacity.• Reinstallation (<strong>FR</strong>-F740-185K or more)1) After confirming the orientation of the fan, reinstall the fan so that the arrow on the left of "AIR FLOW" facesup.AIR FLOW2) Install fans referring to the above figure.CAUTION• Installing the fan in the opposite air flow direction can cause the inverter life to be shorter.• When installing the fan, use care to prevent wires from being caught between the inverter and fan.• Switch the power off before replacing fans. Since the inverter circuits are charged with voltage even after poweroff, replace fans only when the inverter cover is on the inverter to prevent an electric shock accident.116
Inspection item(2) Replacement procedure of the cooling fan when using a heatsink protrusion attachment(<strong>FR</strong>-A7CN)When replacing a cooling fan, remove a top cover of theheatsink protrusion attachment and perform replacement.After replacing the cooling fan, replace the top cover in theoriginal position.Top cover(3) Smoothing capacitorsA large-capacity aluminum electrolytic capacitor is used for smoothing in the main circuit DC section, and analuminum electrolytic capacitor is used for stabilizing the control power in the control circuit. Their characteristicsare deteriorated by the adverse effects of ripple currents, etc.The replacement intervals greatly vary with the ambient temperature and operating conditions. When the inverter isoperated in air-conditioned, normal environment conditions, replace the capacitors about every 10 years.The appearance criteria for inspection are as follows:1) Case: Check the side and bottom faces for expansion2) Sealing plate: Check for remarkable warp and extreme crack.3) Check for external crack, discoloration, fluid leakage, etc. Judge that the capacitor has reached its life when themeasured capacitance of the capacitor reduced below 80% of the rating.Refer to page 113 to perform the life check of the main circuit capacitor.(4) RelaysTo prevent a contact fault, etc., relays must be replaced according to the cumulative number of switching times(switching life).6.1.7 Inverter replacementThe inverter can be replaced with the control circuit wiring kept connected. Before replacement, remove the wiringcover of the inverter.1) Loosen the two installation screws in both ends of the control circuit terminal block. (These screws cannot be removed.)Pull down the terminal block from behind the control circuit terminals.2)Using care not to bend the pins of the inverter's control circuit connector, reinstall the control circuit terminal blockand fix it with the mounting screws.PRECAUTIONS FOR MAINTENANCE AND INSPECTION6CAUTIONBefore starting inverter replacement, switch power off, wait for at least 10 minutes, and then check the voltage with a testerand such to ensure safety.117
Rating7 SPECIFICATIONS7.1 Rating•200V classType <strong>FR</strong>-F720-K 0.75 1.5 2.2 3.7 5.5 7.5 11 15 18.5 22 30 37 45 55 75 90 110Applicable motor capacity(kW)*10.75 1.5 2.2 3.7 5.5 7.5 11 15 18.5 22 30 37 45 55 75 90 110Rated capacity (kVA)*2 1.6 2.7 3.7 5.8 8.8 11.8 17.1 22.1 27 32 43 53 65 81 110 132 165OutputPower supplyRated current (A)*3Overload currentrating*4Voltage*5Rated input ACvoltage/frequencyPermissible ACvoltage fluctuationPermissible frequencyfluctuationPowersupplysystemcapacity(kVA)*6Without DCreactorWith DCreactorProtective structure(JEM 1030)*8Cooling system4.2(3.6)7.0(6.0)9.6(8.2)15.2(13)23(20)31(26)45(38)58(49)70(60)85(72)114(97)140(119)170(145)120% for 60s, 150% for 3s (inverse time characteristics)Three-phase 200 to 240VThree-phase 200 to 220V 50Hz, 200 to 240V 60Hz170 to 242V 50Hz, 170 to 264V 60Hz±5%212(180)288(245)346(294)2.1 4.0 4.8 8.0 11.5 16 20 27 32 41 52 65 79 99 - - -1.2 2.6 3.3 5.0 8.1 10 16 19 24 31 41 50 61 74 110 132 165SelfcoolingEnclosed type (IP20)*7Forced air coolingOpen type (IP00)Approx. mass (kg) 1.8 2.2 3.5 3.5 3.5 6.5 6.5 7.8 13 13 14 23 35 35 67 70 70*1 The applicable motor capacity indicated is the maximum capacity applicable for use of the Mitsubishi 4-pole standard motor.*2 The rated output capacity indicated assumes that the output voltage is 220V.*3 When operating the inverter with the carrier frequency set to 3kHz or more, the carrier frequency automatically decreases if the inverteroutput current exceeds the value in parenthesis of the rated current. This may cause the motor noise to increase.*4 The % value of the overload current rating indicated is the ratio of the overload current to the inverter's rated output current. For repeatedduty, allow time for the inverter and motor to return to or below the temperatures under 100% load.*5 The maximum output voltage does not exceed the power supply voltage. The maximum output voltage can be changed within the settingrange. However, the pulse voltage value of the inverter output side voltage remains unchanged at about 2 that of the power supply.*6 The power supply capacity varies with the value of the power supply side inverter impedance (including those of the input reactor andcables).*7 When the hook of the inverter front cover is cut off for installation of the plug-in option, the inverter changes to an open type ().*8 <strong>FR</strong>-DU07: IP40 (except for the PU connector)432(367)118
Rating•400V classType <strong>FR</strong>-F740-K 0.75 1.5 2.2 3.7 5.5 7.5 11 15 18.5 22 30 37 45 55Applicable motor capacity (kW)*1 0.75 1.5 2.2 3.7 5.5 7.5 11 15 18.5 22 30 37 45 55OutputPower supplyRated capacity (kVA)*2 1.6 2.7 3.7 5.8 8.8 12.2 17.5 22.1 26.7 32.8 43.4 53.3 64.8 80.8Rated current (A)*3 2.1(1.8)Overload current rating*4Voltage*5Rated input AC voltage/frequencyPermissible AC voltage fluctuation3.5(3.0)4.8(4.1)7.6(6.4)11.5(9.8)16(13)23(19)29(24)35(30)43(36)120% 60s, 150% 3s (inverse time characteristics)Three-phase 380 to 480VThree-phase 380 to 480V 50Hz/60HzSPECIFICATIONS323 to 528V 50Hz/60HzPermissible frequencyfluctuation±5%Power supply Without DC reactor 2.1 4.0 4.8 8.0 11.5 16 20 27 32 41 52 65 79 99system capacity(kVA)*6With DC reactor 1.2 2.6 3.3 5.0 8.1 10 16 19 24 31 41 50 61 74Protective structure(JEM 1030)*8Enclosed type (IP20)*7Open type (IP00)Cooling system Self-cooling Forced air coolingApprox. mass (kg) 3.5 3.5 3.5 3.5 3.5 6.5 6.5 7.5 7.5 13 13 23 35 35Type <strong>FR</strong>-F740-K 75 90 110 132 160 185 220 250 280 315 355 400 450 500 560Applicable motor capacity (kW)*1 75 90 110 132 160 185 220 250 280 315 355 400 450 500 560OutputPower supplyRated capacity (kVA)*2 110 137 165 198 247 275 329 366 416 464 520 586 659 733 833Rated current (A)*3144(122)180(153)216(183)260(221)325(276)Overload current rating*4120% 60s, 150% 3s(inverse time characteristics)Voltage*5Three-phase 380 to 480VRated input AC voltage/frequencyThree-phase 380 to 480V 50Hz/60HzPermissible AC voltage fluctuation323 to 528V 50Hz/60HzPermissible frequency fluctuation ±5%Power supply Without DC reactor - - - - - - - - - - - - - - -systemLD 110 137 165 198 247 275 329 366 416 464 520 586 659 733 833capacity With DCreactor(kVA)*6SLD 137 165 198 247 275 329 366 416 464 520 586 659 733 833 923Protective structure(JEM 1030)*8Open type (IP00)Cooling systemForced air coolingApprox. mass (kg) 37 50 57 72 72 110 110 175 175 175 260 260 370 370 370*1 The applicable motor capacity indicated is the maximum capacity applicable for use of the Mitsubishi 4-pole standard motor.*2 The rated output capacity indicated assumes that the output voltage is 440V.*3 When operating the inverter with the carrier frequency set to 3kHz or more, the carrier frequency automatically decreases if the inverter outputcurrent exceeds the value in parenthesis of the rated current. This may cause the motor noise to increase.*4 The % value of the overload current rating indicated is the ratio of the overload current to the inverter's rated output current. For repeated duty,allow time for the inverter and motor to return to or below the temperatures under 100% load.*5 The maximum output voltage does not exceed the power supply voltage. The maximum output voltage can be changed within the setting range.However, the pulse voltage value of the inverter output side voltage remains unchanged at about 2 that of the power supply.*6 The power supply capacity varies with the value of the power supply side inverter impedance (including those of the input reactor and cables).*7 When the hook of the inverter front cover is cut off for installation of the plug-in option, the inverter changes to an open type (IP00).*8 <strong>FR</strong>-DU07: IP40 (except for the PU connector)361(306)432(367)481(408)547(464)610(518)683(580)57(48)770(654)70(60)866(736)85(72)962(817)106(90)1094(929)1197
Common specifications7.2 Common specificationsControl specificationsOperation specificationsDisplayControl methodOutput frequency rangeFrequencyAnalog inputsettingresolutionDigital inputFrequency Analog inputaccuracy Digital inputVoltage/frequencycharacteristicsStarting torqueAcceleration/decelerationtime settingDC injection brakeStall prevention operation levelFrequencysettingsignalStart signalInput signalsAnalog inputDigital inputOperational functionsOutput signalsOperating statusWhen used withthe <strong>FR</strong>-A7AY,<strong>FR</strong>-A7AR(option)Pulse/analog outputPU(<strong>FR</strong>-DU07/<strong>FR</strong>-PU04/<strong>FR</strong>-PU07)OperatingstatusFault definitionInteractiveguidanceHigh carrier frequency PWM control (V/F control)/optimum excitation control/simplemagnetic flux vector control0.5 to 400Hz0.015Hz/0 to 60Hz (terminal 2, 4: 0 to 10V/12bit)0.03Hz/0 to 60Hz (terminal 2, 4: 0 to 5V/11bit, 0 to 20mA/11bit, terminal 1: 0 to ±10V/12bit)0.06Hz/0 to 60Hz (terminal 1: 0 to ±5V/11bit)0.01HzWithin ±0.2% of the max. output frequency (25°C ± 10°C)Within 0.01% of the set output frequency0 to 400Hz of the base frequency can be set from constant torque/adjustable 5 points V/Fcan be selected.120% (3Hz) when simple magnetic flux vector control and slip compensation are set0 to 3600s (acceleration and deceleration can be set individually), linear or S-patternacceleration/deceleration mode can be selected.Operation frequency (0 to 120Hz), operation time (0 to 10s), operation voltage (0 to 30%)variableOperation current level can be set (0 to 150% variable), whether to use the function or notcan be set.Terminal 2, 4: 0 to 10V, 0 to 5V, 4 to 20mA can be selectedTerminal 1: -10 to +10V, -5 to 5V can be selectedFour-digit BCD or16-bit binary using the setting dial of the operation panel or parameter unit(when used with the option <strong>FR</strong>-A7AX)Forward and reverse rotation or start signal automatic self-holding input (3-wire input) can beselected.You can select any twelve signals using Pr.178 to Pr.189 (input terminal function selection) fromamong multi speed selection, second function selection, terminal 4 input selection, JOGoperation selection, selection of automatic restart after instantaneous power failure, externalthermal relay input, HC connection (inverter operation enable signal), HC connection(instantaneous power failure detection), PU operation/external interlock signal, PID controlenable terminal, PU operation, external operation switchover, output stop, start self-holdingselection, forward rotation command, reverse rotation command, inverter reset, PTCthermistor input, PID forward reverse operation switchover, PU-NET operation switchover,External-NET operation switchover, command source switchover.Maximum and minimum frequency settings, frequency jump operation, external thermalrelay input selection, polarity reversible operation, automatic restart after instantaneouspower failure operation, original operation continuation at an instantaneous power failure,commercial power supply-inverter switchover operation, forward/reverse rotation prevention,operation mode selection, PID control, computer link operation (RS-485).You can select any seven signals using Pr.190 to Pr.196 (output terminal function selection) fromamong inverter running, up-to-speed, instantaneous power failure /undervoltage, overloadwarning, output frequency detection, second output frequency detection, regenerative brakeprealarm*4, electronic thermal relay function pre-alarm, PU operation mode, inverteroperation ready, output current detection, zero current detection, PID lower limit, PID upperlimit, PID forward rotation reverse rotation output, bypass operation-inverter switchover MC1to MC3, fan fault output, heatsink overheat pre-alarm, inverter running start command on,deceleration at an instantaneous power failure, PID control activated, during retry, duringPID output suspension, life alarm, fault output 3 (power-off signal), power savings averagevalue update timing, current average monitor, alarm output 2, maintenance timer alarm,remote output, alarm output, fault output. Open collector output (5 points), relay output (2points) and alarm code of the inverter can be output (4 bit) from the open collector.You can select any seven signals using Pr.313 to Pr. 319 (extension output terminal functionselection) from among control circuit capacitor life, main circuit capacitor life, cooling fan life,inrush current limit circuit life. (Only positive logic can be set for extension terminals of the<strong>FR</strong>-A7AR)Selection can be made from output frequency, motor current (steady or peak value), outputvoltage, frequency setting value, running speed, converter output voltage (steady or peakvalue), electronic thermal relay function load factor, input power, output power, load meter,reference voltage output, motor load factor, power saving effect, regenerative brake duty*4,PID set value, PID measured value using Pr.54 FM terminal function selection (pulse trainoutput) and Pr.158 AM terminal function selection (analog output).Output frequency, motor current (steady or peak value), output voltage, alarm indication,frequency setting, running speed, converter output voltage (steady or peak value), electronicthermal relay function load factor, input power, output power, load meter, cumulative energizationtime, actual operation time, motor load factor, cumulative power, power saving effect, cumulativesaving power, regenerative brake duty*4,PID set point, PID measured value, PID deviation value,inverter I/O terminal monitor, input terminal option monitor*1, output terminal option monitor*1,option fitting status monitor*2, terminal assignment status*2Fault definition is displayed during the fault occurs, output voltage/current/frequency/cumulative energization time and eight past fault definition is stored.Function (help) for operation guide *2120
Common specificationsProtective/warning functionEnvironment*1 Can be displayed only on the operation panel (<strong>FR</strong>-DU07).*2 Can be displayed only on the parameter unit (<strong>FR</strong>-PU04/<strong>FR</strong>-PU07).*3 Temperature applicable for a short period in transit, etc.*4 Only the 75K or more functions.*5 2.9m/s 2 or less for the 185K or more.*6 This protective function does not function in the initial status.Overcurrent during acceleration, overcurrent during constant speed, overcurrent duringdeceleration, overvoltage during acceleration, overvoltage during constant speed, overvoltageduring deceleration, inverter protection thermal operation, motor protection thermal operation,heatsink overheat, instantaneous power failure occurrence, undervoltage, input phase loss *6,motor overload, output side earth (ground) fault overcurrent, output phase loss, externalthermal relay operation *6, PTC thermistor operation *6, option fault, parameter error, PUdisconnection, retry count excess *6, CPU alarm, operation panel power supply short circuit,24VDC power output short circuit, output current detection value excess *6, inrush current limitcircuit alarm, communication alarm (inverter), analog input error, internal circuit error (15Vpower supply), fan fault, overcurrent stall prevention, overvoltage stall prevention, regenerativebrake prealarm electronic thermal relay function prealarm, PU stop, maintenance timer alarm*1*6, brake transistor alarm detection *4, parameter write error, copy operation error, operationpanel lock, parameter copy-10°C to +50°C (non-freezing)90%RH or less (non-condensing)-20°C to +65°CIndoors (without corrosive gas, flammable gas, oil mist, dust and dirt etc.)Maximum 1000m above sea level for standard operation. After that derate by 3% for everyextra 500m up to 2500m (92%) 5.9m/s 2 or less *5SPECIFICATIONSAmbient temperatureAmbient humidityStorage temperature*3AtmosphereAltitude, vibration1217
Outline dimension drawings7.3 Outline dimension drawings7.3.1 Inverter outline dimension drawings• <strong>FR</strong>-F720-0.75K, 1.5K2-φ6 hole2452607.5695 5110D7.5Inverter Type D D1<strong>FR</strong>-F720-0.75K 110 21<strong>FR</strong>-F720-1.5K 125 36D1• <strong>FR</strong>-F720-2.2K, 3.7K, 5.5K• <strong>FR</strong>-F740-0.75K, 1.5K, 2.2K, 3.7K, 5.5K2-φ6 hole61251507.5 2457.52601405* The <strong>FR</strong>-F740-0.75K to2.2K are not providedwith a cooling fan.45.5144(Unit: mm)122
Outline dimension drawings• <strong>FR</strong>-F720-7.5K, 11K, 15K• <strong>FR</strong>-F740-7.5K, 11K, 15K, 18.5KH1H7.52-φ6 hole61957.5D10220211• <strong>FR</strong>-F720-18.5K, 22K, 30K• <strong>FR</strong>-F740-22K, 30KD1Inverter Type H H1 D D1<strong>FR</strong>-F720-7.5K, 11K<strong>FR</strong>-F740-7.5K, 11K<strong>FR</strong>-F720-15K<strong>FR</strong>-F740-15K, 18.5K260 245 170 84300 285 190 101.5(Unit: mm)2-φ10 hole380 10400102302501019010.5250101.5* The <strong>FR</strong>-F720-30K isnot provided with awiring cover.(Unit: mm)SPECIFICATIONS7123
Outline dimension drawings• <strong>FR</strong>-F720-37K, 45K, 55K• <strong>FR</strong>-F740-37K, 45K, 55K2-φd holeH1H550W2W1W10D3.2Inverter Type W W1 W2 H H1 d D<strong>FR</strong>-F720-37K<strong>FR</strong>-F740-37K<strong>FR</strong>-F720-45K, 55K<strong>FR</strong>-F740-45K, 55K325 270 10 530 10 10 195435 380 12 525 15 12 250(Unit: mm)124
Outline dimension drawings• <strong>FR</strong>-F740-75K, 90K2-φ12 hole15HH112W1W10D3.2Inverter Type W W1 H H1 D<strong>FR</strong>-F740-75K 435 380 525 550 250<strong>FR</strong>-F740-90K 465 400 595 620 300• DC reactor suppliedRating plate2-terminal(for M12 bolt)P1 P P1, PH1H 10EW1W 24-installation hole(for M6 screw)Earth (ground) terminal(for M6 screw)Within DDC reactor Type W W1 H H1 DMass(kg)<strong>FR</strong>-HEL-H75K (<strong>FR</strong>-F740-75K) 140 120 320 295 185 16<strong>FR</strong>-HEL-H90K (<strong>FR</strong>-F740-90K) 150 130 340 310 190 20(Unit: mm)SPECIFICATIONS1257
Outline dimension drawings• <strong>FR</strong>-F740-110K2-φ12 hole • DC reactor supplied40046510 595156203003.2P1PRating plate130150E310 10340 104-installation hole(for M6 screw)Earth (ground) terminal(for M6 screw)DC reactor Type2-terminal(for M12 bolt)P1PWithin 195Mass(kg)<strong>FR</strong>-HEL-H110K(<strong>FR</strong>-F740-110K) 22(Unit: mm)• <strong>FR</strong>-F720-75K, 90K, 110K• <strong>FR</strong>-F740-132K, 160K2-φ12 hole40046510 715157403603.2• DC reactor suppliedP1PRating plateW1W 2EH1 10H 104-installation hole(for S screw)Earth (ground) terminal(for S1 screw)2-terminal(for M12 bolt)P1PWithin DDC reactor Type W W1 H H1 D S S1<strong>FR</strong>-HEL-75K(<strong>FR</strong>-F720-75K) 150 130 340 310 190 M6 M6 17<strong>FR</strong>-HEL-90K(<strong>FR</strong>-F720-90K) 150 130 340 310 200 M6 M6 19<strong>FR</strong>-HEL-110K(<strong>FR</strong>-F720-110K) 175 150 400 365 200 M8 M6 20<strong>FR</strong>-HEL-H132K(<strong>FR</strong>-F740-132K) 175 150 405 370 200 M8 M6 26<strong>FR</strong>-HEL-H160K(<strong>FR</strong>-F740-160K) 175 150 405 370 205 M8 M6 28Mass(kg)(Unit: mm)126
Outline dimension drawings• <strong>FR</strong>-F740-185K, 220K3-φ12 hole98510101512103.24920020049380498450185214.5148.5• DC reactor suppliedRating plate2-M6 eye nut (only for <strong>FR</strong>-HEL-H220K)2-terminal (for M12 bolt)P1P370 10405 10P1PE150 1175 24-installation hole(for M8 screw) Within 240Earth (ground) terminal(for M6 screw)* Remove the eye nut after installation of the product.DC reactor TypeMass(kg)<strong>FR</strong>-HEL-H185K (<strong>FR</strong>-F740-185K) 29<strong>FR</strong>-HEL-H220K (<strong>FR</strong>-F740-220K) 30(Unit: mm)SPECIFICATIONS1277
Outline dimension drawings• <strong>FR</strong>-F740-250K, 280K, 315K3- 12 holes9841010123.2300 300380680148R/L1S/L2T/L3N/-P1P/+UVW214• DC reactor suppliedRating plate2-S2 eye nut2-terminal (forbolt)P1P1H1 10H 10PPEW1 1W 24-installation hole(for S screw)Earth (ground) terminal(for S1 screw)Within D* Remove the eye nut after installation of the product.DC reactor Type W W1 H H1 D S S1 S2 φ<strong>FR</strong>-HEL-H250K (<strong>FR</strong>-F740-250K) 190 165 440 400 250 M8 M8 M8 M12 35<strong>FR</strong>-HEL-H280K (<strong>FR</strong>-F740-280K) 190 165 440 400 255 M8 M8 M8 M16 38<strong>FR</strong>-HEL-H315K (<strong>FR</strong>-F740-315K) 210 185 495 450 250 M10 M8 M8 M16 42Mass(kg)(Unit: mm)128
Outline dimension drawings• <strong>FR</strong>-F740-355K, 400K3-φ12 hole18512315315790 440R/L1 T/L3 P1U WS/L2 N/- P/+ V222 194 130013304.5 4.5• DC reactor supplied• DC reactor suppliedRating plate2-M8 eye nut2-terminal (for M16 bolt)2-terminal4- 15 hole2-M8 eye nutRating plateP1P1450 10495 10P1455 10500 10P1PP40PEP40E751852104-installation hole(for M10 screw) Within 250Earth (ground) terminal(for M8 screw)195220Within 2354-installation hole(for M10 screw)Within 250* Remove the eye nut after installation of the product.Earth (ground) terminal(for M8 screw)* Remove the eye nut after installation of the product.DC reactor TypeMass(kg)<strong>FR</strong>-HEL-H355K (<strong>FR</strong>-F740-355K) 46DC reactor TypeMass(kg)<strong>FR</strong>-HEL-H400K (<strong>FR</strong>-F740-400K) 50(Unit: mm)SPECIFICATIONS7129
Outline dimension drawings• <strong>FR</strong>-F740-450K4-φ12 hole1550158012300300 3009959504.54404.5R/L1 S/L2 T/L3 N/- P1 P/+ U VW185227189• DC reactor supplied2-terminal4- 15 hole2-M8 eye nutRating plateP1P1455 10500 1040PP4075E195220Within 2404-installation hole(for M10 screw)Earth (ground) terminal(for M8 screw)Within 270* Remove the eye nut after installation of the product.Inverter TypeMass(kg)<strong>FR</strong>-F740-450K(<strong>FR</strong>-HEL-H450K) 57(Unit: mm)130
Outline dimension drawings• <strong>FR</strong>-F740-500K, 560K4-φ12 hole1550158012300300 3009959504.54404.5R/L1 S/L2 T/L3 N/- P1 P/+ U VW185189227• DC reactor suppliedRating plateP1402-terminal4- 15 holePEarth (ground) terminal(for M12 screw)E* Remove the eye nut after installation of the product.Within 245402-M12 eye nutP75P1Within H1502154-installation hole(for M10 screw)D1 10D 10DC reactor Type H D D1Mass(kg)<strong>FR</strong>-HEL-H500K (<strong>FR</strong>-F740-500K) 345 455 405 67<strong>FR</strong>-HEL-H560K (<strong>FR</strong>-F740-560K) 360 460 410 85(Unit: mm)SPECIFICATIONS1317
Outline dimension drawings• Operation panel (<strong>FR</strong>-DU07)33.2maxPanel<strong>FR</strong>-DU072127.84450363 72 378811625442-M3 screw2272Airbleedinghole20CableOperation panel connection connector(<strong>FR</strong>-ADP option)• Parameter unit (option) (<strong>FR</strong>-PU07)(14.2)8325.05(11.45)2.54040135*1*1*1*15067 5156.8Air-bleedinghole57.84-R126.526.5 4-φ4 hole(Effective depth of the installationscrews hole 5.0)M3 screw *280.3*1 When installing the <strong>FR</strong>-PU07 on the enclosure, etc., remove screws forfixing the <strong>FR</strong>-PU07 to the inverter or fix the screws to the <strong>FR</strong>-PU07 withM3 nuts.*2 Select the installation screws whose length will not exceed the effectivedepth of the installation screw hole.(Unit: mm)• Parameter unit (option) (<strong>FR</strong>-PU04)72 15 10.512521.5804840241318.514.5201716.511.7581.55-M3 screwEffectivedepth of theinstallationscrews hole 4.523.7513 1.51.25401.55-φ4 holeSelect the installation screws whose length will not exceed the effective depth of the installation screw hole.(Unit: mm)132
7.4 Heatsink protrusion attachment procedureHeatsink protrusion attachment procedureWhen encasing the inverter in an enclosure, the generated heat amount in an enclosure can be greatly reduced byinstalling the heatsink portion of the inverter outside the enclosure. When installing the inverter in a compactenclosure, etc., this installation method is recommended.7.4.1 When using a heatsink protrusion attachment (<strong>FR</strong>-A7CN)For the <strong>FR</strong>-F720-2.2K to 110K, <strong>FR</strong>-F740-0.75K to 160K, a heatsink can be protruded outside the enclosure using aheatsink protrusion attachment (<strong>FR</strong>-A7CN). For a panel cut dimension drawing and an installation procedure of theheatsink protrusion attachment (<strong>FR</strong>-A7CN) to the inverter, refer to a manual of "heatsink protrusion attachment (<strong>FR</strong>-A7CN01 to 11)".7.4.2 Protrusion of heatsink of the <strong>FR</strong>-F740-185K or more(1) Panel cuttingCut the panel of the enclosure according to the inverter capacity.• <strong>FR</strong>-F740-185K, 220K• <strong>FR</strong>-F740-250K, 280K, 315K13484200 2006-M10 screw15662300 3006-M10 screw985954Hole984954Hole18• <strong>FR</strong>-F740-355K, 400K(Unit: mm)15• <strong>FR</strong>-F740-450K, 500K, 560K(Unit: mm)7716-M10 screw9768-M10 screw315 31521300 300 3001300125821Hole15501508Hole21(Unit: mm)21(Unit: mm)SPECIFICATIONS1337
Heatsink protrusion attachment procedure(2) Shift and removal of a rear side installation frame• <strong>FR</strong>-F740-250K to 315KOne installation frame is attached to each of the upper and lowerpart of the inverter. Change the position of the rear side installationframe on the upper and lower side of the inverter to the frontside as shown on the right. When changing the installationframes, make sure that the installation orientation is correct.ShiftUpperinstallationframe• <strong>FR</strong>-F740-185K/220K, 355K or moreTwo installation frames each are attached to the upper and lowerparts of the inverter. Remove the rear side installation frame onthe upper and lower side of the inverter as shown on the right.ShiftLowerinstallationframeRemovalUpper installationframe (rear side)Lower installationframe (rear side)Removal134
Heatsink protrusion attachment procedure(3) Installation of the inverterPush the inverter heatsink portion outside the enclosure and fix the enclosure and inverter with upper and lowerinstallation frame.InverterInside theenclosureEnclosureExhausted air** For the <strong>FR</strong>-F740-250K or more, there are fingerguards behind the enclosure. Therefore, thethickness of the panel should be less than10mm(*1) and also do not place anything aroundfinger guards to avoid contact with the fingerguards.EnclosureInstallationframe10* 1 140Finger guard(Unit: mm)Dimension ofCoolingwind the outside ofD1 the enclosureInverter TypeD1(mm)<strong>FR</strong>-F740-185K, 220K 185<strong>FR</strong>-F740-250K to 560K 184CAUTION· Having a cooling fan, the cooling section which comes out of the enclosure can not be used in the environment of waterdrops, oil, mist, dust, etc.· Be careful not to drop screws, dust etc. into the inverter and cooling fan section.SPECIFICATIONS61357
For customers who have replaced the older model with this inverterAPPENDICESAppendix 1 For customers who have replaced the older model with thisinverterAppendix 1-1(1) Instructions for installationReplacement of the <strong>FR</strong>-F500 series1)Removal procedure of the front cover was changed. (with screws) Please note. (Refer to page 5.)2)Removal procedure of the operation panel was changed. (with screws) Please note. (Refer to page 5.)3)Plug-in options of the F500 series are not compatible4)Operation panel (<strong>FR</strong>-DU04) can not be used.5)Setup software (<strong>FR</strong>-SW0-SETUP) can not be used.(2) Wiring instructions1)The control circuit terminal block can be used for the <strong>FR</strong>-<strong>F700</strong> series without removing wiring.Note that the wiring cover (0.75K to 30K) is not compatible.<strong>FR</strong>-F500 series<strong>FR</strong>-<strong>F700</strong> series(Note that the relay output 2 (A2, B2, C2) specific for the <strong>FR</strong>-<strong>F700</strong> series can not be used with the <strong>FR</strong>-F500 seriesterminals.)(3) Instructions for continuous use of the <strong>FR</strong>-PU04 (parameter unit)1)For the <strong>FR</strong>-<strong>F700</strong> series, many functions (parameters) have been added. When setting these parameters, theparameter name and setting range are not displayed. Parameter list, change list, initial value list, initial value list2 and parameter clear of the HELP function can not be used.2)For the <strong>FR</strong>-<strong>F700</strong> series, many protective functions have been added. These functions activate, but all faults aredisplayed as "Fault 14". When the faults history has been checked, "E.14" appears. Added faults display will notappear on the parameter unit.3) User initial value setting can not be used.4) User registration/clear (user group 2) can not be used.5) Parameter copy/verification function can not be used.136
(4) Main differences and compatibilities with the <strong>FR</strong>-F500(L) seriesFor customers who have replaced the older model with this inverterItem <strong>FR</strong>-F500(L) <strong>FR</strong>-<strong>F700</strong>Changed/clearedfunctionsTerminal blockPUPlug-in optionInstallation sizeSimple mode parameters 61 Simple mode parameters 15Pr. 0 Torque boost initial value11K to 55K: 2%User group 1 (16), user group 2 (16)(Pr. 160, Pr. 173 to Pr. 175)User initial value setting (Pr. 199)DC injection brake function with terminal (X13signal)(Pr. 11 setting value 8888, Pr. 180 to Pr. 186 settingvalue 13)Long wiring mode(Pr. 240 setting 10, 11)Intelligent optimum acceleration/deceleration(Pr. 60 setting "3" and Pr. 61 to Pr. 63)Automatic torque boost(Pr. 38, Pr. 39)Pr. 0 Torque boost initial valueinitial value11K to 37K: 2%, 45K, 55K: 1.5%(When the torque boost value of the <strong>FR</strong>-F500 series usedwas the initial value, it is not necessary to change thetorque boost value from the initial value when replacingwith the <strong>FR</strong>-<strong>F700</strong> series.)User group (16) onlySetting methods were partially changed(Pr. 160, Pr. 172 to Pr. 173)"User initial value setting" (Pr. 199) was clearedSubstitutable with the copy function of the operation panel(<strong>FR</strong>-DU07)DC injection brake function with terminal was clearedStart in reverse rotation is possible with flying start function(frequency search of automatic restart after instantaneouspower failure function)Setting is not necessary(Pr. 240 settings "10" and "11" were cleared)Function was clearedFor deceleration time, overvoltage alarm can be avoidedwith regeneration avoidance function (Pr. 882 to Pr. 885).Automatic torque boost was cleared because of addition of"Simple magnetic flux vector" (Pr. 80)Performing parameter clear and all clear (H5A96,Pr. 345 and Pr. 346 are not cleared.HAA99) with the <strong>FR</strong>-A7ND clears Pr. 345 and Pr. 346.Removable terminal block<strong>FR</strong>-PU04, DU04Computer link, relay output option<strong>FR</strong>-A5NRThree boards can be mountedRemovable terminal blockUpward compatibility (Terminal block of the F500 can bemounted)<strong>FR</strong>-PU07<strong>FR</strong>-DU07<strong>FR</strong>-DU04 unavailable (Partly restricted when the <strong>FR</strong>-PU04is used. Refer to page 136.)Dedicated plug-in option (not compatible)Built into the inverter(RS-485 terminal, relay output 2 points)One board can be mounted<strong>FR</strong>-F720-0.75K, 2.2K, 3.7K, 7.5K, 18.5K, 22K, 37K, 45K,<strong>FR</strong>-F740-0.75K to 3.7K, 7.5K, 22K, 37K to 55K are compatible in mounting dimensionsFor other capacities, an optional intercompatibility attachment (<strong>FR</strong>-AAT) is necessary.Appendix 1-2Replacement of the <strong>FR</strong>-A100 seriesInstructions for installation• When using the installation holes of the <strong>FR</strong>-A100(E) series, <strong>FR</strong>-A5AT (intercompatibility attachment) is necessary.137
Appendix 2 Instructions for UL and cUL Compliance(Conforming standard UL 508C, CSA C22.2 No.14)(1) InstallationThis inverter is a UL / cUL Listed, enclosed type device with a suitably rated enclosure.Design an enclosure so that the inverter ambient temperature, humidity and atmosphere satisfy the specifications.(Refer to page 120.)Wiring protectionFor installation in the United States, branch circuit protection must be provided in accordance with the NationalElectrical Code and any applicable provincial codes.For installation in Canada, branch circuit protection must be provided in accordance with the Canadian Electrical Codeand any applicable provincial codes.Provide the appropriate UL and cUL listed Class RK5, Class T or Class L type fuse or UL489 molded case circuitbreaker (MCCB) that is suitable for branch circuit protection in accordance with the table below.<strong>FR</strong>-F720-K 0.75 1.5 2.2 3.7 5.5 7.5 11 15 18.5 22 30 37 45 55Rated fuse voltage(V)Fusemaximumallowablerating (A)*Without powerfactor improvingreactorWith power factorimproving reactorMolded case circuit breaker(MCCB)Maximum allowable rating (A)*<strong>FR</strong>-F720-K 75 90 110Rated fuse voltage(V)Fusemaximumallowablerating (A)*Without powerfactor improvingreactorWith power factorimproving reactorMolded case circuit breaker(MCCB)Maximum allowable rating (A)** Maximum allowable rating by US National Electrical Code.Exact size must be chosen for each installation.240V or more15 20 30 40 60 80 150 175 200 225 300 350 400 50015 20 20 30 50 70 125 150 200 200 250 300 350 40015 15 20 35 50 70 100 125 175 200 250 350 400 500240V or more⎯ ⎯ ⎯500 600 700700 800 1000<strong>FR</strong>-F740-K 0.75 1.5 2.2 3.7 5.5 7.5 11 15 18.5 22 30 37 45 55Rated fuse voltage(V)Fusemaximumallowablerating (A)*Without powerfactor improvingreactorWith power factorimproving reactorMolded case circuit breaker(MCCB)Maximum allowable rating (A)*480V or more6 10 15 20 30 40 70 80 90 110 150 175 200 2506 10 10 15 25 35 60 70 90 100 125 150 175 20015 15 15 15 25 40 50 70 80 100 125 175 200 250<strong>FR</strong>-F740-K 75 90 110 132 160 185 220 250 280 315 355 400 450 500 560Rated fuse voltage(V)Fusemaximumallowablerating (A)*Without powerfactor improvingreactorWith power factorimproving reactorMolded case circuit breaker(MCCB)Maximum allowable rating (A)*500V or more⎯ ⎯ ⎯ ⎯ ⎯ ⎯ ⎯ ⎯ ⎯ ⎯ ⎯ ⎯ ⎯ ⎯ ⎯250 300 350 400 500 600 700 800 900 1000 1100 1200 1350 1500 1800350 450 500 650 800 800 1000 1200 1200 1200 1600 1600 2000 2000 2500138
(2) Wiring of the power supply and motorFor wiring the input (R/L1, S/L2, T/L3) and output (U, V, W) terminals of the inverter, use the UL Listed copper, strandedwires (rated at 75°C) and round crimping terminals. Crimp the crimping terminals with the crimping tool recommendedby the terminal maker.(3) Short circuit ratings• 200V classSuitable For Use in A Circuit Capable Of Delivering Not More Than 100kA rms Symmetrical Amperes, 264V Maximum.• 400V class55K or lessSuitable For Use in A Circuit Capable Of Delivering Not More Than 100kA rms Symmetrical Amperes, 528V Maximum.75K or moreSuitable For Use in A Circuit Capable Of Delivering Not More Than 100kA rms Symmetrical Amperes, 550V Maximum.(4) Motor overload protectionThis inverter is certified as a motor overload protection device by UL.When using the electronic thermal relay function as motor overload protection, set the rated motor current to Pr. 9Electronic thermal O/L relay.Electronic thermal relay function operation characteristic(min) unit display inthis range(s) unit display in this rangePr. 9 = 50% setting ofinverter rating*1.2Operation time (min)Operation time (s)Pr. 9 = 100% settingof inverter rating*1.27030Hz or more*30Hz3or more* 3 20Hz20Hz10Hz6010Hz6Hz6Hz0.5Hz50 0.5Hz2401801206052.5% 105%50 100 120 150Inverter output current (%)(% to the rated output current)Operation rangeRange on the right ofcharacteristic curveNon-operation rangeRange on the left ofcharacteristic curveCharacteristic whenelectronic thermal relayfunction for motorprotection is turned off(When Pr. 9 setting is 0(A))Electronic thermal relayfunction for transistorprotectionThis function detects the overload (overheat) of themotor, stops the operation of the inverter's outputtransistor, and stops the output. (The operationcharacteristic is shown on the left)⋅ When using the Mitsubishi constant-torque motor1) Set "1" in Pr. 71. (This provides a 100% continuous torquecharacteristic in the low-speed range.)2) Set the rated current of the motor in Pr. 9.*1 When a value 50% of the inverter rated output current (currentvalue) is set in Pr. 9*2 The % value denotes the percentage to the inverter rated output current.It is not the percentage to the motor rated current.*3 When you set the electronic thermal relay function dedicated to theMitsubishi constant-torque motor, this characteristic curve appliesto operation at 6Hz or higher.⋅⋅⋅⋅CAUTIONProtective function by electronic thermal relay function is reset by inverter power reset and reset signal input. Avoidunnecessary reset and power-off.When multiple motors are operated by a single inverter, protection cannot be provided by the electronic thermal relay function.Install an external thermal relay to each motor.When the difference between the inverter and motor capacities is large and the setting is small, the protective characteristics ofthe electronic thermal relay function will be deteriorated. In this case, use an external thermal relay.A special motor cannot be protected by the electronic thermal relay function. Use the external thermal relay.139
Appendix 3 Instructions for Compliance with the European Directives(1) EMC DirectiveWe have self-confirmed our inverters as products compliant to the EMC Directive (second environment of conforming standard EN61800-3) and place the CE mark on the inverters.Note:First environmentEnvironment including residential buildings. Includes buildings directly connected without a transformer to the low voltage power supplynetwork which supplies power to residential buildings.Second environmentEnvironment including all buildings except buildings directly connected without a transformer to the low voltage power supply networkwhich supplies power to residential buildings.1) NotesSet the EMC filter valid and install the inverter and perform wiring according to the following instructions.* The inverter is equipped with a built-in EMC filter. Set the EMC filter valid. (The EMC filter is invalid when shipped from the factory. (The<strong>FR</strong>-F720-0.75K and 1.5K are always valid.) For details, refer to page 9.)* Connect the inverter to an earthed power supply.* Install a motor and a control cable written in the EMC Installation Manual (BCN-A21041-204) according to the instruction.* The cable length between the inverter and the motor is 5 m maximum.* Confirm that the inverter complies with the EMC Directive as the industrial drives application for final installation.(2) Low Voltage DirectiveWe have self-confirmed our inverters as products compliant to the Low Voltage Directive (Conforming standard EN 50178) and place theCE mark on the inverters.1)Outline of instructions* Do not use an earth leakage current breaker as an electric shock protector without connecting the equipment to the earth. Connect theequipment to the earth securely.* Wire the earth terminal independently. (Do not connect two or more cables to one terminal.)* Use the cable sizes on page 14 under the following conditions.⋅ Ambient temperature: 40°C maximumIf conditions are different from above, select appropriate wire according to EN60204 Appendix C TABLE 5.* Use a tinned (plating should not include zinc) crimping terminal to connect the earth (ground) cable. When tightening the screw, be carefulnot to damage the threads.For use as a product compliant with the Low Voltage Directive, use PVC cable whose size is indicated on page 14.* Use the moulded case circuit breaker and magnetic contactor which conform to the EN or IEC Standard.* When using an earth leakage current breaker, use a residual current operated protective device (RCD) of type B (breaker which can detectboth AC and DC). If not, provide double or reinforced insulation between the inverter and other equipment, or put a transformer between themain power supply and inverter.* Use the inverter under the conditions of overvoltage category II (usable regardless of the earth (ground) condition of the power supply),overvoltage category III (usable with the earthed-neutral system power supply, 400V class only) and pollution degree 2 or lower specifiedin IEC664.⋅ To use the inverter of 37K or more (IP00) under the conditions of pollution degree 2, install it in the enclosure of IP 2X or higher.⋅ To use the inverter under the conditions of pollution degree 3, install it in the enclosure of IP54 or higher.⋅ To use the inverter of 30K or less (IP20) outside of an enclosure in the environment of pollution degree 2, fix a fan cover with fan coverfixing screws enclosed.Fan coverfixing screwFan coverFan coverfixing screwsFan coverFan coverfixing screwFan coverFanFanFan<strong>FR</strong>-F720-2.2K to 5.5K<strong>FR</strong>-F740-3.7K, 5.5K<strong>FR</strong>-F720-7.5K to 15K<strong>FR</strong>-F740-7.5K to 18.5K<strong>FR</strong>-F720-18.5K to 30K<strong>FR</strong>-F740-22K, 30K* On the input and output of the inverter, use cables of the type and size set forth in EN60204 Appendix C.* The operating capacity of the relay outputs (terminal symbols A1, B1, C1, A2, B2, C2) should be 30VDC, 0.3A. (Relay outputs are basicallyisolated from the inverter internal circuit.)* Control circuit terminals on page 8 are safely isolated from the main circuit.* EnvironmentDuring Operation In Storage During TransportationAmbient temperature -10°C to +50°C -20°C to +65°C -20°C to +65°CAmbient humidity 90% RH or less 90% RH or less 90% RH or lessMaximum altitude 1000m 1000m 10000mDetails are given in the technical information "Low Voltage Directive Conformance Guide" (BCN-A21041-203). Please contact your salesrepresentative.140
MEMO141
REVISIONS*The manual number is given on the bottom left of the back cover.Print Date * Manual Number RevisionDec., 2003 IB(NA)-0600176ENG-A First editionMar., 2004 IB(NA)-0600176ENG-B Additions<strong>FR</strong>-F740-0.75K to 30KJun., 2004 IB(NA)-0600176ENG-C Additions<strong>FR</strong>-F740-75K, 90KOct., 2004 IB(NA)-0600176ENG-D Additions⋅ <strong>FR</strong>-F720 - 0.75K to 55K⋅ <strong>FR</strong>-F740 - 110K to 160K⋅ Pr.299 Rotation direction detection selection at restartingMar., 2005 IB(NA)-0600176ENG-E Additions⋅ <strong>FR</strong>-F720 - 75K to 110K⋅ <strong>FR</strong>-F740 - 185K to 560KJul., 2006 IB(NA)-0600176ENG-F Additions⋅ Pr. 539 Modbus-RTU communication check time interval⋅ Voltage/current input switch⋅ Setting value "2" of Pr. 882 Regeneration avoidance operation selectionNov., 2007 IB(NA)-0600176ENG-G AdditionsAdditional explanation to "Causes and Corrective Actions"⋅ Setting values "10, 11" of Pr. 495 Remote output selection⋅ Partial review of Instructions for UL and cUL CompliancePartial changes⋅ Replacement procedure of the cooling fun of <strong>FR</strong>-F740-185K or moreFor Maximum Safety• Mitsubishi inverters are not designed or manufactured to be used in equipment or systems in situations thatcan affect or endanger human life.• When considering this product for operation in special applications such as machinery or systems used inpassenger transportation, medical, aerospace, atomic power, electric power, or submarine repeatingapplications, please contact your nearest Mitsubishi sales representative.• Although this product was manufactured under conditions of strict quality control, you are strongly advisedto install safety devices to prevent serious accidents when it is used in facilities where breakdowns of theproduct are likely to cause a serious accident.• Please do not use this product for loads other than three-phase induction motors.142IB(NA)-0600176ENG-G