Manual - Unvented Gas Log Heater or Vented Decorative Appliance
Manual - Unvented Gas Log Heater or Vented Decorative Appliance
Manual - Unvented Gas Log Heater or Vented Decorative Appliance

You also want an ePaper? Increase the reach of your titles
YUMPU automatically turns print PDFs into web optimized ePapers that Google loves.
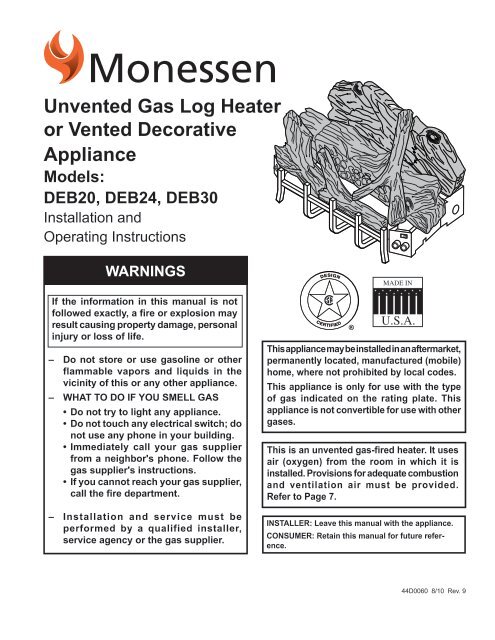
<strong>Unvented</strong> <strong>Gas</strong> <strong>Log</strong> <strong>Heater</strong><strong>or</strong> <strong>Vented</strong> Dec<strong>or</strong>ative<strong>Appliance</strong>Models:DEB20, DEB24, DEB30Installation andOperating InstructionsWARNINGSIf the inf<strong>or</strong>mation in this manual is notfollowed exactly, a fire <strong>or</strong> explosion mayresult causing property damage, personalinjury <strong>or</strong> loss of life.– Do not st<strong>or</strong>e <strong>or</strong> use gasoline <strong>or</strong> otherflammable vap<strong>or</strong>s and liquids in thevicinity of this <strong>or</strong> any other appliance.– WHAT TO DO IF YOU SMELL GAS• Do not try to light any appliance.• Do not touch any electrical switch; donot use any phone in your building.• Immediately call your gas supplierfrom a neighb<strong>or</strong>'s phone. Follow thegas supplier's instructions.• If you cannot reach your gas supplier,call the fire department.– Installation and service must beperf<strong>or</strong>med by a qualified installer,service agency <strong>or</strong> the gas supplier.440060DEB coverThis appliance may be installed in an aftermarket,permanently located, manufactured (mobile)home, where not prohibited by local codes.This appliance is only f<strong>or</strong> use with the typeof gas indicated on the rating plate. Thisappliance is not convertible f<strong>or</strong> use with othergases.This is an unvented gas-fired heater. It usesair (oxygen) from the room in which it isinstalled. Provisions f<strong>or</strong> adequate combustionand ventilation air must be provided.Refer to Page 7.INSTALLER: Leave this manual with the appliance.CONSUMER: Retain this manual f<strong>or</strong> future reference.44D0060 8/10 Rev. 9
DEB <strong>Unvented</strong> <strong>Gas</strong> <strong>Log</strong>sCONTENTSThank you and congratulations on your purchase of an MHSC <strong>Log</strong> Set.PLEASE READ THE INSTALLATION AND OPERATION INSTRUCTIONS BEFORE USING THE APPLIANCE!IMPORTANT: Read all instructions and warnings carefully bef<strong>or</strong>e starting installation.Failure to follow these instructions may result in a possible fire hazard and will void the warranty.Imp<strong>or</strong>tant Safety Inf<strong>or</strong>mation......................................3Codes......................................................................4Product Features ........................................................5<strong>Gas</strong> Specifications...................................................5<strong>Gas</strong> Pressures.........................................................5Ignition Controls.......................................................5Pilot..........................................................................5Thermal Generat<strong>or</strong>..................................................5Getting Started.............................................................6Combustion and Ventilation Air................................7Fireplace and Hearth Dimensions .............................8Placement in a Fireplace with Restrictive Barrier.....8Clearances and Height Requirements ......................9Installation Requirements.........................................10Installation..................................................................12Installing <strong>Vented</strong> Applications................................12Damper Stop Installation.......................................12Place and Secure <strong>Appliance</strong>..................................12Assembly Procedure.............................................13<strong>Gas</strong> Line Connection ................................................13Check <strong>Gas</strong> Pressure .................................................14<strong>Manual</strong> Control......................................................14Millivolt/Thermostat Control...................................14Electrical Wiring - Millivolt........................................15Connect Wall Switch <strong>or</strong> Thermostat......................15Connect Remote Receiver....................................16Install Thermostat Sens<strong>or</strong>......................................16Operation of Thermostat Sens<strong>or</strong>...........................18Check System Operation.......................................18<strong>Log</strong> Placement ..........................................................19Flame Appearance.....................................................21Millivolt/Thermostat Control...................................21<strong>Manual</strong> Control......................................................21Burner Flame Appearance.....................................22Operating Instructions...............................................23F<strong>or</strong> Your Safety Read Bef<strong>or</strong>e Lighting...................24<strong>Manual</strong> Control .....................................................25Millivolt/Thermostat Control ..................................26To Turn Off <strong>Gas</strong> to <strong>Heater</strong>.....................................26Match Lighting Instructions....................................27Cleaning and Servicing.............................................27Troubleshooting.........................................................28Replacement Parts.....................................................30Burner Assembly...................................................30Access<strong>or</strong>ies...........................................................31<strong>Log</strong>s.......................................................................32Massachusetts Residents Only................................34Warranty......................................................................3544D0060
IMPORTANT SAFETY INFORMATIONINSTALLERPlease leave these instructions with the appliance.OWNERDEB <strong>Unvented</strong> <strong>Gas</strong> <strong>Log</strong>sPlease retain these instructions f<strong>or</strong> future reference.WARNING• Any change to this heater <strong>or</strong> its controls can be dangerous.• Improper installation <strong>or</strong> use of the heater can cause serious injury <strong>or</strong> death fromfire, burns, explosion <strong>or</strong> carbon monoxide poisoning.• Do not allow fans to blow directly into the fireplace. Avoid any drafts that alterburner flame patterns.• Do not use a blower insert, heat exchanger insert <strong>or</strong> other access<strong>or</strong>y, notapproved f<strong>or</strong> use with this heater where applicable.1. Due to high temperatures, the appliance should belocated out of traffic and away from furniture anddraperies.2. Children and adults should be alerted to the hazardof high surface temperature and should stay awayto avoid burns <strong>or</strong> clothing ignition.3. Young children should be carefully supervised whenthey are in the same room with the appliance.4. Do not place clothing <strong>or</strong> other flammable materialon <strong>or</strong> near the appliance.5. Any safety screen <strong>or</strong> guard removed f<strong>or</strong> servicingan appliance, must be replaced pri<strong>or</strong> to operatingthe heater.6. Installation and repair should be done by a qualifiedservice person.7. To prevent malfunction and/<strong>or</strong> sooting, an unventedgas heater should be cleaned bef<strong>or</strong>e use and atleast annually by a professional service person.M<strong>or</strong>e frequent cleaning may be required due toexcessive lint from carpeting, bedding material, etc.It is imperative that control compartments, burnersand circulating air passageways be kept clean.8. CARBON MONOXIDE POISONING: Early signs ofcarbon monoxide poisoning are similar to the flu withheadaches, dizziness and/<strong>or</strong> nausea. If you have thesesigns, obtain fresh air immediately. Have the heaterserviced as it may not be operating properly.9. The installation must conf<strong>or</strong>m with local codes <strong>or</strong>, inthe absence of local codes, with the National Fuel <strong>Gas</strong>Code, ANSI Z223.l/NFPA54.10. This unit complies with the latest edition of ANSIZ21.11.2 <strong>Unvented</strong> <strong>Heater</strong>s and also complies withANSI Z21.60 / CSA 2.26 Dec<strong>or</strong>ative <strong>Vented</strong> <strong>Appliance</strong>sf<strong>or</strong> Solid Fuel Burning Fireplaces. State and localcodes may only allow operation of this appliance in avented configuration. Check your state <strong>or</strong> local codes.F<strong>or</strong> vented operation, see “<strong>Vented</strong> Instructions” in thismanual.11. Do not install the heaters in a bathroom <strong>or</strong> bedroom.44D006012. C<strong>or</strong>rect installation of the ceramic fiber logs, properlocation of the heater, and annual cleaning are necessaryto avoid potential problems with sooting. Sooting,resulting from improper installation <strong>or</strong> operation, cansettle on surfaces outside the fireplace. See log placementinstructions f<strong>or</strong> proper installation.13. Avoid any drafts that alter burner flame patterns. Do notallow fans to blow directly into fireplace. Do not placea blower inside burn area of firebox. Ceiling fans maycreate drafts that alter burner flame patterns. Sootingand improper burning will occur.14. Caution: Candles, incense, oil lamps, etc. producecombustion byproducts including soot. Vent-free applianceswill not filter <strong>or</strong> clean soot produced by thesetypes of products. In addition, the smoke and/<strong>or</strong> aromatics(scents) may be reburnt in the vent-free appliancewhich can produce od<strong>or</strong>s. It is recommended tominimize the use of candles, incense, etc. while thevent-free appliance is in operation.15. This is an unvented gas-fired heater. It uses air(oxygen) from the room in which it is installed. Provisionsf<strong>or</strong> adequate combustion and ventilation air mustbe provided. Refer to Page 7.16. Keep room area clear and free from combustiblematerials, gasoline and other flammable vap<strong>or</strong>s andliquids.17. <strong>Unvented</strong> gas heaters are a supplemental zone heater.They are not intended to be the primary heating appliance.18. <strong>Unvented</strong> gas heaters emit moisture into the livingarea. In most homes of average construction, thisdoes not pose a problem. In houses of extremelytight construction, additional mechanical ventilation isrecommended.19. During manufacturing, fabricating and shipping, variouscomponents of this appliance are treated with certainoils, films <strong>or</strong> bonding agents. These chemicals are notharmful but may produce annoying smoke and smellsas they are burned off during the initial operation of theappliance; possibly causing headaches <strong>or</strong> eye <strong>or</strong> lungirritation. This is a n<strong>or</strong>mal and temp<strong>or</strong>ary occurrence.
DEB <strong>Unvented</strong> <strong>Gas</strong> <strong>Log</strong>sThe initial break-in operation should last two to threehours with the burner at the highest setting. Providemaximum ventilation by opening windows <strong>or</strong> do<strong>or</strong>s toallow od<strong>or</strong>s to dissipate. Any od<strong>or</strong>s remaining after thisinitial break-in period will be slight and will disappearwith continued use.20. Input ratings are shown in BTU per hour and are f<strong>or</strong>elevations up to 2,000 feet. F<strong>or</strong> elevations above 2,000feet, input ratings should be reduced 4 percent f<strong>or</strong> each1,000 feet above sea level. Refer to the National Fuel<strong>Gas</strong> Code.21. The appliance and its appliance main gas valve mustbe disconnected from the gas supply piping systemduring any pressure testing of that system at test pressuresin excess of 1/2 psig (3.5 kPa).22. The appliance must be isolated from the gas supplypiping system by closing its equipment shutoff valveduring any pressure testing of the gas supply pipingsystem at test pressures equal to <strong>or</strong> less than 1/2 psig(3.5 kPa).23. Do not use this room heater if any part has been underwater. Immediately call a qualified service technicianto inspect the room heater and to replace any part ofthe control system and any gas control which has beenunder water.24. This appliance must not be used with glass do<strong>or</strong>s inthe closed position. This can lead to pilot outages andsevere sooting outside the fireplace.25. Never burn solid fuels in a fireplace where a unventedroom heater is installed.26. Always have a fireplace screen in place when theappliance is in operation and, unless other provisionsf<strong>or</strong> combustion air are provided, the screen must havean opening(s) f<strong>or</strong> induction of combustion air.WARNINGIMPORTANT SAFETY INFORMATIONNever connect unit to private (non-utility)gas wells. This gas is commonly knownas wellhead gas.Nous recommandons que nosappareils de chauffage au gazsoient installés et entretenus pardes professionnels qui ont étéaccrédités aux È.U. par le NationalFireplace Institute ® (NFI) commeétant des spécialistes du NFI enmatièred’appareils de chauffageau gaz.CODESAdhere to all local codes <strong>or</strong>, in their absence, the latest edition of THE NATIONAL FUEL GAS CODEANSI Z223.1 <strong>or</strong> NFPA54 which can be obtained from…American National Standards Institute, Inc.1430 BroadwayNew Y<strong>or</strong>k, NY 10018<strong>or</strong>National Fire Protection Association, Inc.Batterymarch ParkQuincy, MA 0226944D0060
DEB <strong>Unvented</strong> <strong>Gas</strong> <strong>Log</strong>sGETTING STARTEDCAUTION• Handle the gas log burner assembly bythe burner only. Do not pick the unit upby the burners.• Gloves are recommended when handlingceramic fiber logs to prevent skin irritationfrom loose fibers. <strong>Log</strong>s are fragile —handle with care.Make sure you have received all parts:Check your packing list to verify that all listed parts havebeen received. You should have the following:• <strong>Unvented</strong> gas log grate/burner assembly• Two (2) plastic bags containing crushed volcanicrock• Installation/operating instructions• Two (2) anch<strong>or</strong>ing screws• Ceramic fiber logsThe millivolt controlled version of this heater is the onlystyle designed to be operated with optional devices f<strong>or</strong>ON/OFF functions. The following options may be usedwith the millivolt controlled heater. These options are notpackaged with the log set.• Hand held Remote with receiver• Wall thermostat with 15' wire• Wall switch with 15' wire• Hand held Thermostat Remote with receiver• Thermostat sens<strong>or</strong>Carefully inspect the contents f<strong>or</strong> shipping damage. If anyparts are missing <strong>or</strong> damaged, immediately inf<strong>or</strong>m thedealer from whom you purchased the appliance. Do notattempt to install any part of the appliance unless youhave all parts in good condition.What you will need f<strong>or</strong> installation:You should have the following items available bef<strong>or</strong>e proceedingwith installation:• External regulat<strong>or</strong> (f<strong>or</strong> propane/LPG and 1/2 lb.natural gas systems only)• Piping which complies with local codes• Sediment trap (recommended)• Screwdriver• Tee joint.• Pipe sealant approved f<strong>or</strong> use with propane/LPG(Resistant to sulfur compounds)• Drill with 5/32 bit• Pipe wrench <strong>or</strong> appropriate size crescent wrenchset• <strong>Manual</strong> shutoff valve44D0060
COMBUSTION and VENTILATION AIRDEB <strong>Unvented</strong> <strong>Gas</strong> <strong>Log</strong>sADEQUATE COMBUSTION AND VENTILATION AIRThis heater shall not be installed in a confined space <strong>or</strong> unusually tight construction unlessprovisions are provided f<strong>or</strong> adequate combustion and ventilation air.The National Fuel <strong>Gas</strong> Code, (ANSI Z223.1/NFPA54), defines a confined space as a spacewhose volume is less than 50 cubic feet per 1,000 BTU per hour (4.8 m 3 per kw) of the aggregateinput rating of all appliances installed in that space, and an unconfined space as a spacewhose volume is not less than 50 cubic feet per 1,000 BTU per hour (4.8 m 3 per kw) of theaggregate input rating of all appliances installed in that space. Rooms communicating directlywith the space in which the appliances are installed, through openings not furnished with do<strong>or</strong>s,are considered a part of the unconfined space.Unusually tight construction is defined as constructionwhere:a) walls and ceilings exposed to the outside atmosphere have a continuous water vap<strong>or</strong> retarderwith a rating of 1 perm(6 x 10 11 kg per pa/sec-m 2 ) <strong>or</strong> less with openings gasketed <strong>or</strong> sealed;b) weather striping has been added on openable windows and do<strong>or</strong>s, andc) caulking <strong>or</strong> sealants are applied to areas such as joints around window and do<strong>or</strong> frames,between sole plates and flo<strong>or</strong>s, between wall-ceiling joints, between wall panels, at penetrationsf<strong>or</strong> plumbing, electrical, and gas lines, and at other openings.The following f<strong>or</strong>mula can be used to determine the maximum heater rating per the definitionof unconfined space:BTU/hr =(L 1+ L 2) Ft x (W) Ft x (H) Ftx 100050Consider two connecting rooms with an open area between, with the following dimensions:L 1= 15Z\x Ft., L 2= 12 Ft., W = 12 Ft., H = 8 Ft.BTU/hr =(15Z\x+ 12) x (12) x (8)50x 1000 = 52800 BTU/hrIf there were a do<strong>or</strong> between the two rooms the calculation would be based only on the roomwith the heater.BTU/hr =(15Z\x) x (12) x (8)x 1000 = 29,760 BTU/hr50Room DividerFireplaceWHWARNINGIf the area in which the heater may beoperated is smaller than that defined asan unconfined space <strong>or</strong> if the building isof unusually tight construction, provideadequate combustion and ventilation air byone of the methods described in the NationalFuel <strong>Gas</strong> Code, ANSI Z223.1/NFPA 54, Air f<strong>or</strong>Combustion and Ventilation <strong>or</strong> applicablelocal codes.Figure 1 -Example of a Large Room with 1/2 Wall Divider44D0060FP2439combustion airFP2439
DEB <strong>Unvented</strong> <strong>Gas</strong> <strong>Log</strong>sFIREPLACE and HEARTH DIMENSIONSWARNINGThis appliance is f<strong>or</strong> installation only in a solid-fuel burning masonry <strong>or</strong>UL127 fact<strong>or</strong>y-built fireplace, vent free appliance, <strong>or</strong> in listed ventlessfirebox enclosure. It has been design certified f<strong>or</strong> these installations.Exception: DO NOT install this appliance in a fact<strong>or</strong>y-built fireplace thatincludes instructions stating it has not been tested <strong>or</strong> should not beused with unvented gas logs.Use manufacturer's installation and clearance requirementsas defined in their manual.The DEB Series unvented room heater is approved f<strong>or</strong>installation into the following unvented fireplaces:GCUF Series Fireboxes Magnum 32,36.The DEB Series unvented room heater may also beinstalled into a Ventless Firebox Enclosure f<strong>or</strong> <strong>Gas</strong> FiredDec<strong>or</strong>ative Type <strong>Unvented</strong> Room <strong>Heater</strong>s per IAS RequirementNo. 2-97 ANSI Z21.91-2001 (typically referred to as a"Universal Firebox"), as long as firebox hearth dimensionsmeet the minimum hearth dimensions shown below.DAModel A B C DDEB20 7” 13Z\v” 18” 17”FP2530(686 mm) (337 mm) (457 mm) (432 mm)hearth dimsDEB24 28Z\x” 13Z\v” 22Z\v” 17”(724 mm) (337 mm) (565 mm) (432 mm)DEB30 32Z\x” 13Z\v” 25Z\x” 17”30” <strong>Log</strong>s (826 mm) (337 m) (648 mm) (432 mm)Figure 2 -Hearth Minimum DimensionsWARNINGCBFP2530Barriers such as the bottom of a glass do<strong>or</strong>frame placed in front of a gas log set canchange the air flow characteristics of thefireplace which in turn can cause the unitto overheat and malfunction.Imp<strong>or</strong>tant inf<strong>or</strong>mation f<strong>or</strong> theinstallation of this gas log setThe following are guidelines f<strong>or</strong> placing a gas log set ina fireplace that has a restrictive barrier along the bottomfront opening of the fireplace. Some examples of barriersare glass/screen do<strong>or</strong> frames and sunken/recessedfireplaces.Height of Minimum Depth ofRestriction (x) Fireplace/FireboxNo Restriction13Z\v”0” to 1Z\x” 16”Greater than 1Z\x” to 3” 16”Greater than 3” **Any barrier greater than 3” placed in front of the gas logset is not recommended by the manufacturer.NOTE: Non combustible material such as refract<strong>or</strong>y brickmay be used to line the flo<strong>or</strong> of the fireplace in <strong>or</strong>der to raisethe height of the gas log set in relation to a restrictive barrier.If the unit is raised, the minimum height dimension listed inthe homeowner’s manual must not be exceeded.NOTE: If the log set is equipped with a remote receiver, arestrictive barrier may reduce the battery life by increasingthe ambient temperature inside the fireplace. Placementof the receiver outside of the fireplace will extend thebattery life.Glass do<strong>or</strong> frameswith adjustablelouvers shouldhave the louversfully open whilethe unit is inoperationXHeight of restrictive barriercaused by glass do<strong>or</strong>frames, recessed fireplaces,etc. from the base <strong>or</strong> bottomsurface of the unit. (Refer toTable).Figure 3 -Reference Drawing of a NaturalFlame <strong>Log</strong> Set in an EnclosureFP2794logs in enclosureThe log set shouldbe placed against <strong>or</strong>as near as possibleto the rear wall of thefireplaceDepth of Fireplace/Firebox(Refer toTable)FP279444D0060
CLEARANCE and HEIGHT REQUIREMENTSDEB <strong>Unvented</strong> <strong>Gas</strong> <strong>Log</strong>sWARNINGThe dimensions shown in Figures 4 through 12 and defined in the fireplacemanufacturer's instructions are minimum clearances to maintain wheninstalling this heater. Left and right clearances are determined when facingthe front of the heater.When heater is installed into a ventless firebox, minimum clearances, asspecified by the ventless firebox manufacturer, must be met.Follow these instructions carefully to ensure safe installation. Failure tofollow instructions exactly can create a fire hazard.Sidewall and ceiling clearances: The sides of the fireplaceopening must be at least 16" from any combustiblewall. The ceiling must be at least 42" from the top of thefireplace opening.Heat ResistantMaterialMeasure ThisDistance42"16"<strong>Heater</strong> inFireplace <strong>or</strong>FireboxFigure 5 -Measure Heat Resistant MaterialFP2795Figure 4 -Sidewall and Ceiling ClearancesFP1996Heat resistant material (minimum requirements)with no wooden FP1996 mantel <strong>or</strong> other combustible projection:wall ceiling clearancesTo install the gas logs into a fireplace with no woodenmantel, shelf <strong>or</strong> other combustible projection above thefireplace opening, measure the heat resistant materialheight, per Figure 5, then see TABLE A.Heat resistant materials such as slate and marble must beat least 1/2” thick. Sheet metal should not be installedonto combustible material.IMPORTANT: If you cannot meet these minimum clearancesyou must operate the heater with chimney fluedamper open. Refer to “Installing <strong>Vented</strong> Applications”found on page 18.Table A -Heat Resistant Material Requirements with NoMantel <strong>or</strong> Combustible ProjectionFP2795Measure heat resist materialHeat ResistantMaterial Requirements f<strong>or</strong> Safe InstallationMeasurement DEB20 DEB24/3012” <strong>or</strong> m<strong>or</strong>e Hood not required8” <strong>or</strong> less than 12” Hood not required Extend heatresistant mat’l to12” <strong>or</strong> install hoodFigure 5Less than 8”Extend heat resistant Extend heatmaterial to at least 8” resistant mat’l toand install hood. at least 8” andFigure 5install hood.Figure 5.OR, extend heatresistant materialto a height of atleast 12”44D0060
DEB <strong>Unvented</strong> <strong>Gas</strong> <strong>Log</strong>sINSTALLATION REQUIREMENTSHeat resistant material (minimum requirements) withwooden mantel <strong>or</strong> other combustible projection:To install the heater with a wooden mantel, shelf <strong>or</strong> othercombustible projection above, first measure the heat resistantmaterial shown in Figure 6, then refer to Table B.Table B -Heat Resistant Material Heights and Mantel LocationFP2796FP2796mantel8” <strong>or</strong> M<strong>or</strong>e ofHeat ResistantMaterialHood<strong>Heater</strong> in Fireplaceof FireboxFigure 6 -Measure Heat Resistant Material f<strong>or</strong> MantelHeat Resistant Requirements f<strong>or</strong> Safe Installation with WoodMaterialShelf <strong>or</strong> Other Combustible ProjectionMeasurement DEB20 DEB24/3012” <strong>or</strong> m<strong>or</strong>e Hood not required. Hood not required.Observe profiles (side Observe profile (sideelevations) shown on Page elevations) shown on15, Fig. 7 Page 16, Figure 98” to less than 12” Install hood and observe Install hood and obprofilesshown on Page 15, serve profiles shown onFigure 8, OR, extend heat Page 15, Figure 7, OR,resistant material to at extend heat resistantleast 12” and observe material to at least 12”profiles shown on Page 15, and observe profilesFig. 7. shown on Page 16, Fig. 9Less than 8” Extend heat resistant mat’l Extend heat resistantto at least 8”, install hood material to at least 8”,and observe profiles shown install hood and observeon Page 15, Fig. 8, OR profile shown on Pageextend heat resistant 15, Fig. 7; OR extendmaterial to at least 12” and resistant material to atobserve profiles shown on least 12” and observePage 15, Fig. 8.profiles shown on Page16, Fig. 9.Heat ResistantMaterial10”8”6”2”8”14”20”24”28”Heat ResistantMaterial2”12”10”8”6”14”18”26”22”8”FP2797<strong>Heater</strong> in Fireplace<strong>or</strong> FireboxExample: A mantelmay project from thewall a maximum of2Z\x" at a minimum of14" above the opening,and a maximum of 6"at a minimum of 20Z\x"above the opening.<strong>Heater</strong> inFireplace <strong>or</strong>FireboxFigure 7 -Figure 8 -DEB20 Minimum Mantel Clearance with No HoodFp2797All Models Minimum Mantel Clearance with a Hoodmantel no hoodFP279810 mantel with hood44D0060FP2798HoodExample: A mantel mayproject from the wall amaximum of 2Z\x" at aminimum of 8" abovethe opening, and a maximumof 6" at a minimumof 14Z\x" above the opening.
INSTALLATION REQUIREMENTSHeat ResistantMaterial10” <strong>or</strong> Less12”Min.28”DEB <strong>Unvented</strong> <strong>Gas</strong> <strong>Log</strong>sThe gas log heater must be installed at least 5" above anycombustible flo<strong>or</strong>ing material, such as carpeting <strong>or</strong> tile,which is closer than 14" to the base of the fireplace. Theminimum distance must be maintained from the top surfaceof carpeting, tile, etc. Figure 11OR,The gas log heater may be installed nearer to the flo<strong>or</strong> if aminimum of 14" of noncombustible material such as slate<strong>or</strong> marble is installed between the base of the fireplace andthe combustible flo<strong>or</strong>ing. Figure 12Fp2799mantel no hood 24<strong>Heater</strong> in Fireplace<strong>or</strong> FireboxFP2799Example: Thebottom of themantel may projectfrom the wall amaximum of 10" ata minimum of 28"above the opening.Figure 9 -DEB24/30 Minimum Mantel Clearance with No HoodMantel7”6”FP2876<strong>Heater</strong> inFireplace <strong>or</strong>Firebox5” MinimumFP2876combustible flo<strong>or</strong>CombustibleMaterialFigure 11 -Minimum Clearance above Combustible Flo<strong>or</strong>ingMinimum of 8”Heat ResistantMaterial2”4”8”14”This DistanceMay Now beLess than 5”<strong>Heater</strong> inFireplace <strong>or</strong>Firebox14” MinimumCombustibleMaterialFP2800HoodFigure 10 -DEB24/30 Example of Unsafe FP2800 Installation - MinimumMantel Clearance with bad No mantel HoodFigure 10 is an example of an unsafe mantel installation.This mantel projects 4" at 8" above the opening,exceeding the maximum acceptable distance of 2Z\x" Themantel also projects 7" at 14Z\x" above the opening, exceedingthe maximum acceptable distance of 6".If your mantel profile is unsafe, you may either:• Raise the mantel to an acceptable height<strong>or</strong>• Remove the mantelFigure 12 -Minimum Clearance above Combustible Flo<strong>or</strong> with NoncombustibleMaterial Installed at Base of FireplaceFP2802non combustible flo<strong>or</strong>44D0060 11
DEB <strong>Unvented</strong> <strong>Gas</strong> <strong>Log</strong>sBef<strong>or</strong>e fully installing the unit:• Turn OFF the gas supply to the fireplace <strong>or</strong> firebox.• Seal any fresh air vents and/<strong>or</strong> ash clean-out do<strong>or</strong>slocated on the flo<strong>or</strong> <strong>or</strong> wall of the fireplace. If leftunsealed, drafting may cause pilot outage <strong>or</strong> sooting.Use a heat resistant sealant. Do not seal the chimneyflue damper.Damper stop installationINSTALLATIONA damper stop must be provided with the unit. Contact yourdealer to obtain one. The damper stop must be installed asshown in Figure 13 to prevent full closure of the fireplacedamper blade and provide a minimum 29 square inch flueopening.DamperStopWARNINGBef<strong>or</strong>e installing in a solid fuel burningfireplace, The chimney flue and fireboxmust be cleaned of soot, creosote, ashesand loose paint by a qualified chimneycleaner.INSTALLING VENTED APPLICATIONS<strong>Manual</strong> and millivolt controlled gas logs may beinstalled as a vented dec<strong>or</strong>ative log set in compliancewith ANSI Z21.60 and National Fuel <strong>Gas</strong> Code,Section 6.6. Since, the gas logs are operated withthe damper open, non-combustible material andminimum mantel requirements do not apply.WARNINGThis appliance is f<strong>or</strong> installation only in a solidfuel burning fireplace (masonry fireplace <strong>or</strong>manufactured fireplace) with a w<strong>or</strong>kingflue and constructed of noncombustiblematerial.Exception: DO NOT install this appliancein a fact<strong>or</strong>y-built fireplace that includesinstructions stating that it has not beentested <strong>or</strong> should not be used with unventedgas logs. This log set may be installed as avented log set.Bef<strong>or</strong>e installing the appliance:• Turn off gas supply to fireplace <strong>or</strong> firebox.• Have the fireplace flo<strong>or</strong> and chimney professionallycleaned to remove ashes, soot, creosote <strong>or</strong> otherobstructions. Have this cleaning perf<strong>or</strong>med annuallyafter installation.• Seal any fresh air vents <strong>or</strong> ash clean-out do<strong>or</strong>s locatedon flo<strong>or</strong> <strong>or</strong> wall of fireplace. If not, drafting may causepilot outage <strong>or</strong> sooting. Use a heat-resistant sealant.Install and operate the appliance as directed in thismanual.WARNINGDamperFP2538 Figure 13 -Damper Stop Installation(See Warning)The fireplace and gas logs function as asystem. If the fireplace is spilling into theroom (check FP2538with a match <strong>or</strong> a smoke stick),reposition the damper clamp until a positivedamper stopdraft is obtained by opening the damper. Ifnegative pressure in home prevents havinga positive draft, contact your dealer f<strong>or</strong>assistance.PLACE AND SECure APPLIANCEWARNINGYou must secure the gas log heater tothe fireplace flo<strong>or</strong>. If not, the entire unitmay move when you adjust the controls.Movement of unit may cause shifting ofthe gas logs which leads to sooting andimproper burning. Grate movement couldcause a gas leak.Special care is required if you are installingthe unit into a sunken fireplace. You mustraise the fireplace flo<strong>or</strong> to allow access togas log controls. This will insure adequateair flow and guard against sooting. Raisethe fireplace flo<strong>or</strong> using noncombustiblematerials, as described in Placement in aFireplace with Restrictive Barrier on Page8.12 44D0060
INSTALLATIONAssembly procedure:1. Center the gas log unit in the fireplace <strong>or</strong> firebox. Makecertain the front feet of the grate sit inside the front edgeof the fireplace <strong>or</strong> firebox.2. Anch<strong>or</strong> holes are located on the right and left sides ofthe unit. After centering the grate c<strong>or</strong>rectly, mark thehole positions on the fireplace/firebox flo<strong>or</strong>. Drill two (2)B\cx" diameter holes approximately 1Z\x" deep.3. Anch<strong>or</strong> the grate to the fireplace/firebox flo<strong>or</strong> using thescrews provided. Figure 14Proper installation of the grate is essential to preventany movement of the gas logs and controls duringoperation.ScrewsCONNECT THE GASDEB <strong>Unvented</strong> <strong>Gas</strong> <strong>Log</strong>sNOTICE: A qualified gas appliance installer must connectthe heater to the gas supply. Consult all local codes.CAUTIONUse new black iron <strong>or</strong> steel pipe. Internallytinned copper <strong>or</strong> copper tubing can beused per National Fuel Code, section 2.6.3,providing gas meets hydrogen sulfidelimits, and where permitted by local codes.<strong>Gas</strong> piping system must be sized to provideminimum inlet pressure (Listed on DataPlate) at the maximum flow rate (BTU/Hr).Undue pressure loss will occur if the pipeis too small.A manual shutoff valve must be installedupstream of the appliance. Union teeand plugged 1/8" NPT pressure tappingpoint should be installed upstream of theappliance. Figure 15StainlessFlexibleTubePipeTo<strong>Heater</strong>ValvePossible Locationsf<strong>or</strong> PressureTapping PointFP2803PipeCoupling<strong>Gas</strong>SupplyInletFP2877DEB secure to flo<strong>or</strong>Anch<strong>or</strong>HolesFigure 14 -Secure <strong>Heater</strong> to Flo<strong>or</strong> of Fireplace <strong>or</strong> Firebox<strong>Manual</strong> ShutoffValveFigure 15 -<strong>Gas</strong> ConnectionWARNINGFP2371gas connectFP2371CHECK GAS TYPE: The gas supply mustbe the same as stated on the heater’s ratingplate. If the gas supply is different, DONOT INSTALL THE HEATER. Contact yourdealer f<strong>or</strong> the c<strong>or</strong>rect model.WARNINGConnecting directly to an unregulated propane/LPGtank can cause an explosion.Always use an external regulat<strong>or</strong> f<strong>or</strong> all propane/LPGheaters and high pressure one to two-pound systemsonly, to reduce the supply tank pressure to a maximum of13" w.c. This is in addition to the internal regulat<strong>or</strong> in theheater valve.44D0060 13
DEB <strong>Unvented</strong> <strong>Gas</strong> <strong>Log</strong>sINSTALLATIONWARNINGConnecting directly to an unregulatedp r o p a n e / L P G t a n k c a n c a u s e a nexplosion.CHECK GAS PRESSUREThe heater gas inlet connection is a 3/8" NPT at the valve.On all control type units, the inlet connection is on the rightside of unit. To connect from the opposite side, route thepipe around the back p<strong>or</strong>tion of the unit.When tightening up the joint to the valve, hold the valvesecurely to prevent movement.Test all gas joints from the gas meter to the heater valvef<strong>or</strong> leaks using a gas analyzer <strong>or</strong> soap and water solutionafter completing connection. DO NOT USE AN OPENFLAME.Check the gas pressure with the appliance burning andthe control set to HIGH.<strong>Manual</strong> ControlFigure 16The pressure regulat<strong>or</strong> is preset and locked to discouragetampering. If the pressure is not as specified,replace the regulat<strong>or</strong> with the c<strong>or</strong>rect part from the partslist in this manual.Remove 1/8" NPT plug, located on side of regulat<strong>or</strong> body.Install fitting and tubing to pressure gauge. After takingpressure reading, reinstall test plug. Check f<strong>or</strong> gas leaks.Millivolt ControlFigure 17The valve regulat<strong>or</strong> controls the burner pressure whichshould be checked at the pressure test point.Turn captured screw counter clockwise two <strong>or</strong> thre turnsand then place tubing to pressure gauge over test point(Use test point “OUT” closest to control knob). After takingpressure reading, be sure and turn captured screw clockwisefirmly to re-seal. Do not over t<strong>or</strong>que. Check f<strong>or</strong> gasleaks.Test P<strong>or</strong>t “Out”Figure 17 -Millivolt Control PressureTest Point LocationFP2372millivolt valveFP2372NPT Test PlugFigure 16 -<strong>Manual</strong> Control PressureTest Point LocationFP2499manual valveFP249914 44D0060
ELECTRICAL WIRING - MILLIVOLTDEB <strong>Unvented</strong> <strong>Gas</strong> <strong>Log</strong>sWARNINGLabel all wires pri<strong>or</strong> to disconnection when servicing controls.Wiring err<strong>or</strong>s can cause improper and dangerous operation.Verify proper operation after servicing.ODS PilotOn/OffSwitchODS PilotWallSwitchMillivoltValveOn/Off SwitchSpade TerminalTH = 3TP = 1TP/TH = 2SwitchFP2112Figure 18 -Wiring DiagramThe millivolt valve is a self-powered combination gas controlthat does not require 110 Vac to operate.Connect Optional Wall Switch <strong>or</strong>Thermostat1. Use 18 awg, two-wire cable, 15 feet maximum length.2. At one end of the cable, connect both wires to the wallswitch <strong>or</strong> thermostat. At the other end, connect onewire to TP/TH and one wire to TH, <strong>or</strong> connect the wallswitch/thermostat to the two male (0.25") terminals onthe left side of the unit. The col<strong>or</strong> of the wires does notmatter.FP2112wiring diagram12/08Optional WallSwitch, RemoteReceiver <strong>or</strong>Optional T-Stat44D0060 15
26D331726D3317DEB <strong>Unvented</strong> <strong>Gas</strong> <strong>Log</strong>sConnect Remote ReceiverConnect the connect<strong>or</strong>s to the two (2) .25” male connect<strong>or</strong>slocated on the right side when facing the unit. Figure 19.Do not allow the wire to touch the grate <strong>or</strong> burners.NOTE: Heat reduces battery life. You can protect thereceiver and extend battery life by mounting the receiverin a wall <strong>or</strong> other location outside the fireplace.ELECTRICAL WIRING - MILLIVOLTinstall t-Stat Sens<strong>or</strong>option sold separately1. Remove metal bracket and label from box.2. Peel away the paper backing on the label. Align holesin label with holes on the bracket. Right side of labelshould flush with right side of bracket. Figure 20. Presslabel firmly and smoothly to bracket.3. Using Phillips screwdriver, install t-stat sens<strong>or</strong> to bracketwith two screws provided. Figure 21. Make sure thethermo bulb wire is at the bottom of t-stat sens<strong>or</strong>.4. Plug in wiring harnesses to back of t-stat sens<strong>or</strong>. Figure21.RemoteWireConnect<strong>or</strong>sFP2879FP2878THERMOSTATSETTINGAlignHolesHIGHFigure 19 -Install Remote ReceiverRemoteReceiverLOWFP2878install remote receiverFigure 20 -Apply Label to BracketT-Stat Sens<strong>or</strong>Align Edges ofLabel to Right Sideof BracketWiringHarnessesFP2879place lab<strong>or</strong>BracketTHERMOSTATSETTINGHIGHFP2880LOWScrewsThermo BulbFigure 21 -Install T-Stat Sens<strong>or</strong> andWiring HarnessesFP288016 install sens<strong>or</strong>s44D0060
ELECTRICAL WIRING - MILLIVOLTDEB <strong>Unvented</strong> <strong>Gas</strong> <strong>Log</strong>s5. Route wiring harnesses through large hole on side of unit. Mount bracket to side of unit withscrew provided. Figure 226. Attach wiring harness to either TP/TH and TH on control valve <strong>or</strong> to existing wiring harnesswith two (2) 0.250" male spade terminals f<strong>or</strong> remote <strong>or</strong> t-stat option. Figures 22 and 23.7. Install knob to shaft of t-stat sens<strong>or</strong>. Figure 22.8. Place thermo bulb in front of the firebox f<strong>or</strong> incoming air.Wiring HarnessesFP2881ScrewTHERMOSTATSETTINGHIGHKnob26D3317LOWFigure 22 -Install T-Stat Sens<strong>or</strong> to DEB BaseThermo BulbT-Stat Sens<strong>or</strong>and BracketFP2881install TstatTHTP/THWiring HarnessesFP2808Figure 23 -Attach Wiring Harnesses to Control ValveFP2808attach tstat to valve44D0060 17
DEB <strong>Unvented</strong> <strong>Gas</strong> <strong>Log</strong>sELECTRICAL WIRING - MILLIVOLToperation of thermostat sens<strong>or</strong>1. Follow millivolt lighting instructions on lighting plateattached to unit <strong>or</strong> in homeowner’s manual.2. With control knob in the “ON” position make surethe ON/OFF switch is in the “OFF” position. Figure243. The unit is now being controlled by the thermostatsens<strong>or</strong>. The sens<strong>or</strong> will now cycle the burners onand off. You can adjust how often the unit cyclesby turning the control knob on the sens<strong>or</strong>.On/Off SwitchTHERMOSTATSETTING26D3317LOWHIGHFP2882Control KnobT-Stat Sens<strong>or</strong>CHECKING SYSTEM OPERATIONFigure 24 -Control Knob in “ON” Position andON/OFF Switch in “OFF” PositionFP2882DEB controlsThe millivolt system and individual components may be checked with a millivolt meter havinga 1-1000 mV range. Conduct each check shown in chart by connecting meter test leadsto terminals as indicated.A. Complete Millivolt System Check(“A” Reading - Thermostat contacts CLOSED - Control knob “ON” - Main burner shouldturn ON)1. If reading is m<strong>or</strong>e than 175 millivolts and the automatic valve still does not come on,replace the control.2. If the closed circuit reading (“A” reading) is less than 175 millivolts, determine causef<strong>or</strong> low reading, proceed to Section B.B. Thermopile Output Reading Check(“B” Reading - thermostat contacts OPEN - Main burner OFF1. Check gas pressure to the unit. If gas pressure is within minimum and maximum ondata plate, then check pilot voltage, 500 millivolts minimum. If the minimum millivoltreading is not obtainable, replace pilot.Connect Switch <strong>or</strong> MeterCheck Meter Leads Thermostat ReadingTest To Test To Terminals Contacts Should BeA Complete TP/TH and TH Closed Minimum 175SystemB Thermopile TP and TP/TH Open Minimum 500Output18 44D0060
LOG PLACEMENTDEB <strong>Unvented</strong> <strong>Gas</strong> <strong>Log</strong>sWARNINGThe positioning of the logs are critical to the safe and clean operationof this heater. Sooting and other problems may result if the logs are notproperly and firmly positioned in the appliance. Never add additional logs <strong>or</strong>embellishments such as pine cones, vermiculite <strong>or</strong> rock wool to the heater.Only use the logs and EB-RW (rock wool) supplied with the unit.Failure to position the parts in acc<strong>or</strong>dance with diagrams below <strong>or</strong> to useonly parts specifically approved f<strong>or</strong> this heater may result in property damage<strong>or</strong> personal injury.Bef<strong>or</strong>e you begin — This unit is supplied with four <strong>or</strong> five ceramic fiber logs. Do not handle these logs with yourbare hands. Always wear gloves to prevent skin irritation from ceramic fibers. After handling the logs, washyour hands gently with soap and water to remove any traces of fibers.<strong>Log</strong> #6PLACE logs on grateFigures 25 and 26NOTE: Model DEB20 has 4 logs and modelsDEB24 and DEB30 have 5 logs.1. Install back log (#1) on two pins located near theback of base. Check log position and stability.2. Install right center log (#2) on pins located nearright front of base and center of base.Note: The #2 log is a heat shield f<strong>or</strong> the controlvalve. It is critical that this log is sitting in its pinplacement and completely down with the frontnoise of the embers placed below the front burner.If the #2 log is not placed properly it could causedamage to the control valve and wiring.3. Install left center log (#3) on pin located near leftfront of base and on top of right center log (#2).4. Install middle front log (#4) in front of center log.Make sure bottom of log is resting on the center ofgrate. Do not let log #4 contact the front burner.5. DEB 24 and DEB 30 only: Rest right end of leftfront log (#5) on log #3 and the top of left front logon log #1.6. Place back end of top center log (#5) on recessedarea of back log (#1). Cross log #6 over log #2 andrest right extension on grate. <strong>Log</strong> #6 should fit onpin on center log #3.<strong>Log</strong> #4<strong>Log</strong> #1LeftFrontPin<strong>Log</strong> #1<strong>Log</strong> #2Figure 25 -Place <strong>Log</strong>s onGrate (DEB20)Right Front andCenter PinsLG102444D0060 19LG1024DEB20 logs
DEB <strong>Unvented</strong> <strong>Gas</strong> <strong>Log</strong>sLOG PLACEMENT<strong>Log</strong> #6<strong>Log</strong> #4<strong>Log</strong> #3<strong>Log</strong> #1<strong>Log</strong> #5(24 & 30Only)<strong>Log</strong> #2Left FrontPinFigure 26 -Place <strong>Log</strong>s on Grate(DEB24/30)Right Frontand CenterPinsLG1025BackPinsLG1005DEB24 30 logs20 44D0060
FLAME APPEARANCEDEB <strong>Unvented</strong> <strong>Gas</strong> <strong>Log</strong>sPlacE the dec<strong>or</strong>ative rockCAUTIONDO NOT sprinkle volcanic rock on the logs, around the pilot, <strong>or</strong> on <strong>or</strong>near burners. This may cause sooting. Place volcanic rock only on theflo<strong>or</strong> of the fireplace.During initial operation of the new heater, burning logs will give off apaper burning smell and <strong>or</strong>ange flames will be present. Simply open thewindows f<strong>or</strong> a few hours to vent the od<strong>or</strong>.Flames from the pilot, front and rear burner should be visually checked as soon as theheater is installed. In addition, periodically check the flames visually during operation.Check the pilot flameThe pilot flame must always be present when the heater is in operation. It should justtouch the top of the thermocouple tip f<strong>or</strong> natural. Refer to Figures 27 and 29 f<strong>or</strong> c<strong>or</strong>rect pilotflame appearance.If the pilot flame does not touch the thermocouple, then the main burner cannot functionreliably. Refer to Figures 28 and 30 f<strong>or</strong> inc<strong>or</strong>rect pilot flame appearance.Millivolt ControlMANUAL & HI/LO CONTROLThermocouplef<strong>or</strong> Natural <strong>Gas</strong>Thermocouplef<strong>or</strong> LPThermocouplef<strong>or</strong> Natural <strong>Gas</strong>Thermocouplef<strong>or</strong> LPFP2272Figure 27 -C<strong>or</strong>rect Pilot Flame AppearanceFigure 29 -C<strong>or</strong>rect Pilot Flame AppearanceThermocouplef<strong>or</strong> Natural <strong>Gas</strong>FP2272pilot c<strong>or</strong>rect flameThermocouplef<strong>or</strong> Natural <strong>Gas</strong>Thermocouplef<strong>or</strong> LPFP2501manuaThermocouplef<strong>or</strong> LPFP2273FP2502Figure 28 -Inc<strong>or</strong>rect Pilot Flame AppearanceFigure 30 -Inc<strong>or</strong>rect Pilot Flame Appearance44D0060 21FP2273pilot bad flame
DEB <strong>Unvented</strong> <strong>Gas</strong> <strong>Log</strong>sFLAME APPEARANCEIn n<strong>or</strong>mal operation at full rate after 15 minutes, thefollowing flame appearances should be observed:LG1026Figure 31 -C<strong>or</strong>rect Rear Flame AppearanceLG1026DEB log flamesThe left and right rear flames should be yellow and extend1"-2" above the mid log top surfaces. The yellow flamesshould not contact the logs. There should be glowingembers on the front burner.NOTE: The front flames and embers will be an opaque<strong>or</strong>ange col<strong>or</strong> during the burn off time.22 44D0060
OPERATING INSTRUCTIONSDEB <strong>Unvented</strong> <strong>Gas</strong> <strong>Log</strong>sOPERATING INSTRUCTIONSAvoid any drafts that alter burner flame patterns. Do not allow fans to blow directly into thefireplace. Do not place a blower inside the burn area of the firebox. Ceiling fans may create draftsthat alter flame patterns. Sooting and improper burning will result.During manufacturing, fabricating and shipping, various components of this appliance are treatedwith certain oils, films <strong>or</strong> bonding agents. These chemicals are not harmful, but may produce annoyingsmoke and smells as they are burned off during the initial operation of the appliance, possiblycausing headaches <strong>or</strong> eye <strong>or</strong> lung irritation. This is a n<strong>or</strong>mal and temp<strong>or</strong>ary occurrence.The initial break-in operation should last two to three hours with the burner at the highest setting.Provide maximum ventilation by opening windows <strong>or</strong> do<strong>or</strong>s to allow od<strong>or</strong>s to dissipate. Any od<strong>or</strong>sremaining after this initial break-in will be slight and will disappear with continued use.This appliance must not be used with glass do<strong>or</strong>s in the closed position. This can lead to pilot outagesand severe sooting outside the fireplace. Page 8, Figure 3.44D0060 23
DEB <strong>Unvented</strong> <strong>Gas</strong> <strong>Log</strong>sOPERATING INSTRUCTIONSFOR YOUR SAFETY, READ BEFORE LIGHTINGWARNINGIf you do not follow these instructionexactly, a fire <strong>or</strong> explosion may resultcausing property damage, personal injury<strong>or</strong> loss of life.A. This appliance is equipped with a piezo ignition device which lights the pilot. If piezo is not w<strong>or</strong>kingproperly, refer to “Match Lighting” instructions on Page 27.B. BEFORE OPERATING smell all around the appliance area f<strong>or</strong> gas. Be sure to smell next to theflo<strong>or</strong> because some gas is heavier than air and will settle on the flo<strong>or</strong>.WHAT TO DO IF YOU SMELL GAS:• Do not attempt to light any appliance.• Do not touch any electric switch; do not use any phone in your building.• Immediately call your gas supplier from a neighb<strong>or</strong>'s phone. Follow the gas supplier's instructions.• If you cannot reach your gas supplier, call the fire department.C. Use only your hand to push in, <strong>or</strong> turn the gas control knob. Never use tools. If the knob will notpush in <strong>or</strong> turn by hand, don't try to repair it. Call a qualified service technician. F<strong>or</strong>ce <strong>or</strong> attemptedrepair may result in a fire <strong>or</strong> explosion.D. Do not use this appliance if any part of it has been under water. Immediately call a qualified servicetechnician to inspect the appliance and to replace any part of the control system and any gascontrol that has been under water.Piezo Ignit<strong>or</strong>FP2883SwitchLocation of Piezo Ignit<strong>or</strong>, ControlKnobs and Switch on Millivolt and<strong>Manual</strong> UnitsHi/Lo KnobFP2883controls24 44D0060
OPERATING INSTRUCTIONSMANUAL control lighting instructions1. STOP! Read the safety inf<strong>or</strong>mation.2. Make sure the manual shutoff valve is fully open.3. This heater is equipped with an ignition device (piezo) which automaticallylights the pilot.4. Refer to Page 24 f<strong>or</strong> the location of the piezo ignit<strong>or</strong> and control knob. Pushin gas control knob slightly and turn control knob clockwise to the OFFposition.NOTE: Knob cannot be turned to OFF unless knob is pushed in slightly. Donot f<strong>or</strong>ce.5. Wait 5 minutes to clear out any gas. Then smell f<strong>or</strong> gas, including near theflo<strong>or</strong>. If you smell gas STOP! Follow the instructions under “What to Do if YouSmell <strong>Gas</strong>”, Page 24. If you do not smell gas, go to the next step.6. From OFF position, push in gas control knob slightly and turn counterclockwiseto the IGN position. Figure 32. Push in and hold control knob f<strong>or</strong> 5seconds.NOTE: If you are running the heater f<strong>or</strong> the first time, it will be necessary topress in the control knob f<strong>or</strong> 30 seconds to allow air to bleed out of the gaspiping.7. With the control knob pushed in, push and release the piezo ignit<strong>or</strong> button tolight the ODS pilot. The pilot is located on the left side of the heater, behindthe middle log and in front of the back log. If piezo ignit<strong>or</strong> does not light thepilot, refer to “Match Lighting Instructions”, Page 27.8. Hold the control knob in f<strong>or</strong> an additional 10 seconds to prevent the ODS pilotfrom shutting off the gas while the thermocouple is warming up.9. Release the control knob.• If the knob does not pop out when released, stop and immediately call yourservice technician <strong>or</strong> gas supplier.• If the ODS pilot will not stay lit after several tries, push and turn the gascontrol knob clockwise to OFF and wait 15 seconds. Repeat steps 6through 9.10. Push in control knob and turn counterclockwise to the HIGH setting. Atthis location the control knob will pop out when positioned c<strong>or</strong>rectly. The knobcan now be positioned at any position between HIGH and LOW. Figures 33and 34RotateDEB <strong>Unvented</strong> <strong>Gas</strong> <strong>Log</strong>sFigure 32 -IGN PositionRotateFigure 33 -HIGH PositionRotateFigure 34 -LOW PositionPushPushWARNINGWait 30 seconds bef<strong>or</strong>e readjusting theheater when the control knob has beenturned down to a lower setting.TO TURN OFF GAS TO HEATER1. Turn control knob clockwise to OFF position to completely shut off the heater.2. If applicable: Turn off all electric power to the heater.44D0060 25
DEB <strong>Unvented</strong> <strong>Gas</strong> <strong>Log</strong>sOPERATING INSTRUCTIONSMillivolt control lighting instructions1. STOP! Read the safety inf<strong>or</strong>mation label.2. Make sure the manual shutoff valve is fully open.3. This gas log set is equipped with an ignition device (piezo) which automatically lights the pilot. If piezoignit<strong>or</strong> does not light the pilot, refer to instructions f<strong>or</strong> Match Lighting Instructions, Page 27.4. Turn gas control knob clockwise to the OFF position, set thermostat to lowest setting and turn ON/OFFswitch to OFF position.5. Wait (5) minutes to clear out any gas. Then smell f<strong>or</strong> gas, including near the flo<strong>or</strong>. If you smell gas,STOP! Follow What to Do if You Smell <strong>Gas</strong>, Page 24. If you don't smell gas, go to next step.6. From OFF position, turn the gas control knob counterclockwise to IGN position. Push in controlknob f<strong>or</strong> 5 seconds. NOTE: If you are running the heater f<strong>or</strong> the first time, it may be necessary topress in the control knob f<strong>or</strong> 30 seconds <strong>or</strong>longer to allow air to bleed out of the gas piping.7. With the control knob pushed in, push in and release the piezo ignit<strong>or</strong> button to light the pilot.8. Continue pushing the control knob in f<strong>or</strong> a further 60 seconds to prevent the flame detect<strong>or</strong> from shuttingoff the gas while the probe is warming up. Release the control knob.9. Turn gas control knob counterclockwise to the ON position.10. After the pilot has been lit f<strong>or</strong> one minute, the burners can be turned on. Turn the ON/OFF switch to ONposition <strong>or</strong> adjust thermostat to desired setting. NOTE: To use the thermostat function (if installed)the control knob must be set to “ON” and ON/OFF switch must in the “OFF” position.11. If the gas logs will not operate, follow the instructions To Turn Off <strong>Gas</strong> To <strong>Heater</strong> below and call yourservice technician <strong>or</strong> gas supplier.ON/OFFSwitchHi/Lo ControlFP2275Ignit<strong>or</strong> PilotControlPilotPiezoFP2884Millivolt ControlsFP2884Millivolt controlsTO TURN OFF GAS TO HEATER1. Turn control knob clockwise to OFF position to completely shut off the heater.2. If applicable: Turn ON/OFF switch to OFF position and/<strong>or</strong> set thermostat (if present) to lowest setting.3. If applicable: Turn off all electric power to the heater.26 44D0060
OPERATING INSTRUCTIONS and CLEANING DEB <strong>Unvented</strong> & SERVICING <strong>Gas</strong> <strong>Log</strong>sMATCH lighting instructions1. Remove any items necessary f<strong>or</strong> easy access to the pilot (f<strong>or</strong> example: logs, screens, etc.).2. Follow appropriate lighting instructions found previously. Instead of pushing and releasing the piezobutton, light a match and hold the flame to the end of the pilot and ignite the pilot.3. After control knob has been released and pilot stays lit, reinstall any items that were removed f<strong>or</strong> pilotaccess.4. Call a qualified service technician f<strong>or</strong> repair <strong>or</strong> replacement of the piezo ignit<strong>or</strong>.WARNINGTurn off heater and allow to cool bef<strong>or</strong>ecleaning. Disconnect electrical powerbef<strong>or</strong>e cleaning <strong>or</strong> servicing.CLEANING AND SERVICINGAnnual inspection and cleaning by your dealer <strong>or</strong> qualified service technician is recommendedto prevent malfunction and/<strong>or</strong> sooting.Remove logs, handling carefully by holding gently at each end. Gloves are recommended to preventskin irritation from ceramic fibers. If skin becomes irritated, wash gently with soap and water. Referto manual f<strong>or</strong> c<strong>or</strong>rect log placement.Periodic Cleaning - Refer to parts diagram f<strong>or</strong> location of items discussed below.• Do not use cleaning fluid to clean logs <strong>or</strong> any part of heater.• Brush logs with soft bristle brush <strong>or</strong> vacuum with brush attachment.• Vacuum loose particles and dust from the front and rear burner, control and piezo covers andgrate weldment.• Inspect and clean burner air intake holes. Remove lint <strong>or</strong> particles with vacuum, brush, <strong>or</strong>pipe cleaners.Failure to keep air intake holes clean will result in sooting and po<strong>or</strong> combustion.• External case should be dusted and wiped with a wet soapy cloth.Annual Cleaning/Inspection - Refer to parts diagram f<strong>or</strong> location of items discussedbelow.• Inspect and clean burner air intake holes. Remove lint <strong>or</strong> particles with vacuum, brush <strong>or</strong>pipe cleaners.Failure to keep air intake holes clean will result in sooting and po<strong>or</strong> combustion.• Inspect and clean all burner p<strong>or</strong>ts.• Inspect ODS pilot f<strong>or</strong> operation and accumulation of lint at air intake holes.• Verify flame pattern and log placement f<strong>or</strong> proper operation.• Verify smooth and responsive ignition of main burner and rear burner.• Replace battery in remote control device.44D0060 27
DEB <strong>Unvented</strong> <strong>Gas</strong> <strong>Log</strong>sTROUBLESHOOTINGWARNINGTurn off appliance and allow to cool bef<strong>or</strong>ecleaning.Only a qualified service person shouldservice and repair the heater.NOTE: All troubleshooting items are listed in <strong>or</strong>der ofoperation.ProblemWhen ignit<strong>or</strong> button ispressed, there is not sparkat ODS/pilot.<strong>Appliance</strong> produces unwantedod<strong>or</strong>s.<strong>Appliance</strong> shuts off duringuse.<strong>Gas</strong> od<strong>or</strong> even whencontrol knob is in OFFposition.When ignit<strong>or</strong> button ispressed, there is spark atODS/pilot, but no ignition.Possible Cause1. Ignit<strong>or</strong> electrode positioned wrong.2. Ignit<strong>or</strong> electrode is broken.3. Ignit<strong>or</strong> electrode not connected toignit<strong>or</strong> cable.4. Ignit<strong>or</strong> cable pinched <strong>or</strong> wet. Keepignit<strong>or</strong> cable dry.5. Broken ignit<strong>or</strong> cable.6. Bad piezo ignit<strong>or</strong>.1. <strong>Appliance</strong> burning vap<strong>or</strong>s frompaint, hair spray, glues, etc.2. <strong>Gas</strong> leak.3. Initial burn off.1. Not enough fresh air is available f<strong>or</strong>ODS/pilot to operate.2. Low line pressure.3. ODS/pilot is partially clogged.4. Defective thermopile.5. Restrictions in incoming air flow.1. <strong>Gas</strong> leak.2. Control valve defective.1. <strong>Gas</strong> supply turned off <strong>or</strong> manualshutoff valve closed.2. Control knob not in PILOT position.3. Control knob not pressed in while inPILOT position.4. Air in gas lines when installed.5. ODS/pilot is clogged.6. <strong>Gas</strong> regulat<strong>or</strong> setting is not c<strong>or</strong>rect.Solution1. Replace ignit<strong>or</strong>.2. Replace ignit<strong>or</strong>.3. Reconnect ignit<strong>or</strong> cable.4. Free ignit<strong>or</strong> cable if pinched by anymetal <strong>or</strong> tubing.5. Replace ignit<strong>or</strong> cable.6. Replace piezo ignit<strong>or</strong>.1. Ventilate room. Stop using od<strong>or</strong> causingproducts while heater is running.2. Locate and c<strong>or</strong>rect leaks.3. Ventilate room and turn unit on high untilod<strong>or</strong> is gone. Od<strong>or</strong> should be gone after6 hours of continuous use.1. open window and/<strong>or</strong> do<strong>or</strong> f<strong>or</strong> ventilation.2. Contact local gas company.3. Clean ODS/pilot.4. Check wire connections. Check outputshould be 500 mV across TH/TP and TPterminals with ON/OFF switches off.5. Check f<strong>or</strong> bottom riser on glass do<strong>or</strong>,sunken fireplace, excessive lava rock/cinders densely packed against grate.1. Locate and c<strong>or</strong>rect all leaks.2. Replace control valve.1. Turn on gas supply <strong>or</strong> open manualshutoff valve.2. Turn control knob to PILOT position.3. Press in control knob while in PILOTposition.4. Continue holding down control knob.Repeat igniting operation until air isremoved.5. Replace ODS/pilot assembly <strong>or</strong> get itservices.6. Check incoming pressure. Replace gasregulat<strong>or</strong>.28 44D0060
TROUBLESHOOTINGDEB <strong>Unvented</strong> <strong>Gas</strong> <strong>Log</strong>sProblem Possible Cause SolutionODS/pilot lights, but flamegoes out when controlknob is released.Burner does not light afterODS/pilot is lit.Burner backfires duringcombustion.Slight smoke <strong>or</strong> od<strong>or</strong> duringinitial operation.<strong>Log</strong>s appear to smokeafter initial operation.<strong>Heater</strong> produces a whistlingnoise when burner islit.No gas to pilot.1. Control knob not fully pressed in.2. Control knob not pressed in longenough.3. <strong>Manual</strong> shutoff valve not fully open.4. Thermocouple connection loose atcontrol valve.5. Pilot flame not touching thermocouple,which allows thermocoupleto cool, causing pilot flame to go out.This problem could be caused byeither low gas pressure, <strong>or</strong> a dirty <strong>or</strong>partially clogged ODS/pilot.6. Thermocouple damaged.7. Control valve damaged.1. Burner <strong>or</strong>ifice is clogged.2. Burner <strong>or</strong>ifice diameter is too small.3. Inlet gas pressure is too low.1. Manifold Pressure is too low.2. Burner <strong>or</strong>ifice is clogged.1. Burner <strong>or</strong>ifice is clogged <strong>or</strong> damaged.2. Burner is damaged.3. <strong>Gas</strong> regulat<strong>or</strong> is defective.1. Vap<strong>or</strong>s from paint <strong>or</strong> curing processof logs.1. Turning control knob to HIGH positionwhen burner is cold.2. Air in gas line.3. Dirty <strong>or</strong> partially clogged burner<strong>or</strong>ifices.1. LP regulat<strong>or</strong> shut down due to inletpressure too high.1. Press in control knob fully.2. After ODS/pilot lights, keep control knobpressed in f<strong>or</strong> 30 seconds.3. Fully open manual shutoff valve.4. Hand tighten thermocouple connectionuntil snug, then tighten 1/4 turn m<strong>or</strong>e.5. Contact local gas company.6. Replace thermocouple.7. Replace control valve.1. Clean burner <strong>or</strong> replace burner <strong>or</strong>ifice.2. Replace burner <strong>or</strong>ifice.3. Contact qualified service person.1. Contact local gas company.2. Clean burner <strong>or</strong> replace burner <strong>or</strong>ifice.1. Clean burner <strong>or</strong> replace burner <strong>or</strong>ifice.2. Replace burner.3. Replace gas regulat<strong>or</strong>.1. Problem will stop after a few hoursof operation. Run the heater with thedamper open if you have one, <strong>or</strong> open awindow f<strong>or</strong> the first few hours.2. <strong>Log</strong> heater is intended to be smokeless.Turn OFF heater and call qualifiedservice person.1. Turn control knob to LOW position andlet warm up f<strong>or</strong> a minute.2. Operate burner until air is removed fromline. Have gas line checked by local gascompany.3. Clean burner <strong>or</strong> replace burner <strong>or</strong>ifice.1. Verify LP tank regulat<strong>or</strong> is installed andset at 11” to 13” w.c.2. Replace regulat<strong>or</strong> on heater.WARNINGIf the gas quality is bad, your pilot may notstay lit, the burners may produce soot andthe heater may backfire when lit. If the gasquality <strong>or</strong> pressure is low, contact your localgas supplier immediately.44D0060 29
DEB <strong>Unvented</strong> <strong>Gas</strong> <strong>Log</strong>sREPLACEMENT PARTS10695 (<strong>Manual</strong>)125 (Millivolt)101 2 31187413WARNING440060Failure to position the parts in acc<strong>or</strong>danceDEB partswith these diagrams <strong>or</strong> failure to useonly parts specifically approved with thisappliance may result in property damage<strong>or</strong> personal injury.30 44D0060
REPLACEMENT PARTSDEB <strong>Unvented</strong> <strong>Gas</strong> <strong>Log</strong>sDEB20DEB24/30Ref. Description Qty. Natural Propane Natural Propane1. Piezo Ignit<strong>or</strong> 1 14D0503 14D0503 14D0503 14D05032. Piezo Wire 1 00K0632 00K0632 00K0632 00K06323. Front Burner 1 44D0020K 44D0020K 44D0019K 44D0019K4. Rear Burner 1 44D0035K 44D0036K 44D0081K 44D0082K<strong>Manual</strong> Control5. Control Valve 1 30D0201 30D0202 30D0201 30D02026. Control Valve Nut 1 00F0586 00F0586 00F0586 00F05867. Valve Regulat<strong>or</strong> 1 4D0305 24D0305 24D0305 24D03058. Front Burner Inject<strong>or</strong> 1 44D0200 44D0202 44D0204 44D02069. ODS Pilot Assembly 1 6D2529 14D0476 26D2529 14D047610. Control Knob 1 18D0603 18D0603 18D0603 18D060311. Rear Burner Inject<strong>or</strong> 1 44D0201 44D0203 44D0205 44D0207Millivolt Control5. Control Valve 1 14D0467 14D0468 14D0467 14D04688. Front Burner Inject<strong>or</strong> 1 44D0208 44D0210 44D0212 44D02149. ODS Pilot Assembly 1 14D0473 14D0477 14D0473 14D047710. Control Knob 1 18D0603 18D0603 18D0603 18D060311. Rear Burner Inject<strong>or</strong> 1 44D0209 44D0211 44D0213 44D021512. On/Off Switch 1 32D0232 32D0232 32D0232 32D023213. Thermostat Sens<strong>or</strong> 1 6D3314 26D3314 26D3314 26D3314Access<strong>or</strong>iesThermostat Sens<strong>or</strong> Kit TS All ModelsFlex Connect<strong>or</strong> Flexcon 30 All ModelsWall Switch Kit MVWS Millivolt OnlyWall Thermostat Kit WT Millivolt OnlyHand Held Remote RCT, RCB Millivolt OnlyHand Held Thermostat Remote RCT, RCST Millivolt OnlyRemote Receiver Cover Ember RRCE All ModelsRemote Receiver Cover Metal RRCM All Models44D0060 31
DEB <strong>Unvented</strong> <strong>Gas</strong> <strong>Log</strong>sREPLACEMENT PARTS632145 (DEB24/DEB30)Ref. Description Qty. DEB18 DEB24 DEB301. Back <strong>Log</strong> 1 44D1011K 44D1001K 44D1006K2. Right Center <strong>Log</strong> 1 44D1022 44D1020 44D1024K3. Left Center <strong>Log</strong> 1 44D1023 44D1021 44D10254. Middle Front <strong>Log</strong> 1 440060 44D1012K 44D1002K 44D1007K5. Left Front <strong>Log</strong> 1 DEB log parts -- 44D1003K 44D1008K6. Top <strong>Log</strong> 1 44D1013K 44D1004K 44D1009KWARNINGFailure to position the parts in acc<strong>or</strong>dance withthese diagrams <strong>or</strong> failure to use only partsspecifically approved with this appliance mayresult in property damage <strong>or</strong> personal injury.32 44D0060
DEB <strong>Unvented</strong> <strong>Gas</strong> <strong>Log</strong>s44D0060 33
Massachusetts DEB <strong>Unvented</strong> <strong>Gas</strong> <strong>Log</strong>s Residents Only — Please read and follow these special requirementsNOTE REGARDING VENTED PRODUCTSThis product must be installed by a licensed plumber <strong>or</strong> gas fitterwhen installed within the Commonwealth of Massachusetts.Any residence with a direct vent product must have a COdetect<strong>or</strong> installed in the residence.Installation of the fireplace <strong>or</strong> vented gas log in the State ofMassachusetts requires the damper to be permanently removed<strong>or</strong> welded in the fully open position.In addition, a naturally vented gas log may not be installed in abedroom <strong>or</strong> bathroom in the State of Massachusetts.Flex line installation must not exceed 36 inches and must havea T shutoff valve.NOTE REGARDING VENT FREE PRODUCTSThis product must be installed by a licensed plumber <strong>or</strong> gas fitterwhen installed within the Commonwealth of Massachusetts.In addition, vent free products may not be installed in abedroom <strong>or</strong> bathroom regardless of size <strong>or</strong> type in the State ofMassachusetts.Flex line installation must not exceed 36 inches and must havea T shutoff valve.CARBON MONOXIDE DETECTOR REQUIREMENTS(2) Revise 10.8.3 by adding the following additionalrequirements:(a) F<strong>or</strong> all side wall h<strong>or</strong>izontally vented gas fueledequipment installed in every dwelling, building <strong>or</strong> structure usedin whole <strong>or</strong> in part f<strong>or</strong> residential purposes, including thoseowned <strong>or</strong> operated by the Commonwealth and where the sidewall exhaust vent termination is less than seven (7) feet abovefinished grade in the area of the venting, including but notlimited to decks and p<strong>or</strong>ches, the following requirements shallbe satisfied:1. Installation of carbon monoxide detect<strong>or</strong>s. At the timeof installation of the side wall h<strong>or</strong>izontal vented gas fueledequipment, the installing plumber <strong>or</strong> gas fitter shall observethat a hard wired carbon monoxide detect<strong>or</strong> with an alarm andbattery back-up is installed on the flo<strong>or</strong> level where the gasequipment is to be installed. In addition, the installing plumber<strong>or</strong> gas fitter shall observe that a battery operated <strong>or</strong> hard wiredcarbon monoxide detect<strong>or</strong> with an alarm is installed on eachadditional level of the dwelling, building <strong>or</strong> structure served bythe side wall h<strong>or</strong>izontal vented gas fueled equipment. It shall bethe responsibility of the property owner to secure the services ofqualified licensed professionals f<strong>or</strong> the installation of hard wiredcarbon monoxide detect<strong>or</strong>sa. In the event that the side wall h<strong>or</strong>izontally vented gasfueled equipment is installed in a crawl space <strong>or</strong> an attic, thehard wired carbon monoxide detect<strong>or</strong> with alarm and batteryback-up may be installed on the next adjacent flo<strong>or</strong> level.b. In the event that the requirements of this subdivisioncan not be met at the time of completion of installation, theowner shall have a period of thirty (30) days to comply with theabove requirements; provided, however, that during said thirty(30) day period, a battery operated carbon monoxide detect<strong>or</strong>with an alarm shall be installed.2. Approved Carbon Monoxide Detect<strong>or</strong>s. Each carbonmonoxide detect<strong>or</strong> as required in acc<strong>or</strong>dance with the aboveprovisions shall comply with NFPA 720 and be ANSI/UL 2034listed and IAS certified.3. Signage. A metal <strong>or</strong> plastic identification plate shall bepermanently mounted to the exteri<strong>or</strong> of the building at aminimum height of eight (8) feet above grade directly in line withthe exhaust vent terminal f<strong>or</strong> the h<strong>or</strong>izontally vented gas fueledheating appliance <strong>or</strong> equipment. The sign shall read, in print sizeno less than one-half (1/2) inch in size, “GAS VENT DIRECTLYBELOW. KEEP CLEAR OF ALL OBSTRUCTIONS.”4. Inspection. The state <strong>or</strong> local gas inspect<strong>or</strong> of the side wallh<strong>or</strong>izontally vented gas fueled equipment shall not approve theinstallation unless, upon inspection, the inspect<strong>or</strong> observescarbon monoxide detect<strong>or</strong>s and signage installed in acc<strong>or</strong>dancewith the provisions of 248 CMR 5.08(2)(a)1 through 4.(b) Exemptions: The following equipment is exempt from 248CMR 5.08(2)(a)1 through 4:1. The equipment listed in Chapter 10 entitled "Equipment NotRequired To Be <strong>Vented</strong>" in the most current edition of NFPA 54as adopted by the Board; and2. Product Approved side wall h<strong>or</strong>izontally vented gas fueledequipment installed in a room <strong>or</strong> structure separate from thedwelling, building <strong>or</strong> structure used in whole <strong>or</strong> in part f<strong>or</strong>residential purposes.(c) Manufacturer requirements — <strong>Gas</strong> Equipment VentingSystem Provided. When the manufacturer of ProductApproved side wall h<strong>or</strong>izontally vented gas equipment providesa venting system design <strong>or</strong> venting system components withthe equipment, the instructions provided by the manufacturerf<strong>or</strong> installation of the equipment and the venting system shallinclude:1. Detailed instructions f<strong>or</strong> the installation of the venting systemdesign <strong>or</strong> the venting system components; and2. A complete parts list f<strong>or</strong> the venting system design <strong>or</strong> ventingsystem.(d) Manufacturer requirements — <strong>Gas</strong> Equipment VentingSystem Not Provided. When the manufacturer of a ProductApproved side wall h<strong>or</strong>izontally vented gas fueled equipmentdoes not provide the parts f<strong>or</strong> venting the flue gases, butidentifies “special venting systems,” the following requirementsshall be satisfied by the manufacturer:1. The referenced "special venting system" instructions shallbe included with the appliance <strong>or</strong> equipment installationinstructions; and2. The “special venting systems” shall be Product Approved bythe Board, and the instructions f<strong>or</strong> that system shall include aparts list and detailed installation instructions.(e) A copy of all installation instructions f<strong>or</strong> all ProductApproved side wall h<strong>or</strong>izontally vented gas fueled equipment,all venting instructions, all parts lists f<strong>or</strong> venting instructions,and/<strong>or</strong> all venting design34 44D0060
LIMITED LIFETIME WARRANTYDEB <strong>Unvented</strong> <strong>Gas</strong> <strong>Log</strong>sLifetime WarrantyThe following components are warranted f<strong>or</strong> life to the <strong>or</strong>iginal owner, subject of proof of purchase:Firebox, Combustion Chamber, Heat Exchanger, Grate, and Stainless Steel Burners.Five Year WarrantyThe following components are warranted f<strong>or</strong> 5 years to the <strong>or</strong>iginal owner, subject of proof of purchase:Vent Free Ceramic Fiber <strong>Log</strong>s and Aluminized Burners.Basic WarrantyMHSC warrants the components and materials in your gas appliance to be free from manufacturingand material defects f<strong>or</strong> a period of two years from date of installation. After installation, if any ofthe components manufactured by MHSC in the appliance are found to be defective in materials <strong>or</strong>w<strong>or</strong>kmanship, MHSC will, at its option, replace <strong>or</strong> repair the defective components at no charge tothe <strong>or</strong>iginal owner. MHSC will also pay f<strong>or</strong> reasonable lab<strong>or</strong> costs incurred in replacing <strong>or</strong> repairingsuch components f<strong>or</strong> a period of two years from the date of installation. Any products presented f<strong>or</strong>warranty repair must be accompanied by a dated proof of purchase.This Limited Lifetime Warranty will be void if the appliance is not installed by a qualified installer inacc<strong>or</strong>dance with the installation instructions. The Limited Lifetime Warranty will also be void if theappliance is not operated and maintained acc<strong>or</strong>ding to the operating instructions supplied with theappliance, and does not extend to (1) firebox/burner assembly damage by accident, neglect, misuse,abuse, alteration, negligence of others, including the installation thereof by unqualified installers,(2) the costs of removal, reinstallation <strong>or</strong> transp<strong>or</strong>tation of defective parts on the appliance, <strong>or</strong> (3)incidental <strong>or</strong> consequential damage. All service w<strong>or</strong>k must be perf<strong>or</strong>med by an auth<strong>or</strong>ized servicerepresentative.This warranty is expressly in lieu of other warranties, express <strong>or</strong> implied, including the warranty ofmerchantability of fitness f<strong>or</strong> purpose and of all other obligations <strong>or</strong> liabilities. MHSC does not assumef<strong>or</strong> it any other obligations <strong>or</strong> liability in connection with the sale <strong>or</strong> use of the appliance. In states thatdo not allow limitations on how long an implied warranty lasts, <strong>or</strong> do not allow exclusion of indirectdamage, those limitations of exclusions may not apply to you. You may also have additional rightsnot covered in this Limited Lifetime Warranty.MHSC reserves the right to investigate any and all claims against the Limited Lifetime Warranty anddecide upon method of settlement.IF WARRANTY SERVICE IS NEEDED...1. Contact your supplier. Make sure you have your warranty, your sales receipt and the model/serialnumber of your MHSC product.2. DO NOT ATTEMPT TO DO ANY SERVICE WORK YOURSELF.44D0060 35
MHSC149 Cleveland Drive • Paris, Kentucky 40361www.mhsc.com