Multisport 270 Owner's Manual - Aquaglide
Multisport 270 Owner's Manual - Aquaglide
Multisport 270 Owner's Manual - Aquaglide
- No tags were found...
You also want an ePaper? Increase the reach of your titles
YUMPU automatically turns print PDFs into web optimized ePapers that Google loves.
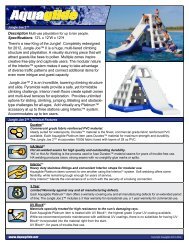
Congratulations on the purchase of your <strong>Aquaglide</strong> ® <strong>Multisport</strong><strong>270</strong>.You’ve joined tens of thousands of other satisfied owners who havediscovered the fun and versatility of this unique craft. To ensure the bestpossible experience, please take the time to read carefully through thisOwner’s <strong>Manual</strong>.The <strong>Multisport</strong><strong>270</strong> is a compact, inflatable sailboat that converts easilyfor use as a windsurfer, towable, or kayak (when used with optionalKayak Kit). Compared to other sailboats, the <strong>Multisport</strong><strong>270</strong> is lightweight,compact and very portable.I. Package ContentsBefore attempting to assemble the <strong>Multisport</strong>, locate and familiarizeyourself with each of the components included with your <strong>Multisport</strong><strong>270</strong>.These parts are shown on page 3 for reference.II. Warnings• Read and understand the Owner’s <strong>Manual</strong>, including all warnings.• Never use this product if you do not know how to swim.• When on the water, always wear an appropriate life vest (PFD) approvedby the authorities in your country of use.• Adverse conditions can put you in a life-threatening situation. Conditionschange rapidly, so be aware!• Wear protective water shoes and/or a wetsuit when necessary.• Use the buddy system. Sailing with others is safer and more funthan sailing alone.• Keep clear of swimmers, and other water users. Stay out of swimmingareas.• When on the water, always stay with the <strong>Multisport</strong> hull. It providesflotation and visibility.• Be sure to know the rules of marine navigation before you use thisproduct. For more information and/or training on these rules, contactyour local Coast Guard office or marine dealer.• Know and understand the detailed warnings listed on page 4-5 ofthis Owner’s <strong>Manual</strong>.Table of ContentspagePackage Contents.......................... 2Included Items............................ 3Warnings............................................ 2EN Warnings.................................. 4Salt Water Warning.................. 5Tow Warning................................ 5Assembly - Sailboat...................... 6Preparing Hull............................. 6Preparing Sailing Rig............. 6Preparing Sailing Harness... 10Attaching Sailing Rig.............. 15Attaching Keel & Rudder........ 17Now What?.................................... 18Assembly - Windsurfer................ 18Preparing Hull............................. 18Preparing Sailing Rig............. 18Preparing Sailing Harness... 19Attaching Sailing Rig.............. 19Attaching Keels.......................... 21Now What?.................................... 21Assembly - Towable...................... 22Preparing Hull............................. 22Points to Note.............................. 22Attaching Tow Rope.................. 22Now What?.................................... 23Assembly - Kayak........................... 23Preparing Hull............................. 23Points to Note.............................. 23Now What?.................................... 24Operation............................................ 24Care & Maintenance..................... 25Storage............................................ 26Warranty............................................. 27Repair.................................................... 28for more info go to:<strong>Aquaglide</strong>, Inc. #1 North Shore Dr, SE White Salmon, WA 98672 TEL: (509) 493-4938 FAX: (509) 493-4966www.<strong>Aquaglide</strong>.net2
A. EN WarningsThe warnings shown below are designed to warn, caution and instructregarding the proper use of thhis product.Warning• There is a risk of drowning.• Maximum sail area is 4.1 m 2 . Do not use with any parts not designedby the manuafacturer for use with this product.• Proper working pressure is listed as 1.0 psi (.069 bar). Do not usewithout proper inflation.Caution• Users must read and understand the Owner’s <strong>Manual</strong>.• All users must be capable swimmers.• Keep at least 3 m (10 ft) away from other boats, docks, shore or anyhard obstructions.• Maximum number of users: 2.• Children must always be under adult supervision• Always wear a properly fitted life vest (PFD) approved by the authoritiesin the country of use.• Maximum weight capacity: 181 kg (400 lbs).Limitations• Not for use by children under 5 yrs of age.• Do not use in strong, or offshore winds.• Do not use in strong currents.• Do not use in conditions in excess of the ability of the user.for more info go to:4<strong>Aquaglide</strong>, Inc. #1 North Shore Dr, SE White Salmon, WA 98672 TEL: (509) 493-4938 FAX: (509) 493-4966www.<strong>Aquaglide</strong>.net
III. Assembly - SailboatA-2The best way to ensure a quick, efficient setup the first time you go tothe water is to go through a preliminary assembly first. This may takeup to an hour for some users. Once familiar, sailboat assembly typicallytakes about 10-15 minutes. Much of the assembly can be left in-tact,even in storage, simplifying assembly next time you use the craft.A. Preparing the Hull1. Locate a flat, dry area no sharp or abrasive features. A patch of grassor sandy beach near the water would work well. The best setup positionwill also make launching easy. NOTE: Dragging or sliding the <strong>Multisport</strong>over ground either before or after inflation can cause damage.Once in the setup/ launch position, unfold the <strong>Multisport</strong> hull completelyand locate the inflation valves at the back of the hull.A-13. Next, move the pump to the valve at the left hand (port) side of the<strong>Multisport</strong> hull. Inflate chamber #2, the center chamber, to the properworking pressure of 1.0 psi (.069 bar). The hull should be firm with veryfew or no wrinkles remaining in the cover. After inflation, seal the valveby screwing the valve cap on securely.CAUTION: DO NOT EXCEED WORKING PRESSURE. Carefullymonitor air pressure in the hull, especially during hot weather or directexposure to the sun. Release some air if necessary to reduce pressure.A-32. Connect the foot pump hose to the “INFLATE” port on the foot pump,included. Place the opposite end of the foot pump hose with RapidInflate adaptor into the valve at the right hand (starboard) side of the<strong>Multisport</strong> hull. Inflate chamber #1, the perimeter chamber, to theproper working pressure of 1.0 psi (.069 bar).During inflation, make sure that the bladder and cover are well aligned.There should be very few wrinkles in the cover. The rudder hole andvalve holes should align well with the cover. It may be necessary toadjust the cover fit with the bladder partly inflated. Do this by massagingand pulling the bladder into position as needed. After inflation, seal thevalve by screwing the valve cap on securely.B. Preparing the Sailing Rig1. Next, prepare the sailing rig. Roll out the sail on a soft, flat surface. Agrassy area or the <strong>Multisport</strong> hull itself works well. If it’s windy, try to picka sheltered area, as the sail will catch wind immediately.B-1CAUTION: DO NOT EXCEED WORKING PRESSURE. Excessively highpressure can cause damage to the product and may void the warranty.WARNING: Do not use an air compressor to inflate tube. Air compressorsare designed for high pressure inflation and can cause tube to burstif over-inflated.for more info go to:6<strong>Aquaglide</strong>, Inc. #1 North Shore Dr, SE White Salmon, WA 98672 TEL: (509) 493-4938 FAX: (509) 493-4966www.<strong>Aquaglide</strong>.net
<strong>Multisport</strong> <strong>270</strong> Owner’s <strong>Manual</strong>2. Assemble the upper and middlemast sections by sliding the uppersection inside the middle one untilit is fully seated.B-2 B-44. The mast should seat firmly into the very top of the sleeve and thestainless padeye on the mast should be in the luff sleeve’s upper cutout,facing out as shown in photo B4.3 Keeping these two mast sections together, slide the mast into the sailluff sleeve.5. Slide the lower mast section through the bottom part of the sail luffsleeve. Connect the lower and middle mast sections, making sure thatthe sections are seated together completely at the joint.B-5B-3Sail Luff Sleevefor more info go to:<strong>Aquaglide</strong>, Inc. #1 North Shore Dr, SE White Salmon, WA 98672 TEL: (509) 493-4938 FAX: (509) 493-4966www.<strong>Aquaglide</strong>.net7
B-6B-86. Open the clamp at the boom front end and remove the rope loopfrom the retainer hook as shown in photo B6.7. Extend the boom to its full length. The boom is set to the properlength when the spring pins are in the “USE” position as shown below.To lengthen, simultaneously press both spring pins and pull outward onthe tail of the boom until the pins snap into the USE position.8. Next, Slide the boom upward from the bottom of the sail, threading thesail through the space between the boom arms. The boom connects tothe mast through the lower cutout in the luff sleeve.9. With the boom clamp open, pry the grip section open enough toinsert the mast. The grip section is designed to flex enough toaccomodate the mast.B-7 B-910. Pass the rope loop around the back of the mast and over theretainer hook. Before closing the clamp, position the boom roughly inthe middle of the sail’s lower sleeve cutout. See photo B10 on followingpage.for more info go to:8<strong>Aquaglide</strong>, Inc. #1 North Shore Dr, SE White Salmon, WA 98672 TEL: (509) 493-4938 FAX: (509) 493-4966www.<strong>Aquaglide</strong>.net
<strong>Multisport</strong> <strong>270</strong> Owner’s <strong>Manual</strong>B-10B-13CAB11. Close the clamp to secure the boom on the mast. The clamp shouldclose with a snap when using firm pressure. Tighten the rope (if necessary)by pulling it through the cleat in the front clamp. If it is too loose,the boom will slip on the mast. If it is too tight, the clamp will not close.B-1113. Thread the line around the retainer at the back of the boom (A),through the clew gromet a second time (B) and to the back of the boomagain (C) as shown in photo B13.14. Engage the line in the embedded cleat as shown in B14.B-14Cleat12. Next, connect the back corner of the sail, known as the clew. Feedthe boom clew line through the gromet in the clew of the sail as shown inphoto B12.15. Wrap the remaining line around the boom tube with several turns,making sure to keep the line engaged in the cleat. Secure the tail bytucking it under a previous turn and cinching tight.B-15B-12for more info go to:<strong>Aquaglide</strong>, Inc. #1 North Shore Dr, SE White Salmon, WA 98672 TEL: (509) 493-4938 FAX: (509) 493-4966www.<strong>Aquaglide</strong>.net9
B-16B-19Main Sheet/Uphaul StrapMain Sheet/Uphaul Strap16. Next, tie the Mainsheet/ Uphaul Strap to the back of the boom.Thread the white rope at the top portion of the Mainsheet Strap throughthe black rope loop at the back of the boom.C. Preparing the Sailing HarnessC-117. Take an additional turn around the black loop.FrontBridle StrapBackB-17Main Sheet/Uphaul StrapShroudConnection Points1. Next, prepare the sailing harness. The first step is to install the bridlestraps. Photo C1 shows one bridle strap completed on the left (port) sideof the hull. Steps C2 through C11 are taken during initial setup, however,for sailboat use, the bridle straps can be left on the hull indefinitely. Forwindsurf, tow or kayak use, the bridle straps should be removed.18 - 19. Tie the white rope to itself using a double half hitch or similarsecure, non-permanent knot, as shown in photos B18 & B19.B-182. Locate and remove the two bridle straps from the sailing harness asshown. The bridle straps have webbing and a clear tubing section.C-2Sailing HarnessBridle StrapsMain Sheet/Uphaul Strapfor more info go to:10<strong>Aquaglide</strong>, Inc. #1 North Shore Dr, SE White Salmon, WA 98672 TEL: (509) 493-4938 FAX: (509) 493-4966www.<strong>Aquaglide</strong>.net
<strong>Multisport</strong> <strong>270</strong> Owner’s <strong>Manual</strong>C-3C-63. To attach the bridle straps, first separate each into two parts by releasingthe webbing at the buckle. Begin on one side of the hull followingthe steps to photos C4 - C10. The left (port) side of the hull is shown.4. Push the rope loop of the bridle strap through the front shroud connectionas shown in photo C4.C-4FrontShroudConnection6. Tighten to secure.7. Next, take the webbing loop through the back shroud connection.C-75. Take the buckle end of the strap through the rope loop as shown inphoto C5.C-58. Similar to the previous steps, take the plain end of the webbingthrough the webbing loop and cinch to secure.C-8for more info go to:<strong>Aquaglide</strong>, Inc. #1 North Shore Dr, SE White Salmon, WA 98672 TEL: (509) 493-4938 FAX: (509) 493-4966www.<strong>Aquaglide</strong>.net11
C-9C-11FrontBridle Straps9. Reconnect the webbing to the rope using the ladder lock buckle.Back10. Once connected, leave the bridle strap as long as possible. Tuck thewebbing end through the elastic retainer to secure it.C-1012. Next, locate the last remaining webbing strap on the sailing harness.This strap is part of the forestay, which goes to the front of the hull.FrontRetainerBackC-1211. Repeat steps C4 - C10 to install the second bridle strap on theopposite side of the hull. Once completed, the hull should look like thephoto in C11 on the following page.ForestayFrontfor more info go to:12<strong>Aquaglide</strong>, Inc. #1 North Shore Dr, SE White Salmon, WA 98672 TEL: (509) 493-4938 FAX: (509) 493-4966www.<strong>Aquaglide</strong>.net
<strong>Multisport</strong> <strong>270</strong> Owner’s <strong>Manual</strong>C-13C-15Front15 - 16. Take the plain end of the webbing through the webbing loop andcinch to secure as shown in C15 and C16.C-1613. Remove the webbing from the ladder lock buckle on the forestay.14. Take the webbing loop through the tow fitting at the front of the hull.C-14FrontTow Fittingfor more info go to:<strong>Aquaglide</strong>, Inc. #1 North Shore Dr, SE White Salmon, WA 98672 TEL: (509) 493-4938 FAX: (509) 493-4966www.<strong>Aquaglide</strong>.net13
C-17C-19ShroudRetainerForestayBridleStrapFront17. Reconnect the webbing strap to the forestay using the ladder lockbuckle. Once connected, leave the webbing strap as long as possible.Tuck the webbing end through the elastic retainer to secure it.18. Work from the hull upward along the forestay, clearing the other linesaway so there are no twists or tangles in the lines. Once you reach thetop of the forestay, locate the stainless mast clip. Identify the mast clipby the three lines coming from it. The center line should be the forestay.The lines on each side are called the shrouds.C-1819. Choose one shroud and connect it to one of the bridle straps onthe side of the hull using the stainless clip at the bottom of the shroud.Repeat this process with the other shroud, making sure that the thereare no twists or tangles in the lines.20. The finished sailing harness should look like the photo in C20, withthe mast clip at the top.C-20Mast ClipMast ClipForestayShroudShroudForestay(center)BridleStrapBridleStrapShroudShroudfor more info go to:14<strong>Aquaglide</strong>, Inc. #1 North Shore Dr, SE White Salmon, WA 98672 TEL: (509) 493-4938 FAX: (509) 493-4966www.<strong>Aquaglide</strong>.net
<strong>Multisport</strong> <strong>270</strong> Owner’s <strong>Manual</strong>D. Attaching the RigD-1FrontMast Step1. Next, you are ready to attach the sailing rig. If the setup area isexposed to the wind, align the hull so that the front points directly intothe wind. This will help prevent the wind from catching the sailing rig andtipping it over during setup. Lift the sailing rig into position with the mastover the mast step and toward the front of the hull.3. Once the mast clip is connected to the padeye, pull the rig toward thefront of the hull while tightening the webbing strap at the bottom of theforestay. Bring the mast to an upright position. Check the mast alignmentfront to back, as well as side to side. Adjust the bridle straps andforestay as needed to bring the mast 90 degrees to the horizon, bringingall three lines of the sailing harness into a snug, even tension.D-32. While holding the rig upright and angled back slightly, connect themast clip to the stainless padeye on the front of the mast. You may needto stand on the inflated hull to reach the padeye.D-2PadeyeMast ClipFrontFrontfor more info go to:<strong>Aquaglide</strong>, Inc. #1 North Shore Dr, SE White Salmon, WA 98672 TEL: (509) 493-4938 FAX: (509) 493-4966www.<strong>Aquaglide</strong>.net15
D-4D-6Main Sheet/UphaulMast StepFrontRearConnector4. Next, attach the sail to the mast step using the webbing strap locatedat the bottom of the sail. Take the webbing strap through the frontconnector on the mast step as shown in photo D4.5. Take the webbing strap around the opposite side of the mast andback up to the ladder lock buckle at the foot of the sail. Connect thewebbing to the buckle and pull firmly down on the foot of the sail whilecinching the strap tight.D-56. Next, move to the back of the hull and locate the black main sheetstrap hanging from the back of the boom. Take the free end of the mainsheet strap through the rear connector loop as shown in photo D6.7. Connect the end of the main sheet strap to the buckle located partwayup the strap. Tighten to a mid-point. Adjust as needed for varioussailing conditions.D-7BackFrontMain SheetStrapBackfor more info go to:16<strong>Aquaglide</strong>, Inc. #1 North Shore Dr, SE White Salmon, WA 98672 TEL: (509) 493-4938 FAX: (509) 493-4966www.<strong>Aquaglide</strong>.net
<strong>Multisport</strong> <strong>270</strong> Owner’s <strong>Manual</strong>E. Attaching the Keel & RudderE-4E-1CenterKeel slotsBackKeel1. Next, tip the entire boat on its side to install the keel and rudder.Insert one keel (two shafts) into the keel slots in the center of the hullas shown in photo E1. Wiggle the keel slightly, pushing it inward until ittouches the hull.2. Secure the keel to the hull with the elastic keel retainer. Make sure theelastic is fully captured in the keel hook as shown in photo E2.E-2Keel Retainer4. Twist the rudder slightly, pushing it inward until it touches the hull.This may require a slight adjustment of the rudder ring on the top of thehull.5. Once the rudder is in position, turn the boat upright again. Secure therudder to the hull using the lower hole on the rudder shaft and one of theclevis pins tethered to the tiller handle as shown in photo E5.E-5Tiller HandleRudder ShaftKeel Hook3. Next, insert the rudder (single shaft) into the rudder slot, locatedclosest to the the back of the hull. DO NOT use the more forward keelslot or the keel retainer, both of which are for windsurfing only.Rudder RingClevis Pin(lower hole)6. Secure the clevis pin using one of the tethered D-rings as shown inphoto E6.E-3Rudder SlotE-6BackD-ringClevis Pinfor more info go to:<strong>Aquaglide</strong>, Inc. #1 North Shore Dr, SE White Salmon, WA 98672 TEL: (509) 493-4938 FAX: (509) 493-4966www.<strong>Aquaglide</strong>.net17
E-7IV. Assembly - WindsurferWhen setting the <strong>Multisport</strong> <strong>270</strong> up for windsurfing, follow the assemblyinstructions for sailboat as noted below, with the followingexceptions:A. Preparing the Hull1. Same as sailboat assembly beginning on page 6.B. Preparing the Rig1. Same as sailboat assembly begining on page 6, except:7. Connect the tiller handle at the upper hole in the rudder shaft usingthe remaining tethered clevis pin as shown in photo E7. The tiller handleshould connect at the back and face toward the front of the hull.B-28. Finally, secure the clevis pin with the remaining tethered D-ring.E-8F. Assembly Complete - Now What? B-31. This completes the <strong>Multisport</strong> <strong>270</strong> sailboat assembly. Before takingoff for your first sail, be sure to read and understand the information onOperation of your new boat. Skip to page 24 for Operation.2. IMPORTANT: Before using the product, be sure to read andunderstand the Warnings on page 4-5.3. IMPORTANT: When moving the <strong>Multisport</strong> <strong>270</strong>, always lift andset it down. DO NOT DRAG, as this can damage the product beforeyou get started. It is helpful to have an assitant available for launchingand moving the craft while on land.2. Do not follow steps B16 through B19 for attaching the main sheetstrap to the back of the boom. Instead, the main sheet/ uphaul strap istied to the rope loop at the front of the boom to be used as an uphaul.3. Thread the rope at the top portion of the uphaul strap through thewhite rope loop at the front of the boom. Take an additional turn aroundthe white loop as shown in photo B3.for more info go to:18<strong>Aquaglide</strong>, Inc. #1 North Shore Dr, SE White Salmon, WA 98672 TEL: (509) 493-4938 FAX: (509) 493-4966www.<strong>Aquaglide</strong>.net
<strong>Multisport</strong> <strong>270</strong> Owner’s <strong>Manual</strong>B-4C-24 - 5. Tie the uphaul rope to itself using a double half hitch or similarsecure, non-permanent knot, as shown in photos B4 & B5.B-52. Remove the bridle straps from each side of the hull.3. Remove the forestay webbing strap from the tow fitting.C-3C. Preparing the Sailing Harness1. DO NOT attach the sailing harness for windsurfing.C-1D. Attaching the RigD-1FrontMast BaseMast Step1. To attach the rig ffor windsurfing, insert the mast base into the maststep as show in photo D1.for more info go to:<strong>Aquaglide</strong>, Inc. #1 North Shore Dr, SE White Salmon, WA 98672 TEL: (509) 493-4938 FAX: (509) 493-4966www.<strong>Aquaglide</strong>.net19
D-2FrontD-4Front2. Connect the mast base to the mast step using the two integratedstraps and buckles. Take each strap through the corresponding maststep connector and secure using the corresponding buckle. Once connected,cinch both straps firmly.3. Next, you are ready to attach the sailing rig. It may be helpful to havean assitant available to steady the rig during this process. Lift the sailingrig into position with the mast over the mast base and toward the frontof the hull. Slide the mast over the upper part of the mast base until it iscompletely seated.D-34. Secure the rig to the mast base using the strap at the foot of the sail.Lead the strap around the catchment on the upper part of the mast basethen back to the buckle at the foot of the sail as show in photo D4 onthe following page. Tighten by pulling down on the sail while cinchingfirmly on the sail strap. Repeat this several times until the sail can go nofarther.5. Attach the lower partof the uphaul strap to thesame catchment on themast base. Lead the freeend of the webbing straparound the mast andcatchment, then back up tothe buckle part way up theuphaul strap. Secure theend of the webbing with thebuckle. The end result isshown in photo D5.D-5Main Sheet/Uphaul StrapFrontfor more info go to:20<strong>Aquaglide</strong>, Inc. #1 North Shore Dr, SE White Salmon, WA 98672 TEL: (509) 493-4938 FAX: (509) 493-4966www.<strong>Aquaglide</strong>.net
<strong>Multisport</strong> <strong>270</strong> Owner’s <strong>Manual</strong>D-6E-4BackBack KeelSlots6. The rig is now attached. Please note: in windsurfing mode, the sailingrig can move about freely on the bast base. It is expected to rest in thehorizontal position as shown in photo D6.E. Attaching the Keels1. Same as sailboat assembly begining on page 17, except:4. After installing the center keel, insert the second keel (two shafts) intothe keel slots in the back of the hull as shown in photo E4. Wiggle thekeel slightly, pushing it inward until it touches the hull.5. Secure the keel to the hull with the elastic keel retainer. Make sure theelastic is fully captured in the keel hook as shown in photo E5.E-5Keel RetainerE-2F. Assembly Complete - Now What?2. Do not attach the rudder.3. Do not attach the tiller handle.E-31. This completes the <strong>Multisport</strong> <strong>270</strong> windsurfing assembly. Beforetaking off for your first sail, be sure to read and understand the informationon Operation of your new boat. Skip to page 24 for Operation.2. IMPORTANT: Before using the product, be sure to read andunderstand the Warnings on page 4-5.3. IMPORTANT: When moving the <strong>Multisport</strong> <strong>270</strong>, always lift andset it down. DO NOT DRAG, as this can damage the product beforeyou get started. It is helpful to have an assitant available for launchingand moving the craft while on land.for more info go to:<strong>Aquaglide</strong>, Inc. #1 North Shore Dr, SE White Salmon, WA 98672 TEL: (509) 493-4938 FAX: (509) 493-4966www.<strong>Aquaglide</strong>.net21
V. Assembly - TowableB-3When towing the <strong>Multisport</strong> <strong>270</strong> behind a boat only the hull is used,consequently, there is very little assembly to be done. The followingsteps outline the steps to be taken and the points to note.FrontA. Preparing the Hull1. Same as the steps for preparing the hull in sailboat mode located onpage 6.B. Points to Note1. Remove the bridle straps from each side of the hull.B-1Mast StepZipper3. Remove the mast step from its zipper pocket on the top of the hull.This is done to protect users from being hurt by contact with the maststep during high-speed towing.4. DO NOT tow the <strong>Multisport</strong> <strong>270</strong> with attachments of any kind. Neveruse the sailing rig, keels or rudder during high-speed towing as damageand/ or injury may result.C. Attaching a Tow Rope1. Take the end of the tow rope through the tow fitting at the front of thehull as shown in photo C1. Note: tow rope not included.Tow Fitting2. Remove the forestay webbing strap from the tow fitting.B-2FrontTow Rope(not included)for more info go to:22<strong>Aquaglide</strong>, Inc. #1 North Shore Dr, SE White Salmon, WA 98672 TEL: (509) 493-4938 FAX: (509) 493-4966www.<strong>Aquaglide</strong>.net
<strong>Multisport</strong> <strong>270</strong> Owner’s <strong>Manual</strong>A. Preparing the Hull1. Same as the steps for preparing the hull in sailboat mode located onpage 6.B. Points to Note1. Remove the bridle straps from each side of the hull.B-12. Next, lead the opposite end of the rope through the eye splice asshown in photo C2.3. Pull the entire length of the tow rope through the eye splice and cinchfirmly.2. Remove the forestay webbing strap from the tow fitting.B-2D. Assembly Complete - Now What?1. IMPORTANT: Before using the product, be sure to read andunderstand the Warnings on page 4-5.2. IMPORTANT: When moving the <strong>Multisport</strong> <strong>270</strong>, always lift andset it down. DO NOT DRAG, as this can damage the product beforeyou get started. It is helpful to have an assitant available for launchingand moving the craft while on land.VI. Assembly - KayakWhen using the <strong>Multisport</strong> <strong>270</strong> as a kayak, only the hull and keels areused. Paddle is not included. <strong>Multisport</strong> Kayak Kit is an optional accessory.Detailed instructions on attaching the Kayak Kit are containedin that package. The following steps outline the steps to be taken andthe points to note.3. Install BOTH keels in the hull. Secure using the keel retainer.B-3Keel Retainerfor more info go to:<strong>Aquaglide</strong>, Inc. #1 North Shore Dr, SE White Salmon, WA 98672 TEL: (509) 493-4938 FAX: (509) 493-4966www.<strong>Aquaglide</strong>.net23
C. Assembly Complete - Now What?1. IMPORTANT: Before using the product, be sure to read andunderstand the Warnings on page 4-5.2. IMPORTANT: When moving the <strong>Multisport</strong> <strong>270</strong>, always lift andset it down. DO NOT DRAG, as this can damage the product beforeyou get started. It is helpful to have an assitant available for launchingand moving the craft while on land.VII. Operation1. To operate the <strong>Multisport</strong> <strong>270</strong> it is only necessary to have 1 personon board. It is possible to have up to 2 people as long as the maximumweight capacity, 181 kg (400 lbs), is observed.2. Know your limits. When piloting your own craft, you are solely responsiblefor your safety. Inexperienced users should be extremely cautiousabout the risks as well as the location and conditions they choose tooperate in. Calm waterways without waves, tides or currents are thebest place to start. Gentle, steady winds and stable weather will help toensure an enjoyable experience.3. When sailing the <strong>Multisport</strong>, a sitting position offers the best controland stability. DO NOT stand up while sailing.4. As with all sailboats, there is a possibility of capsize. To prevent this,all users should position themselves toward the centerline of the hullon the windward side of the boat. The windward side is closest to thedirection the wind is coming from. As the boat changes directions, allusers will need to reposition themselves in order to maintain this positionrelative to the wind.Sailing5. When sailing, it is generally not necessary to adjust, or ‘trim’, the mainsheet strap when underway. This allows users to focus on steering. Tensionthe main sheet strap as needed, tightening for better upwind sailing,loosening to improve speed and downwind sailing angles.6. If the <strong>Multisport</strong> should capsize, instruct all users to climb aboardthe inverted hull as it provides floatation, even upside down. It is possibleto self-right the craft by standing at one side of the hull while quicklysquatting and pulling on the sailing bridle from the opposite side. Thegoal is to partially sink one side of the hull while pulling the opposite sideup and over. Once the boat is righted, climb aboard and resume sailing.7. When sailing or windsurfing, the general principles of sailing apply.Refer to the diagram below. Sailing upwind (in the direction the wind iscoming from) must be done using a series of ‘tacks’, gradually workingthe boat in an upwind direction. It is not possible to sail directly into thewind. The boat should be in this orientation only momentarily, during adirection change or tack. Prepare for a tack by warning other users ofthe imminent turn. Approach with some speed and steer the boat purposefullyinto the wind, continuing the turn until the wind catches the sailon the new side and the boat gathers speed again. During the tack, userschange positions so as to remain on the windward side of the boat.When sailing downwind always remain mindful of the wind direction, asa downwind turn, or ‘jibe’, will cause the sail to rotate rapidly. An unintentionaljibe can catch users on the downwind side of the boat, increasingthe possibility of a capsize, particularly in stronger wind conditions.WINDWINDfor more info go to:24<strong>Aquaglide</strong>, Inc. #1 North Shore Dr, SE White Salmon, WA 98672 TEL: (509) 493-4938 FAX: (509) 493-4966www.<strong>Aquaglide</strong>.net
<strong>Multisport</strong> <strong>270</strong> Owner’s <strong>Manual</strong>WindsurfingWIND8. When windsurfing on the <strong>Multisport</strong>, it is most appropriate to sailwith only one user at a time. Stand near the centerline of the hull andnear the mast step. Lift the sail slowly using the uphaul strap connectedto the front of the boom. Keep your legs bent, your back straight andlean back slightly. Hold the boom with your hands, changing the angle ofthe sail to control the power of the wind. Once under way, tipping the sailtoward the front or back of the hull changes the sailing direction slightly.Exaggerate these movements to turn the hull. To complete a turn, step infront of the mast (tack) or rotate the sail (jibe) so you can hold the boomon the opposite side to return to your launch site. Practice windsurfingwith help standing by until you are confident you can return to yourlaunch.9. When windsurfing, it is not uncommon to loose your balance and fallin the water. Always stay with the hull because it provides floatation.Climb aboard and begin again. Windsurfing can be physically draining.It is your responsibility to monitor your skills and level of exhaustion. Beconservative and return to shore before you grow overly fatigued.10. When towing, observe all applicable safety and navigational requirements.The boat driver is responsible for the the riders and should beaware of factors, such as wind and water conditions, which could affecttheir safety. Do not exceed 29 km/h (18 mph) when towing adults or 24km/h (15 mph) when towing children. The intended position for towing iswith all users lying prone and holding handles with both hands as shownin the towing photo below.Towing11. When kayaking on the <strong>Multisport</strong>, 1 or 2 users are acceptable.The intended position is sitting, cenetered on the hull with feet facingforward. A traditional paddle will work, but the paddle in the optional <strong>Multisport</strong>Kayak Kit is wider than normal to allow for the width of the hull.Paddling the hull with both keels installed will help the the <strong>Multisport</strong> totrack straighter.VIII. Care & Maintenance1. Frequently check the inflation of the <strong>Multisport</strong> hull. It may appearto have lost air early in the morning, but will expand once the sun warmsit. Maximum expansion will occur in the heat of the day. Proper inflationis critical to the safe operation of your product and will prolong damagefrom wear.2. Before each use, check all parts for wear and replace, as needed,before breakage occurs.3. When using the <strong>Multisport</strong> in salt water, or fresh water with depositsof silt or alge, it is best to rinse the the product thoroughly after eachuse. Allow to dry completely before storage.4. To clean the <strong>Multisport</strong>, use a soft bristle brush with a mixture ofmild liquid dish soap diluted with fresh water. Rinse well with fresh waterand allow to dry completely before storage. Do not use harsh chemicalcleaners, as they may damage or stain the materials.WARNING: Use of a high-pressure washer will damage the product andvoid the warranty.5. The best way to dry the <strong>Multisport</strong> after rinsing or cleaning is toleave it inflated, and at least partly assembled in a protected area.6. Long-term exposure to sunlight will damage the product. The bestway to care for your <strong>Multisport</strong> <strong>270</strong> is to store it dry and out of the sun.for more info go to:<strong>Aquaglide</strong>, Inc. #1 North Shore Dr, SE White Salmon, WA 98672 TEL: (509) 493-4938 FAX: (509) 493-4966www.<strong>Aquaglide</strong>.net25
IX. Storage1. Disassemble the <strong>Multisport</strong> following the assembly steps in reverse.NOTE: it is not necessary to remove the sailing harness from the hull, orto remove the main sheet/ uphaul strap from the boom. These items canbe kept in place, making the next assembly easier.7. Folding the hull. Onceall the air is removed fromthe hull, fold the hull intothirds, lengthwise. Photo 7shows the first of two folds.7BackFront2. Before storing, make sure all parts are clean and completely dry.Once stored, any moisture in the product can encourage mildew, whichcan permanently stain, and ultimately damage, the product.3. Remove the air from the hull by unscrewing each valve cap andreleasing each valve flap. For deflation, it is best to reach through thevalve hole and pull the flap through the hole with one finger. This allowsthe air to escape freely without becoming trapped in the bladder. Fortight packing, remove all air from the hull using the DEFLATE port in thefoot pump.8. Next, fold the hull in halffrom front to back as shownin photo 8.84 Store the product out of direct sunlight and protected from the environmentin a clean, dry location. Do not store in a damp location. Donot store at temperatures below freezing, as damage to the product mayoccur.5. Once disassembled, follow the steps below to pack the <strong>Multisport</strong><strong>270</strong> in the roller travel bag for storage or transport.9. Packing the bag. Beginby packing the rudder, keels,pump and sailing harness (ifdetached).96. Rolling the sail. The <strong>Multisport</strong> sail should be rolled up for storage.Fold the top of the sail over the top batten and begin to roll the sailfrom this point as shown in photo 6A below. Continue as shown in photo6B until the sail is completely rolled. Slip the rolled sail into the sail bagfor storage.6-A 6-B10. Next, place the foldedhull in the bag.1011. Last, place the mast,boom and sail on top of thehull. The mast and sail needto be placed at a diagonalangle relative to the bag inorder to fit properly. Carefullyzip the bag closed and storein a warm, dry location.11for more info go to:26<strong>Aquaglide</strong>, Inc. #1 North Shore Dr, SE White Salmon, WA 98672 TEL: (509) 493-4938 FAX: (509) 493-4966www.<strong>Aquaglide</strong>.net
<strong>Multisport</strong> <strong>270</strong> Owner’s <strong>Manual</strong>NOTICE! - Release of Liability, Claim Waiver, and Assumption of Risk AgreementBy opening and assembling this product, you are agreeing (1) to be bound to the terms set forth below and (2) to require anyone using thisproduct to be bound by such terms. If you are unwilling to be bound by these terms, return this product (before use) for a full refund.ASSUMPTION OF RISK: Use of this product and any of its components involves certain inherent risks, dangers, and hazards which can result in serious personal injury anddeath. In using the product, you freely agree to assume and accept any and all known and unknown risks of injury while using this equipment. The risks inherent in the sportcan be greatly reduced by abiding by the Warning Guidelines listed in this Owner’s <strong>Manual</strong> and by using common sense.RELEASE AND WAIVER OF CLAIMS AGREEMENT: In consideration of the sale of the product to you, you hereby agree to the fullest extent permitted by law as follows:TO WAIVE ANY AND ALL CLAIMS that you have or may in the future have against North Sports Inc., and <strong>Aquaglide</strong> Inc.,its distributors and dealers, resulting from use ofthis product and any of its components.TO RELEASE North Sports, Inc. and <strong>Aquaglide</strong>, Inc. from any and all liability for any loss, damage, injury, or expense that you or any users of this product may suffer, or thatyour next of kin may suffer, as a result of the use of this product, due to any cause whatsoever, including negligence or breach of contract on the part of North Sports Inc. and<strong>Aquaglide</strong> Inc. in the design or manufacture of this product and any of its components.ARBITRATION: In further consideration of the sale to you of this product and any of its components, you hereby agree to submit to binding arbitration any and all claims whichyou believe you may have against North Sports Inc. and <strong>Aquaglide</strong> Inc. arising from the use of any North Sports Inc. and <strong>Aquaglide</strong> Inc. equipment or products. The arbitrationshall be pursuant to the rules of the American Arbitration Association. Arbitration shall be commenced within (1) year from the date on which any alleged claim first arose.Further, the arbitration shall be held in White Salmon, Washington unless otherwise mutually agreed to by all parties. The submission to the American Arbitration Associationshall be unlimited and the arbitration award may be enforced by any Court of competent jurisdiction.BINDING EFFECT OF AGREEMENT: In the event of your death or incapacity, this Agreement shall be effective and binding upon your heirs, next of kin, executors, administrators,assigns, and representatives.ENTIRE AGREEMENT: In entering into this Agreement, you are not relying upon any oral or written representations other than what is set forth in this agreement and theNorth Sports Inc. and <strong>Aquaglide</strong> Inc. Owner’s <strong>Manual</strong>.Warranty<strong>Aquaglide</strong>, Inc. warrants products to be freeof defects in material or workmanship to theoriginal purchaser for a period of one (1)year from date of purchase. This warranty issubject to the following limitations:1. Warranty is valid only with dated proof of purchasein the form of the original invoice.2. Warranty is valid only when the product is usedfor normal recreational activities, and does notcover use in schools or rental operations.3. <strong>Aquaglide</strong> will make the final warranty determinationwhich may require inspection and/or photosof the product which clearly show defect(s). Werequire the above be sent to another location of ourchoice, freight prepaid, or by email to warranty@northsports.com.4. If a product is deemed to be defective by <strong>Aquaglide</strong>,the warranty covers the repair or replacementof the defective product only. <strong>Aquaglide</strong> will notbe responsible for any costs, losses, or damagesincurred as a result of loss of use of product.5. This warranty does not cover damage causedby misuse, abuse, neglect, or normal wear andtear, including, but not limited to, punctures,dragging the product over the ground, damagedue to excessive sun exposure or seam failuredue to overinflation in the sun, damage caused byimproper handling and storage, damage caused byuse in waves or shore break, and damage causedby anything other than defects in materials andworkmanship.6. This warranty is voided if any unauthorizedrepair, change, or modification has been made toany part of the equipment. Authorization for suchmust come in writing from <strong>Aquaglide</strong>.7. The warranty for any repaired or replacementequipment is good from the date of the originalpurchase only.8. Any warranty claims must be accompanied bythe original purchase receipt. The name of the retailerand date of purchase must be clear & legible.9. There are no warranties which extend beyondthe warranty specified here.Returns and Service PolicyProduct can be returned only if a return authorizationnumber (RA) is given by <strong>Aquaglide</strong> inadvance. The RA number must be on the outsideof the package or it will not be accepted at ourwarehouse. Freight on the returned product mustbe prepaid or it will not be accepted. Upon receipt,<strong>Aquaglide</strong> will make a determination within (30)days. If the product is covered under warranty itwill be returned to the customer at the expense of<strong>Aquaglide</strong>, Inc. after repairs can be made. If not,the customer will receive a quote for repair and/or replacement as well as any necessary cleaningand shipping charges. The customer will have30 days to accept the quotation. At the end of 30days, or upon refusal of the quote, <strong>Aquaglide</strong> willreturn the product in the condition in which it wasreceived at the customer’s expense. The customeragrees to authorize <strong>Aquaglide</strong>, Inc. to charge thecustomer’s credit card for any costs not coveredunder the terms and conditions of the <strong>Aquaglide</strong>Warranty.for more info go to:<strong>Aquaglide</strong>, Inc. #1 North Shore Dr, SE White Salmon, WA 98672 TEL: (509) 493-4938 FAX: (509) 493-4966www.<strong>Aquaglide</strong>.net27
X. RepairThe <strong>Multisport</strong> <strong>270</strong> cover is made with high quality 600 denierpolyester fabric and the sails are constructed using a combination ofDacron sailcloths. These materials are easily repaired at your localsailmaker or sail repair facility.Damage or wear to the sailing harness, or other hardware may, ormay not be repairable. Contact your local dealer, or <strong>Aquaglide</strong>, Inc. forreplacement parts.The <strong>Multisport</strong> <strong>270</strong> bladder is constructed of high quality PVC, andis designed to last for years. Every hull is inflated at the factory for 12hours before shipping to insure reliability. PVC is not puncture proof,and leaks can occur. Many times leaks in the hull are caused by thevalves not being tightly secured. Always test this before assuming arepair is necessary. Many leaks are caused by dragging the hull acrossa sharp object that puts a very small puncture hole in the bladder. ThePVC bladder can split along a seam if it is abused or towed at excessivespeeds. PVC is easily repaired in almost any area.The <strong>Multisport</strong> <strong>270</strong> comes with a small repair kit that is sufficientto fix most small punctures. You can also purchase a more robustrepair kit that contains sandpaper, Co-Tol solvent, PVC patch material,Tear-Aid patch material, china marker, applicator brush, shop toweland complete repair instructions. This complete <strong>Aquaglide</strong> Repair Kit isavailable through <strong>Aquaglide</strong>, Inc, or your local dealer. For quick repairs,you can use Tear-Aid® self adhesive patch material.Materials and Tools Needed* <strong>Aquaglide</strong> repair kit or Tear-Aid®* A sponge and Soapy water* Paper towels* A small square of 220-grit sandpaper or similar* Scissors* Duct tape* A piece of the vinyl repair material large enough to extend at least1.2 cm (1 inch) to either side and beyond each end of the hole1. REMOVE THE PVC BLADDER - Open the zipper along the back ofthe cover. Reach inside the cover and fold the sides of the bladder intothe center so the bladder can be removed through the zipper. Removethe PVC bladder from the outer cover.2. LOCATE THE PROBLEM - Inflate the PVC bladder and listen forthe leak. If you do not hear the leak, wipe down suspect areas liberally- the entire bladder if necessary - with a sponge soaked in soapy water.The location of the leak will become apparent when the air exiting thePVC bladder makes the soapy water bubble. (Remember, sometimesthere might be more than one hole, so make sure you do a thoroughinspection) Dry the area around the hole, taking care not to lose itslocation. Mark a 4-cm (about 1.5-inch) diameter circle around the holewith a felt tip pen or china marker.3. PREPARE THE SURFACE AREA - Deflate the bladder and placeit on a hard flat surface so that the area to be repaired is unwrinkledand horizontal. IMPORTANT! IN ORDER TO MAKE A RELIABLEREPAIR, YOU MUST PREPARE THE SURFACE CORRECTLY ORTHE PATCH COULD FAIL. PVC products have an oily residue thatcan affect the adhesion of glue to the surface. You need to remove thisoil and any dirt with sandpaper and solvent. Using 220-grit sandpaper,lightly sand the area 1 inch around the hole or tear as shown inPHOTO 1 below. Blow away dust. Clean the area to be repaired witha solvent such as acetone or Cotol-240 solvent as shown in PHOTO 2Allow to dry. Make sure the surface area is properly prepared. Do nottouch this area with your fingers; any oil from your finger may causethe patch to fail.1 2FOR SMALL HOLES - Using the scissors, cut the piece of vinyl repairmaterial into a circle about 2.5 cm (1 inch) in diameter) and lightly sandone side of this patch with the sandpaper and clean with solvent.FOR LARGE REPAIRS OR TEARS - Cut a piece of Duct tape andplace inside the hull with the sticky side up, folding the edges of thetear onto the tape so that the boat retains it’s original shape and thatthe edges of the tear are unwrinkled, horizontal and adjacent eachother. Using scissors cut the piece of vinyl repair material into a shapethat will extend at least 2.5 cm (1 inch) to either side and beyond eachend of the tear and lightly sand one side of this patch with the sandpaper,and clean with solvent.4. APPLY THE PATCH & GLUE - Use the glue from the supplied repairkit, or another glue designed for PVC. Apply a thin, even layer of glueas show in PHOTO 3. Most contact glues require that you allow themto dry BEFORE you apply the patch. Carefully read and follow theinstructions on the glue you are using.5. DRY- As shown in PHOTO 4, allow repair to dry in level positionaccording to the glue instructions. Once the repair is dry, inflate thebladder to 50% and leave overnight to insure that all holes have beenpatched.3 46. REPLACE THE BLADDER - Roll up the Bladder lengthwise so thatthe valves will align with the valve openings and insert the bladder backinside the cover.© 2012, <strong>Aquaglide</strong>, Inc - ALL RIGHTS RESERVED.<strong>Aquaglide</strong>, Inc. #1 North Shore Dr, SE White Salmon, WA 98672 TEL: (509) 493-4938 FAX: (509) 493-4966for more info go to:www.<strong>Aquaglide</strong>.net


