Bosch Video Management System - Bosch Security Systems
Bosch Video Management System - Bosch Security Systems
Bosch Video Management System - Bosch Security Systems
You also want an ePaper? Increase the reach of your titles
YUMPU automatically turns print PDFs into web optimized ePapers that Google loves.
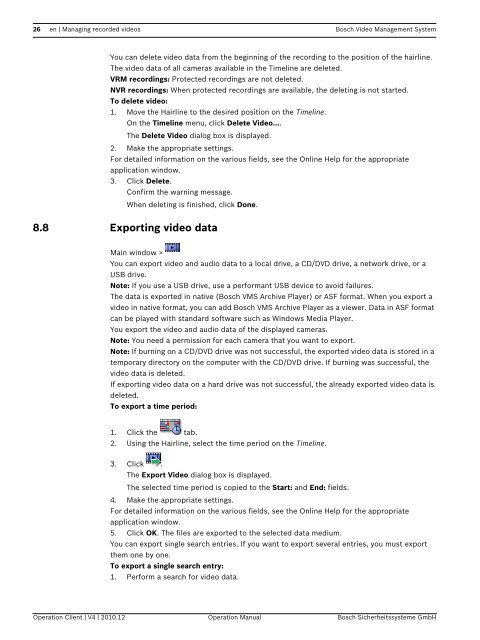
26 en | Managing recorded videos <strong>Bosch</strong> <strong>Video</strong> <strong>Management</strong> <strong>System</strong>You can delete video data from the beginning of the recording to the position of the hairline.The video data of all cameras available in the Timeline are deleted.VRM recordings: Protected recordings are not deleted.NVR recordings: When protected recordings are available, the deleting is not started.To delete video:1. Move the Hairline to the desired position on the Timeline.On the Timeline menu, click Delete <strong>Video</strong>....The Delete <strong>Video</strong> dialog box is displayed.2. Make the appropriate settings.For detailed information on the various fields, see the Online Help for the appropriateapplication window.3. Click Delete.Confirm the warning message.When deleting is finished, click Done.8.8 Exporting video dataMain window >You can export video and audio data to a local drive, a CD/DVD drive, a network drive, or aUSB drive.Note: If you use a USB drive, use a performant USB device to avoid failures.The data is exported in native (<strong>Bosch</strong> VMS Archive Player) or ASF format. When you export avideo in native format, you can add <strong>Bosch</strong> VMS Archive Player as a viewer. Data in ASF formatcan be played with standard software such as Windows Media Player.You export the video and audio data of the displayed cameras.Note: You need a permission for each camera that you want to export.Note: If burning on a CD/DVD drive was not successful, the exported video data is stored in atemporary directory on the computer with the CD/DVD drive. If burning was successful, thevideo data is deleted.If exporting video data on a hard drive was not successful, the already exported video data isdeleted.To export a time period:1. Click the tab.2. Using the Hairline, select the time period on the Timeline.3. Click .The Export <strong>Video</strong> dialog box is displayed.The selected time period is copied to the Start: and End: fields.4. Make the appropriate settings.For detailed information on the various fields, see the Online Help for the appropriateapplication window.5. Click OK. The files are exported to the selected data medium.You can export single search entries. If you want to export several entries, you must exportthem one by one.To export a single search entry:1. Perform a search for video data.Operation Client | V4 | 2010.12 Operation Manual <strong>Bosch</strong> Sicherheitssysteme GmbH


