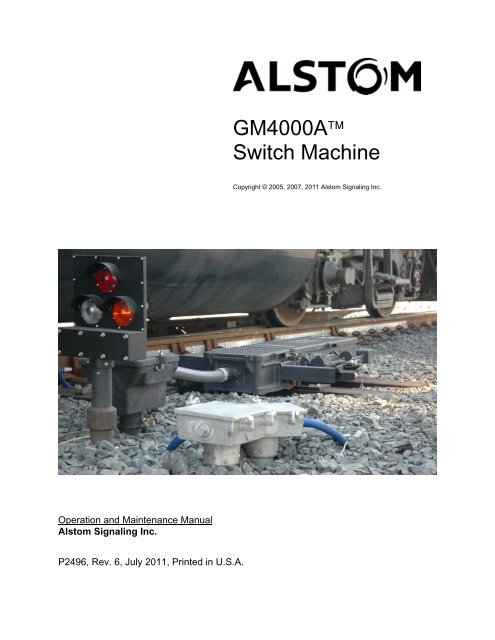
- Page 1: GM4000ASwitch MachineCopyright © 2
- Page 6 and 7: THIS PAGE INTENTIONALLY LEFT BLANK.
- Page 8 and 9: REVISION LOGRevision Date Descripti
- Page 10 and 11: MANUAL SPECIAL NOTATIONSIn the Alst
- Page 12 and 13: 1.8. SAFETY PRECAUTIONS FOR MAINTAI
- Page 14 and 15: 6. SECTION 6 - CORRECTIVE MAINTENAN
- Page 16 and 17: Figure A-3. 3-Wire Circuit For Repl
- Page 18 and 19: Table 4-14. Annual Switch Machine L
- Page 20 and 21: THIS PAGE INTENTIONALLY LEFT BLANK.
- Page 22 and 23: General Description1.3. STANDARD FE
- Page 24 and 25: General DescriptionLock Rod Module
- Page 26 and 27: General Description1.5. UNIVERSAL F
- Page 28 and 29: General DescriptionGM4000A specific
- Page 30 and 31: General DescriptionThrow Bar and Lo
- Page 32 and 33: General Description1.7.1. Cam BarTh
- Page 34 and 35: General Description1.7.3. Condensat
- Page 36 and 37: General DescriptionThe wiring of th
- Page 38 and 39: General Description1.7.9. Hand Cran
- Page 40 and 41: General Description1.7.12. Hand Thr
- Page 42 and 43: General Description1.7.15. Lock Rod
- Page 44 and 45: General Description1.7.17. Motor Ge
- Page 46 and 47: General Description1.7.20. Point De
- Page 48 and 49: General Description1.7.22. Throw Ba
- Page 50 and 51: General Description1.7.24. Wire Har
- Page 52 and 53:
General Description1.8. SAFETY PREC
- Page 54 and 55:
General Description1.8.4. Safety at
- Page 56 and 57:
General DescriptionTHIS PAGE INTENT
- Page 58 and 59:
Theory of Operation2.3. POWER OPERA
- Page 60 and 61:
Theory of Operation2.5. NORMAL AND
- Page 62 and 63:
Theory of Operation2.6. POINT DETEC
- Page 64 and 65:
Theory of Operation2.6.1. Latch Out
- Page 66 and 67:
Theory of OperationTable 2-2. Non-E
- Page 68 and 69:
Theory of OperationTable 2-3. Reset
- Page 70 and 71:
Theory of Operation2.7. MANUAL SWIT
- Page 72 and 73:
Theory of OperationTable 2-4. Hand
- Page 74 and 75:
Theory of OperationTable 2-5. Hand
- Page 76 and 77:
Theory of OperationTable 2-7. Local
- Page 78 and 79:
InstallationTHROW BAR CONNECTION HA
- Page 80 and 81:
Installation3.6. TOOLSThe following
- Page 82 and 83:
InstallationThe Secondary Point Mon
- Page 84 and 85:
InstallationTable 3-2. Switch Machi
- Page 86 and 87:
Installation3.10. LEFT-HAND OR RIGH
- Page 88 and 89:
InstallationTable 3-4. Switch Machi
- Page 90 and 91:
InstallationTable 3-4. Switch Machi
- Page 92 and 93:
InstallationTable 3-4. Switch Machi
- Page 94 and 95:
Installation3.11. SWITCH MACHINE MO
- Page 96 and 97:
Installation3.12.1. Field WiringFie
- Page 98 and 99:
Installation1-1 P 1-2 P 1-3 P 1-4 C
- Page 100 and 101:
InstallationTable 3-7. Controller W
- Page 102 and 103:
Installation3.12.3. Switch Machine
- Page 104 and 105:
InstallationNOTEDuring some of the
- Page 106 and 107:
cInstallationTable 3-9. Throw Rod I
- Page 108 and 109:
Installation3.15. LOCK ROD INSTALLA
- Page 110 and 111:
Installation3.16. POINT DETECTOR RO
- Page 112 and 113:
InstallationTable 3-11. Point Detec
- Page 114 and 115:
InstallationTable 3-12. Motor Limit
- Page 116 and 117:
InstallationTable 3-13. Switch Mach
- Page 118 and 119:
InstallationTable 3-15. Throw Rod P
- Page 120 and 121:
Installation3.21. OPTIONAL TEST BAR
- Page 122 and 123:
InstallationTable 3-16. Test Bar In
- Page 124 and 125:
InstallationThe following materials
- Page 126 and 127:
InstallationTable 3-17. Secondary P
- Page 128 and 129:
InstallationTable 3-17. Secondary P
- Page 130 and 131:
Installation.THIS PAGE INTENTIONALL
- Page 132 and 133:
Preventive Maintenance4.3. PREVENTI
- Page 134 and 135:
Preventive MaintenanceDuring mainte
- Page 136 and 137:
Preventive Maintenance4.3.3. Warnin
- Page 138 and 139:
Preventive MaintenanceTable 4-2. 75
- Page 140 and 141:
Preventive MaintenanceTable 4-3. Ex
- Page 142 and 143:
Preventive MaintenanceTable 4-4. Ha
- Page 144 and 145:
Preventive MaintenanceTable 4-5. Ha
- Page 146 and 147:
Preventive Maintenance4.5.3. Point
- Page 148 and 149:
Preventive MaintenanceTable 4-7. Se
- Page 150 and 151:
Preventive Maintenance4.5.6. Switch
- Page 152 and 153:
Preventive MaintenanceTable 4-9. Na
- Page 154 and 155:
Preventive MaintenanceTable 4-10. W
- Page 156 and 157:
Preventive MaintenanceTable 4-10. W
- Page 158 and 159:
Preventive Maintenance4.6. QUARTERL
- Page 160 and 161:
Preventive MaintenanceTable 4-12. I
- Page 162 and 163:
Preventive Maintenance4.7. SEMI-ANN
- Page 164 and 165:
Preventive Maintenance4.8. ANNUAL M
- Page 166 and 167:
Preventive MaintenanceTable 4-16. W
- Page 168 and 169:
Preventive MaintenanceTable 4-17. P
- Page 170 and 171:
Preventive Maintenance4.9.3. Gear B
- Page 172 and 173:
Preventive MaintenanceTHIS PAGE INT
- Page 174 and 175:
TroubleshootingREMOTEF ORWARDRUNLOC
- Page 176 and 177:
TroubleshootingTable 5-2. Symptoms
- Page 178 and 179:
TroubleshootingTable 5-3. Symptoms
- Page 180 and 181:
Troubleshooting5.3.4.1. Standard Co
- Page 182 and 183:
Troubleshooting5.3.4.2.1. Overload
- Page 184 and 185:
Troubleshooting5.3.4.3. Controller
- Page 186 and 187:
Corrective Maintenance6.2.1. Covers
- Page 188 and 189:
Corrective Maintenance6.2.3. Contro
- Page 190 and 191:
Corrective Maintenance6.2.4. DC Mot
- Page 192 and 193:
Corrective MaintenanceTable 6-4. DC
- Page 194 and 195:
Corrective MaintenanceStepTable 6-5
- Page 196 and 197:
Corrective Maintenance6.2.6. Motor
- Page 198 and 199:
Corrective MaintenanceTable 6-7. Ca
- Page 200 and 201:
Corrective MaintenanceTable 6-8. Ha
- Page 202 and 203:
Corrective MaintenanceTable 6-9. Ha
- Page 204 and 205:
Corrective Maintenance6.2.10. Hand
- Page 206 and 207:
Corrective MaintenanceTable 6-10. H
- Page 208 and 209:
Corrective MaintenanceTable 6-10. H
- Page 210 and 211:
Corrective Maintenance6.2.11. Latch
- Page 212 and 213:
Corrective Maintenance6.2.13. Point
- Page 214 and 215:
Corrective MaintenanceTable 6-14. P
- Page 216 and 217:
Corrective MaintenanceTable 6-14. P
- Page 218 and 219:
Corrective MaintenanceTable 6-14. P
- Page 220 and 221:
Corrective MaintenanceTable 6-14. P
- Page 222 and 223:
Corrective MaintenanceTable 6-15. P
- Page 224 and 225:
Corrective MaintenanceTable 6-16. P
- Page 226 and 227:
Corrective MaintenanceTable 6-17. P
- Page 228 and 229:
Corrective MaintenanceTable 6-18. T
- Page 230 and 231:
Corrective MaintenanceTable 6-19. T
- Page 232 and 233:
Corrective Maintenance6.2.20. Motor
- Page 234 and 235:
Corrective MaintenanceTHIS PAGE INT
- Page 236 and 237:
Parts CatalogTHIS PAGE INTENTIONALL
- Page 238 and 239:
Parts Catalog131271217SWITCH MACHIN
- Page 240 and 241:
Parts CatalogHEATER APPLICATION:STE
- Page 242 and 243:
Parts CatalogPART NUMBERAND NAMECAS
- Page 244 and 245:
3 -11 A X 3- 12 A XParts CatalogABC
- Page 246 and 247:
Parts CatalogTable 7-1. Alstom Mode
- Page 248 and 249:
Parts CatalogTable 7-1. Alstom Mode
- Page 250 and 251:
Parts CatalogTable 7-1. Alstom Mode
- Page 252 and 253:
Parts CatalogTable 7-1. Alstom Mode
- Page 254 and 255:
Parts CatalogTable 7-2. GM4000A Con
- Page 256 and 257:
Parts CatalogTHIS PAGE INTENTIONALL
- Page 258 and 259:
Parts CatalogTable 7-3. Alstom Mode
- Page 260 and 261:
Parts CatalogTHIS PAGE INTENTIONALL
- Page 262 and 263:
Parts CatalogTHIS PAGE INTENTIONALL
- Page 264 and 265:
DrawingsA.2.WIRING AND CIRCUIT APPL
- Page 266 and 267:
DrawingsWZRRWRLR3EORSDC(+)NWRDC(-)3
- Page 268 and 269:
DrawingsA.2.4.4-Wire Configuration
- Page 270 and 271:
DrawingsA.2.5.5-Wire Configuration
- Page 272 and 273:
DrawingsA.2.6.Terminal Block Pin Ou
- Page 274 and 275:
DrawingsA.2.8.Typical Polarized Swi
- Page 276 and 277:
DrawingsTypical Polarized Switch Re
- Page 278 and 279:
DrawingsTypical 6 Wire Polarized Sw
- Page 280 and 281:
DrawingsTypical Neutral Switch Repe
- Page 282 and 283:
DrawingsTypical Neutral Switch Repe
- Page 284 and 285:
DrawingsFigure A-20. GM4000A Wiring
- Page 286:
DrawingsFigure A-20. GM4000A Wiring